How many times have you taken what could be a great iPhone photo, only to find out that it’s blurry? While that happens to all of us, there are only three situations in which your photos can be blurry. In this article you’re going to discover why some of your iPhone photos end up blurry and what you should do to never take a blurry iPhone photo again.
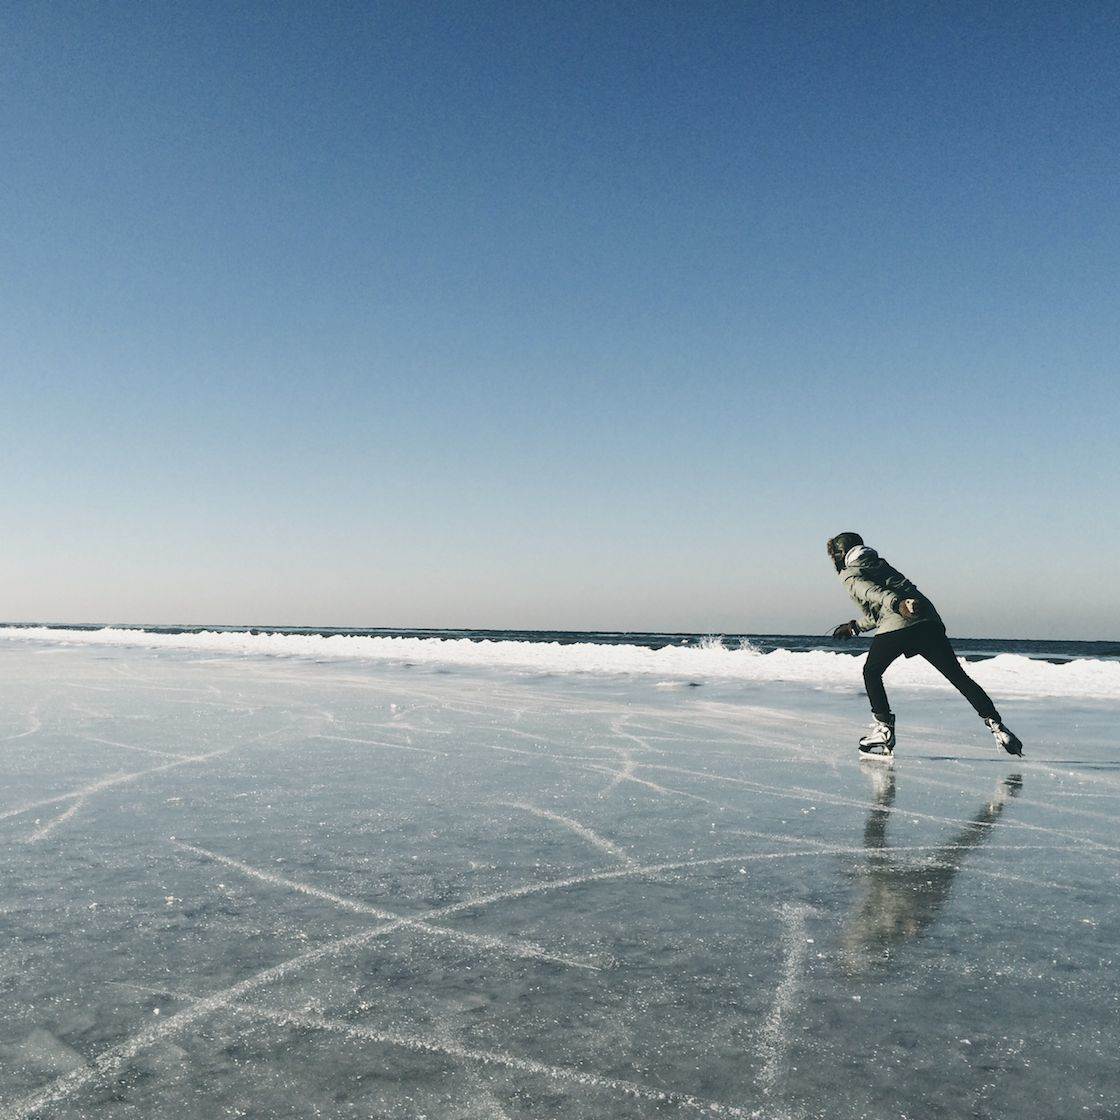
Problem 1: Your Photos Are Out Of Focus
Inappropriate focus in one of the most common reasons why iPhone photos end up blurry. You know the focus is wrong when the important parts of the image are blurry while others are sharp, or when everything is blurry even though there’s abundant light in the scene.

In the photo above, the focus is incorrectly set to the extreme foreground. While the apples in the foreground are in focus and show a lot of detail, the more important human figures are blurry and out of focus.
Most iPhone users don’t adjust the focus themselves, and that works a lot of the time. With that said, there are times when autofocus fails, particularly when your photo has large uniform areas, when some parts of the photo are close to you while others are far, or when the scene changes rapidly.
Interestingly, you’re more likely to experience problems with focus on the newer iPhones, especially iPhone 5S which has a significantly smaller depth of field. While the small depth of field (which is caused by larger aperture) is awesome, it also means that you have to set your focus more carefully.
Solution: Stop Relying on Autofocus
The best thing you can do to avoid out-of-focus images is to always set the focus yourself. Simply tap on the part of the image that you want to be in focus, and your iPhone will take care of the rest.
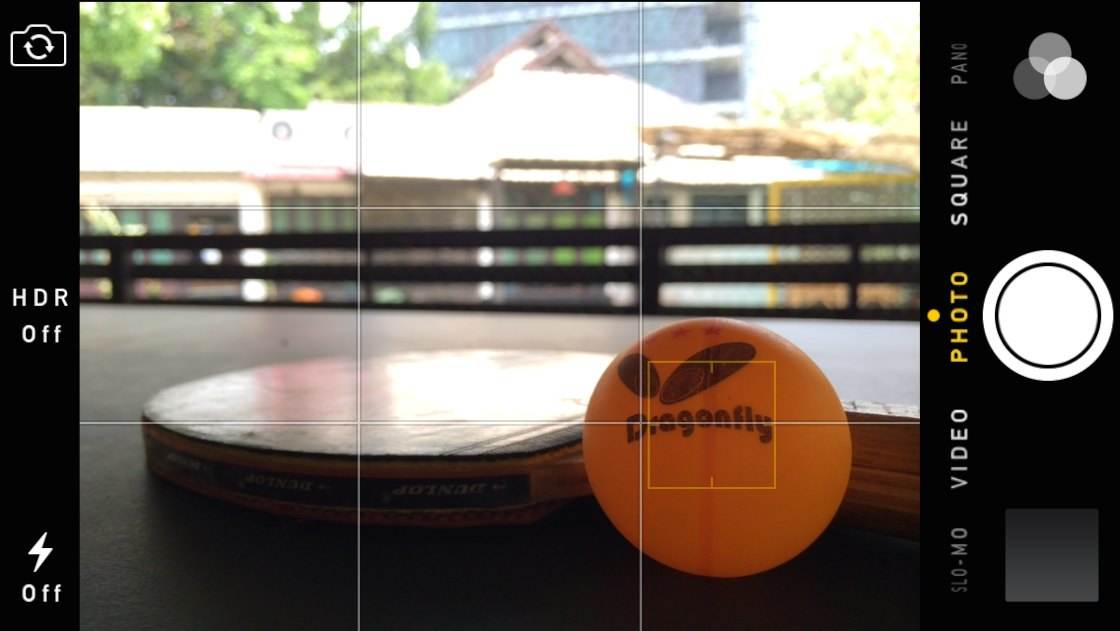
In this example I tapped on the tennis ball in the foreground, which set the focus (and exposure) on the ball. Notice how the ball is now really sharp, while the building in the background is blurry. You want to make sure that the important parts of the image are in focus by tapping the screen there.
However, even when you set the focus perfectly, the iPhone will automatically try to change it as soon as anything changes inside the frame. This can get quite annoying, especially if you’ve set the perfect focus yourself and all of a sudden it’s lost just because somebody walks into the scene.
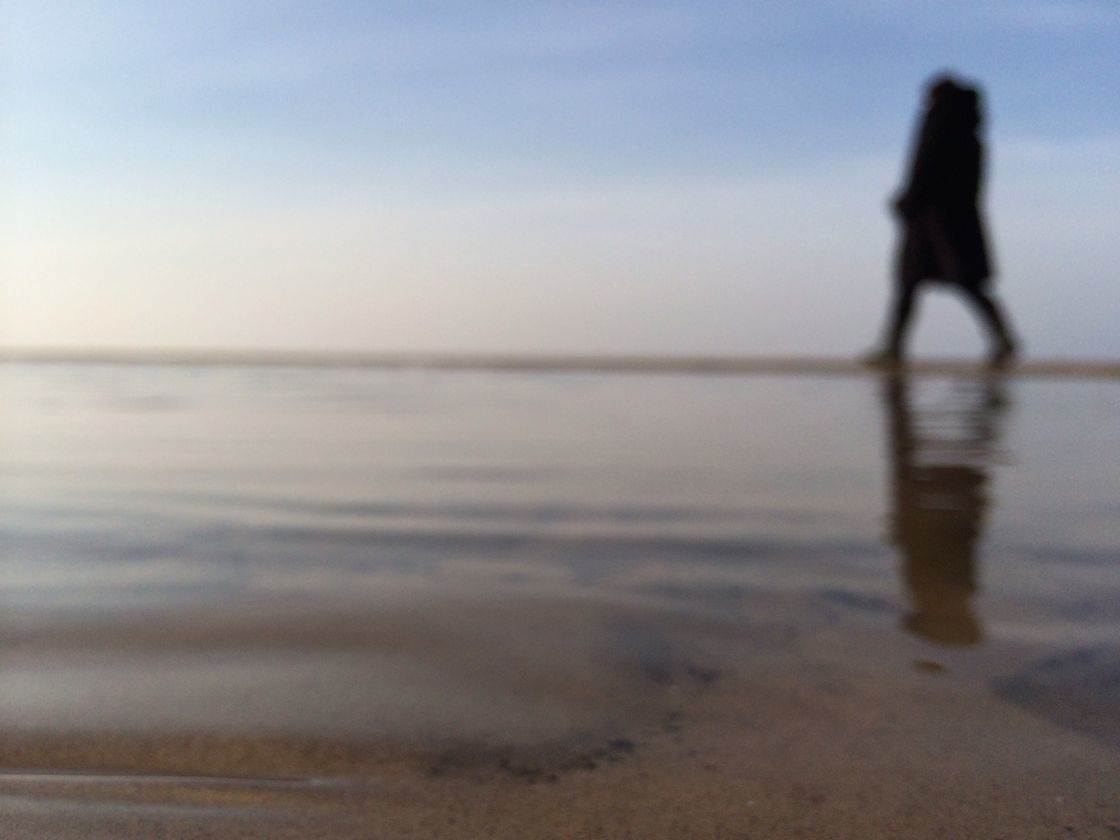
Even worse, sometimes the iPhone will try to refocus exactly when you’re trying to take a photo, which is what happened to me in the photo above. I was actually waiting for the woman to enter the frame so that the photo would have an interesting subject, but then the iPhone started refocusing and the moment was gone.
I should have locked the focus, which prevents the iPhone from refocusing when there are changes in the frame. You can lock focus (and exposure) easily by holding down your finger for a couple of seconds where you want the focus to be – a large yellow square and the text AE/AF LOCK appears when the focus is locked.
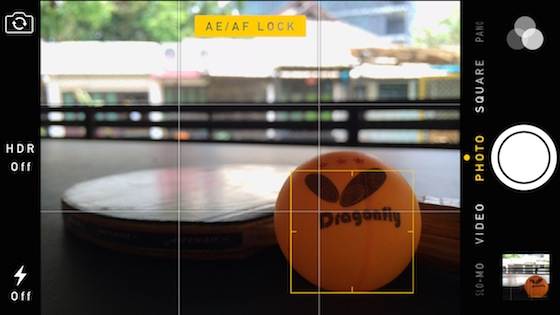
When the focus is locked, you’ve essentially disabled autofocus and the iPhone won’t adjust focus no matter what happens inside the scene, which is particularly useful when you expect someone to walk inside the frame and you want to make sure that the focus stays unchanged. To exit focus lock, simply tap the screen again.
While it requires more effort to set the focus manually every time you take a photo, it’s definitely worth doing if you want to make sure that your iPhone photos are always sharp.
Problem 2: Camera Shake
Before we discuss the other reasons why your photos may end up blurry, we have to take a step back and consider how the iPhone camera works. Even though we think about photos as moments frozen in time, it actually takes time for the iPhone to capture a photo, and if anything is moved during that time, that movement will result in blur.
When the light is abundant, as it is outdoors in the middle of a sunny day, the shutter stays open for such a short period of time that you don’t have to worry about camera shake. But when there’s less light in the scene (which is almost always the case indoors), the shutter stays open much longer and even moderate movement of the iPhone will be a problem.
To give you an example, the following photo is extremely blurry since I couldn’t keep my iPhone steady. I know this photo was blurred by camera shake because stationary objects both in the foreground and background are blurry as well.

Solution: Keep Your iPhone Steady
Now, what would happen to the same photo, taken from the same spot with the same iPro telephoto lens, if I could keep my iPhone more steady?

As you can see from this example, how steady your iPhone is makes a world of a difference, especially when the light in the scene is not abundant. But what can you do to actually keep your iPhone steady?
The first tip that I have for you is to take multiple photos. Since camera shake is random and unpredictable, it varies a lot between otherwise identical photos. So if you want to make sure your low light photos are less affected by camera shake, take multiple identical shots and some of them will always be sharper than others.
However, there are times when simply taking multiple photos won’t be enough and it’s really helpful to physically support your hands. There are many different ways you can do this. You can support your hands on a table or a railing, or support your entire body against the wall, all of which will make your iPhone more steady.
If no external support is available, try supporting your elbows against your torso, or crouch and support your iPhone on your knees. It also helps to relax and slow down your breath. Many photographers have found that their hands are more steady immediately after the exhalation.
When lighting is abundant, I typically take photos with the volume buttons on the side of the iPhone. However, unlike the shutter button of dedicated cameras, the volume buttons of the iPhone need to be pressed quite hard, and that will almost always lead to some camera shake. For this reason I recommend using the on-screen shutter button or the volume buttons on your white Apple earbuds for taking photos in low light.
If the photo doesn’t have any movement, another great way to stabilize your iPhone is using the Image Stabilization mode that you can find in dedicated camera apps such as Camera+. To access Stabilizer in Camera+, tap on the gear icon next to the shutter button and select Stabilizer. Now the photo will only be taken when the iPhone is steady, which may take a few seconds depending on how shaky your hands are.
Another obvious way to reduce the camera shake is to use an iPhone tripod, but there are clearly some disadvantages to carrying around a tripod with you. I use the Manfrotto 190XPROB tripod with Manfrotto 804RC2 tripod head, which provide great stability but are somewhat bulky. Smaller tripods have been a disappointment to me, which is why I recommend using a serious tripod that could also support a DSLR.

That’s me shooting with a tripod
You’ll also need to attach your phone to the tripod using an iPhone tripod mount. While there are many different tripod mounts on the market, nothing beats Glif+ in terms of how securely the phone is attached. Glif+ is available for iPhone 4/4S, iPhone 5/5S and iPhone 6s/6s Plus. When using a tripod, use the headphone shutter release so that you don’t shake the iPhone when pressing the shutter.
Problem 3: Motion Blur
Just like camera shake, motion blur occurs when movement is captured while the shutter is open. But unlike camera shake, motion blur refers to the movement of the subject itself. Just like camera shake, motion blur is more common in low light settings and practically non-existent in abundant light.

The above photo is a typical example of motion blur. The image itself is in focus and my iPhone is reasonably steady, so the man standing still at the back is perfectly sharp, except for his moving hand. However, the other man is blurry and this blur is caused solely by the fact that he’s rapidly moving through the scene.
Solution: Reduce the Effects of Movement
There are several things you can do to reduce the effects of motion blur. The two most obvious options are increasing the amount of lighting and asking for your subjects to stand still. Of course, these are often not practical, but it’s something you should consider when taking photos of people you know.
Just like with camera shake, the effects of motion blur can be reduced by taking multiple versions of the same photo. If the movements are unintentional, as they often are when taking photos of people you know, they tend to be quite random and some photos will naturally be much sharper than others.
It’s also good to know that motion blur becomes weaker and less prominent if the moving subjects are further away from your iPhone, which is a good option to consider when you have no control over the movement of your subjects.
Finally, you can reduce both motion blur and camera shake by setting exposure for the highlights, which in turn makes the photo darker and requires the shutter to stay open for a shorter time. After you’ve set focus by tapping on the screen, you can adjust the exposure by sliding your finger up or down on the screen. Slide up to increase the exposure (making the photo brighter) or down to decrease the exposure (making it darker).

Even though it was already close to sunset and there wasn’t much light left in this scene, I could still capture a sharp photo of birds taking off by setting exposure for the highlights.


Great article; very detailed. So many times I’ve read an article about this subject and it stops at “don’t move your hands”. Thanks for the tips!
Thanks Jerry, so happy to hear that! Don’t move your hands is an important one, but of course there’s so much more than that.
nice hints, thanks for this!:)
I´m having a problem purchasing apps! I´m in Argentina now, (I used to live in Mexico) here, there is no way to get the iTune cards to buy the apps. So I can only download the free ones (gratis). Does anyone out there know the way around it?
I would like to get camera+ that you mentione quite often, Emil!
Thanks for any help, and keep these posts coming, Emil. They are so much more clear and detailed than most of the posts flooding the cybernetic space. Marcelo.-
If you have a credit/debit card or a PayPal account in either of these countries, you can use that with payments and never worry about gift cards again.
Thanks Emil, I’ll try that!
I greatly appreciate your suggestions. I still only have a 3G but will be upgrading in 2 weeks (yay!) and can’t wait to try these out. Thanks!
You’ll be amazed to see how much better the new iPhones are. Which one are you getting? 5S is by far the best.
@iphoneps:disqus I agree with you iPhone 5s or 5 is by far the best..I have an iPhone 5 and Note 3…I was planning to buy the new iPhone 5s, then I would love to wait for the new iPhone 6 as I am expecting the camera to be a killer feature in that one 😀
By now you might as well wait for iPhone 6.
Thanks for the tips Emil…still trying to work out how to control exposure and focus in the the CP Pro app I have 🙂
I don’t think you have real control over exposure in that app.
This was an excellent article. I’ve already tried some of the tips (like locking the focus) and they worked like a charm!
Thanks, so happy to hear that!
I can’t get the AE/AF to appear when I am holding my finger on the screen to lock the focus…
Iphone5 iOS 7.0.6
Are you in the native camera app? Try longer, you need to hold it down for a couple of seconds.
Thanks for this helpful, informative article. Lots of useful advise.
Thanks Connie, happy to hear you enjoyed it!
Thanks for sharing this amazing tip. I’ve been struggling with motion blur when shooting on the street! One thing i just found out and it might work was using burst mode in camera app or the “Fast camera” app! Wonder if that works for you guys?
That definitely works as some of the burst photos will be sharper than others. The downside is that you’ll quickly run out of space and you’ll have to review all the photos, so I’d save that for special occasions.
I find when I zoom in to look at the image its very grainy. How are you images so clear and crisp?
It’s simple – you zoom with your feet only 🙂
ahahahah
If you can’t zoom with your feet (which isn’t always possible) you can increase the image resolution in post production. With the same image at a higher resolution you should be able to zoom and/or crop the image while still maintaining sharp details.
There are image upsizing apps available in the app store or you can upsize in either PhotoShop or other apps such as onOne’s Perfect Resize.
What are the apps you recommended here? I can’t seem to find
Wow! Nice tips. Get me more tips for iPhone 4 camera.
Nice One.
Thank you for the tips! I have n iPhone 4 and find that many of my pictures turn out really bright with white fuzz around the objects. Do you know what this could be?
Glad you’re finding our photography tips useful Mel! Have you tried reducing the exposure when you take a photo to darken the image? After you tap the screen to set focus, swipe down on the screen to bring up the exposure slider, then keep swiping down until the brightness looks good. Hope that helps 🙂
Thank you for the tips on locking the focus prior to taking a picture. It was very helpful. Does it matter if the camera if held in the vertical or horizontal? I
Glad you found this useful Terry! It doesn’t matter which way you hold the phone when focussing 🙂
How do you ensure no blurring when shooting kids?
Shoot in burst mode so that some photos will be sharp even when the kids are moving
Definitely a great option when photographing moving subjects.
I have never gotten this to work for me. I just end up with 20 blurred photos instead of one. As a mom of 3 fast-moving youngsters, I wish I could figure it out!
Hi Suzanne. One of the best solutions is to ensure you’re shooting in good light. If there’s not enough light in the scene, the iPhone camera will need to use a slower shutter speed, and when you combine this with moving subjects you’re very likely to get motion blur. Shooting with burst mode when there’s plenty of light should give you better results. Good luck! 🙂
Why is it when I switch the camera round the photo does not appear as clear as it does.
Hi Cristie. Do you mean when you switch to using the front facetime camera? If so, the picture will be poorer quality because this camera isn’t as good as the back camera and has less pixels. So you’ll always get the clearest and best quality photo when using the back camera. Hope that helps 🙂
My iPhone 5S takes awful blurry photos?? Help?
I love when I get emails from you about photography and how to get the best of it out of an iphone.
Really glad to hear that Sophie 🙂
Wow, this article is very helpful.. Thank you so much for sharing it..
I found many new things to learn on my new iPhone 5s when reading this..
I really appreciated what you have written and shared..
So glad to hear you found these tips helpful Novi 🙂
I still couldnt make my iphone camera got the right focus while the scene is fuzzy and complicated let say i want to focus on the yellow tiny flower (macro) while the background is green grass.. My phone usually focus on the grass not the flower .. Well it can be solved by manual focus on app like vscocam but still there’s possibilty it still turns out out of focus
Hi, you might be getting your iPhone too close to the subject. If it’s too close it can’t focus on the near subject so it will focus on the background which is further away. Try pulling the iPhone back a bit, until it will focus on the flower. If you do a lot of close up photography then you could get a macro lens which allows you to get much closer to the subject. Hope that helps 🙂
Thanks .. I actually have 3 in 1 olloclip and it has macro lens for purpose, thks for reminding me 😉
Hi,
I have a new i5s (ios 8.1.3) and few days ago i went on a trip. Those photos on the mountain on a sunny day were so nice on the phone screen but so bad on my pc, so pixelized. Can u help me with an advice? I missed a setting or is just a problem with my phone? Help me pls. Its annoying to pay so much for this phone and take so bad pics.
i cant add it cause is 2.36 mb or more…
here is a link to see them -> http://fastupload.rol.ro/e63599f03ad5500e27e1a8f2a73a141f.html
How about making sure the lens is clean? Phones get handled more than a camera and quite often there’s a fingerprint on the lens. I showed my wife this and once her lens was clean the difference in the sharpness of her photos was dramatic.
This goes for both front and rear cameras.
That’s a very good tip Alan, thank you! 🙂
I have a 5s and when I take a picture of writing it goes blurry- I focus it so many times and clean the camera and do as much as I can be the words will be bad, it used to be normal but now it is stuffed please help
How close is your camera to the writing? If you have the app Camera+, you might try taking your photo with its macro turned on. I just tried it and it seems I can get a much clearer shot now when I get really close – better than the native camera app. Hope this helps you!
can u tell me what app is that?
It is called “Camera+”. It’s on the app store: https://itunes.apple.com/us/app/camera+/id329670577?mt=8
Any tips for this scenario. IP6, inside gym (light could be better), difficult to lock focus when you are using selfie stick for a group shot… I know tripod would be better… outside better… but blur seems constant. Is the stick the main problem?
Hi Lane. Yes that’s probably the main cause of the problem as it’s impossible to hold the stick perfectly still. In low light it’s essential that the iPhone is held steady. You’ll get better results with a tripod (just make sure everyone is stood still!) or you could try using the selfie stick outside in good light.
Hello
I have a problem, after focusing on a spacial area my iphone takes all of the pics blurry in distant positions. except very close regions.
what I should do?
it has not dropped at all and before this time it was taking pics very excellent with any details, but now just take this form.
it does not focus on distant objects.
The tripod mentioned above has been discontinued by the manufacturer. Could you recommend another?
Thanks so much! Each time I read once of your posts I learn something new about the iPhone camera!
These are mostly easy to implement in shooting.
So happy to hear that Robyn! There’s always something new to learn, which is all part of the fun 🙂
Would a monopod work to help reduce the. “Blurs”?
Hi Richard. Yes a monopod could help, although it’s not as stable as a tripod. Do you have a monopod for the iPhone?
One thing that many forget too is, clean your lens before you shoot. Many of us carry our phones in places that get oily and dusty. The lens gets covered in this and not even a tripod will help you get a clean shot. Believe me, voice of experience. 🙂
Yes, that’s definitely an important point Sharon. It can make a big difference!
I always carry a lens cloth in my purse
That’s a great idea Julie! 🙂
Hi Emil
What do u mean by setting exposure for highlights. I understand that we can manually set exposure to our requirement. But what is setting exposure for highlights?
Hi Aashi. Setting exposure for the highlights means that when you’re manually adjusting the exposure, you should always ensure that you can see details in the highlights (the brightest areas of the photo) – this ensures that the exposure is set correctly for the highlights, even if the shadows (darker areas) appear a bit dark. The reason you should do this is that it’s usually quite easy to brighten up the shadows in post-processing. But if you over-expose the highlights to the point that they appear pure white with no detail at all, then you can never bring that detail back in post-processing. I hope this explanation is helpful 🙂
The Birds – Alfred Hitchcock! Scary photo.
This is another well written and informative article. Thank you again for helping all of us to get better photos
So glad you found this useful Arline.
I had NO idea that the exposure measure was even on
my phone/camera!
It’s amazing what’s hidden away in these apps isn’t it! The exposure control will make a real difference to your photography for sure 🙂
I find I can,.not separate the focus from the exposure and lock both quickly. Any hints for me, Emil? Many thanks. R
Hi, you can do this in the VSCO Camera. Here’s a tutorial on how to use it: http://iphonephotographyschool.com/vsco/
Hey Emil! Loooove the site! Quick question, besides blurry photos what’s the number one persistent problem you continue to face while shooting photos with your iphone?
Hi Peter! Happy to hear that you like our site! I’d say that another big problem, apart from blurriness, is the noise (or grain). Whenever you try to shoot photos in low light situations, noise can be quite a big problem. But Adobe Photoshop Express app has a great noise reduction tool, though. 🙂
My iphone used to take sharp pictures and then one day it stopped. My shots have become grainy and I have to manually sharpen it on my laptop but it is still not the same. As this happened to my old ipod touch before, could this be the same with my iphone 4s too? This has put me off buying a new iphone in the future.
I’d suggest stopping into an Apple shop and asking for help. You may have inadvertently changed some settings!
Awesome article, you are the best!
Thank Emil. I like your articles. I’ve been reading them everyday. They help with my iPhone photography skill 🙂
I’d like to know how to get a sharp picture when using a selfie stick? How do you focus?
You need to lock the focus by tapping and holding on the subject on the screen before you shoot. 🙂
How do you tap on the focus when your camera is at the end of a selfie stick?
One of the most important ways to avoid blurriness is to keep your lens clean – a tip I was given by a professional photographer I met on a plane once 🙂
Yes indeed, that’s very important – especially with our iPhone’s that we’re handling all the time.
And what’s a good way to keep the lens clean?
You can also get a table top tripod and angle it so that the legs rest on your chest. Then use the headset exposure release. OH and don’t forget to hold your breath for the exposure. works for me 😉
Great tips, thanks 🙂
What about using the burst mode on the iphone and then selecting the best photo?
Yes, that’s a great option when photographing moving subjects 🙂
What’s a good way to clean the iPhone camera lens?
The best option is to carry a small lens cloth with you. Failing that, a soft t-shirt material should suffice – you just need to be careful that you’re not using a material that might scratch the lens.
i have an iphone 5s, how do i put the grid on my camera??? i like this option and would like to use it on my iphone..
Hi Jose. You’ll need to open the Settings app, then select Photos and Camera. Scroll down to the Camera Section and turn on the Grid option. Close the Settings app, then open the Camera app and you’ll see the grid on the screen.
thank you that was so easy!!!!
Glad you found it! It’s easy when you know how 🙂
I am using iphone5s my photo galery was full with my photos and videos suddenly all my images got blurry and i cant even share my photos and copy it to my laptop.
I found if you need to zoom deep into a photo it is best to us your pc where you can micro zoom without losing any detail on a photo an stay sha
I have read many of your articals and viewed your videos. Some several times. You have made me love my iPhone 6S even more. I receive a lot of compliments on my pictures and it’s all because of you. Thank you so very much.
Dale
That’s great to hear Dale. Keep up the good work 🙂
Me and my husband just got new IPhone 6s Plus’s and I’ve noticed the camera is very noisy, and grainy. I would expect the IPhone camara to be prestine and flawless. But coming from a Samsung phone that the camara on there seemed to give great detail to close up figures and further away in the background building and or papers, grass etc. as within our new IPhones it can give detail to one subject and not another…. seems like IPhones prided on their elite cameras and it’s not so anymore… not sure going to continue to play around with settings and other apps to help learn more about perfecting my photo taking skills with the sapphire lens instilled within the IPhone 6s Plus.
Thank you for your immensely helpful tips.
So glad to hear you found these tips helpful 🙂
I purchased an iPhone 7 Plus in March of 2017. This article is 3 years old. Will these tips apply to the 7+?
U should go to another website fr that or search for an updated article of this
I can’t take good picture. Every time when i try to capture picture, I was failed to take a blurry. Please anybody help me please.
I have a problem in my iPhone 6s…..
When I take selfies,it make blur of the backgroud,As a result the peoples face behind me become blur….
Sry for my bad english
Really invaluable tips all round but will most of these tips and their helpfull hardware also apply to the current generation of 2017 iphones?
Francesco Trapani
In the case of motion blur, how successful is panning as an optio with a moving subject?
What app are you using to set the exposure on highlights? Are you setting the exposure after you have locked the focus?