Cropping your iPhone photos can greatly improve your images. Whether it’s to improve the composition or eliminate distracting background elements, cropping is an important part of the image editing process. In this article, Alicia Katsur shows you how careful cropping of your iPhone photos can make a huge difference, creating more powerful and visually appealing images.

1. Crop Out the Bad!
Unappealing subject matter can easily be cropped out of a photo. Below is an example of subject matter I came across on a roadside. There were power lines on two sides of the subject that I wanted to capture.

I only wanted the ice cream cones in the photo, but was unable to get close enough since they were too high up. Instead I took the photo including the scenery that I didn’t want, and later cropped the image to leave only the ice cream cones in the photo. The result is shown below.

2. Straighten Crooked Images Later
If your subject will only be there for a moment (e.g. an animal moving or someone momentarily doing something silly) don’t worry if you shoot the photo a little crooked or a bit far away. You can straighten and zoom it in later.
Be sure to leave yourself enough room around the edges of the frame though. In certain instances, if there isn’t enough room, when you attempt to straighten the photo, the subject may get cropped right out of the frame.
However, don’t leave too much room because if you have to crop out too much of the image, the remaining part of the photo may start to appear out of focus.
3. Rectangles vs. Squares
Photo sharing apps such as Instagram are designed to accept images cropped as a square. However, certain images just don’t look right or fit into a square frame.
The photo below was taken with my iPhone and contains no cropping edits.

I then straightened and cropped it just a bit, as shown below. It gives more attention to the subject and makes it a bit more pleasing to look at.

The next image below shows the photo cropped into a square, which is typically used on sites like Instagram. (Note: the EyeEm photo sharing app accepts different sized photos without the use of a special app to fit a rectangle into a square).

The above image is an example of a photo that may be better suited for a rectangular cropping since without the lower part of the photo, the viewer may not know what they are looking at.
The middle photo above keeps a bit of the bench (seen on right side of photo) which helps give the viewer a bit of “perspective” as to the size and placement of the subject.
In certain cases, the point may be not to give perspective – it depends on what you as the photographer are trying to achieve with your photo.

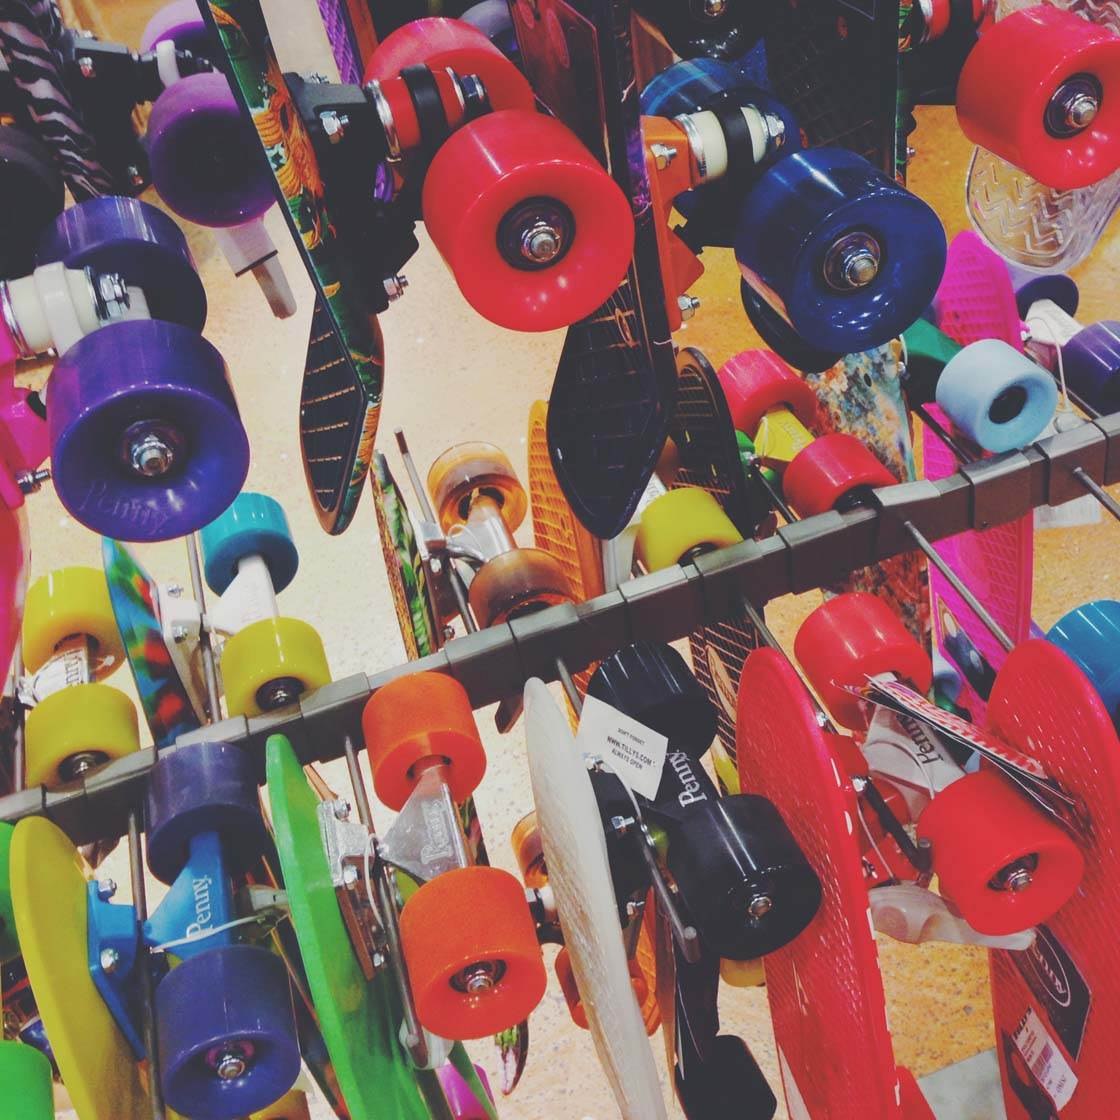
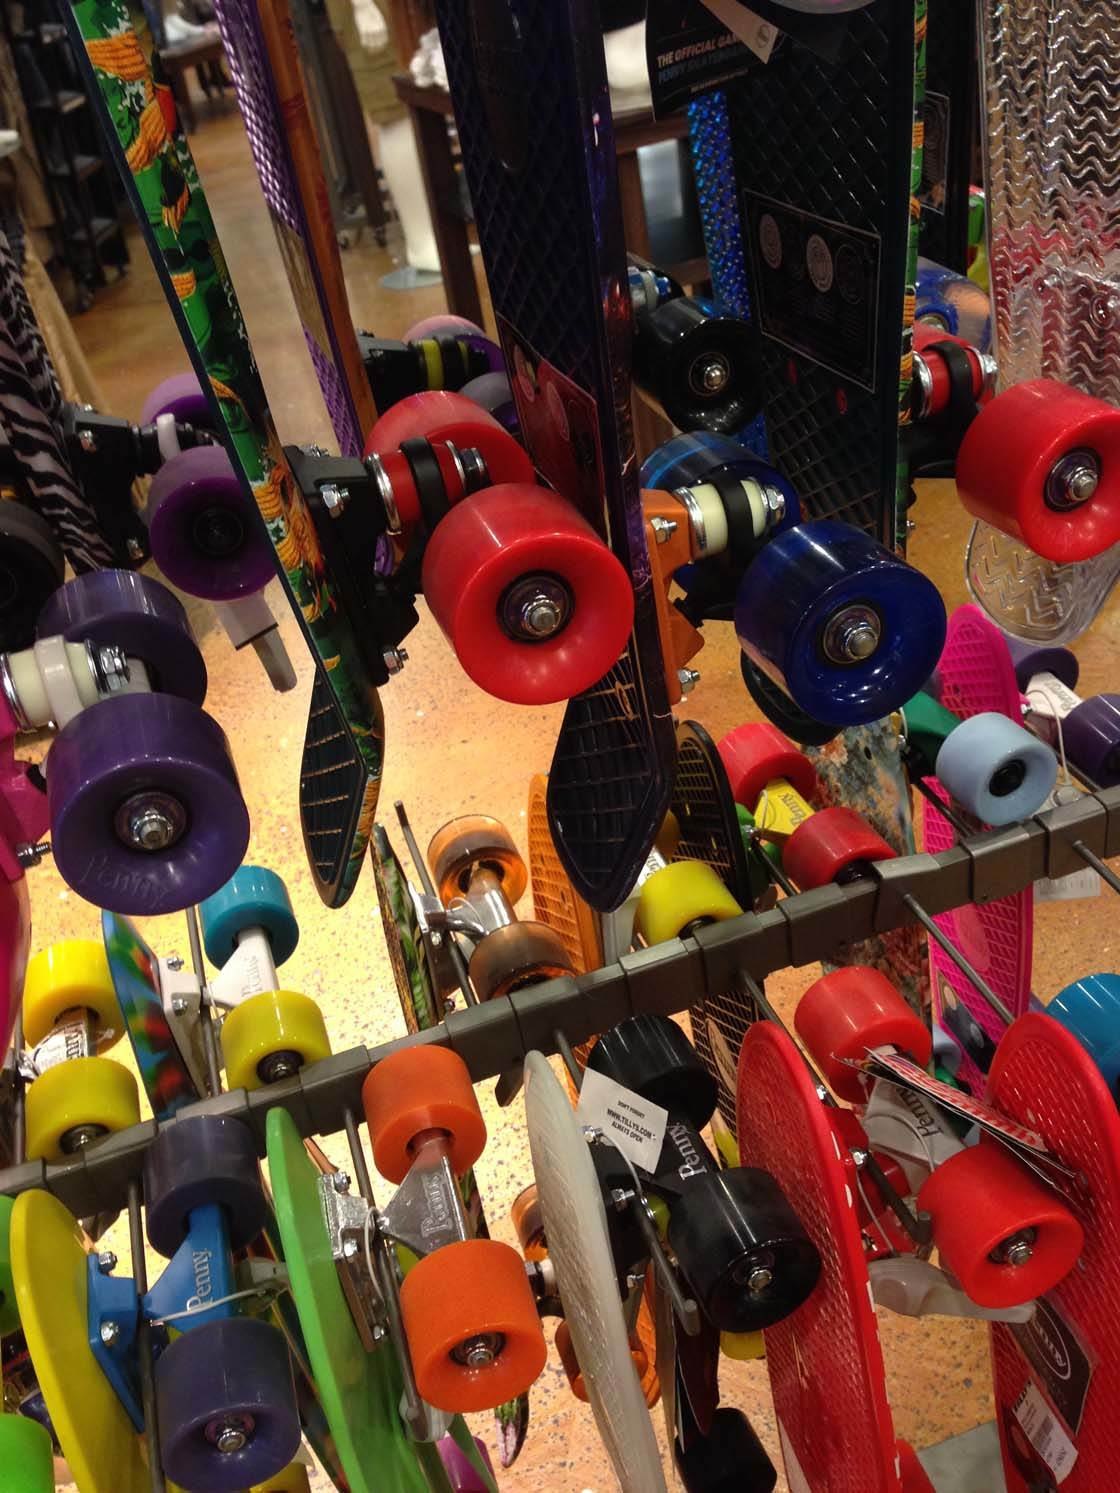
These skateboard photos are an example of an image shot as a rectangle (above) but edited to suit photo sharing apps that only accept squares (below).

I prefer the square image since the content at the top of the rectangular one does not add to the overall photograph.
4. Crop To Capture A Tricky Scene
When taking the photo shown below, I had difficulty lining the sun up to the hole in the shell if I held the shell close to my iPhone. Additionally, holding it closer let too much light in and “ruined” the photo.

Holding the shell further back allowed me to get the shot, and cropping it later enabled me to get the effect I had wanted to achieve.

5. Use The Built-In Crop Feature On Your iPhone
Your iPhone is already equipped with some basic editing tools, including one for cropping. I will provide you with a brief tutorial on how to crop images using the built-in editing features of the native Photos app.
First, open the Photos app and find the image you would like to crop. Hit the “edit” button in the upper right corner. The editing tools will appear as shown below.

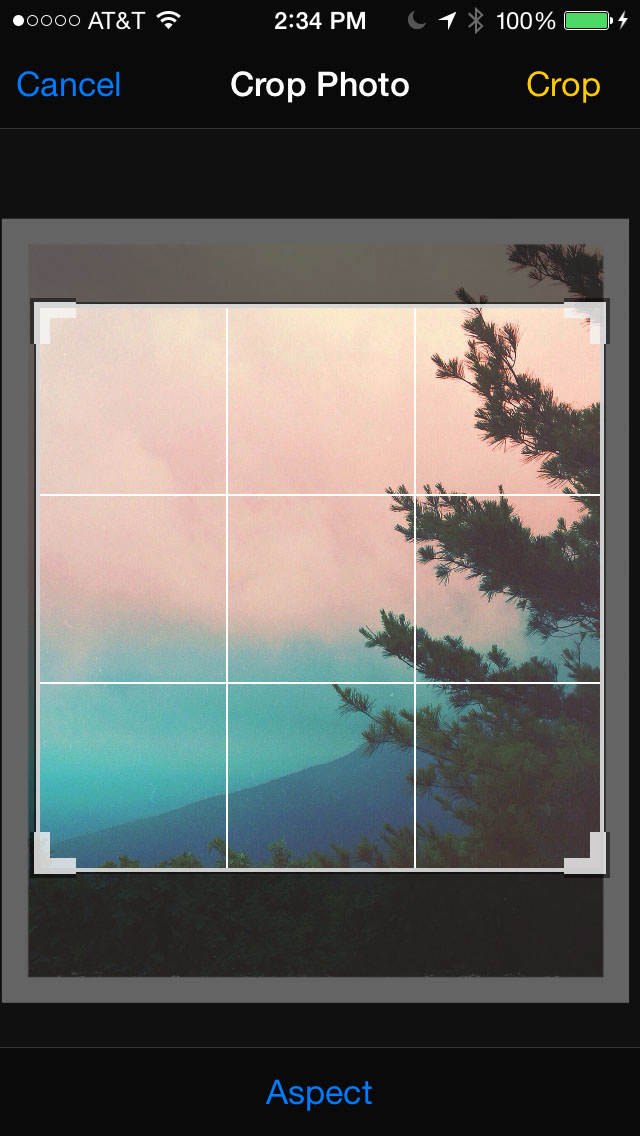
Next, tap the “Crop” icon (the square icon in the bottom row all the way to the right). A grid will appear over your photo. Touch the outer edge of the grid and slide your finger across the screen to zoom in or out.

Tap on the “Aspect” button located at the bottom middle of the screen to change the aspect ratio (cropping shape). There is a specific choice for “square” which is what I used for this image. Make sure you hit “save” when finished.

Note: When using the editing option in the native Photos app, you will not permanently lose any part of the image that is cropped out. You can undo the cropping by using the following commands: Edit > tap Crop icon in lower right > Aspect > “Original” – this will restore it back to the original photo.
The same applies for the other editing features in the Photos app, so go ahead and give them all a try!
These are just a few examples of how cropping your images can change the overall perception by your audience. Every time you take a photo, look at it carefully to see if cropping might improve its composition or overall appeal.
About the Author
Alicia Katsur discovered her passion for photography as a child. In addition to iPhone photography, she enjoys international travel, snowboarding, cycling and seeing penguins in the wild. She splits her time between the city and the country.
See more of her work by checking out both of her Instagram feeds: @flockofpenguins (creative feed with a broad focus) and @igercatskills (photo gallery documenting the beauty of the Catskill Mountain area in upstate New York).


Thanks for sharing these cropping tips with us Alicia.
You are welcome!
One question: when we crop, do we lose detail? I mean do our photos get more grainy?
That’s correct Maria. When you crop you’re reducing the total number of pixels in your photo, and if you try to display or print it too large it will appear pixellated or grainy. So cropping is generally fine if they’re only going to be displayed small on Instagram or a website. But you need to be careful if you’re planning to display it at a large size.
thank you for clarifying this Kate!
How do I turn an upside down photo on iPad right side up so I can email it to family.
how do i make the subject further away?