Enlight is a powerful iPhone photo editor app with a huge range of tools. But with so many settings, it’s difficult to know where to start. In this Enlight tutorial, we guide you through the editing tools with step-by-step instructions and video tutorials. You’ll quickly master the Enlight app… even if you’re new to photo editing. Read on to discover how to use Enlight to create beautiful iPhone photo edits and digital art.
Table Of Contents: Enlight App Tutorial
Click any title link below to go straight to that section of the Enlight tutorial.
1. How To Use Enlight App: Overview
1.1 Open A Photo To Edit
1.2 Open Enlight’s Photo Editing Tools
1.3 Use Enlight’s Help Feature
1.4 Take A Tour Of Enlight Photo App
2. Canvas: Improve The Composition Of Your Photo
2.1 Crop Tool
2.2 Skew Tool
2.3 Refit Tool
3. Image: Enhance Color, Exposure & Clarity
3.1 Adjust Tool
3.2 Clarity Tool
3.3 Target Tool
4. Filters: Quickly Change The Look & Mood Of A Photo
4.1 Analog Tool
4.2 BW (Black & White) Tool
4.3 Duo Tool
5. Tools: Retouch, Blend & Selectively Blur Your Images
5.1 Mixer Tool
5.2 Reshape Tool
5.3 Heal Tool
5.4 Tilt Shift Tool
6. Artistic: Apply Paint & Sketch Effects
6.1 Painting, Urban & Sketch Tools
6.2 Elements Tool
7. Mask: Apply Your Edits Selectively
8. Brushes: Draw Special Effects On Your Photos
8.1 Doodle & Effects Tools
9. Text: Add Text & Captions To Your Images
9.1 Type Tool
9.2 Decals Tool
9.3 Meme Tool
10. Finalize: Add Borders Or Create A Collage
10.1 Border & Frame Tools
10.2 Instafit Tool
10.3 Collage Tool
You can download Enlight from the App Store for $3.99. This price includes all of the Enlight photo editing tools. There are no hidden in-app purchases or subscription fees.
1. How To Use Enlight App: Overview
The Enlight photo app has a clean and simple user interface. But if you’re new to the app, you might struggle to find your way around.
In this section, you’ll learn how to navigate the Enlight app and open photos for editing. You’ll also discover how to access Enlight’s editing tools and Help feature.
1.1 Open A Photo To Edit
Your most recent photos are displayed at the bottom of the screen. Swipe across the row of images to view more pictures. Or swipe up from the small purple line to fill the entire screen with your images.
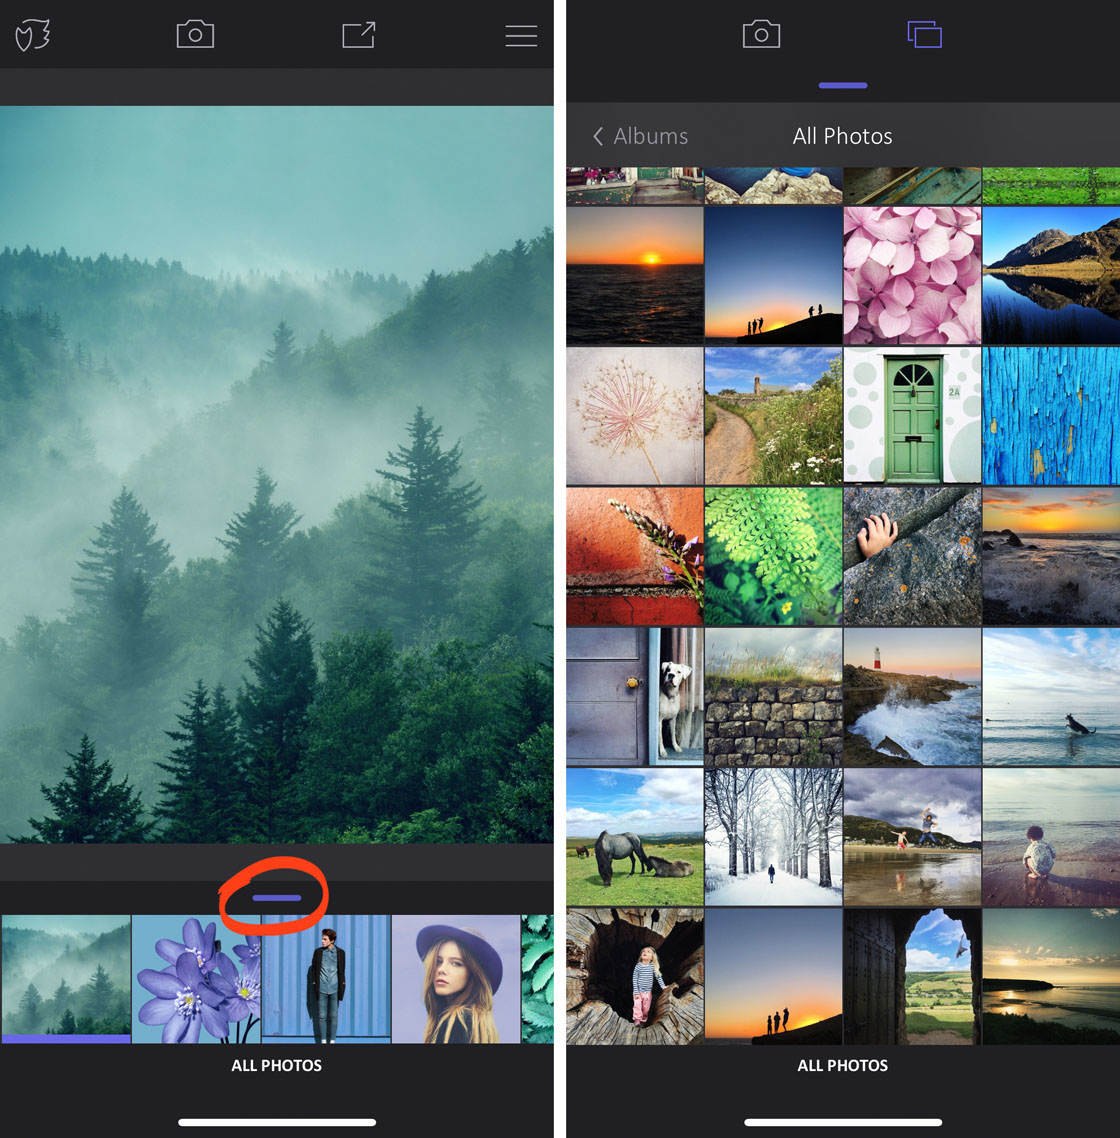
To open a photo from a different album, tap Albums at the top left of your photo library.
Tap a photo to open it. You’re now ready to edit your image.
1.2 Open Enlight’s Photo Editing Tools
To access Enlight’s editing tools, tap the Menu icon (three horizontal lines) at the top right. The tools menu appears on the right of the screen.
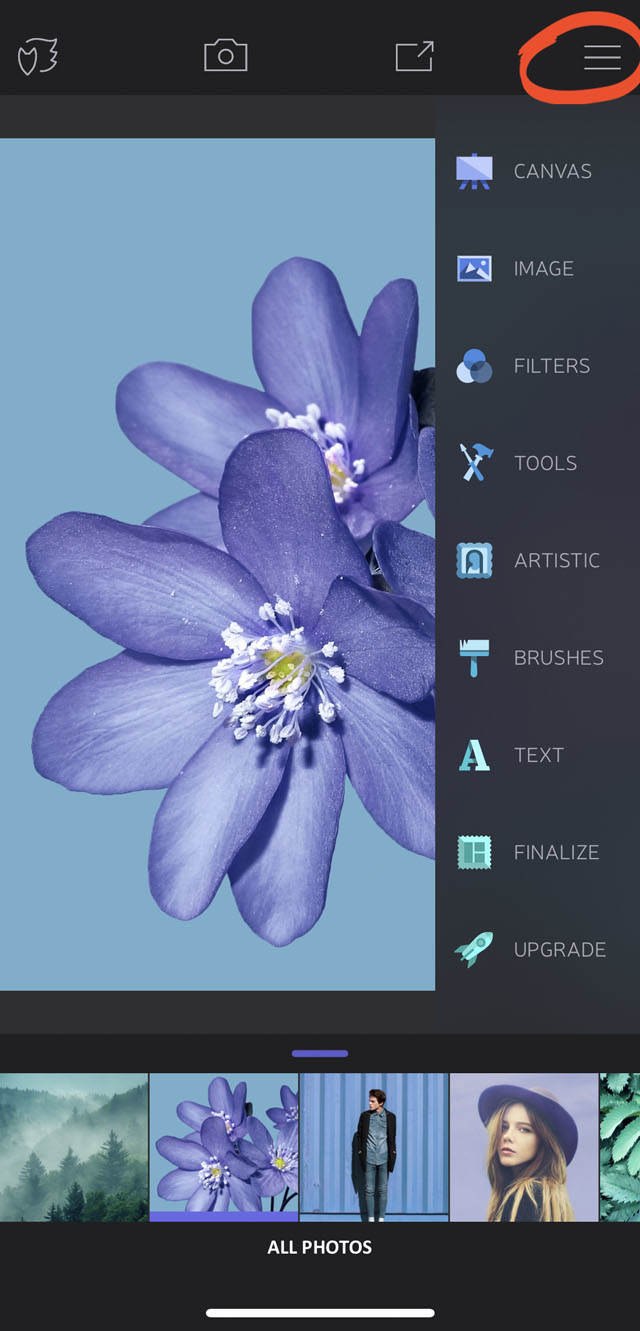
You can also open the tools menu by swiping from right to left.
To close the tools menu, tap the Menu icon or swipe right over the menu.
Tap any tool in the menu to display the individual tools within that category. The individual tools appear in the menu beneath the tool category that you selected.
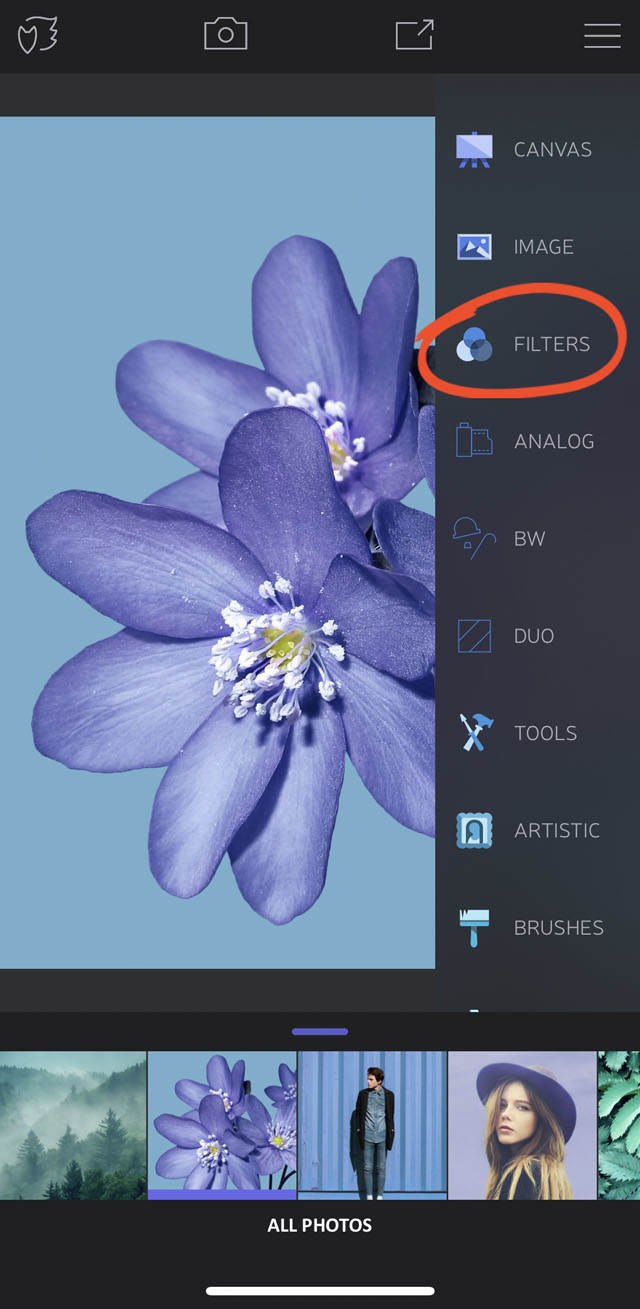
Tap on a tool to open its options and settings. You’ll learn how to use the Enlight editing tools shortly. Tap the X at the top left to exit the tool options.
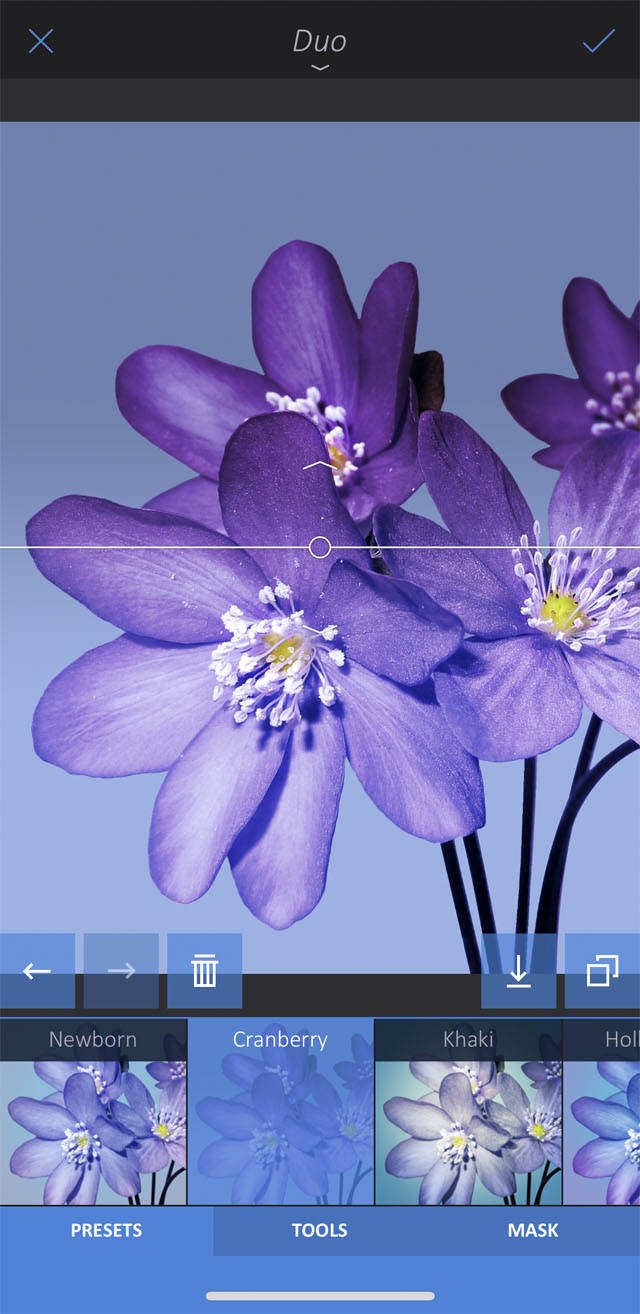
1.3 Use Enlight’s Help Feature
Enlight has a useful Help feature that you can access whenever you’re editing a photo.
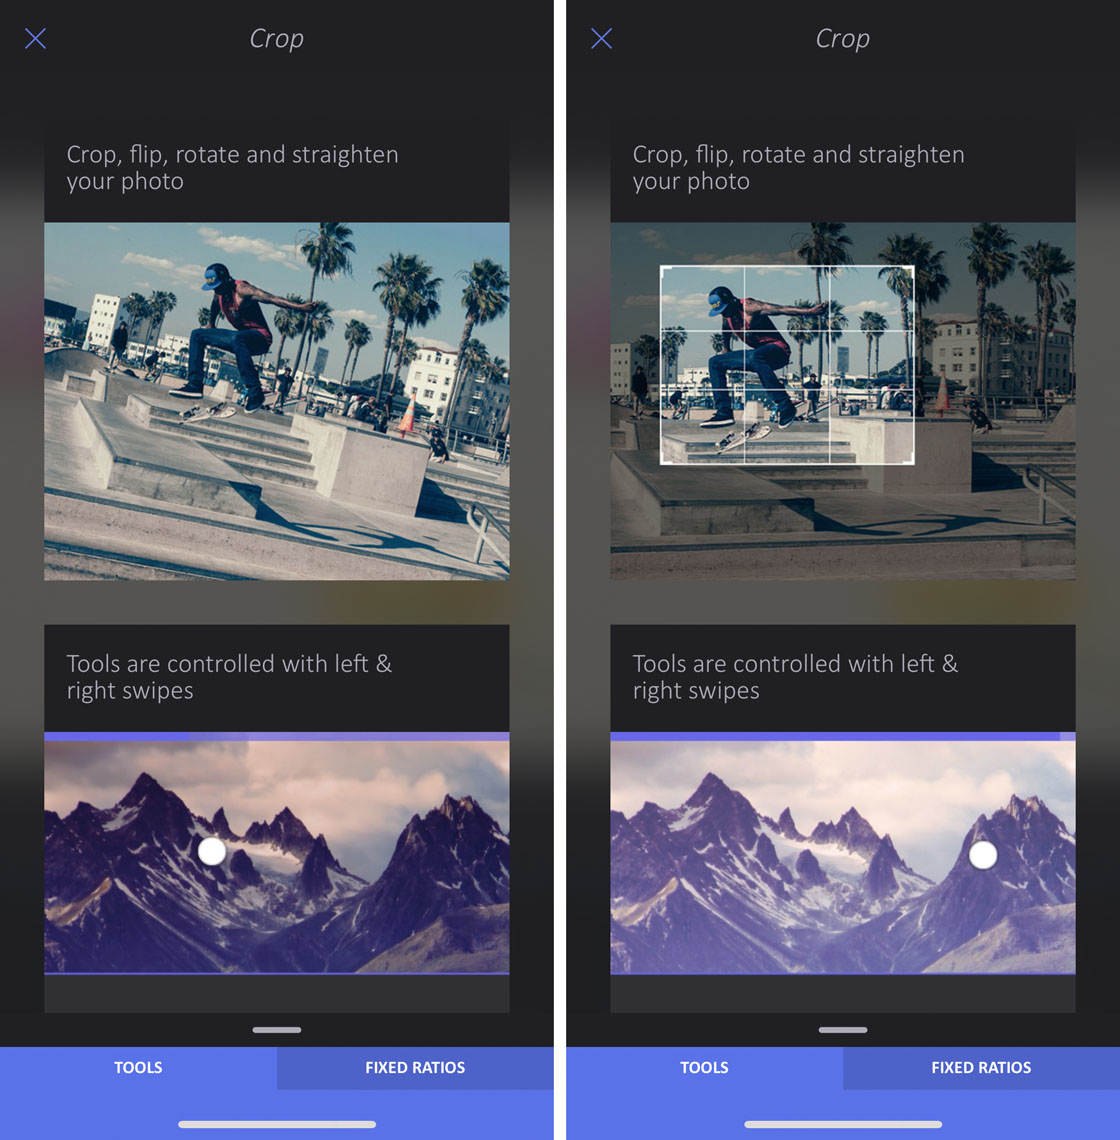
First, open an editing tool from the tools menu. Then swipe down from the arrow beneath the tool name at top of the screen.
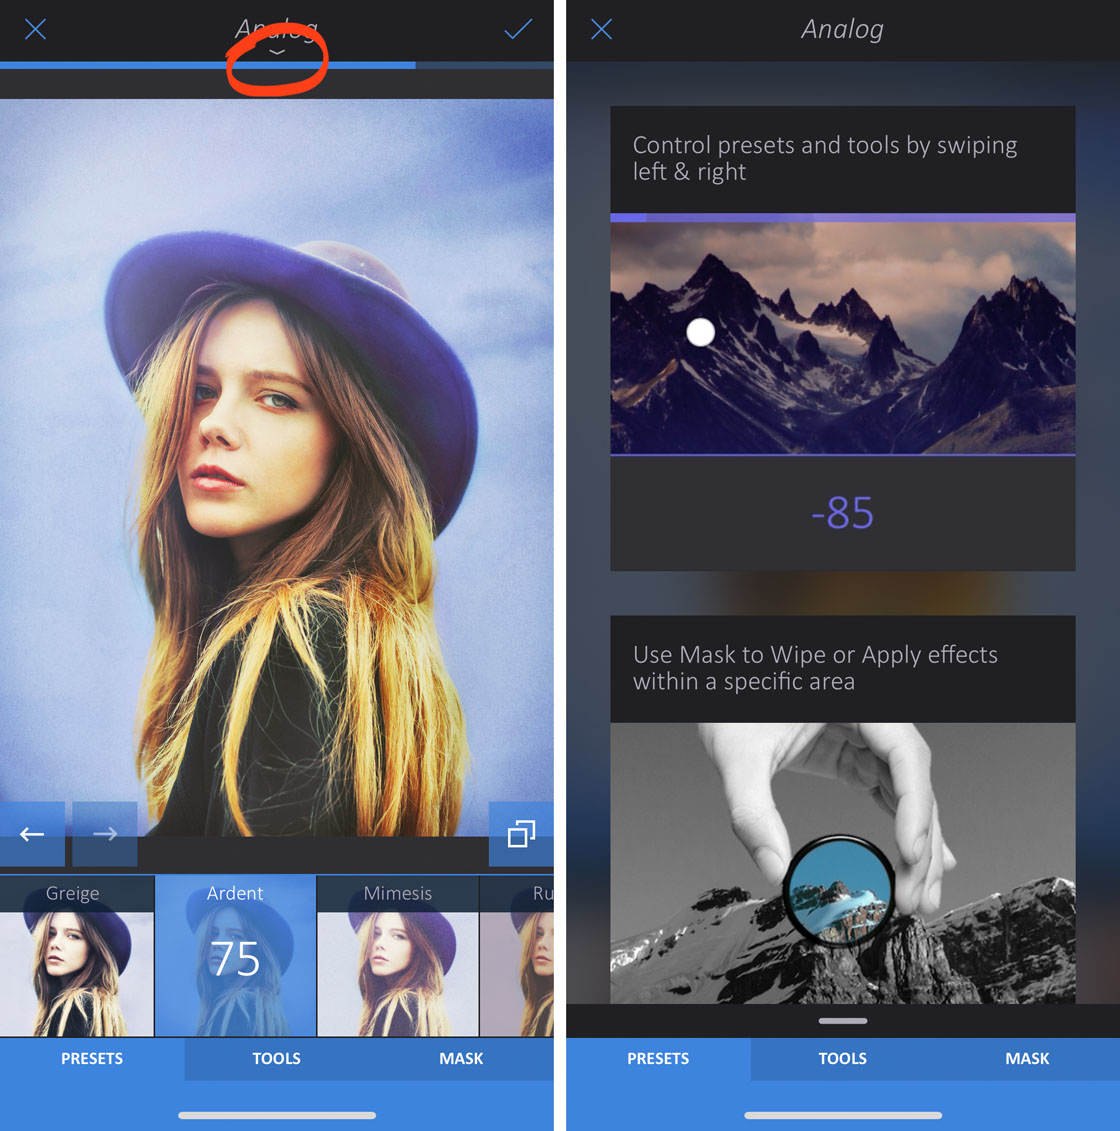
The Help feature for that particular tool will appear. This Help screen provides tips and demonstrations that show you how to use the tool.
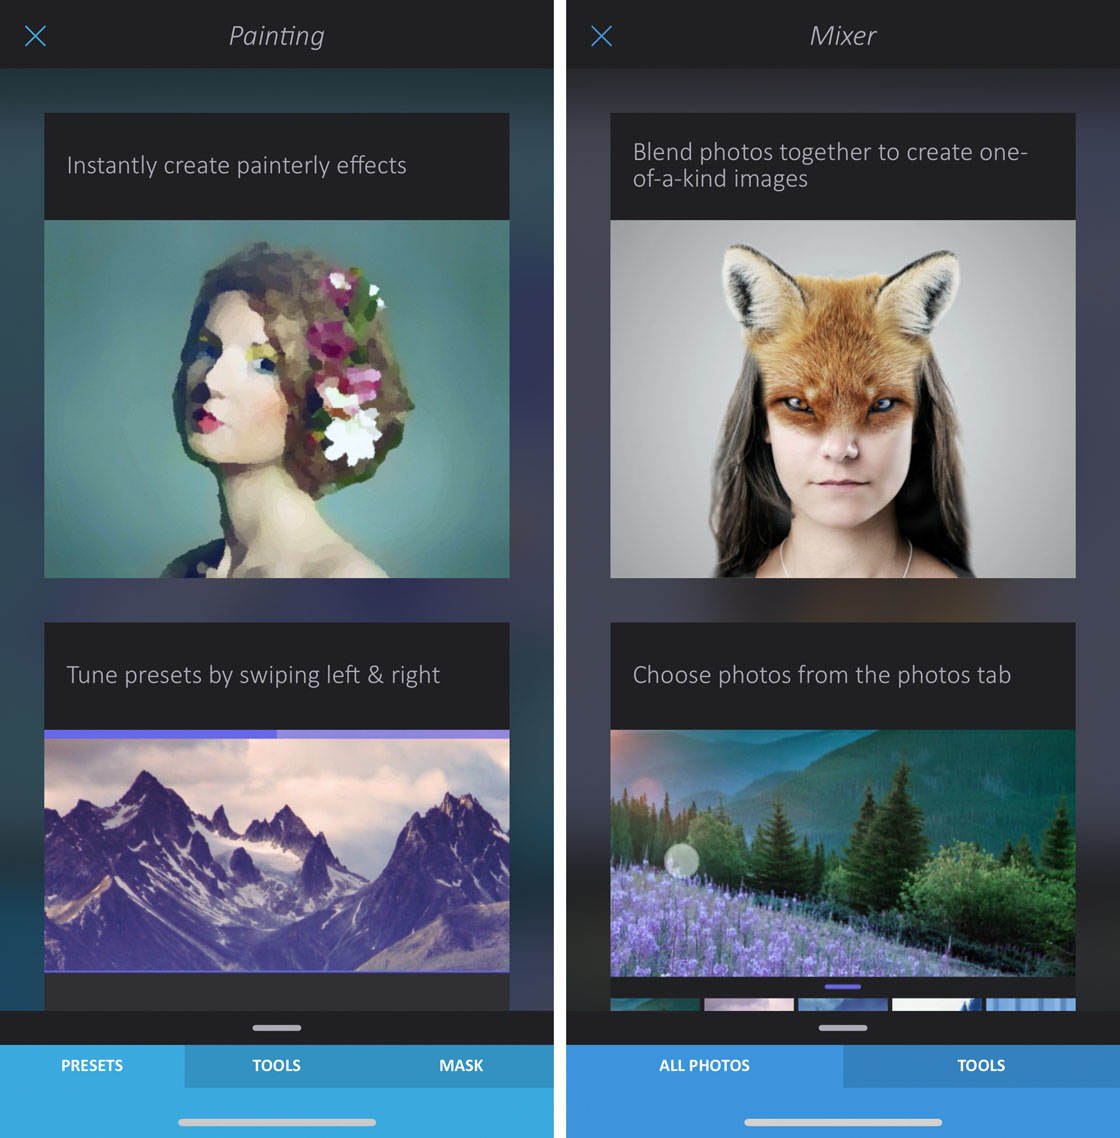
Swipe up to close the Help feature.
1.4 Take A Tour Of Enlight Photo App
Tap the Enlight icon at the top left to access the Backstage section of the app.
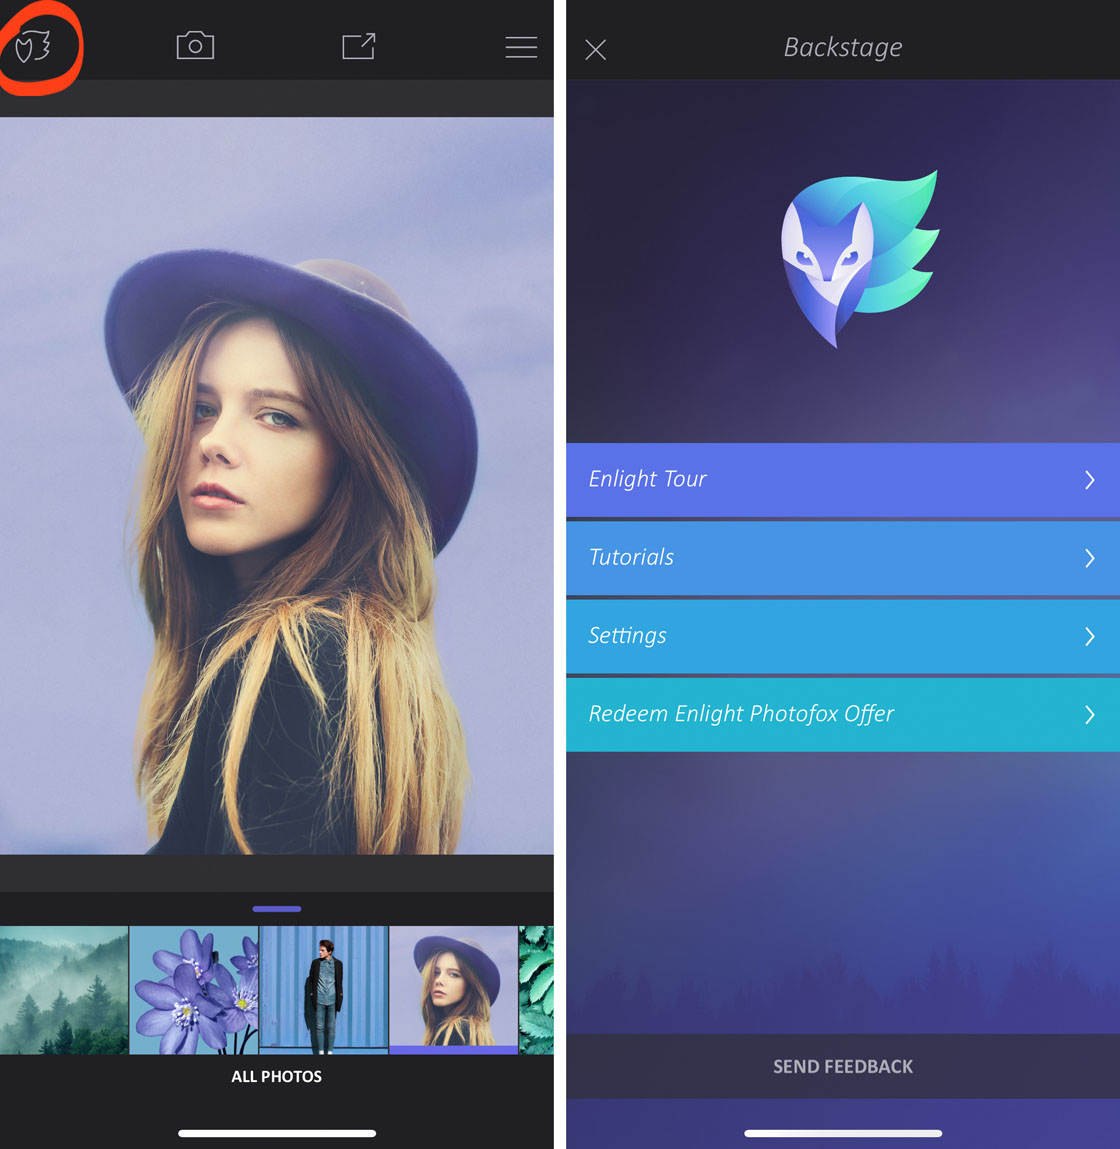
Select Enlight Tour to take a tour of the main features of the Enlight photo app. Or tap Tutorials to access a range of helpful Enlight tutorial topics.
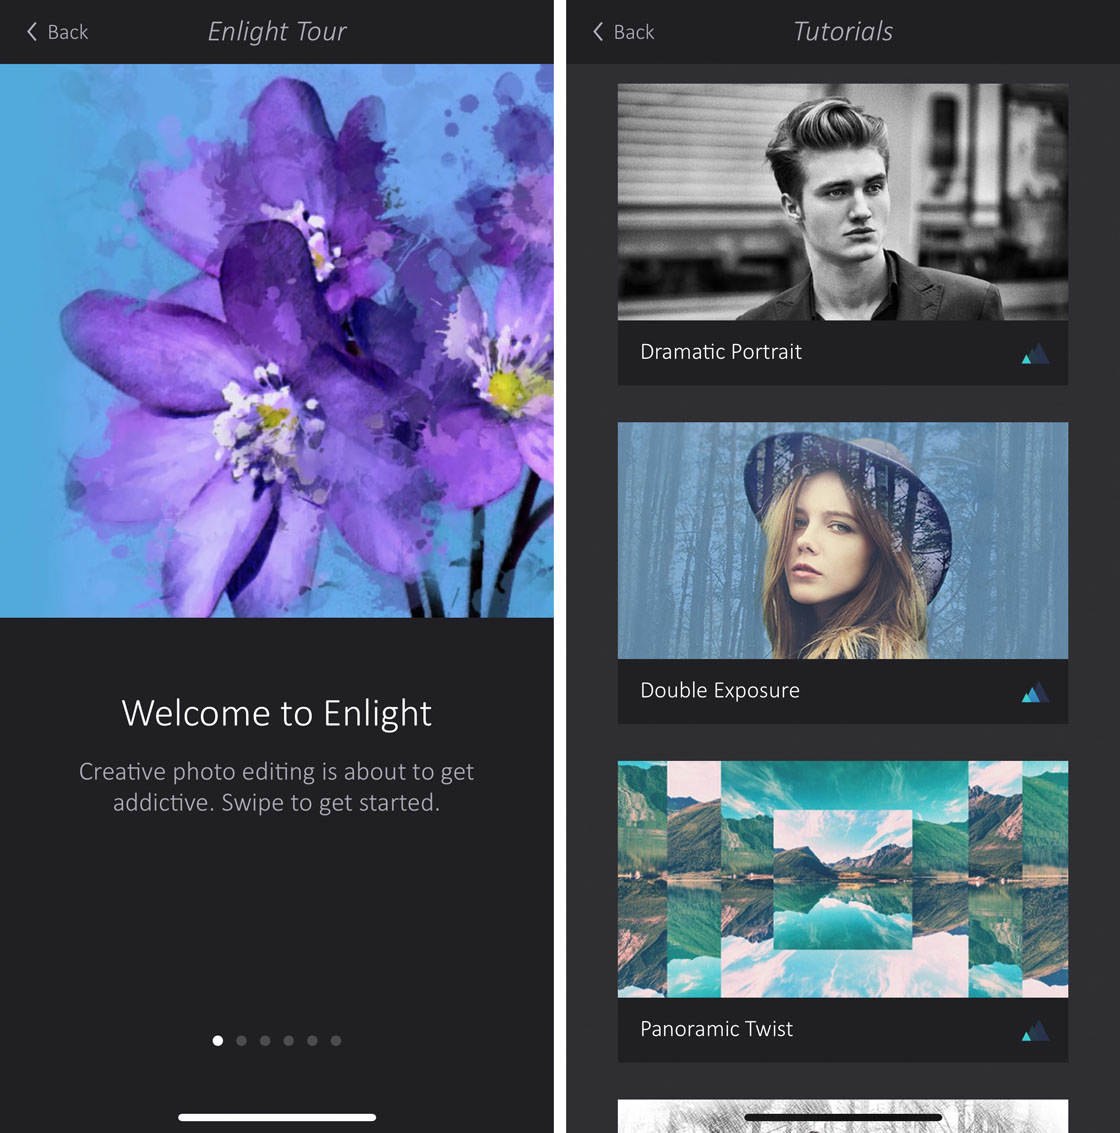
Now it’s time to start editing your images with the Enlight photo app. In the following sections, you’ll discover how to use the tools from all eight categories in the tools menu.
2. Canvas: Improve The Composition Of Your Photo
The Canvas tools allow you to crop, rotate, adjust perspective, and even bring your subjects closer together.
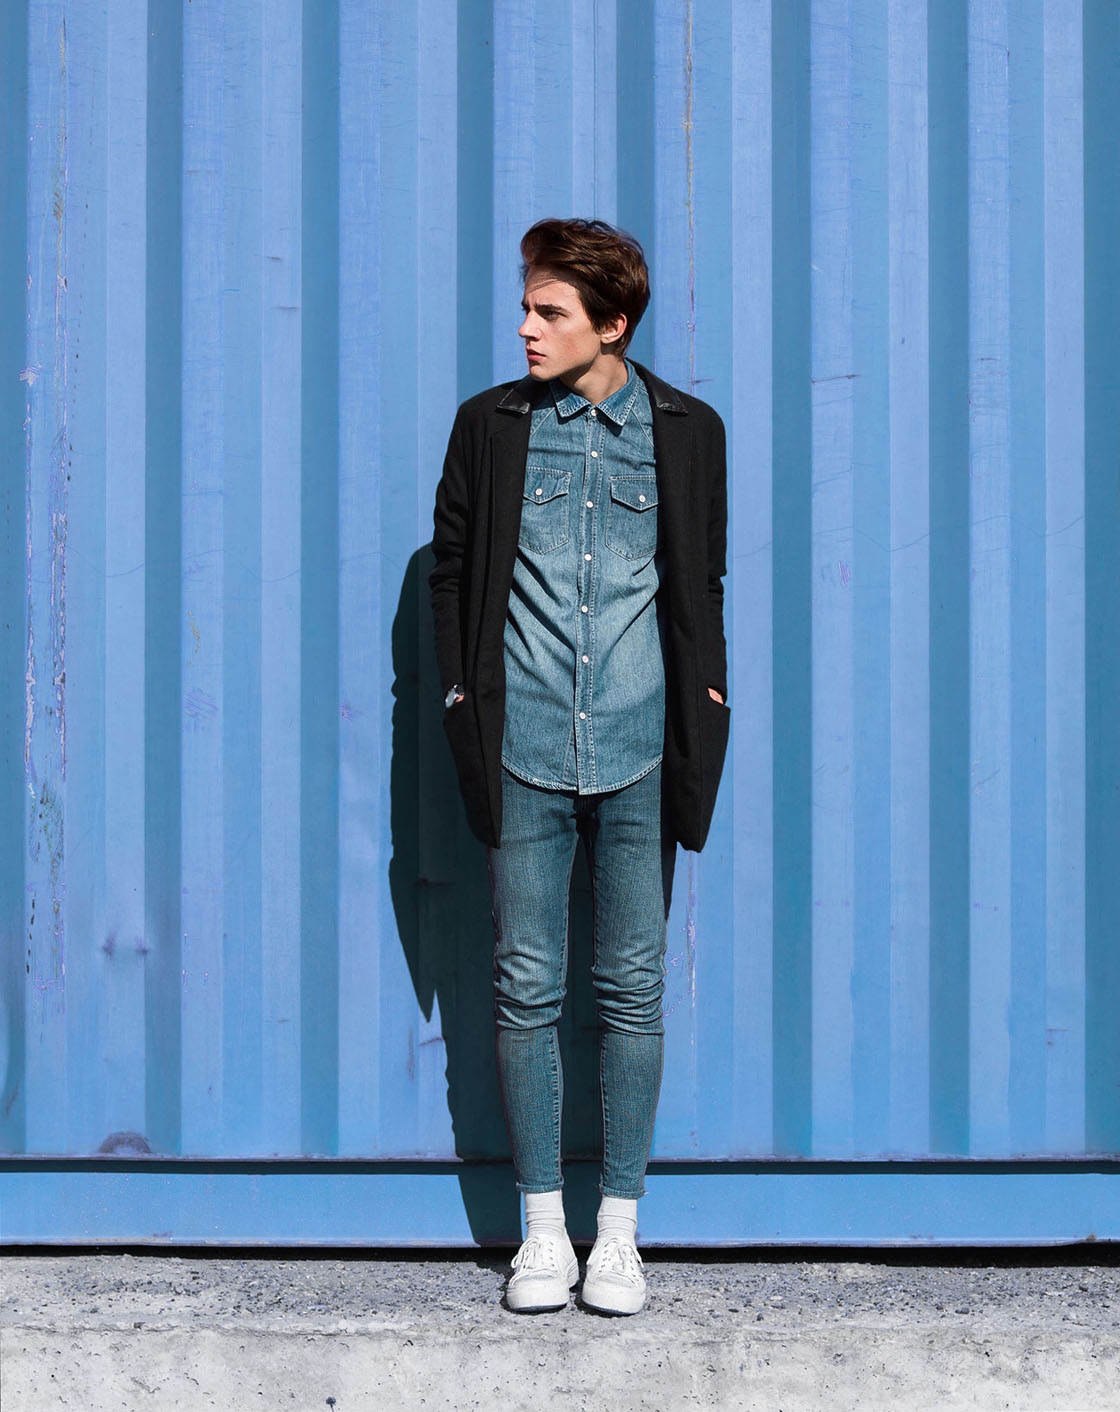
Use this category of tools to improve composition, straighten your images, and correct perspective problems.
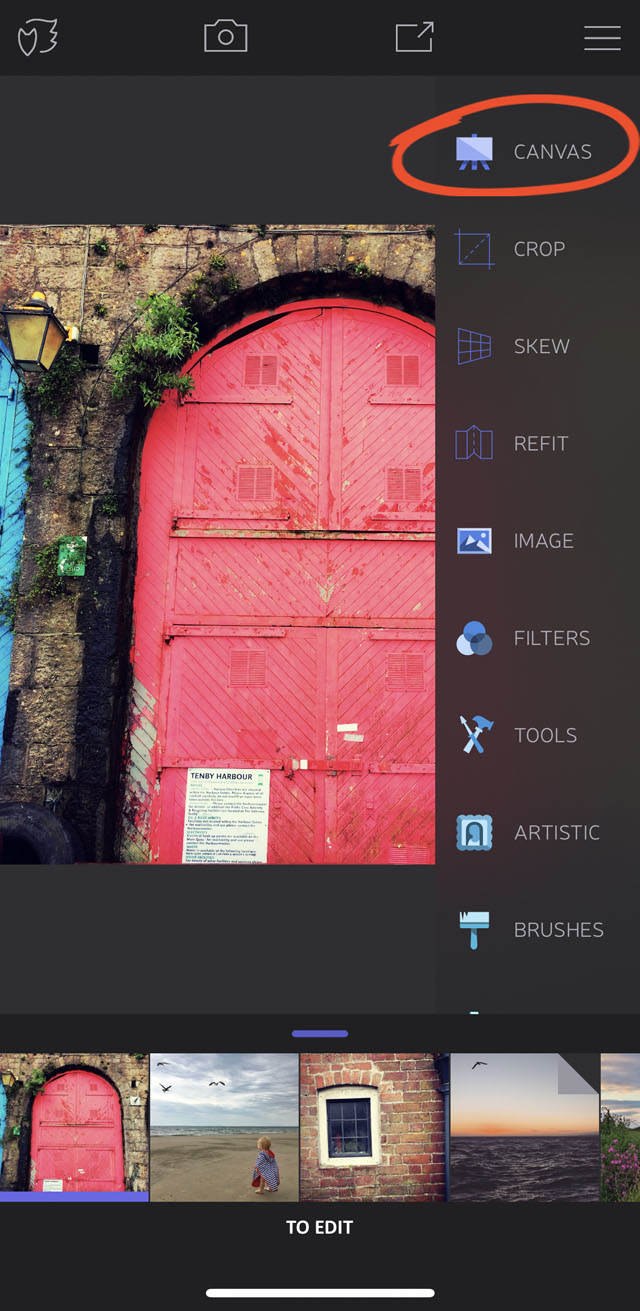
Open the tools menu by tapping the Menu icon (three lines). Tap Canvas to reveal three tools: Crop, Skew, and Refit.
In the video below, you’ll discover how to use Enlight’s Canvas tools to improve the composition of your photos.
2.1 Crop Tool
The Crop tool lets you cut away the edges of your image. Use it to remove distracting objects from the edges of a photo, or to improve the composition.
The Crop tool also has options for rotating, straightening, and flipping your image.
Open the Canvas tool from the tools menu, then select Crop. Tap the Crop option at the bottom of the screen.
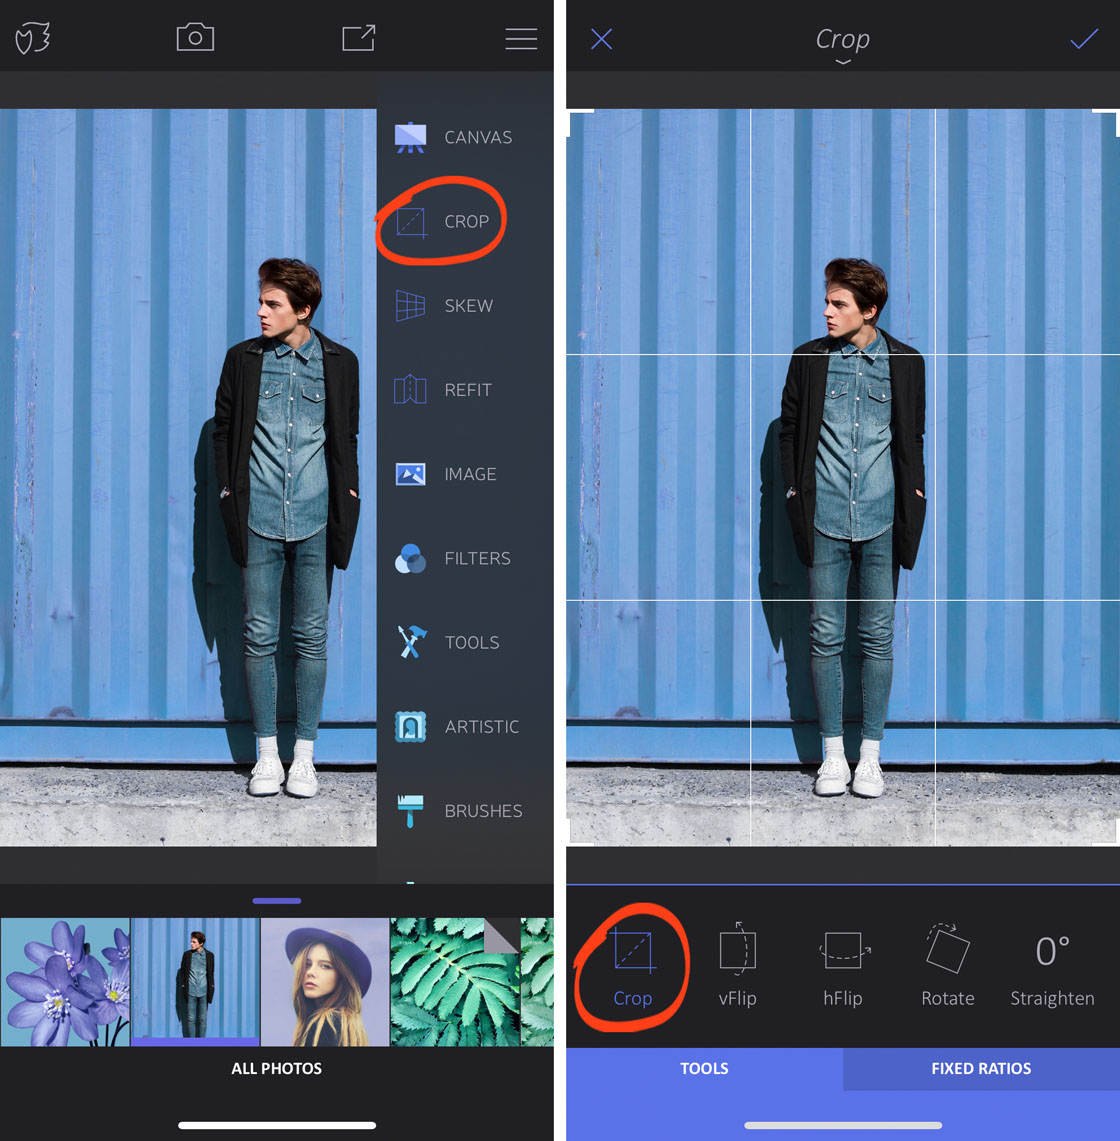
Do you want to crop with a specific aspect ratio, such as square, 3:4, etc? Tap the Fixed Ratios tab at the bottom of the screen. Then select an aspect ratio option beneath your image.
To crop the photo, drag the corner handles.
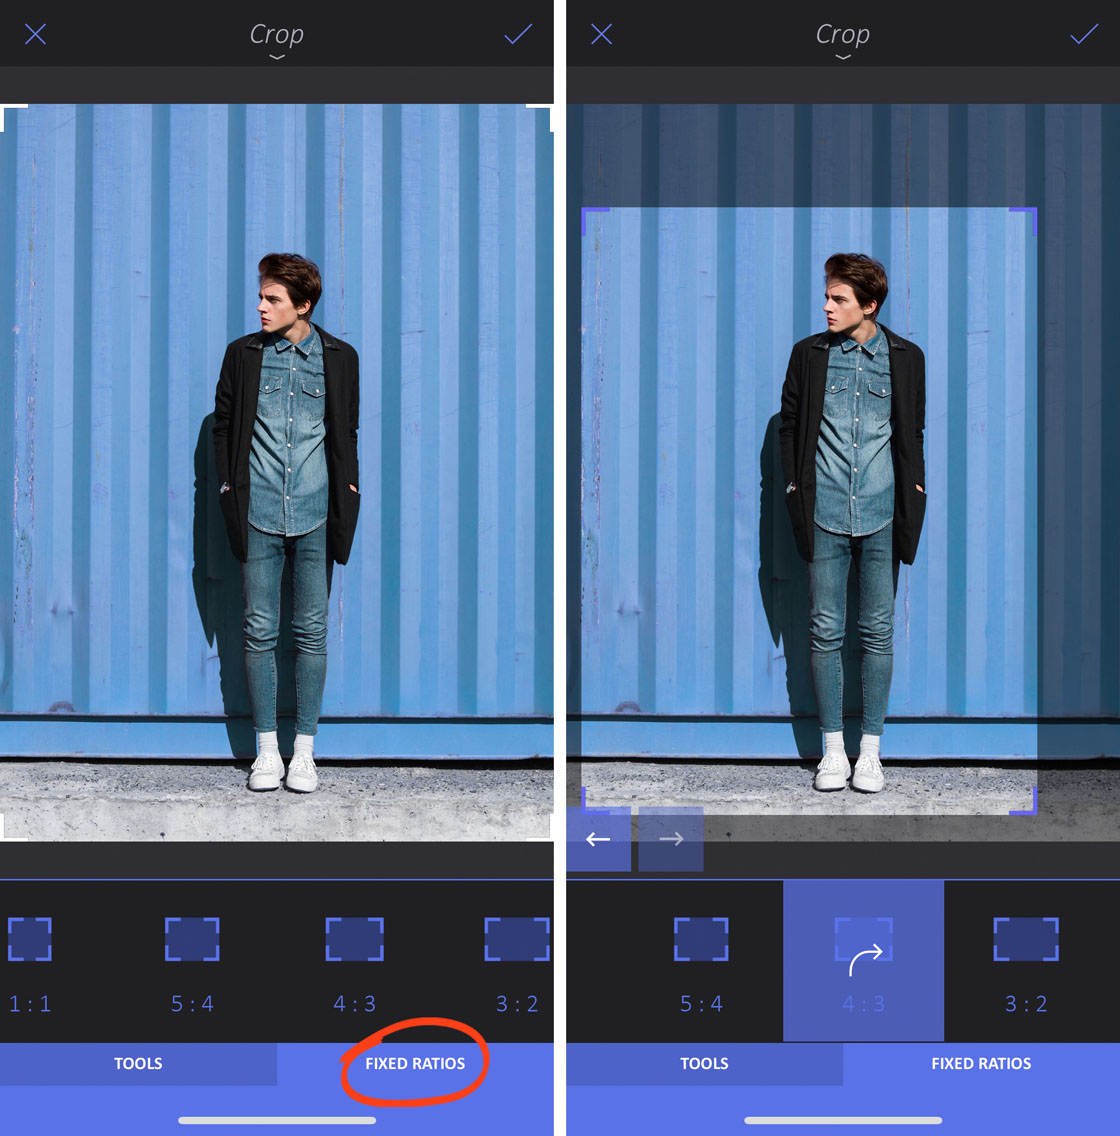
If you want to undo your edit, tap the Undo button (left arrow) at the bottom left of your photo. You can redo an edit that you’ve undone by tapping the Redo button (right arrow).
Tap the checkmark at the top right when you’re happy with your edit. If you want to cancel the edit and exit the tool, tap the X at the top left.
To straighten a photo, tap the Straighten option in the Crop tool. Drag left or right over the photo to rotate it. Use the gridlines to help you get the photo level.
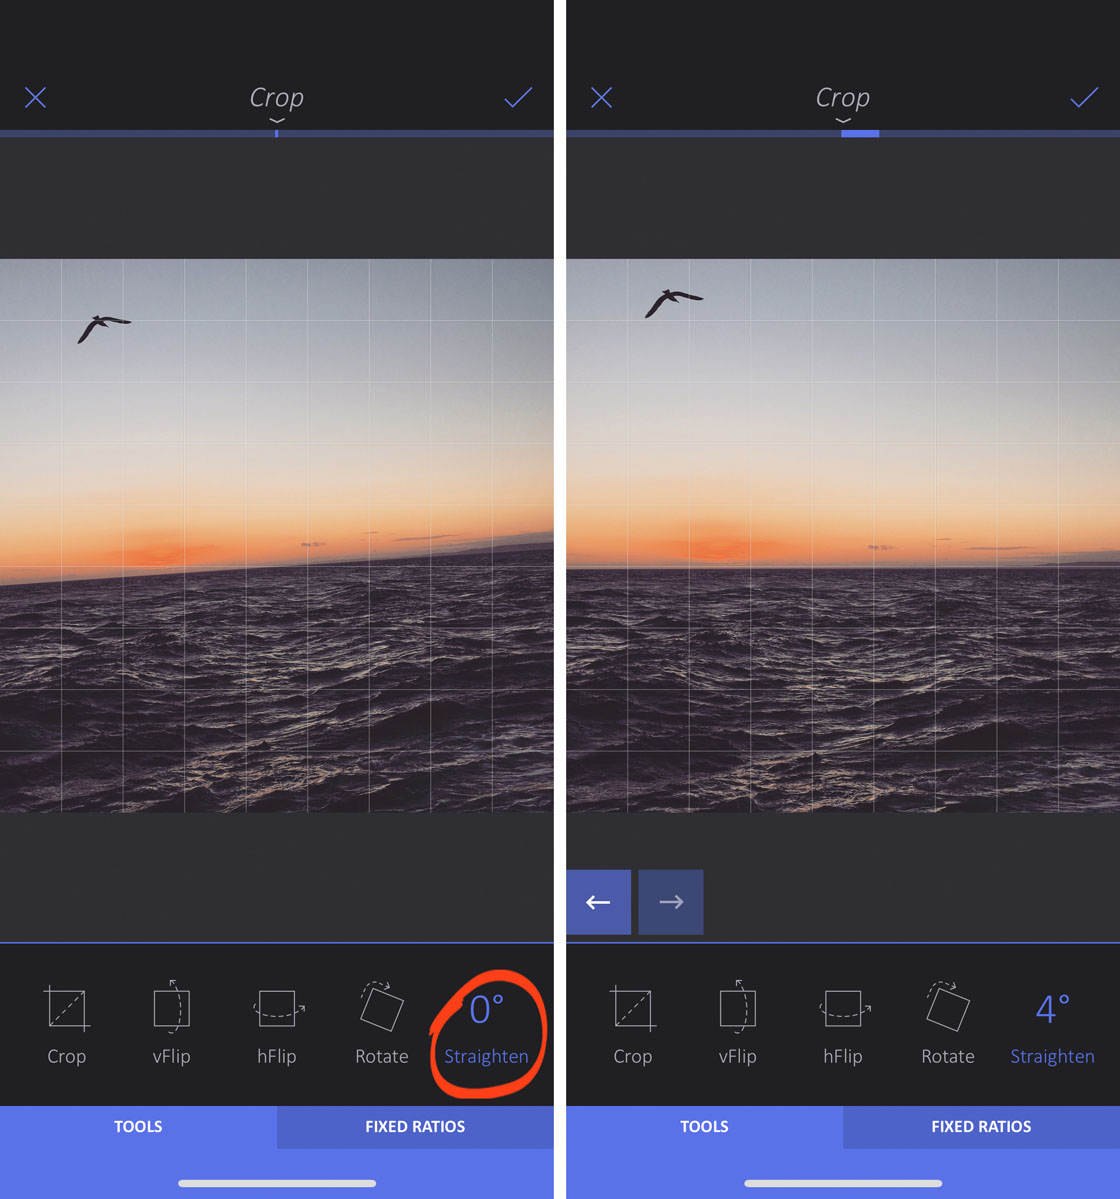
The Straighten tool is perfect for straightening horizons in your landscape photos.
2.2 Skew Tool
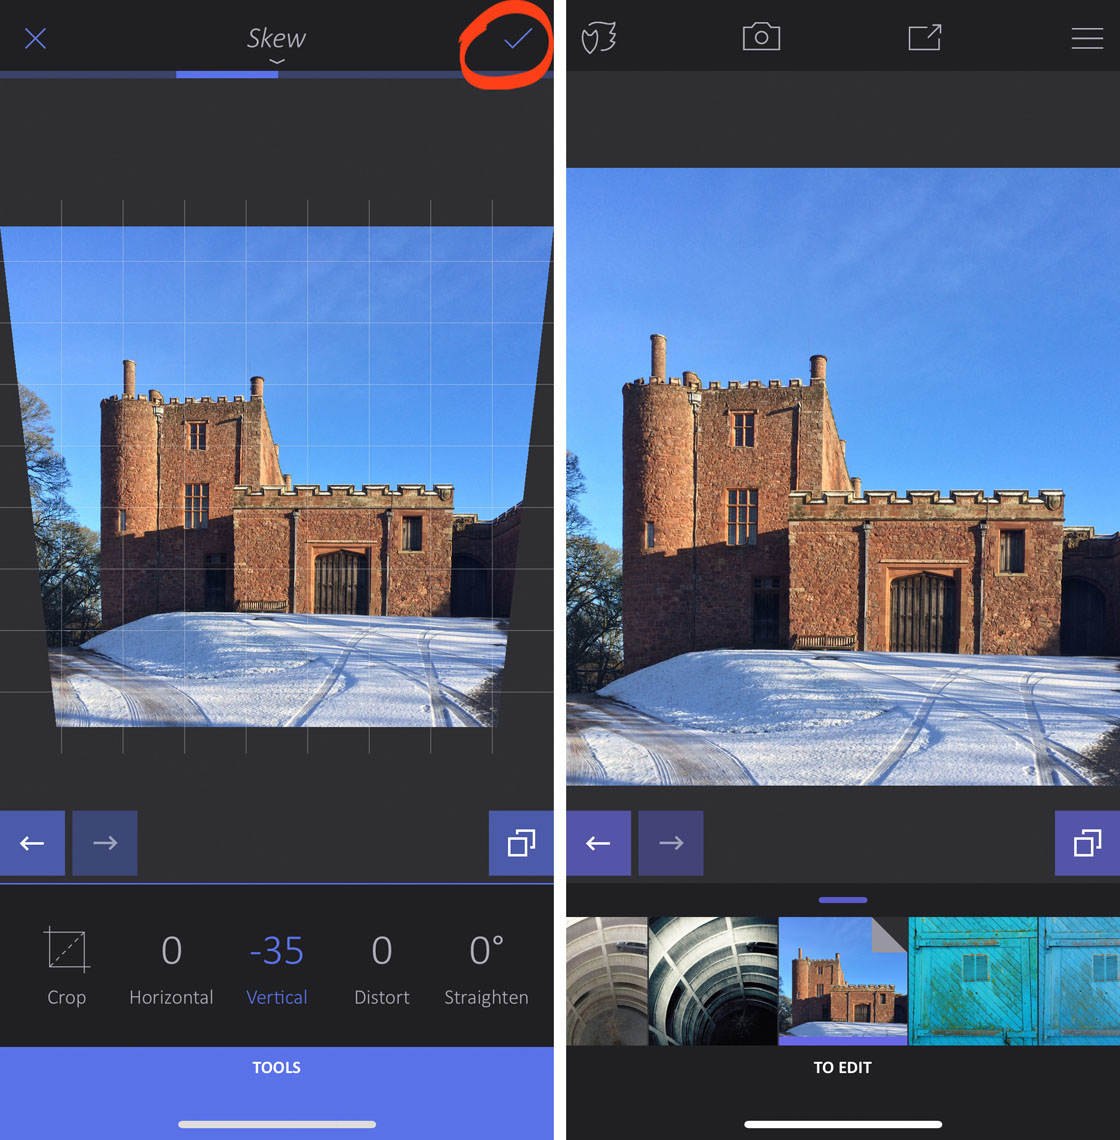
The Skew tool lets you correct perspective problems in your photos.
For example, if you photograph a tall building, the vertical lines of the building can appear to converge towards the top. The Skew tool allows you to straighten up the lines to make them vertical.
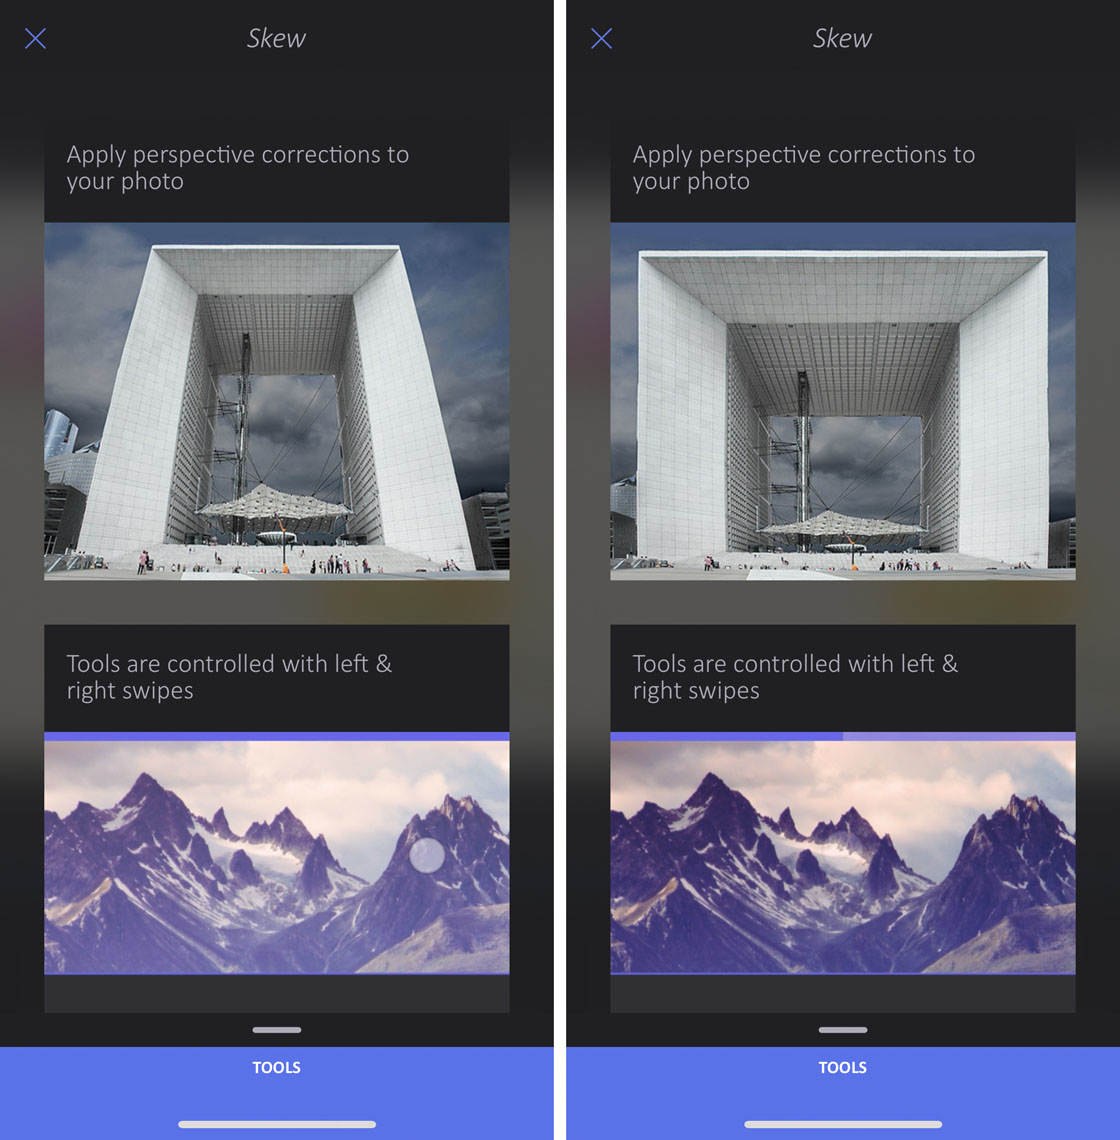
To correct perspective, go to Canvas > Skew. Select Vertical at the bottom of the screen.
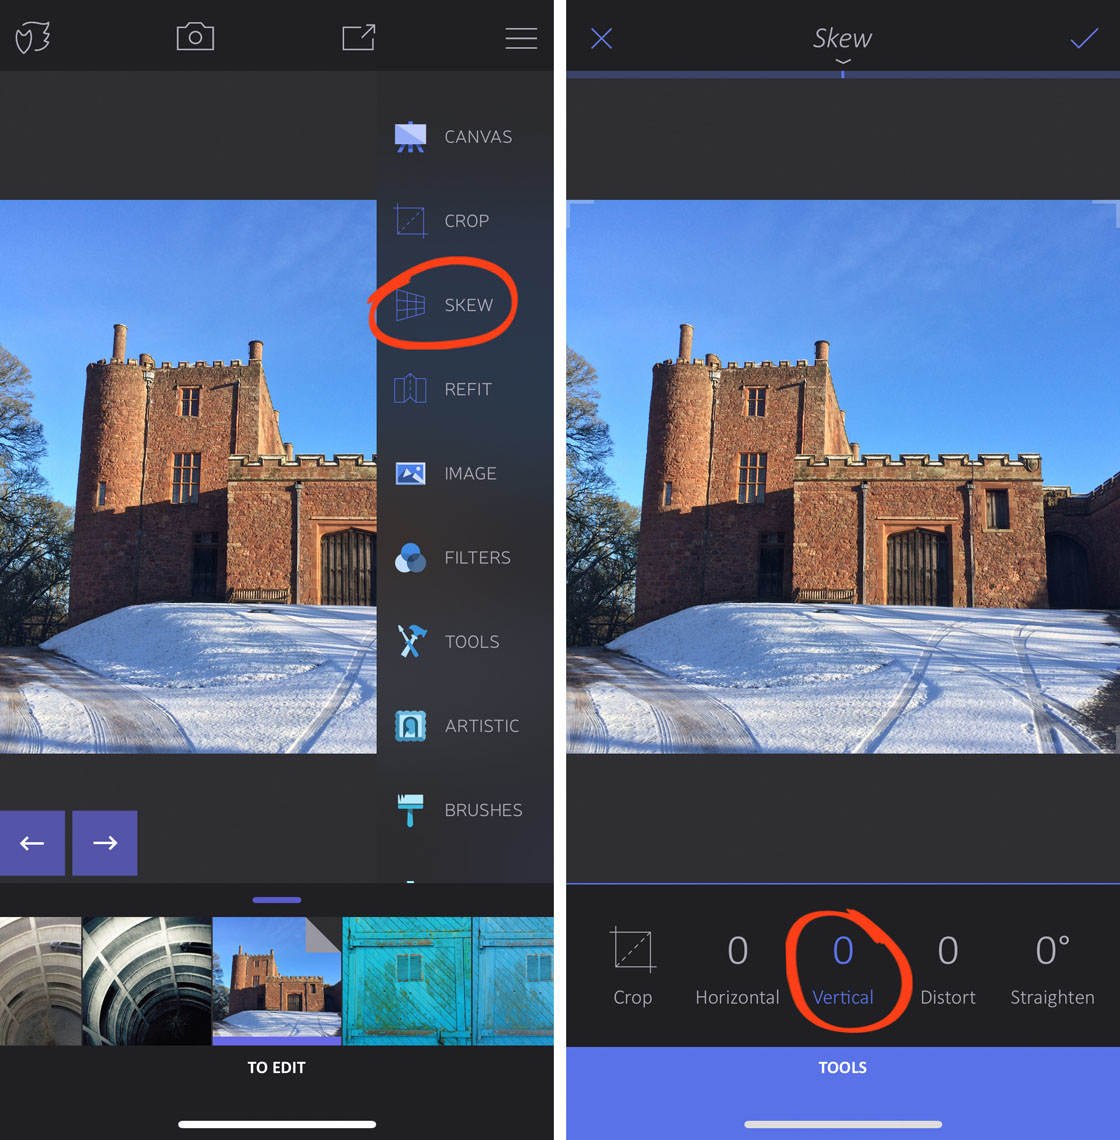
Swipe left or right over your photo to skew the image vertically. Use the gridlines to help you get the lines straight. Tap the checkmark when you’re done.
2.3 Refit Tool
The Refit tool is quite unique. It allows you to move elements of your photo closer together. This feature requires a fairly simple background to be effective.
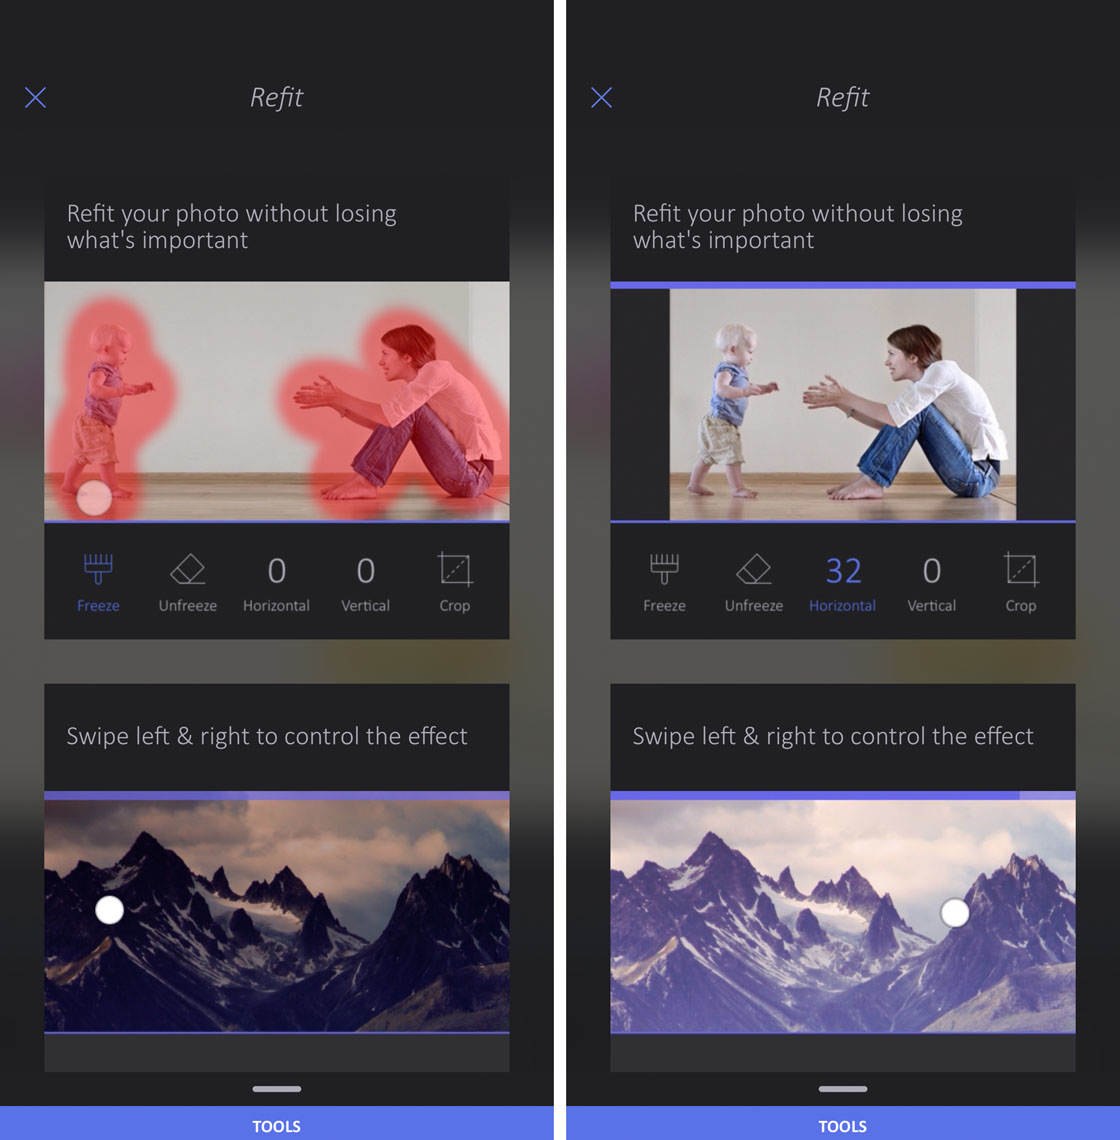
Go to Canvas > Refit. Ensure Freeze is selected at the bottom of the screen.
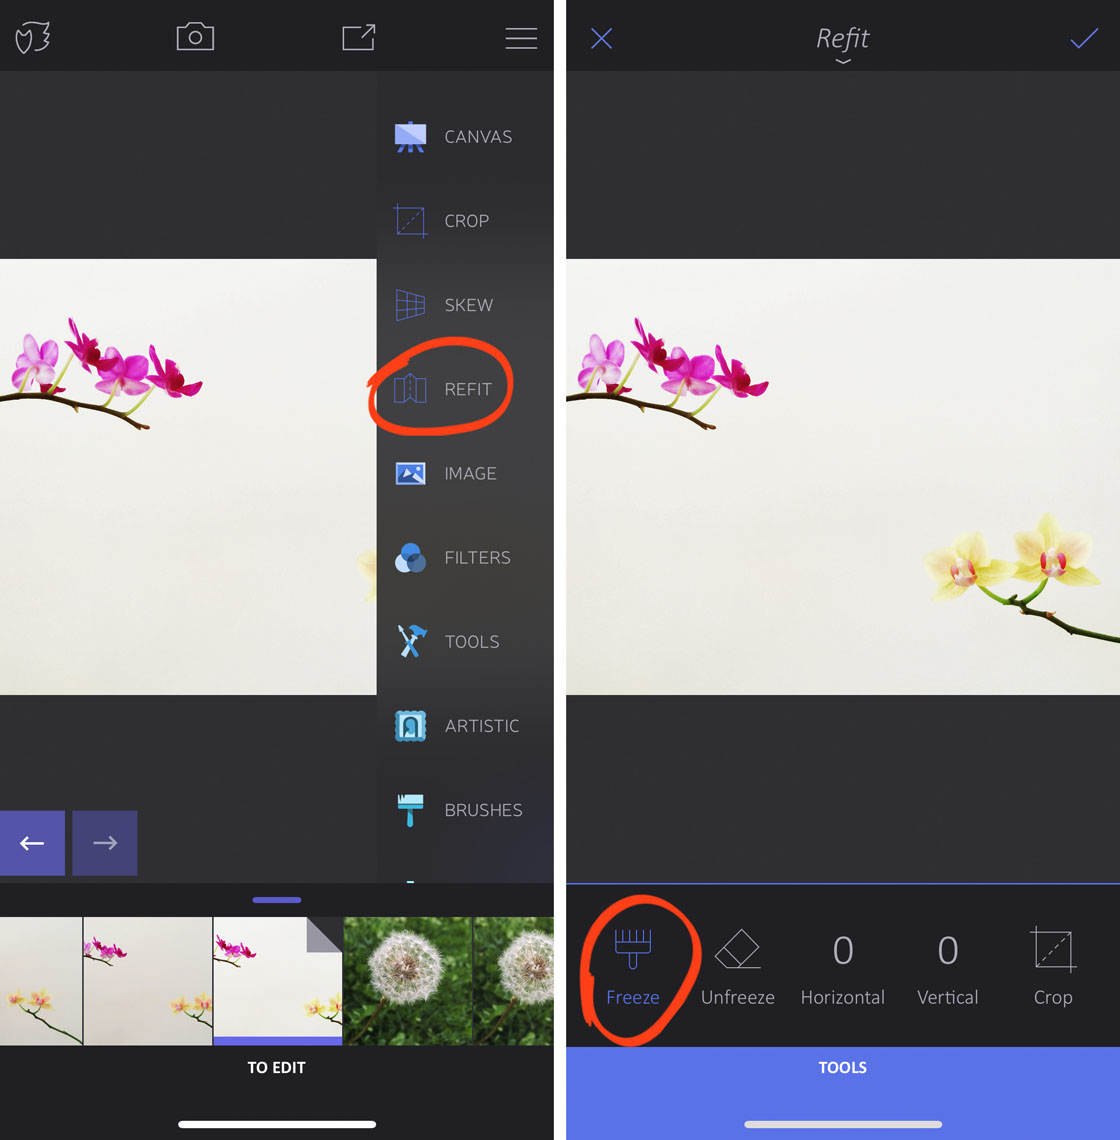
Use your finger to paint over the subjects you want to bring closer together.
Select Horizontal if you want to bring the objects closer together horizontally. Then drag right to reduce the distance between the objects.
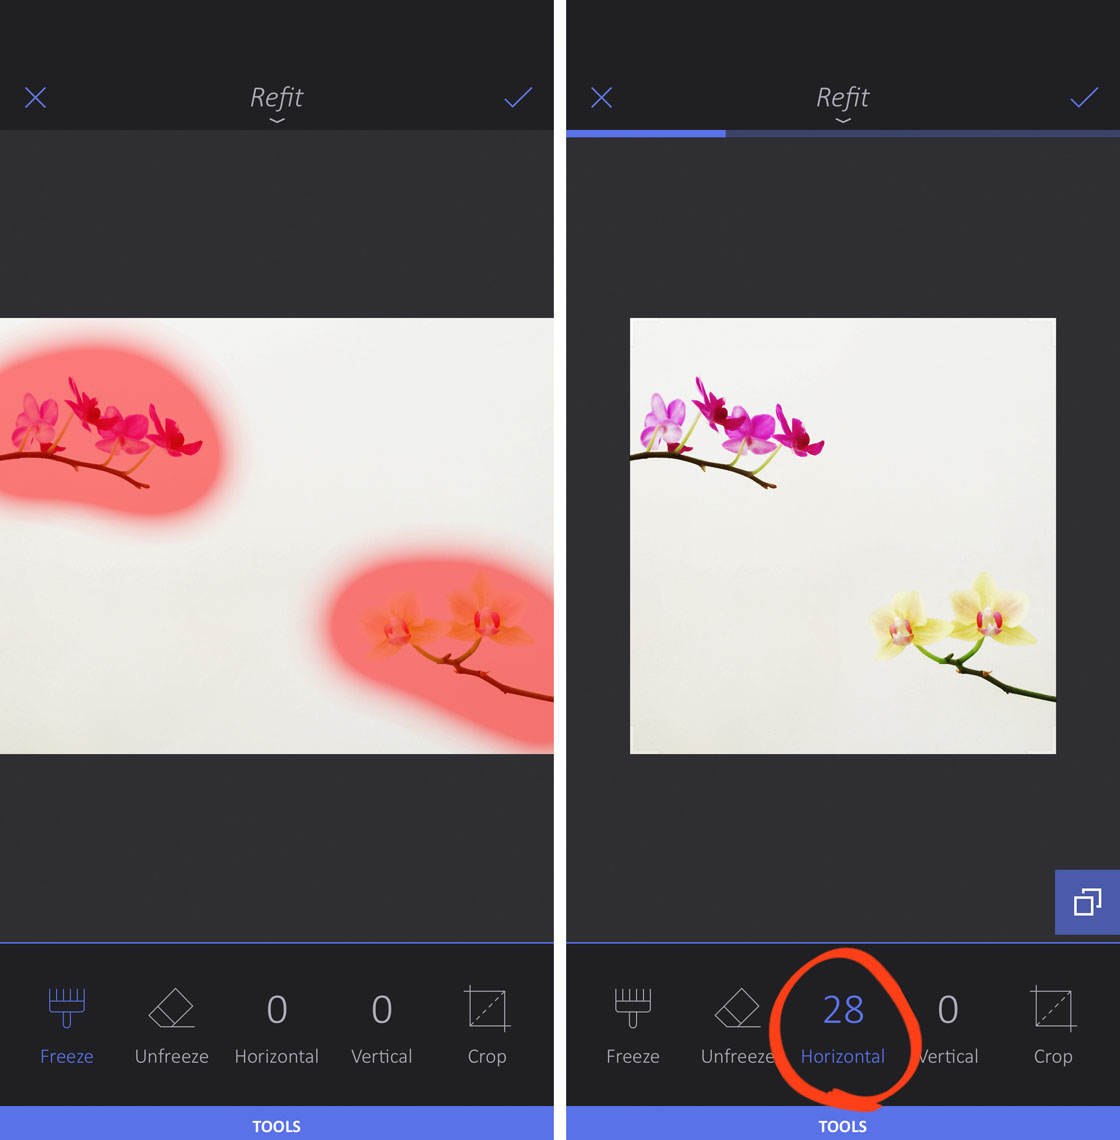
To bring objects closer together vertically, use the Vertical option.
3. Image: Enhance Color, Exposure & Clarity
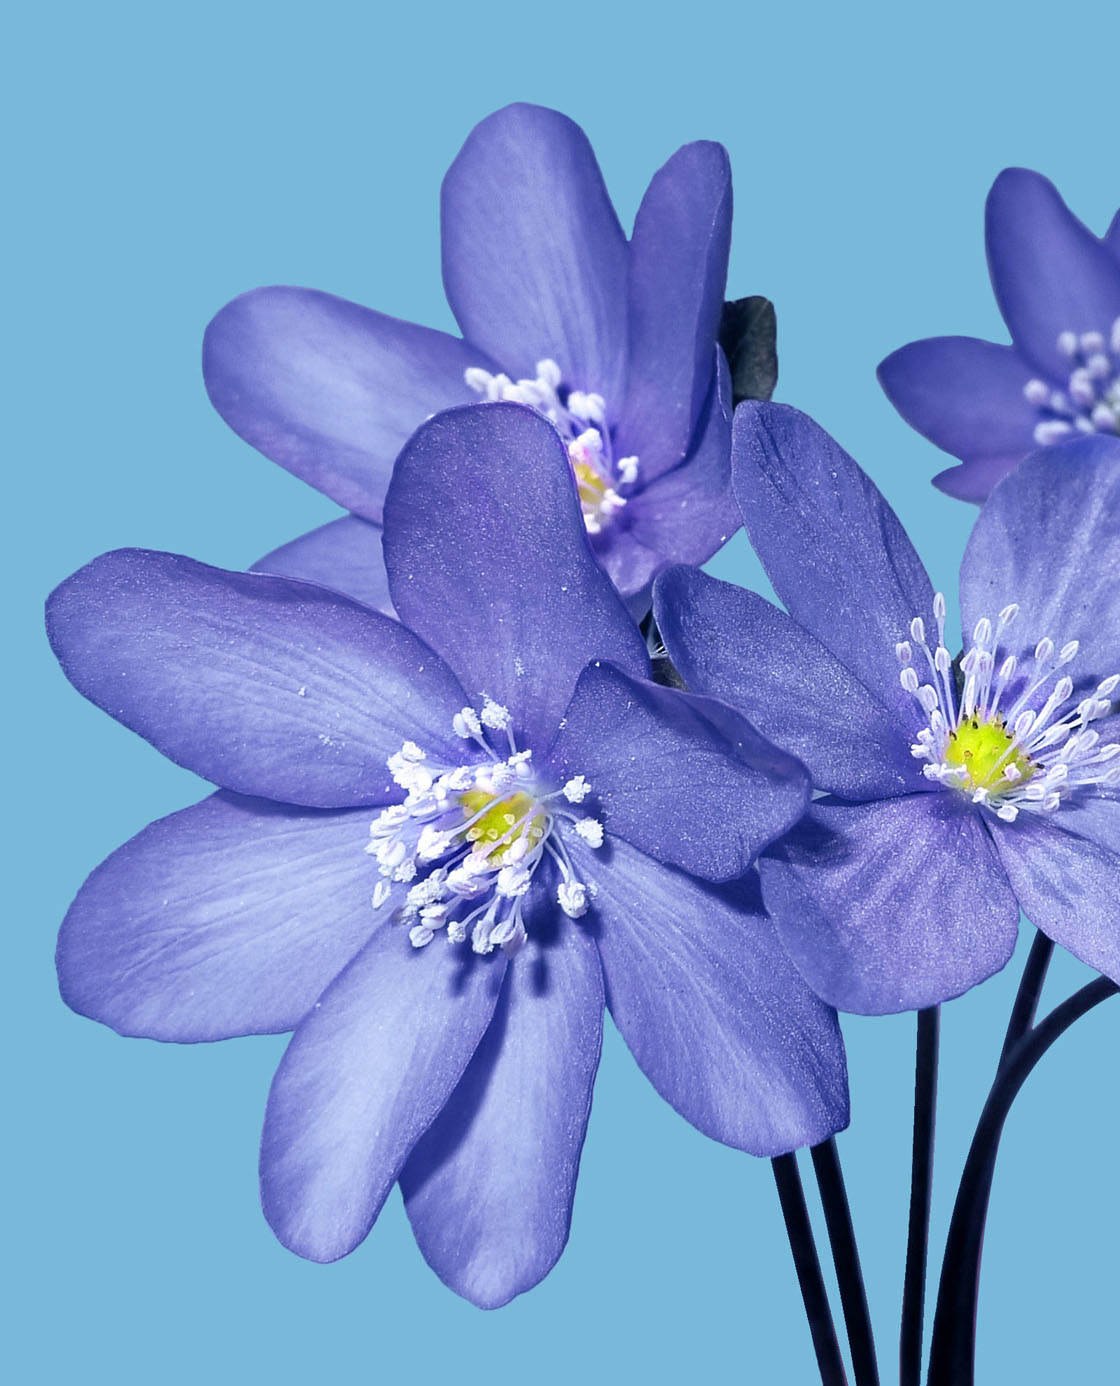
The Image tools allow you to achieve perfect color, exposure (brightness levels), and detail in your photos.
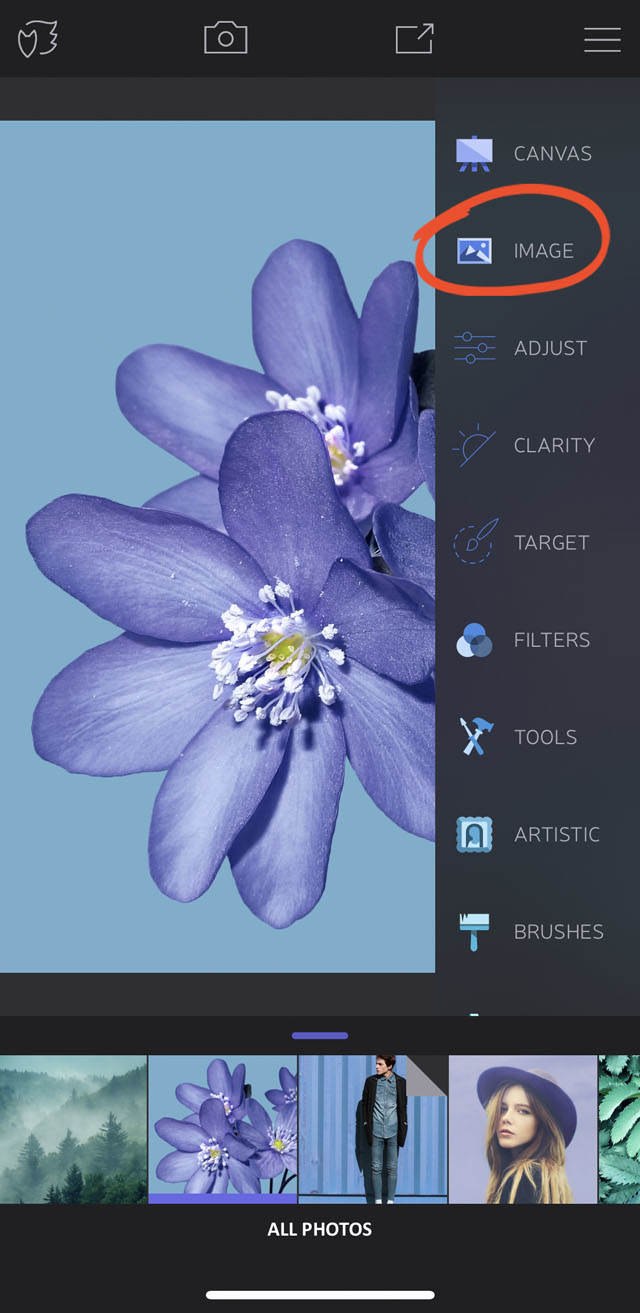
Open the tools menu by tapping the Menu icon. Tap Image to access three tools: Adjust, Clarity, and Target.
Watch the video below to discover how to use the Image tools to enhance your iPhone photos.
3.1 Adjust Tool
The Adjust tool contains presets and manual adjustment tools for improving color, exposure, and detail.
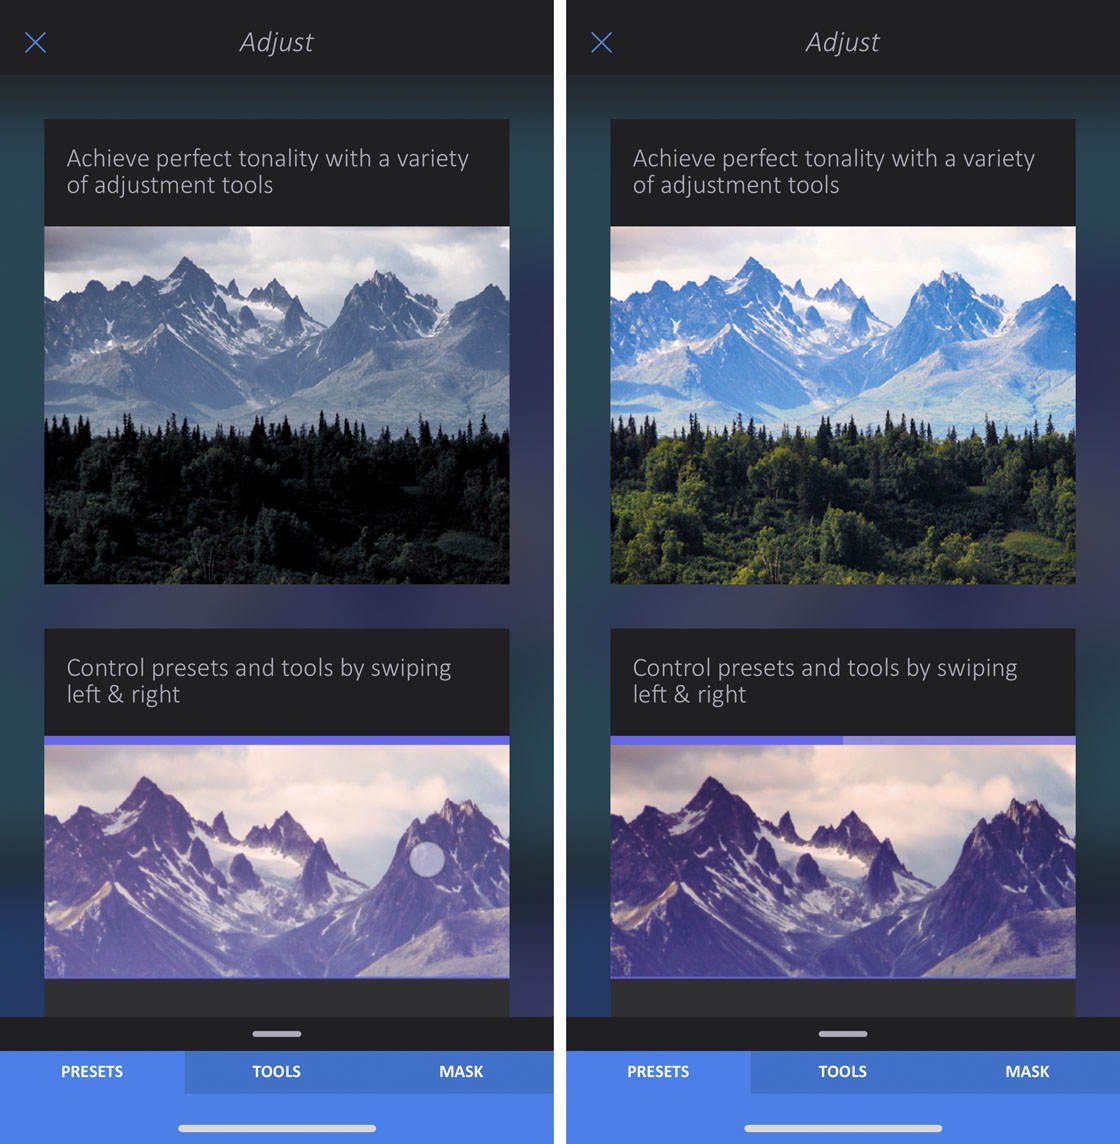
Open the Image tool from the tools menu, then select Adjust. The Adjust options appear at the bottom of the screen.
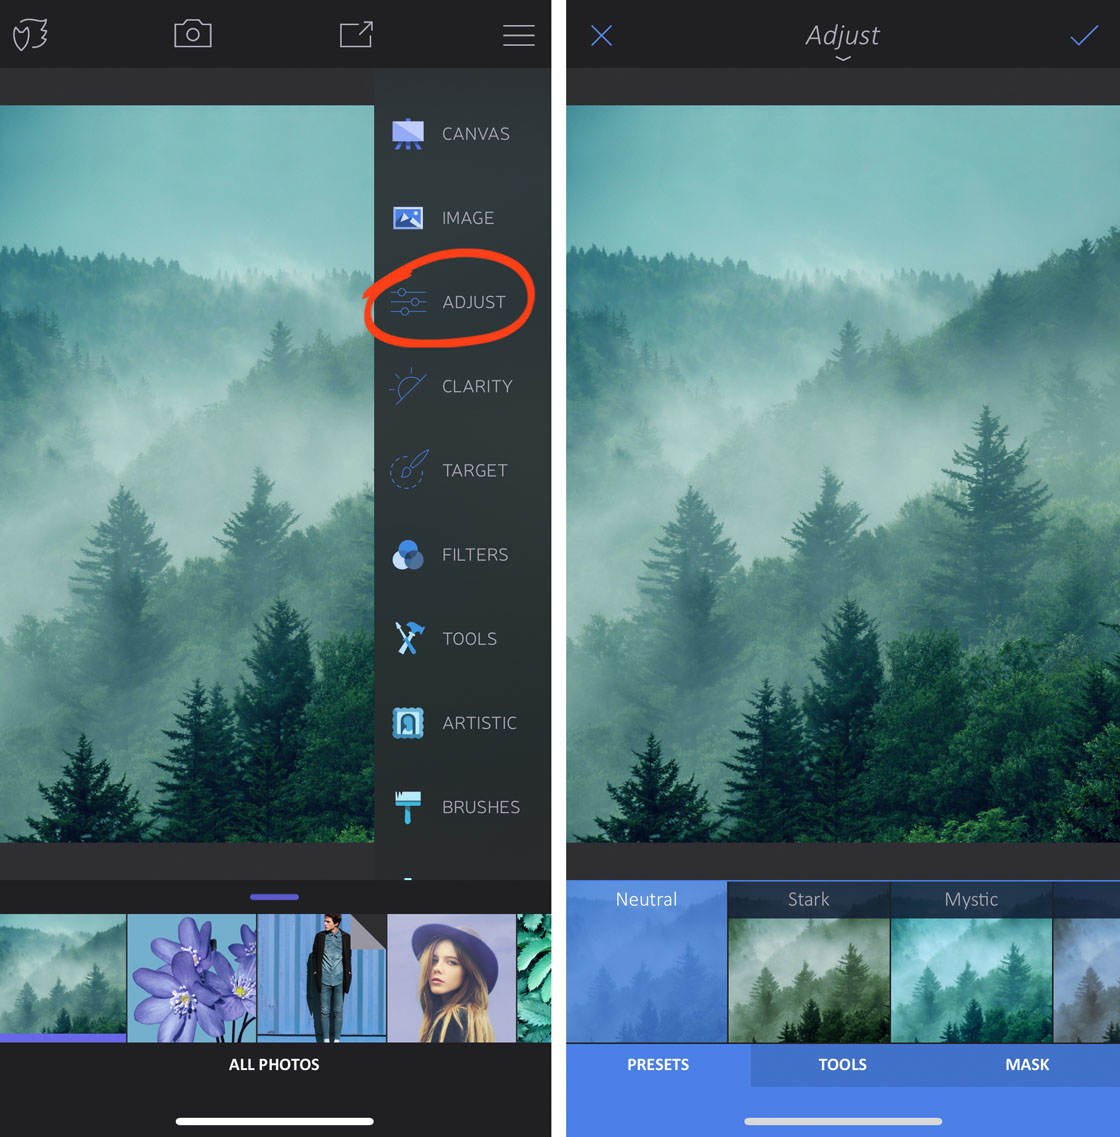
To apply a one-tap preset edit, tap the Presets tab at the bottom of the screen. If you’d prefer to adjust the settings manually, tap the Tools tab.
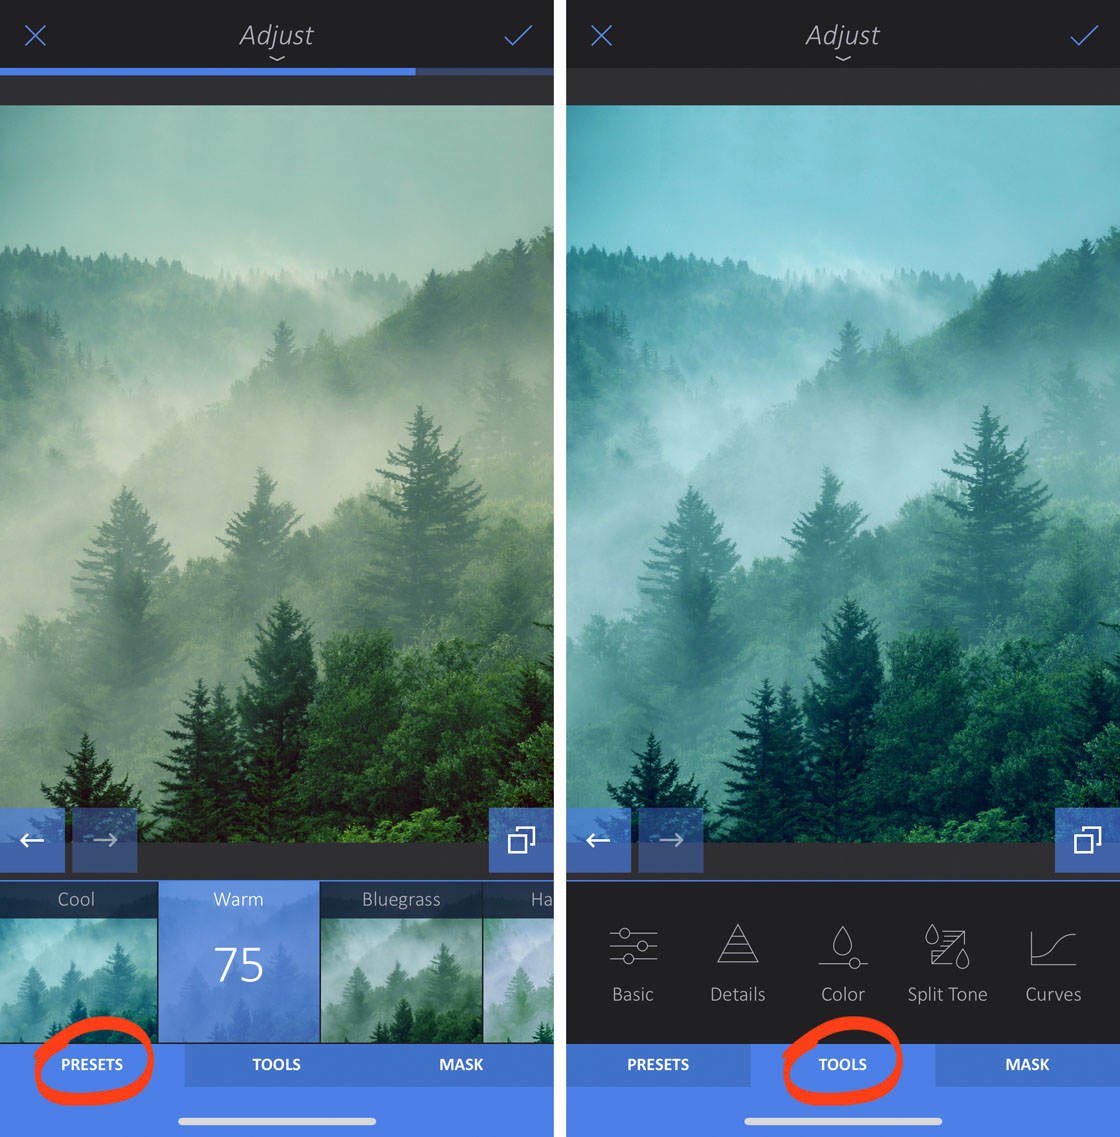
A good way to get started with editing is to apply a preset, then customize it using the manual adjustment tools.
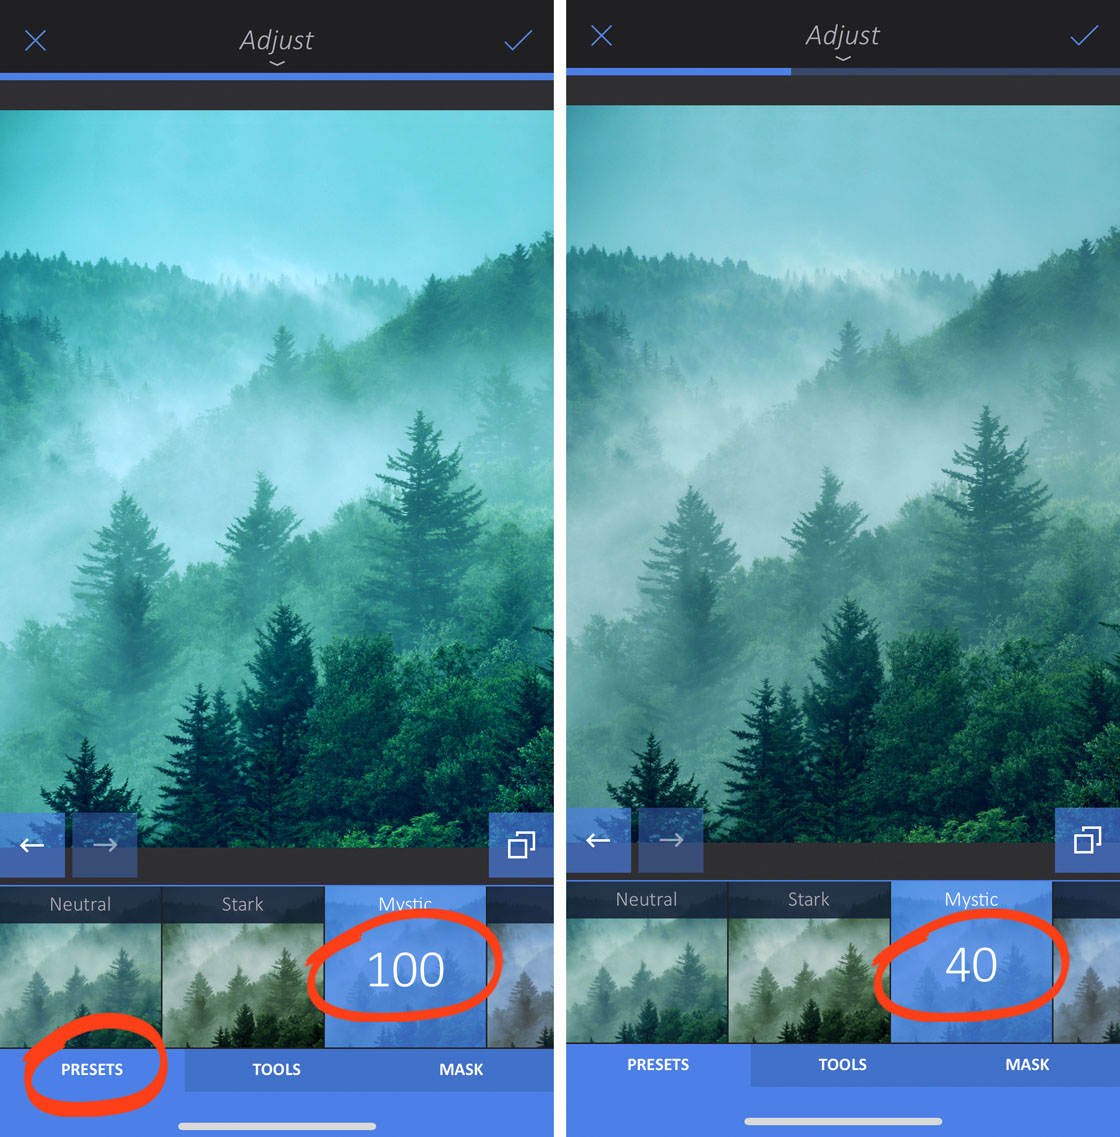
Ensure the Presets tab is selected at the bottom of the screen. Choose a preset from the options beneath your photo. Swipe left or right over your image to adjust the strength of the preset. A lower preset value creates a more subtle edit.
Now tap the Tools tab at the bottom of the screen. Select a tool beneath your photo, for example, Basic, Color, etc. Tap the setting you want to change, then swipe left or right across your photo to make the adjustment.
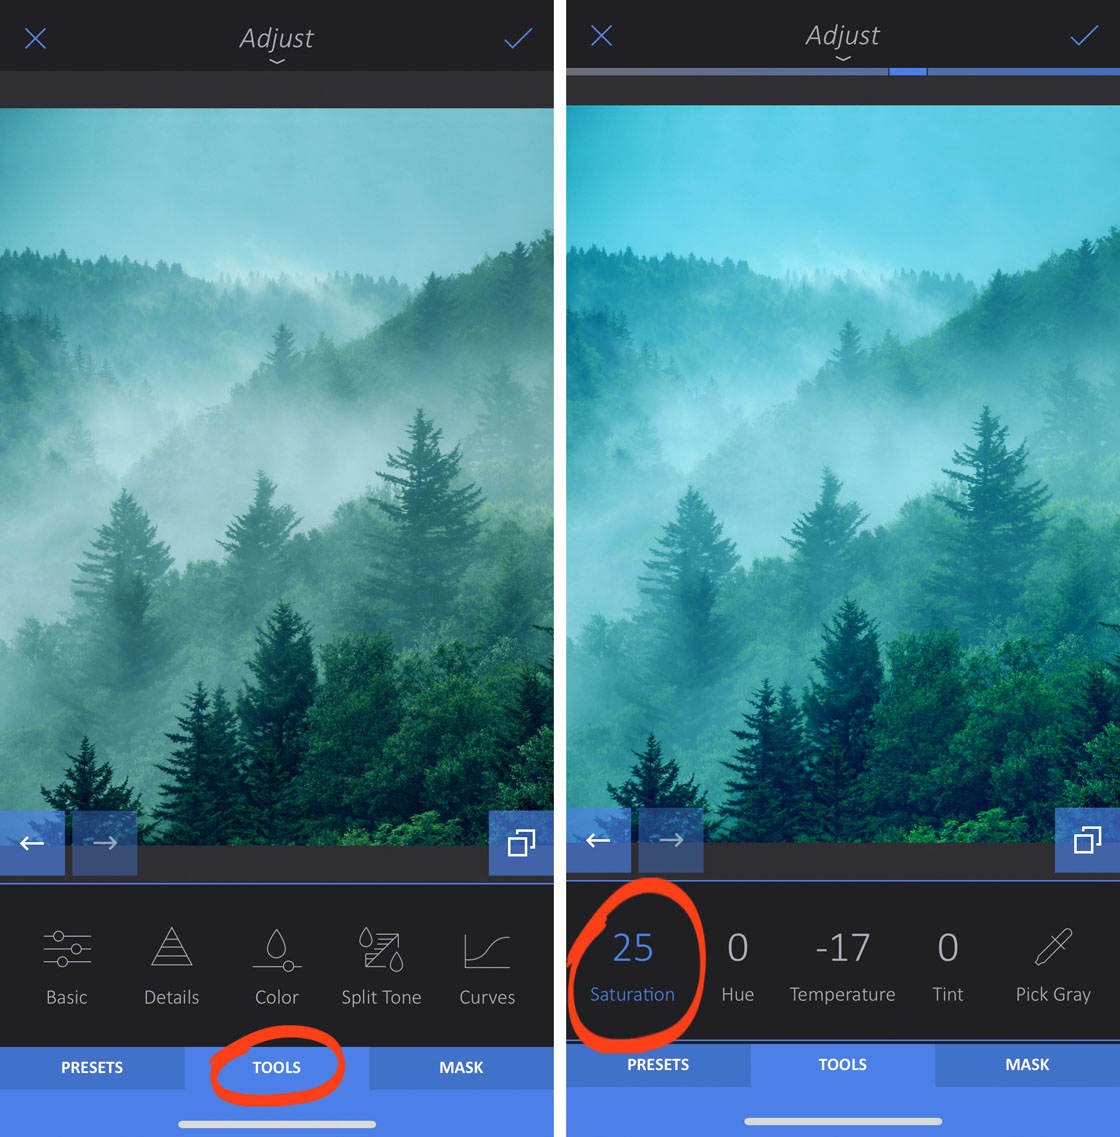
Tap the checkmark when you’re happy with your edit.
3.2 Clarity Tool
The Clarity tool contains presets and manual adjustment tools for bringing out detail in your photo. It also has tools for softening detail, which can be useful for portraits and photos that contain noise (grain).
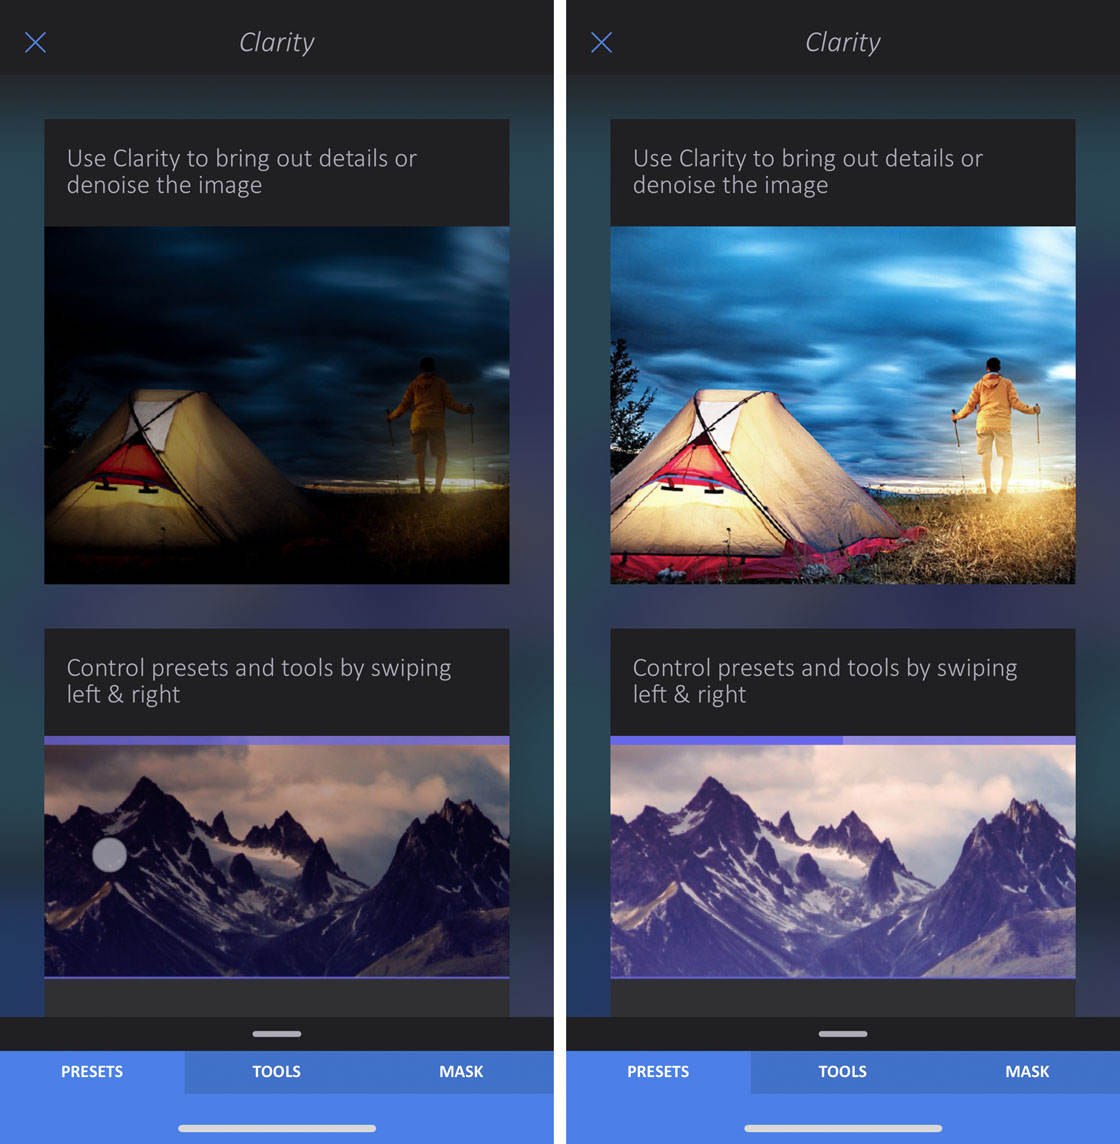
Open the Image tool from the tools menu, then select Clarity. The Clarity tools appear at the bottom of the screen.
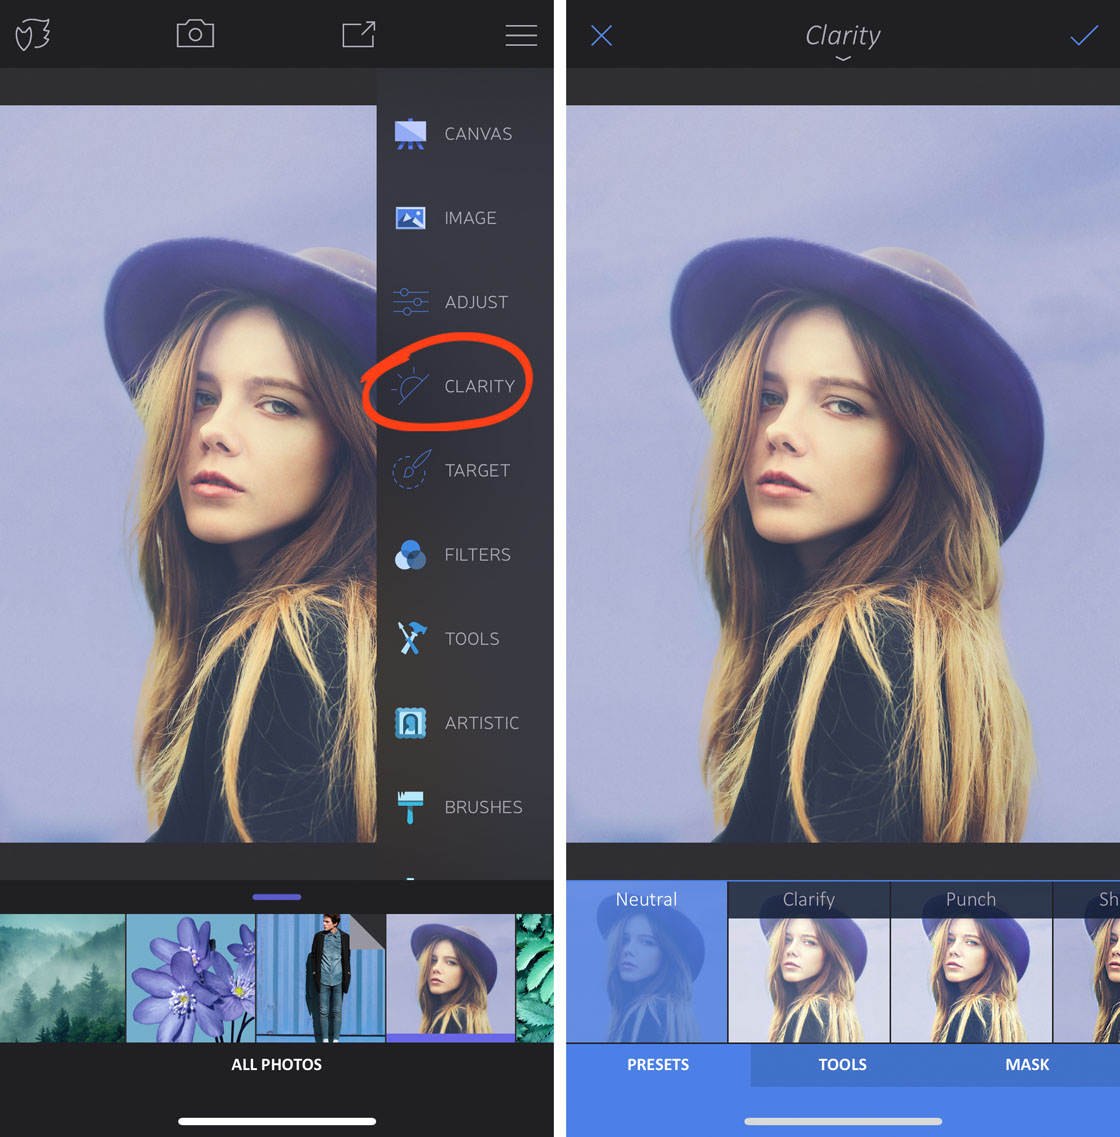
Select Presets to apply a preset adjustment to your photo. Or tap Tools to adjust the settings manually. You could also apply a preset, then customize it using the tools.
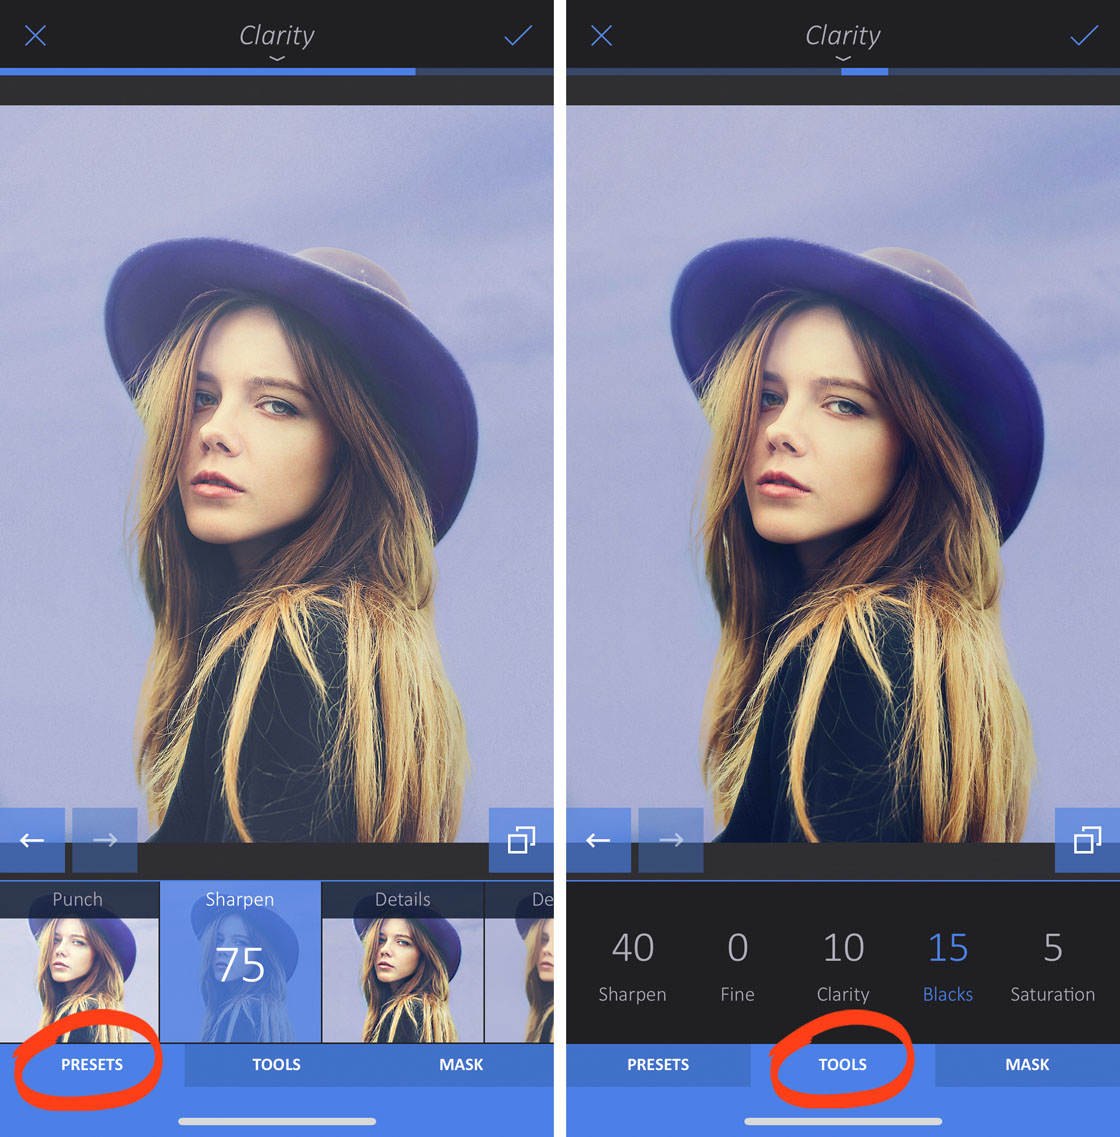
Remember, you can adjust the strength of a preset or tool by swiping left or right. Tap the checkmark when you’re happy with the edit.
3.3 Target Tool
The Target tool lets you apply targeted edits to specific regions of an image. It’s perfect for adjusting the color or exposure of only a certain area.
Go to Image > Target. The Target tools appear at the bottom of the screen. The white circle and red highlight shows which area is currently selected for editing.
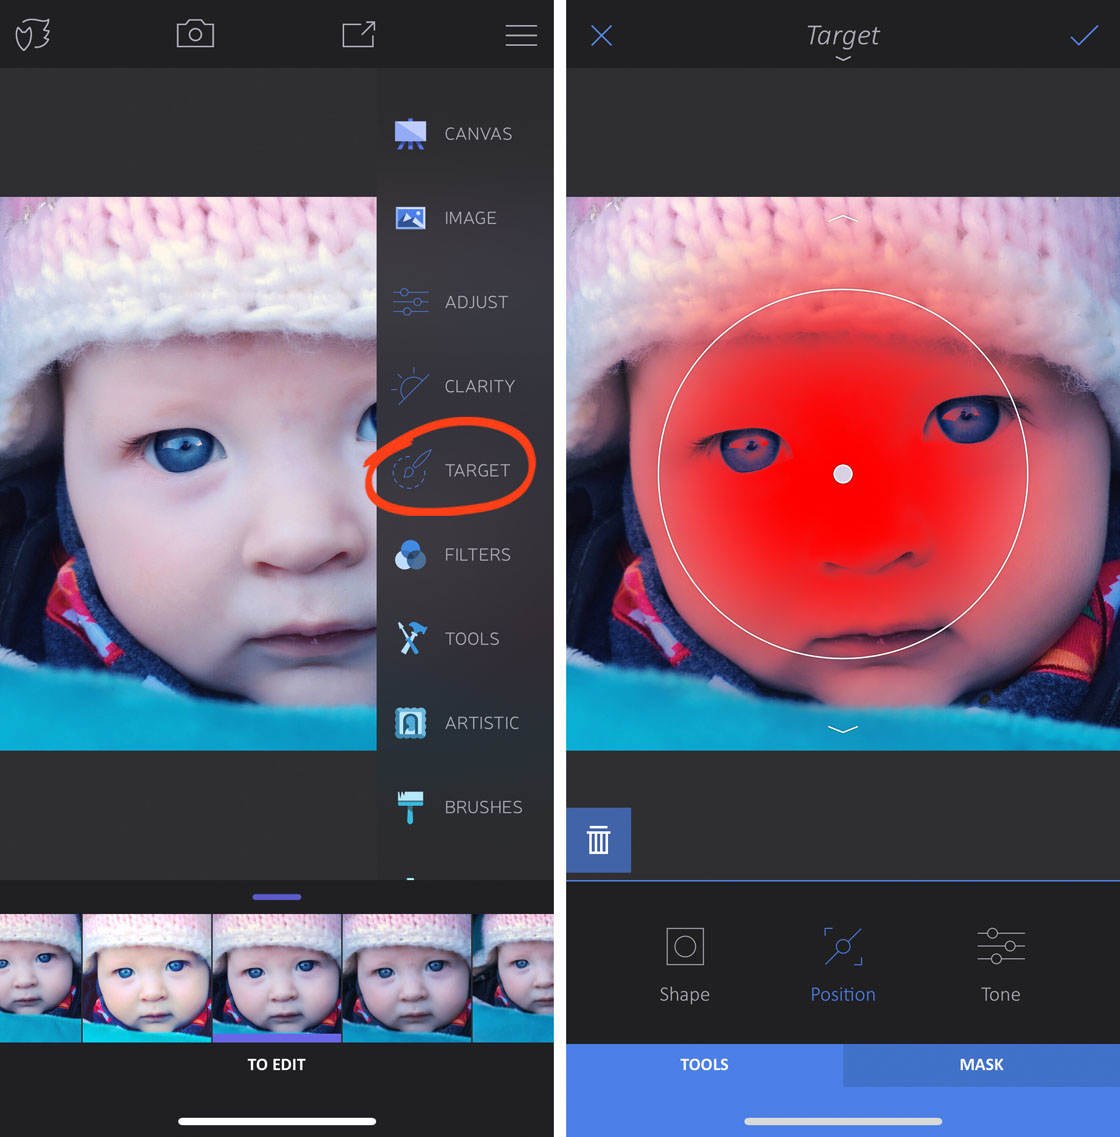
To define which area is affected by your edits, drag the circle and pinch with two fingers to resize it. Only the area you want to edit should be highlighted in red. In the example below, the eye on the left is selected.
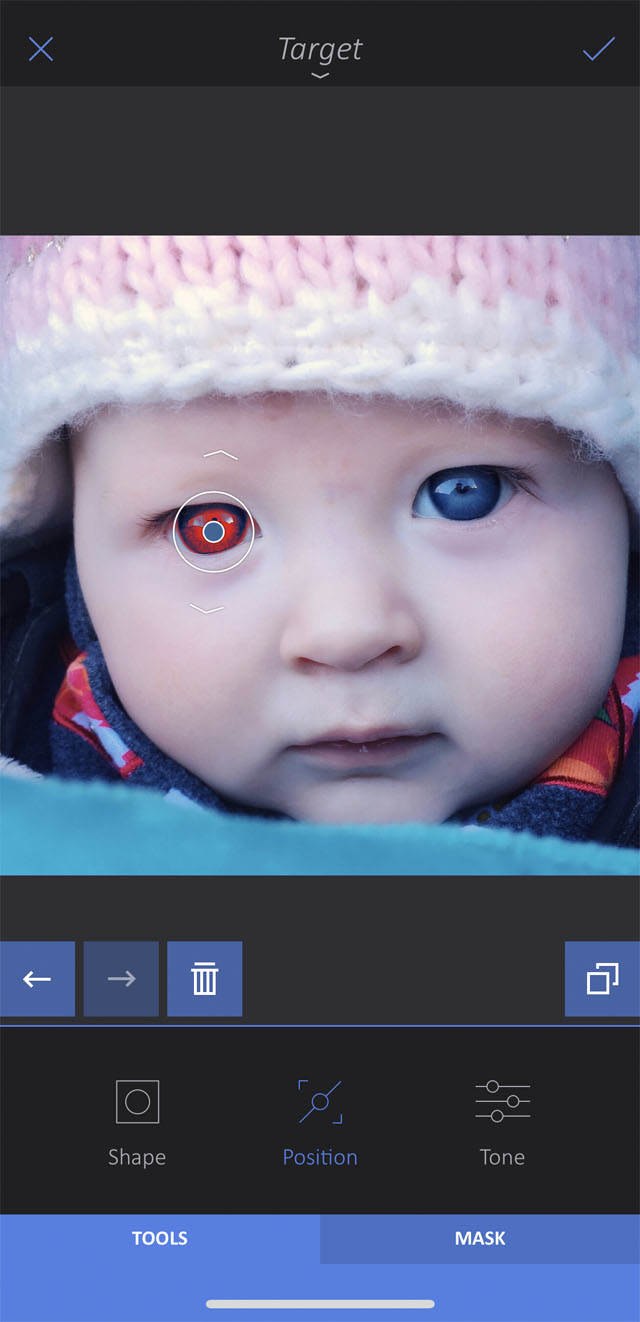
Tap Tone at the bottom of the screen. Select the tool you want to use, for example, Exposure, Saturation, etc. Swipe left or right to make the adjustment.
Tap the down arrow so that you can select a new area to edit.
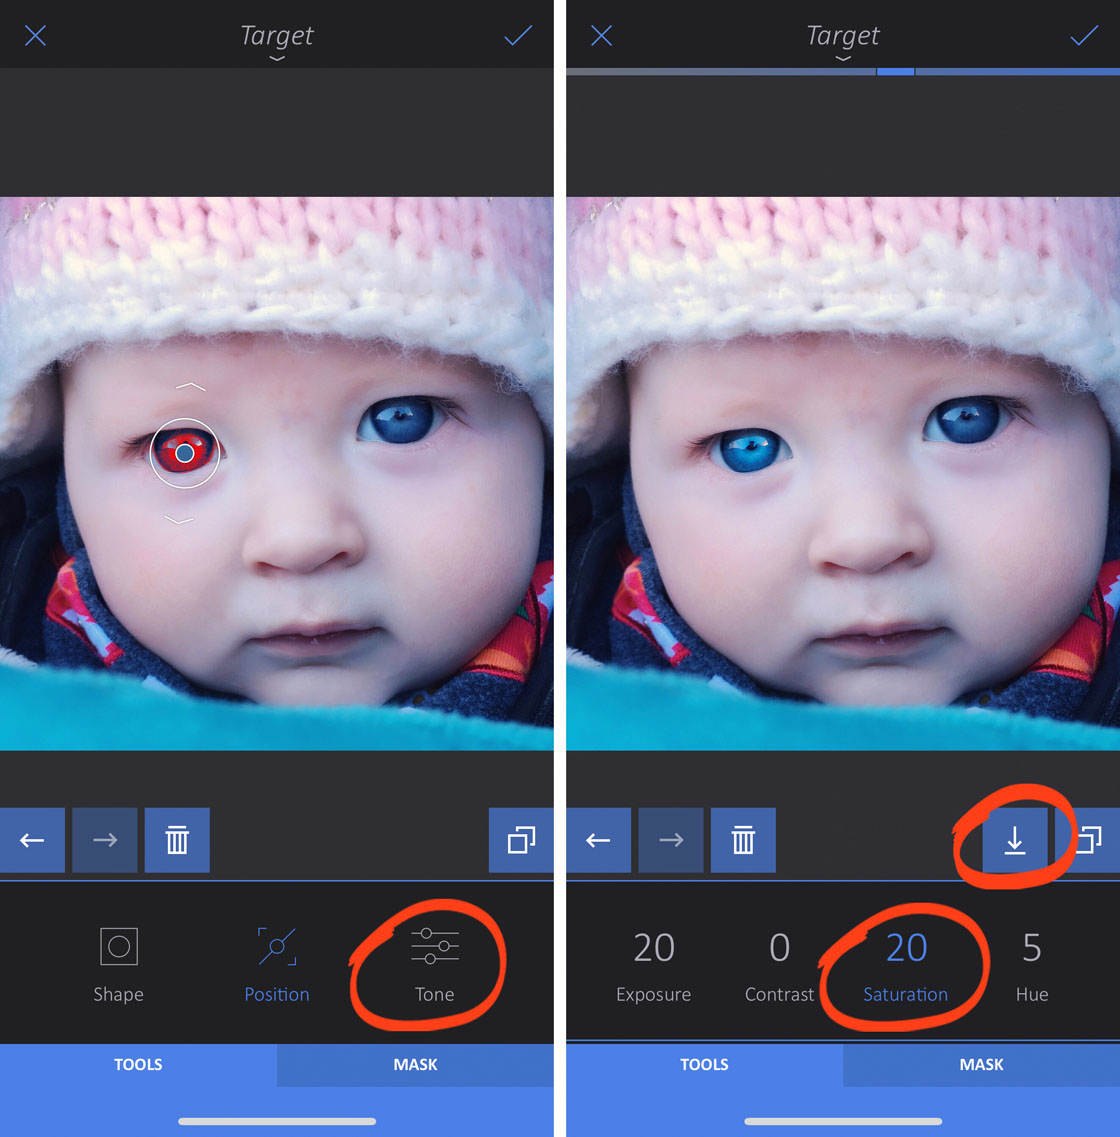
To edit a new area, tap the Tools tab, then select Position. Adjust the position of the circle to make your selection.
Then tap Tone, and adjust the color or exposure settings using the tools at the bottom of the screen.
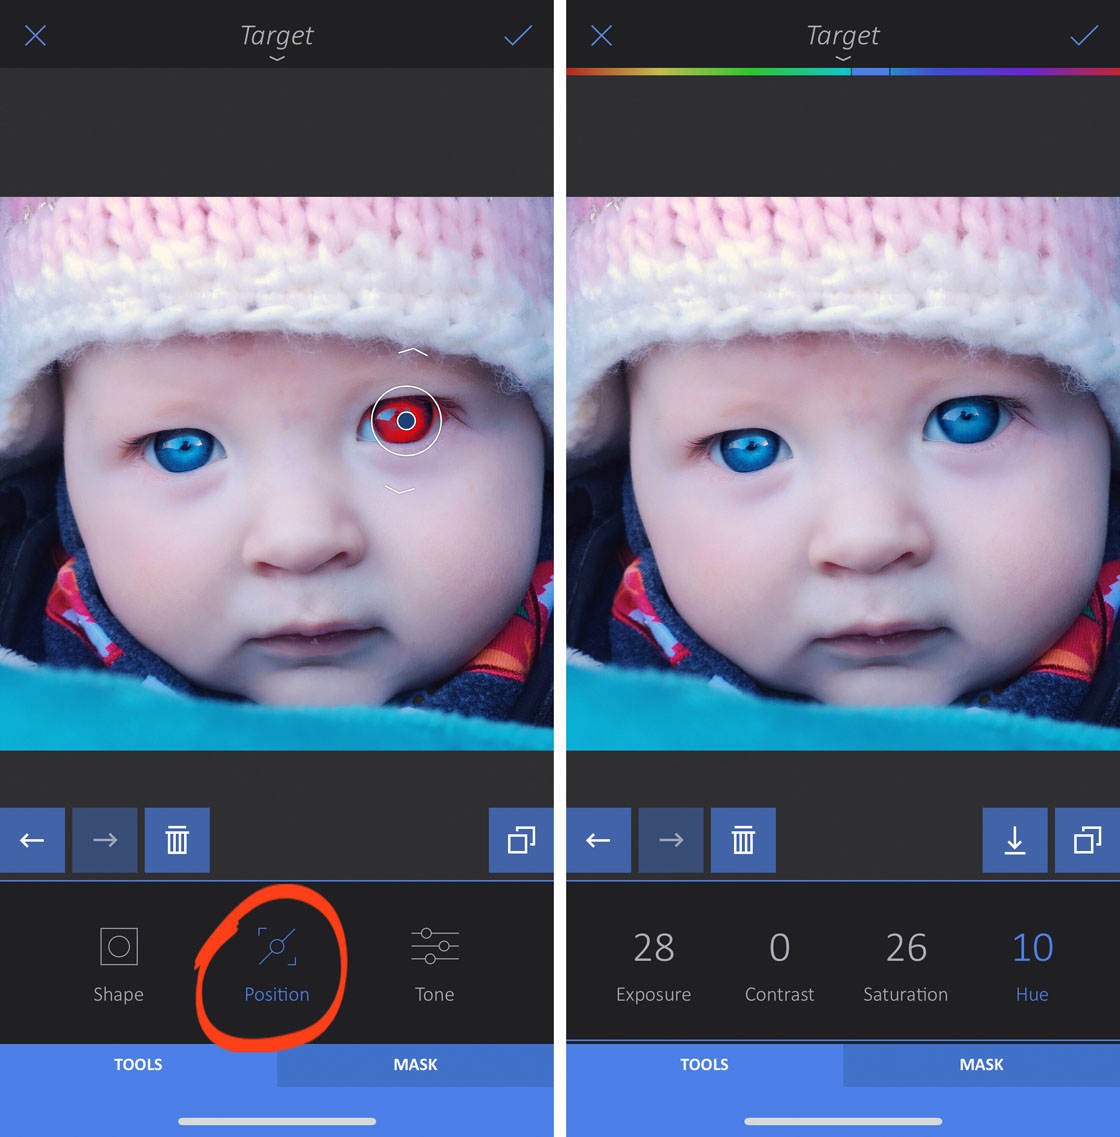
The Target tool in Enlight made it easy to enhance the color of the eyes in this portrait.
4. Filters: Quickly Change The Look & Mood Of A Photo
Enlight is one of the best photo filter apps for iPhone. The Filters tool has a wide range of color and black and white presets.
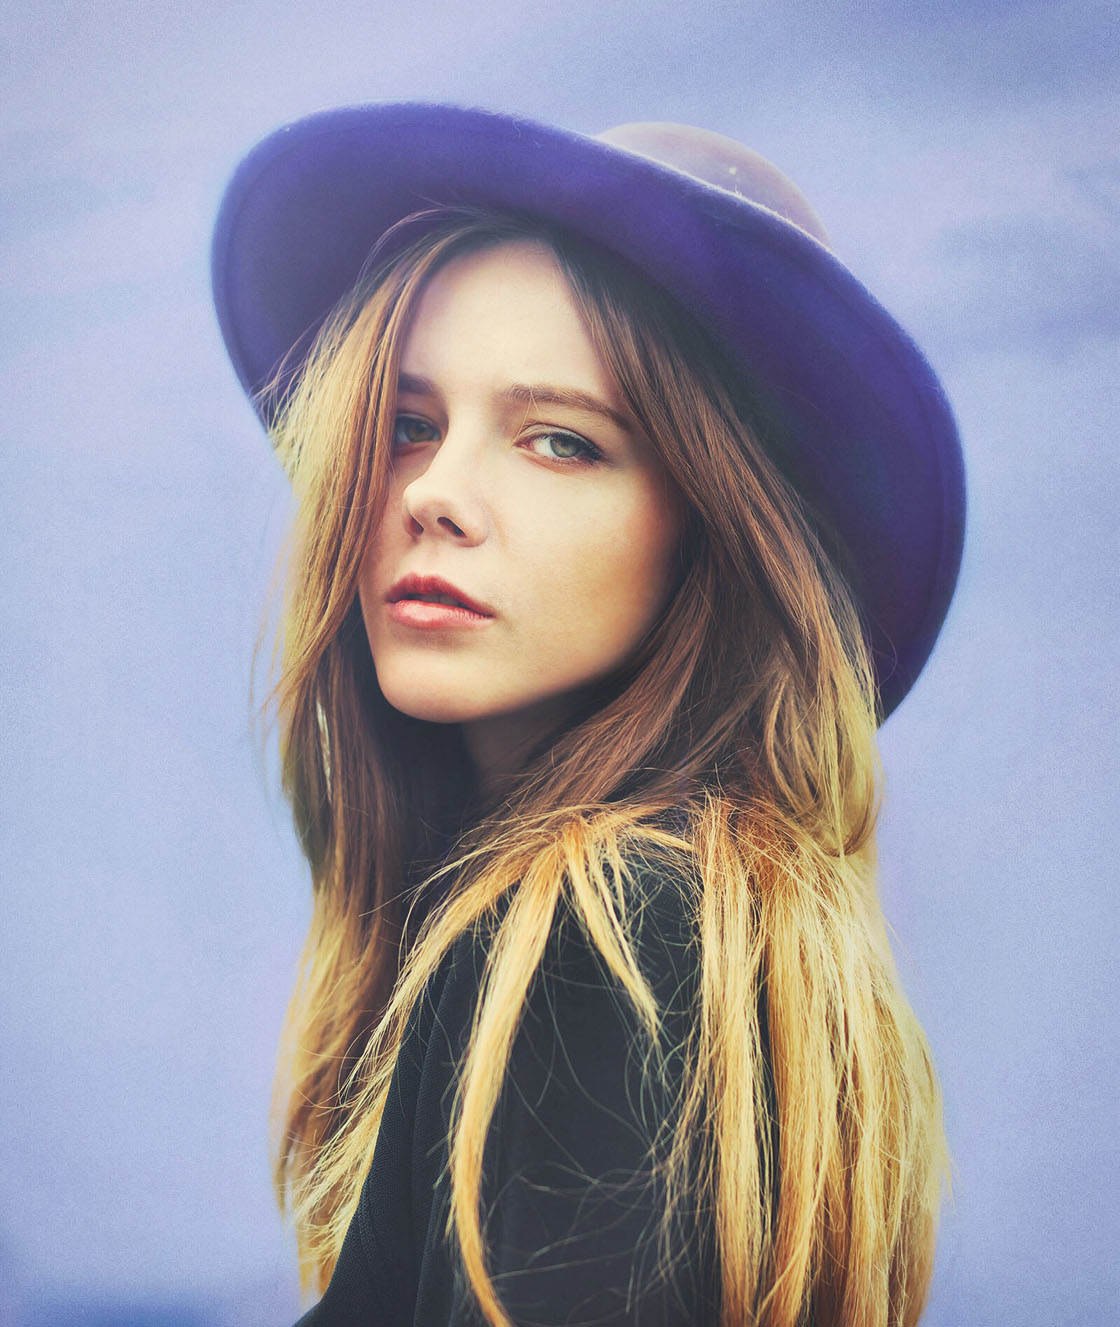
With a single tap, you can apply a filter to change the look and feel of your photo. But there’s more to Enlight filters than this!

Enlight’s filters are highly customizable. You can adjust the filter strength, as well as the individual edits that were used to create the filter.
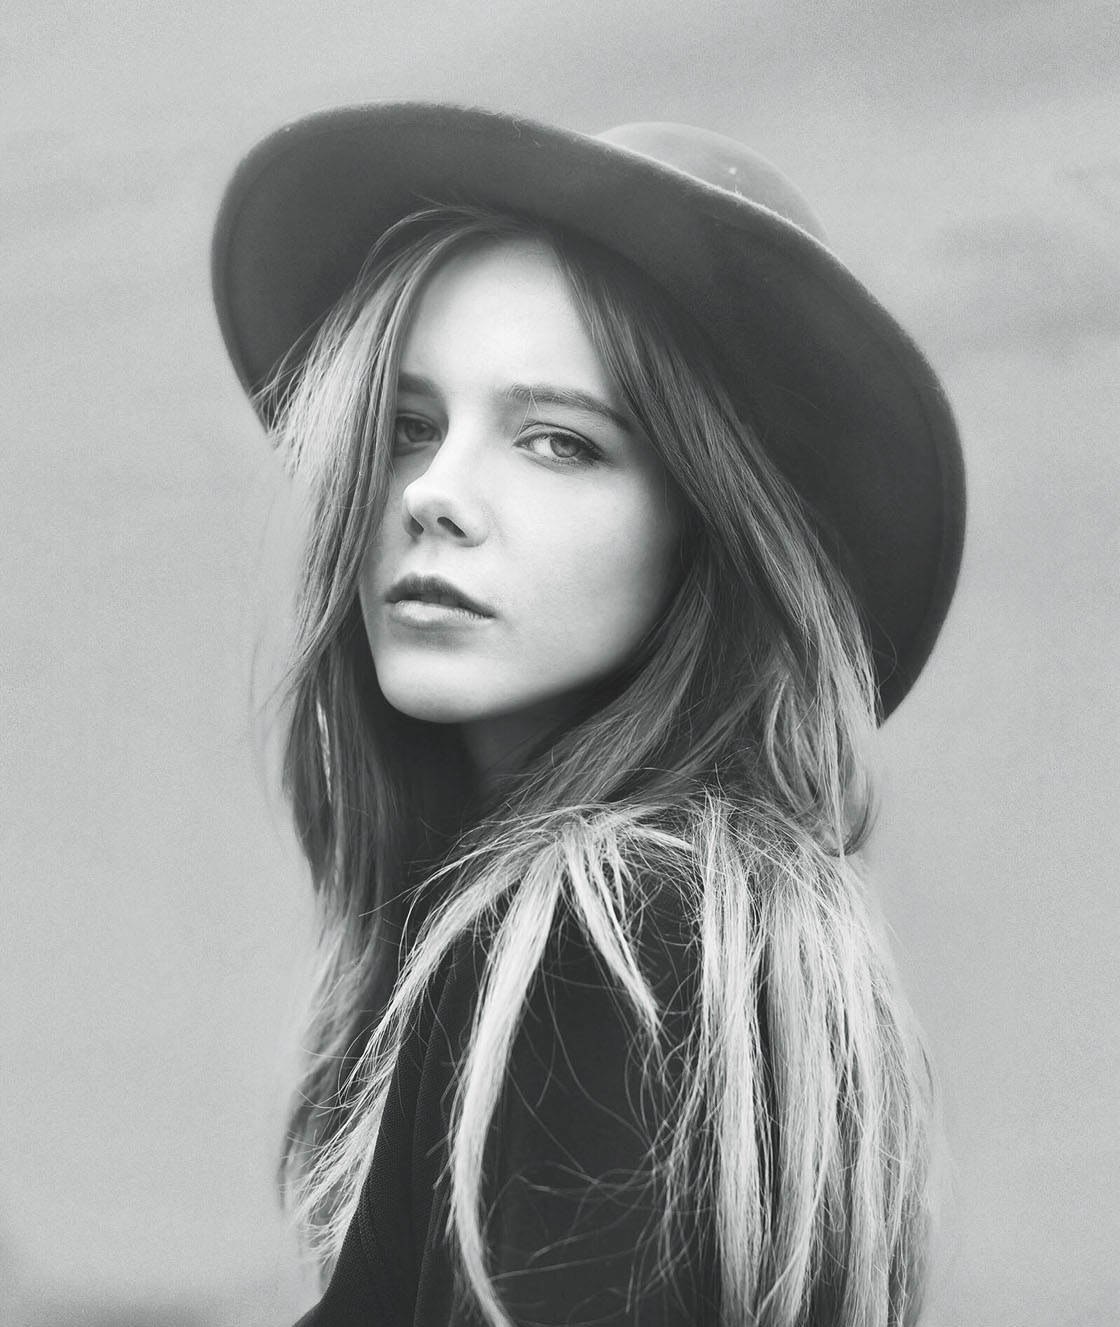
So you can use a filter as a starting point for your edit, then fine-tune it to create the exact look you want.
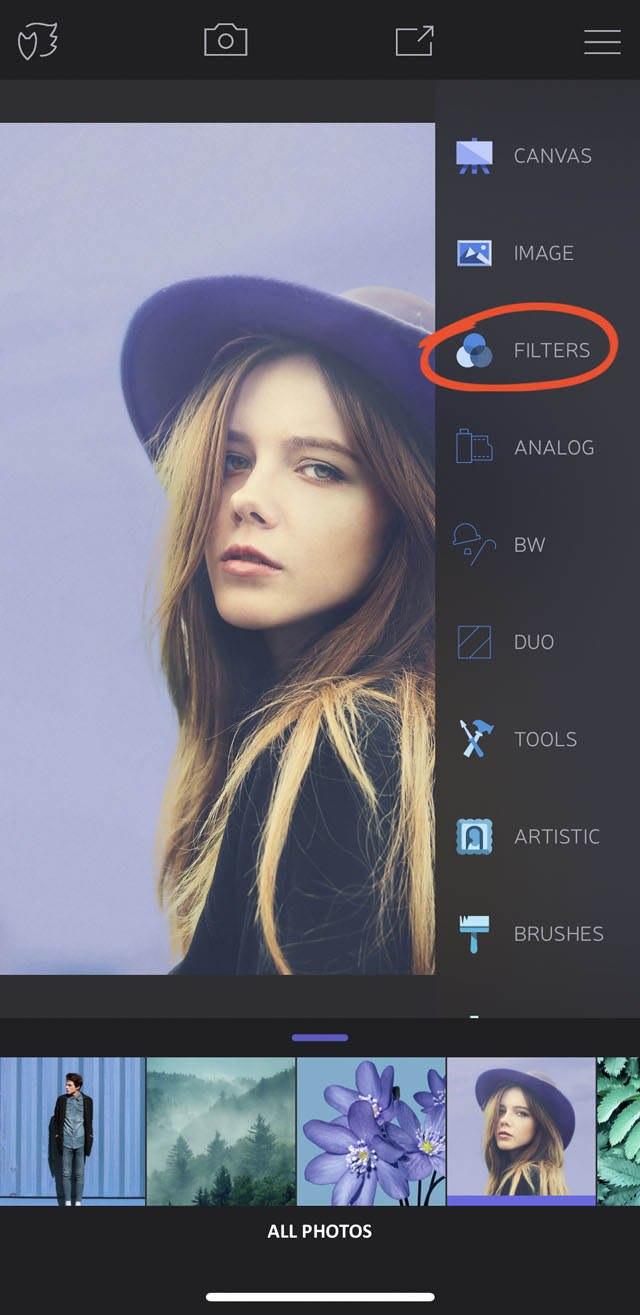
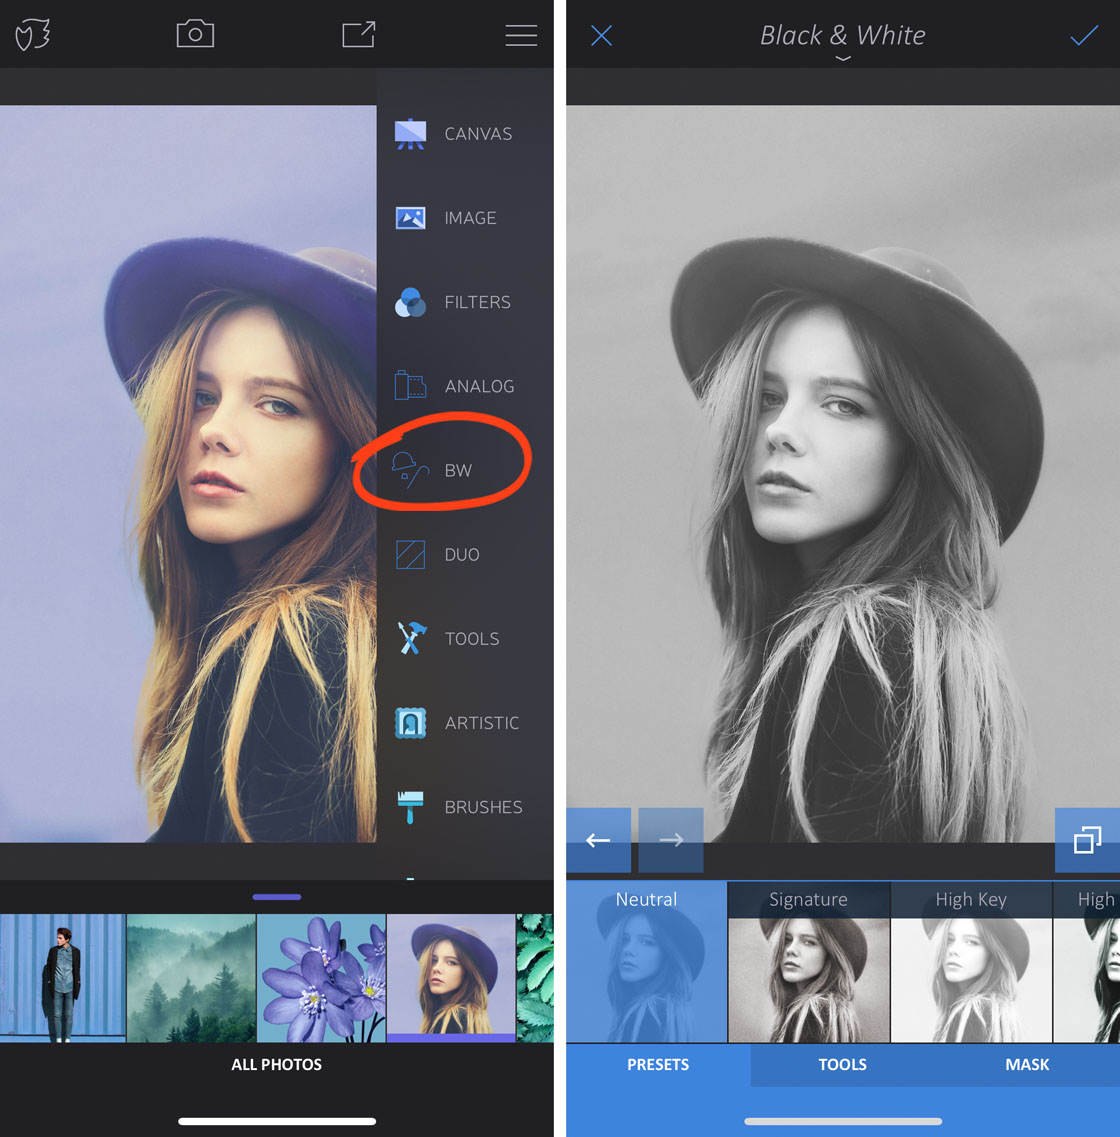
Open the tools menu, then tap Filters. The Enlight filters are organized into three categories: Analog, BW, and Duo.
Watch the video below to discover the full power of using filters in the Enlight app.
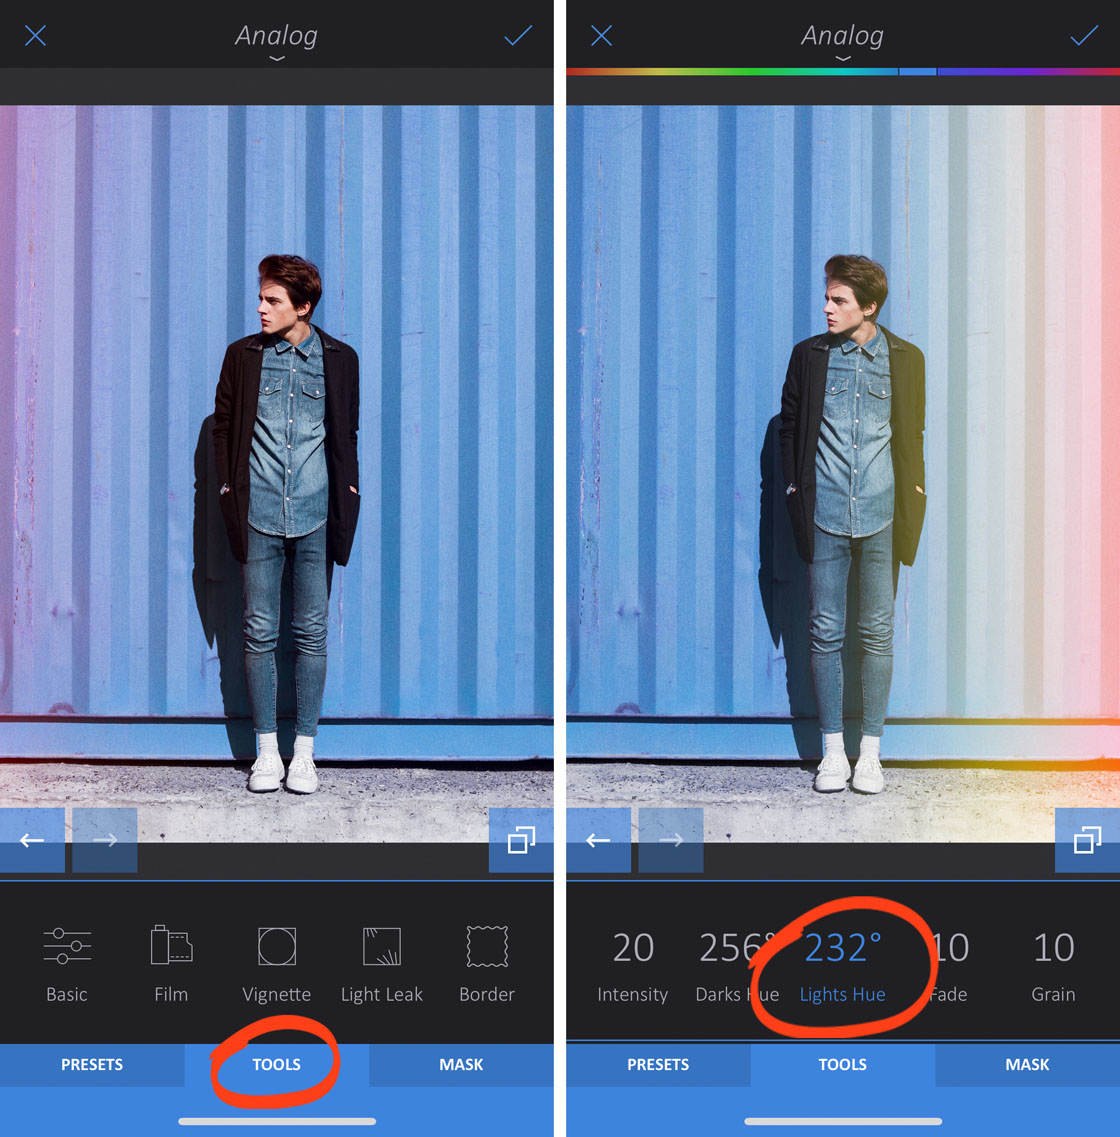
4.1 Analog Tool
The Analog tool has a good selection of film-inspired filters. These are perfect for creating vintage-style images that look like they were shot with a film camera.
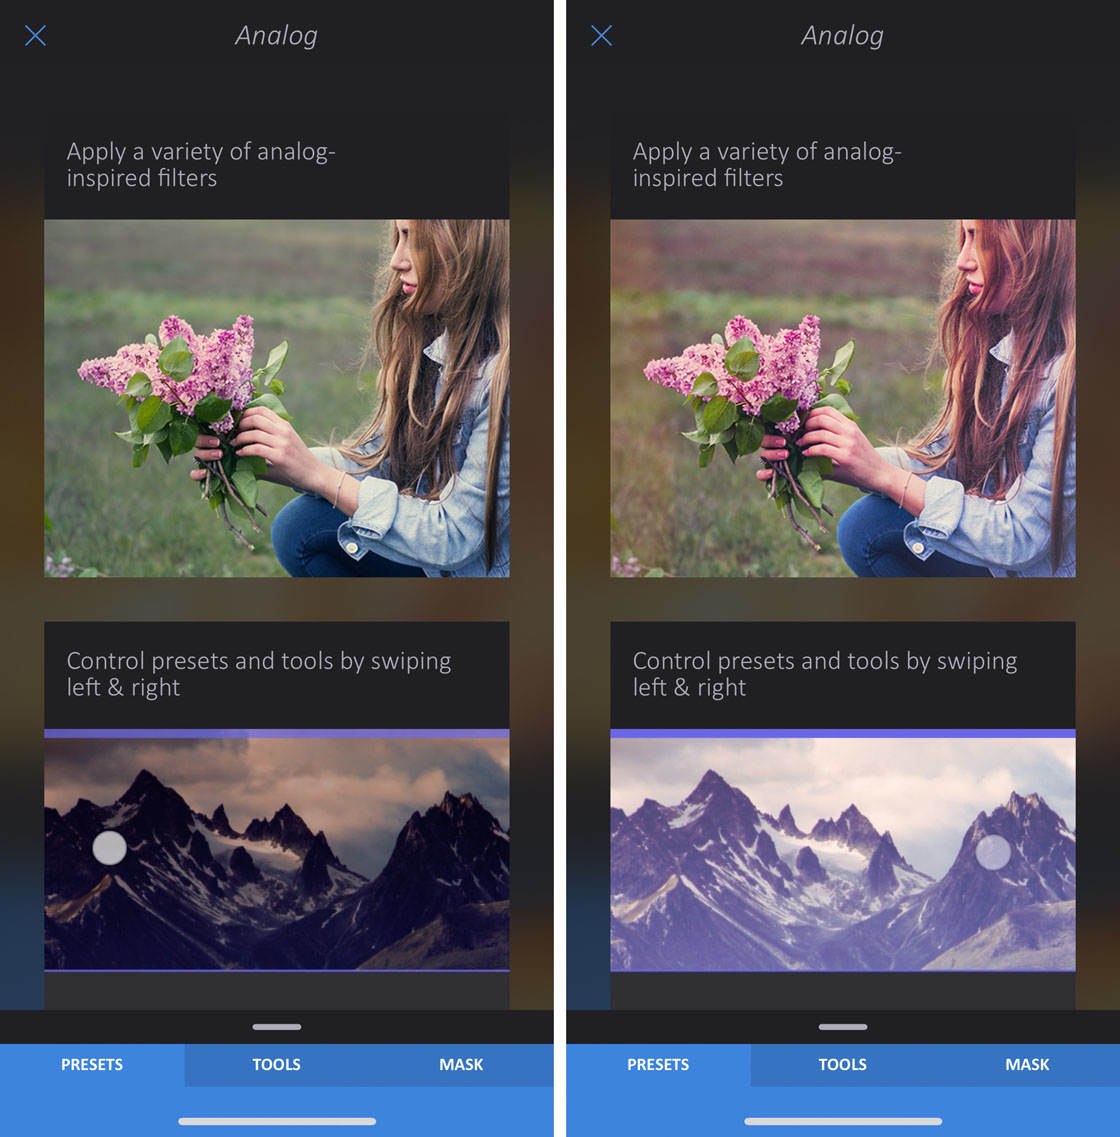
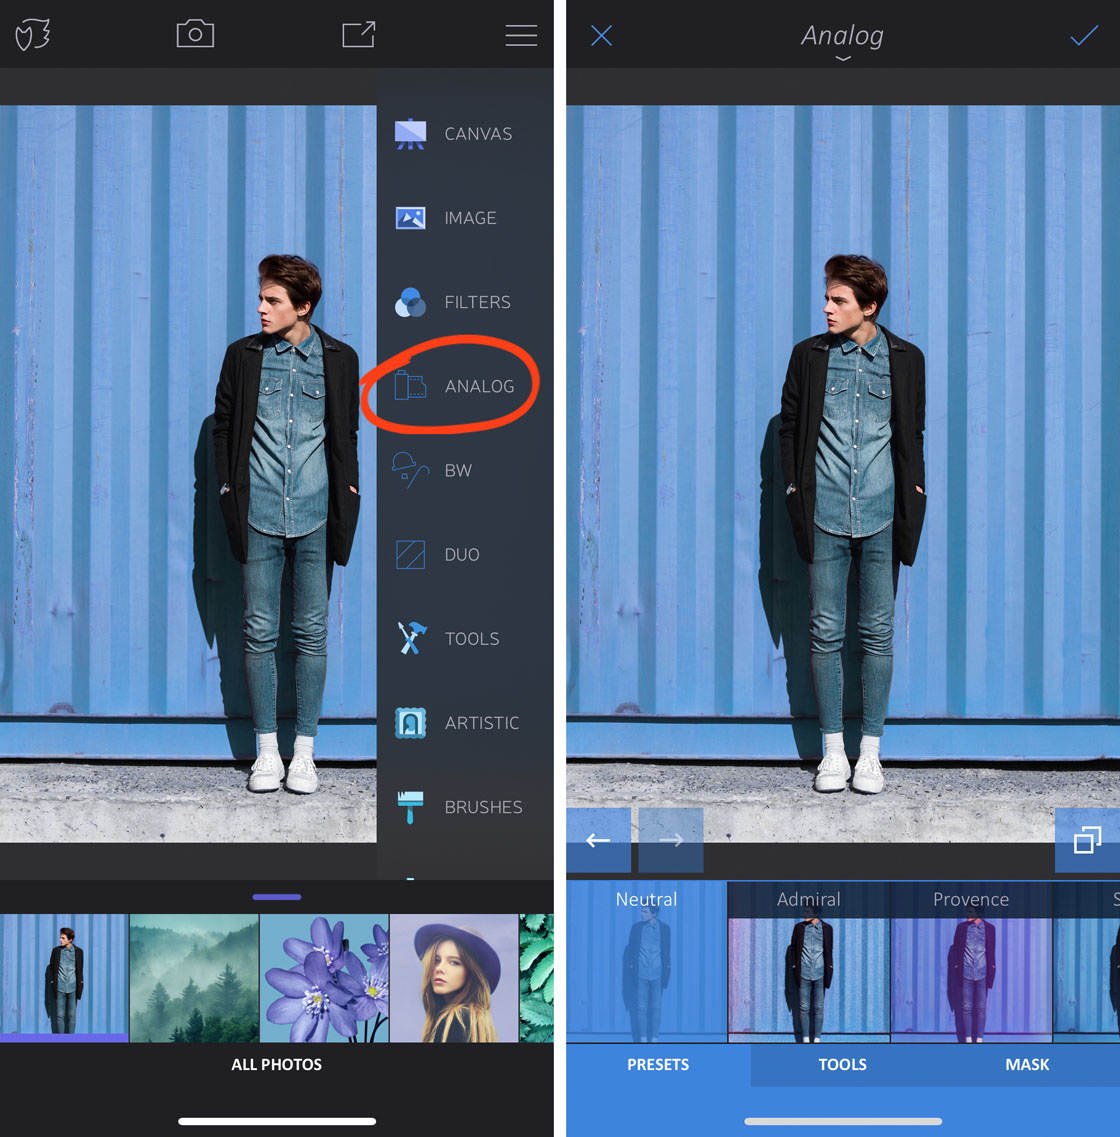
Open the Filters tool from the tools menu, then select Analog. The Analog presets appear at the bottom of the screen.
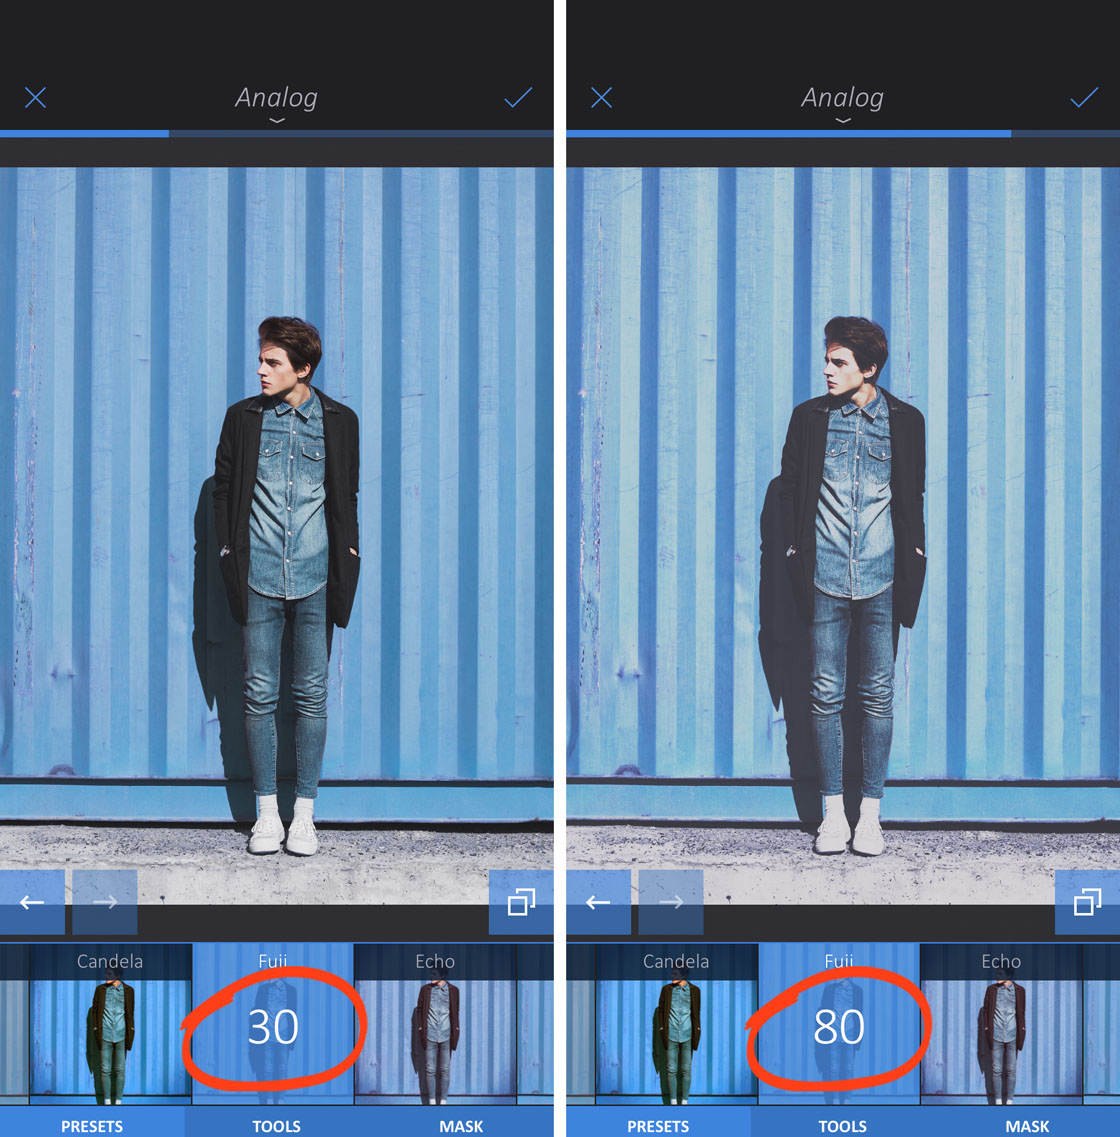
Tap a preset to apply it to your photo. Swipe left or right over your image to adjust the filter strength. A lower value creates a more subtle effect.
To customize the preset, tap the Tools tab at the bottom of the screen. Select the tool you want to use, then tap the setting you want to change. Swipe left or right to make the adjustment.
4.2 BW (Black & White) Tool
The BW filters are for converting your images to black and white. You can choose from a range of different black and white presets.
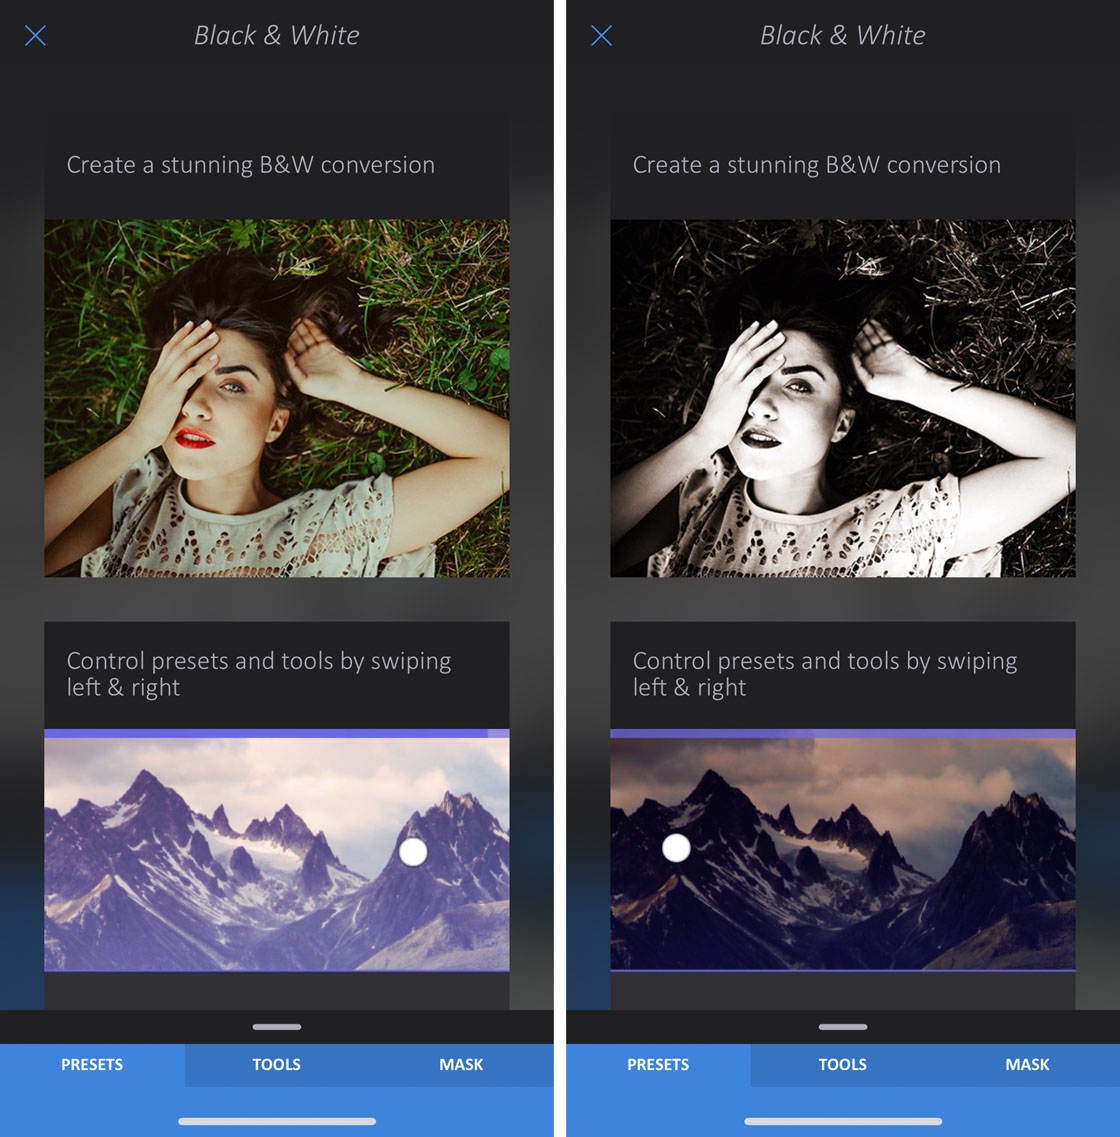
Go to Filters > BW. Select a black and white preset from the bottom of the screen. Swipe left or right to adjust the effect.
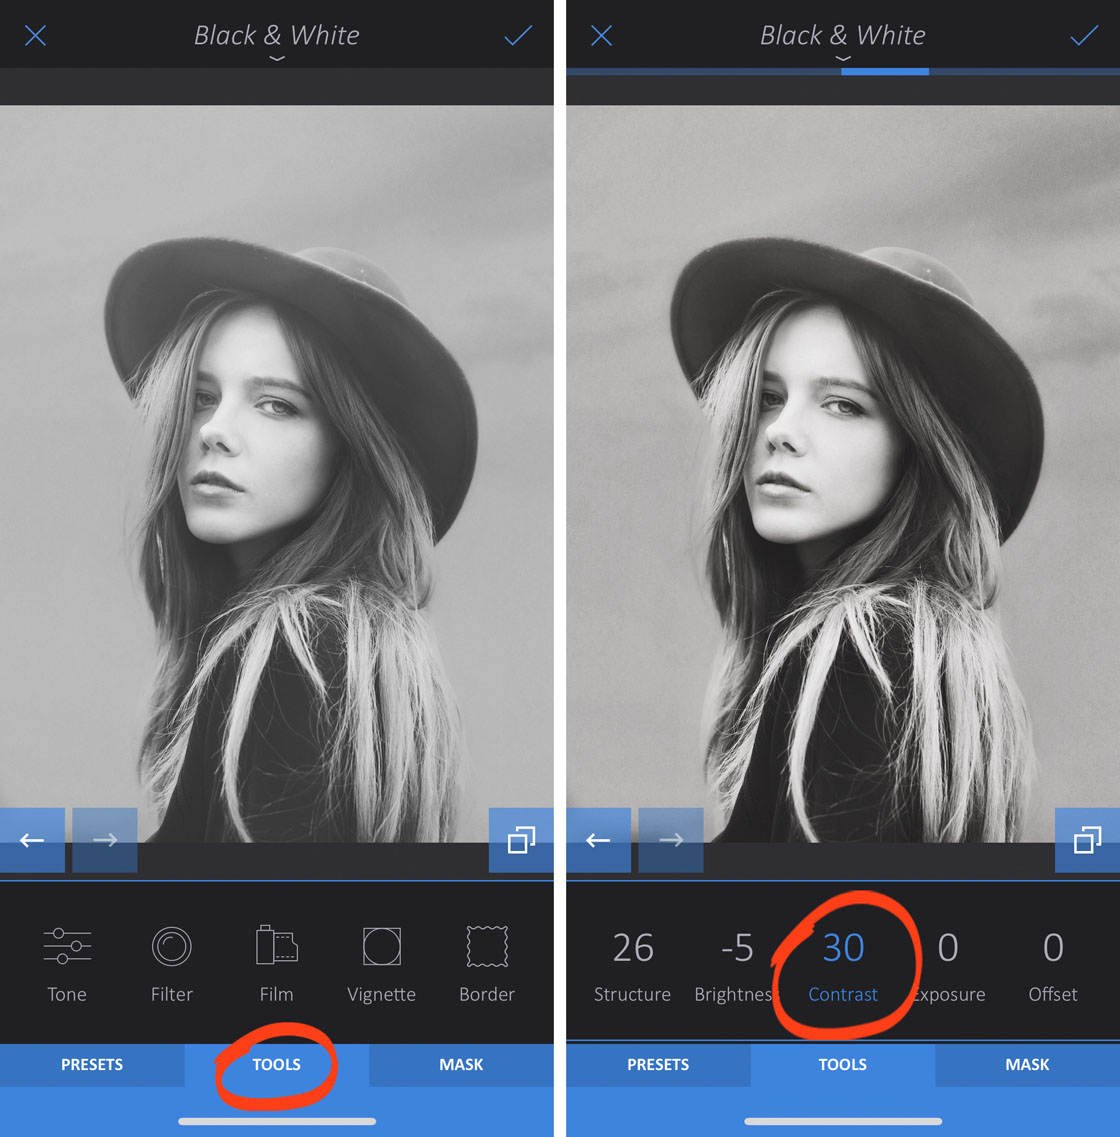
To customize the preset, tap the Tools tab. Select a tool, then tap the setting you want to change. Swipe left or right to make the adjustment.
4.3 Duo Tool
The Duo filters tint your image with a blend of two different colors. You can customize the colors and blending effects to suit your photo.
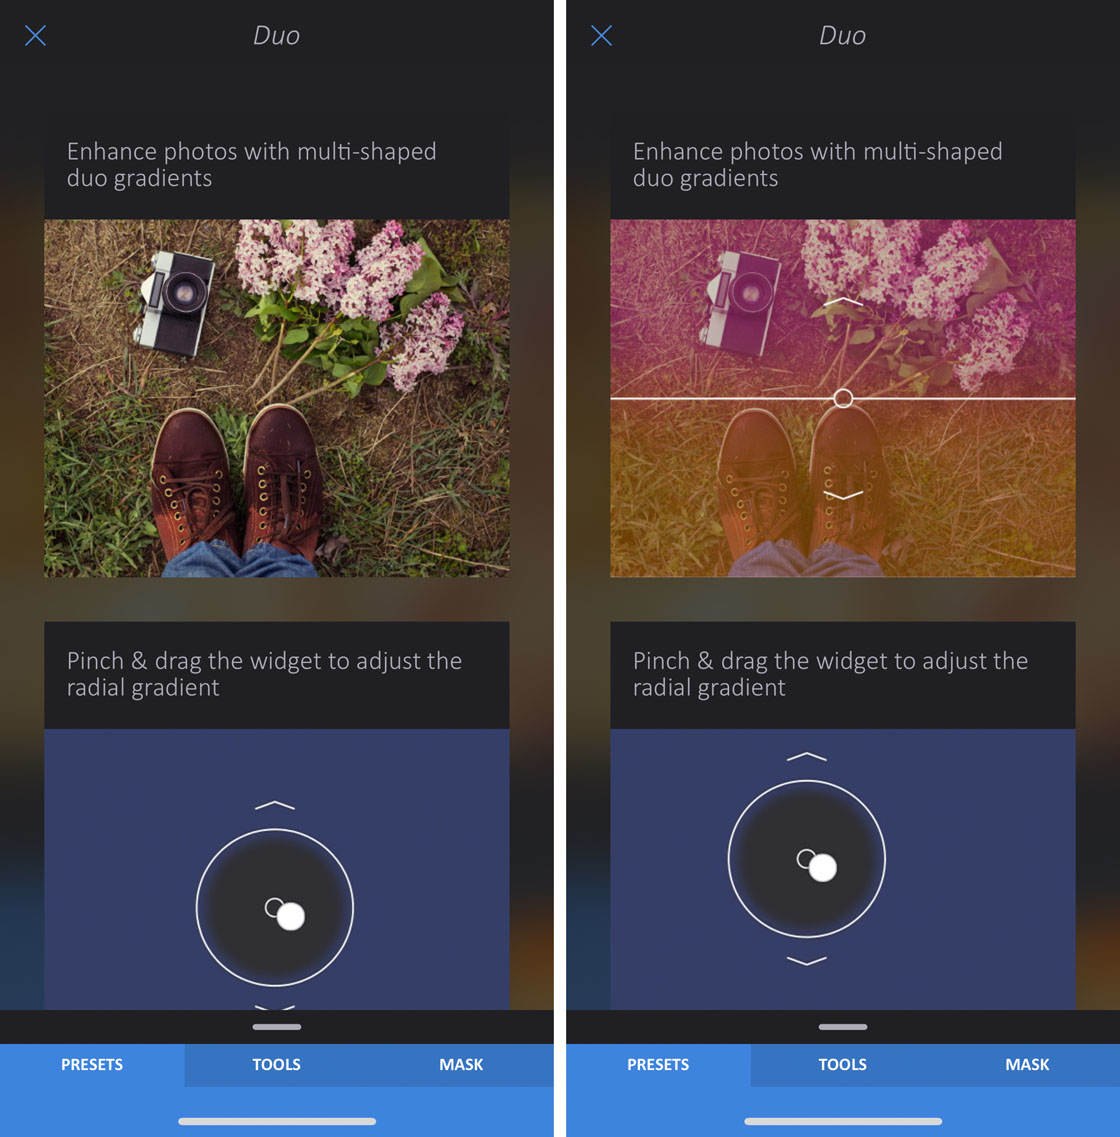
Go to Filters > Duo. Select a preset from the bottom of the screen.
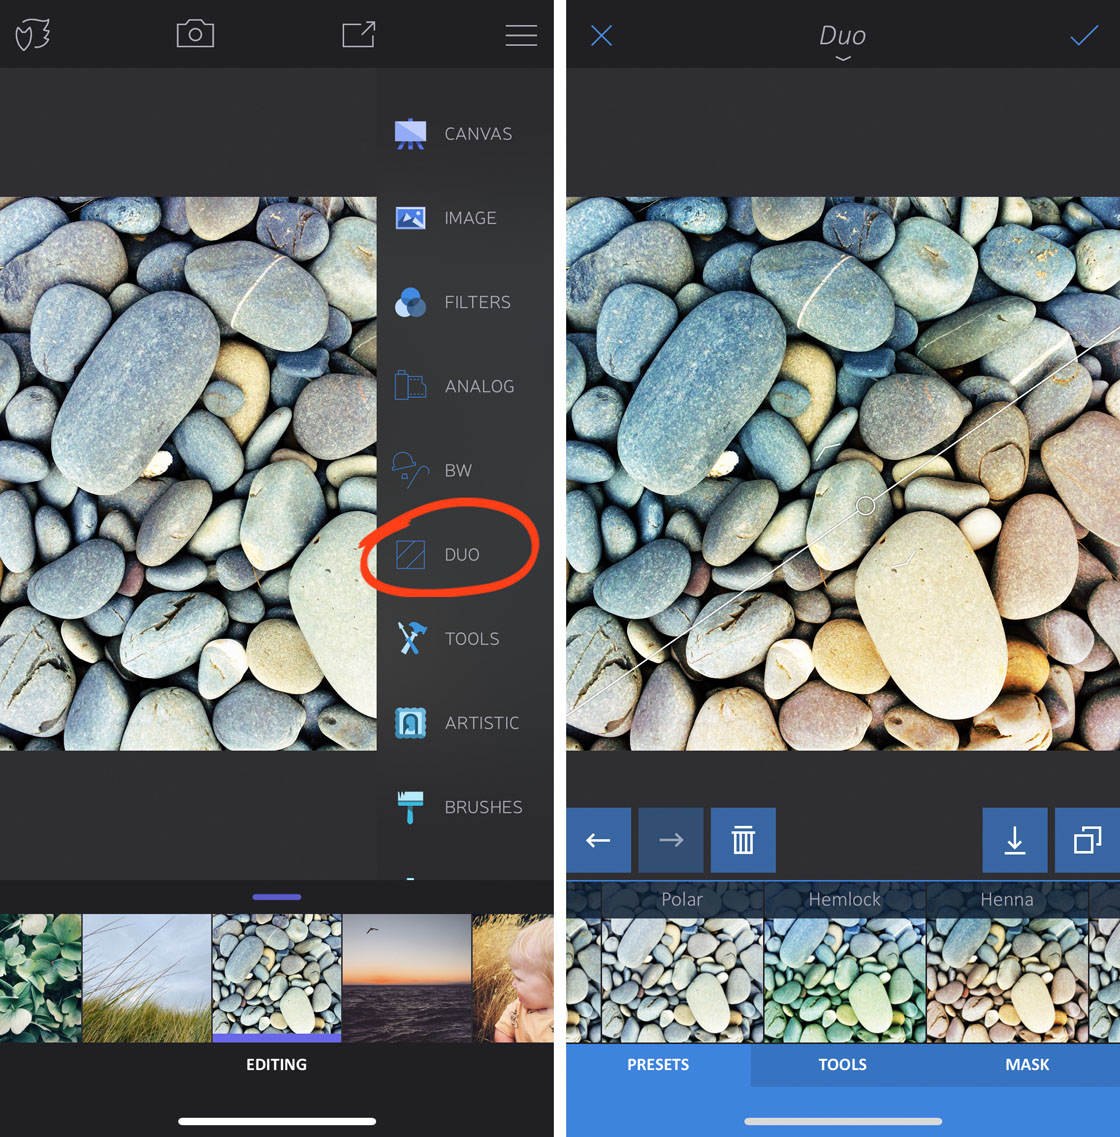
To change the position of the colored gradient, drag or pinch the line or circle that appears on your image. In the example above, I used two fingers to rotate the line diagonally.
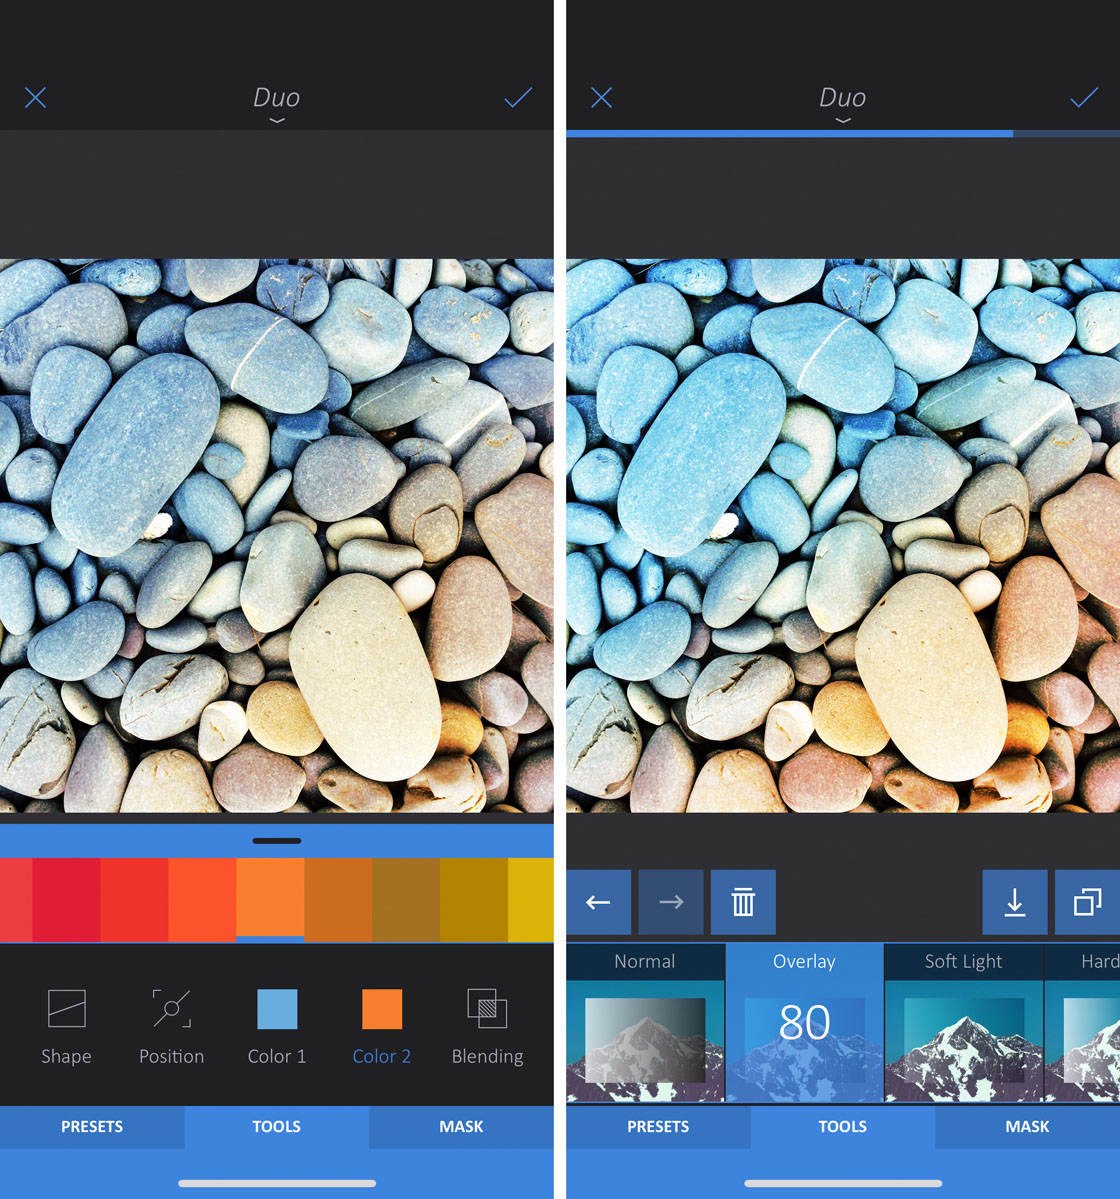
To customize the preset, tap the Tools tab. Here you can change the two colors that make up the duotone gradient. You can also change the blending mode which affects how the colors blend with your photo. In the example below, I used the Overlay blending mode.
5. Tools: Retouch, Blend & Selectively Blur Your Images
The Tools category contains tools for retouching your photos and getting creative.
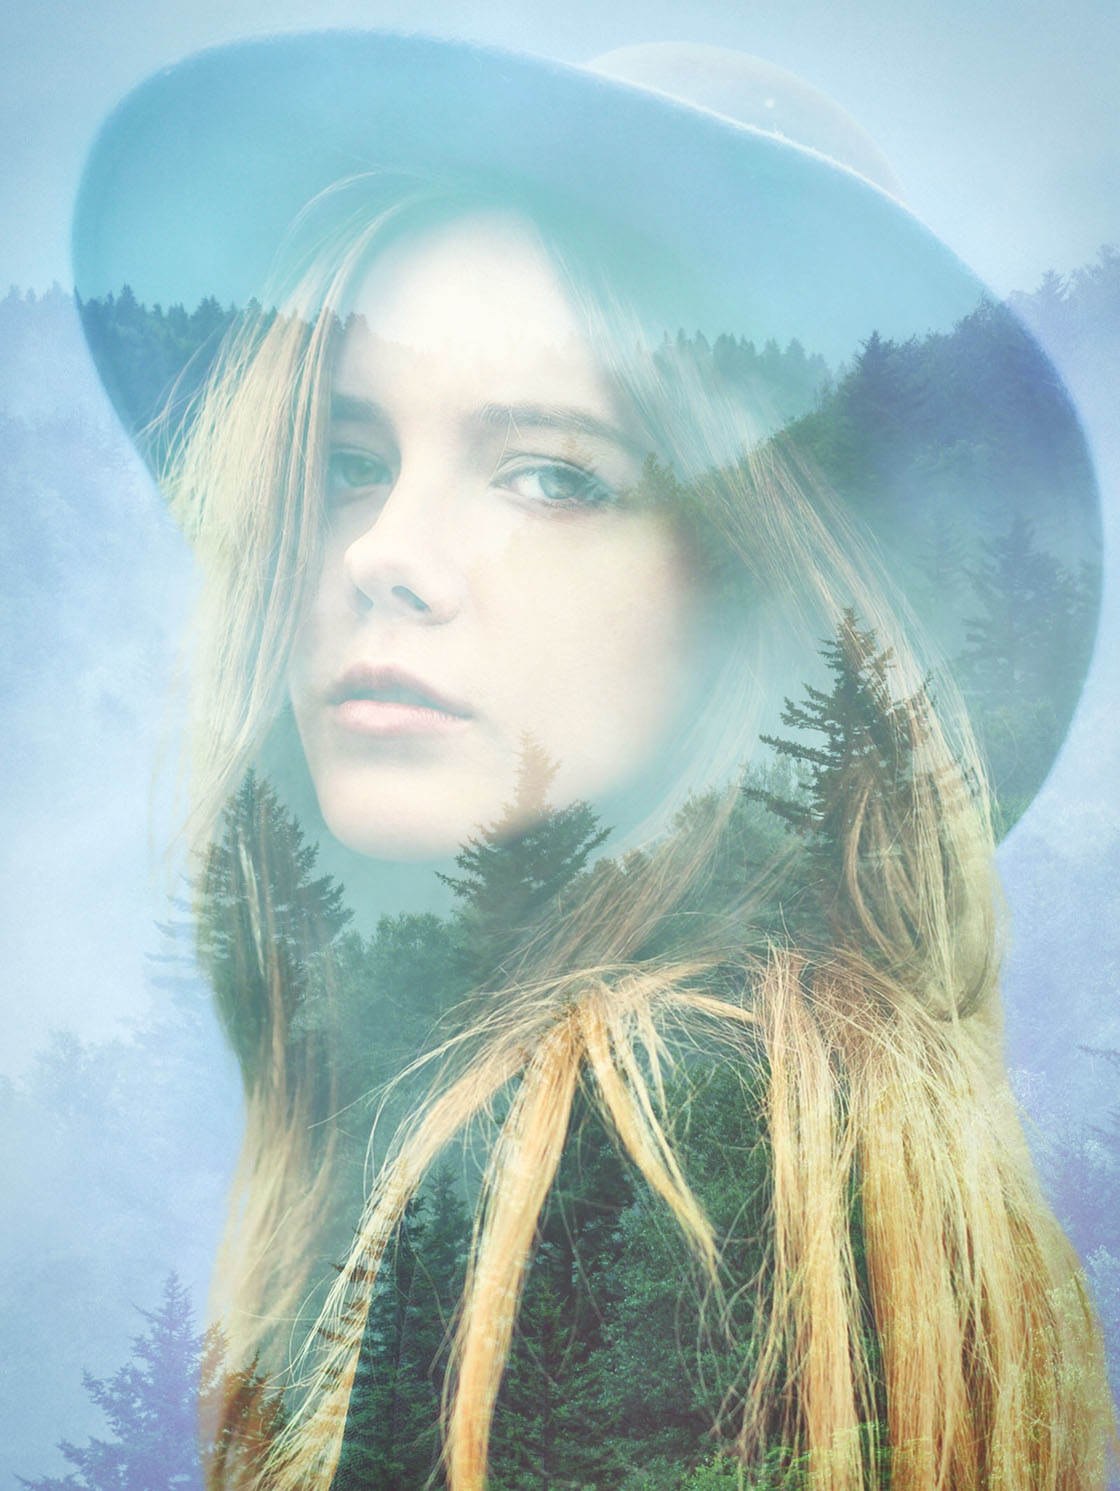
You can remove unwanted objects, reshape certain areas, and apply selective blur. You can even blend two images to create beautiful double exposures like the one below.
Open the tools menu, then tap Tools. The four options in this category are: Mixer, Reshape, Heal, and Tilt Shift.
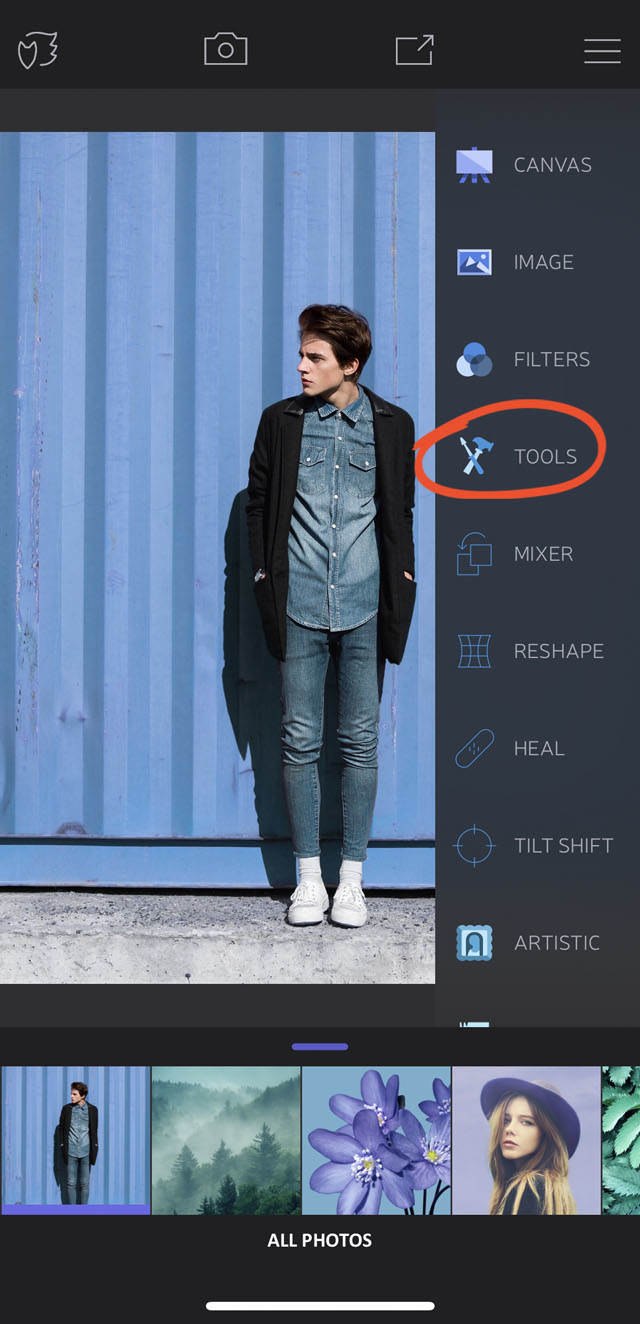
In the video below, you’ll discover how to use these Enlight tools to edit your own iPhone photos.
5.1 Mixer Tool
The Mixer tool lets you blend images together to create unique double exposure photos.
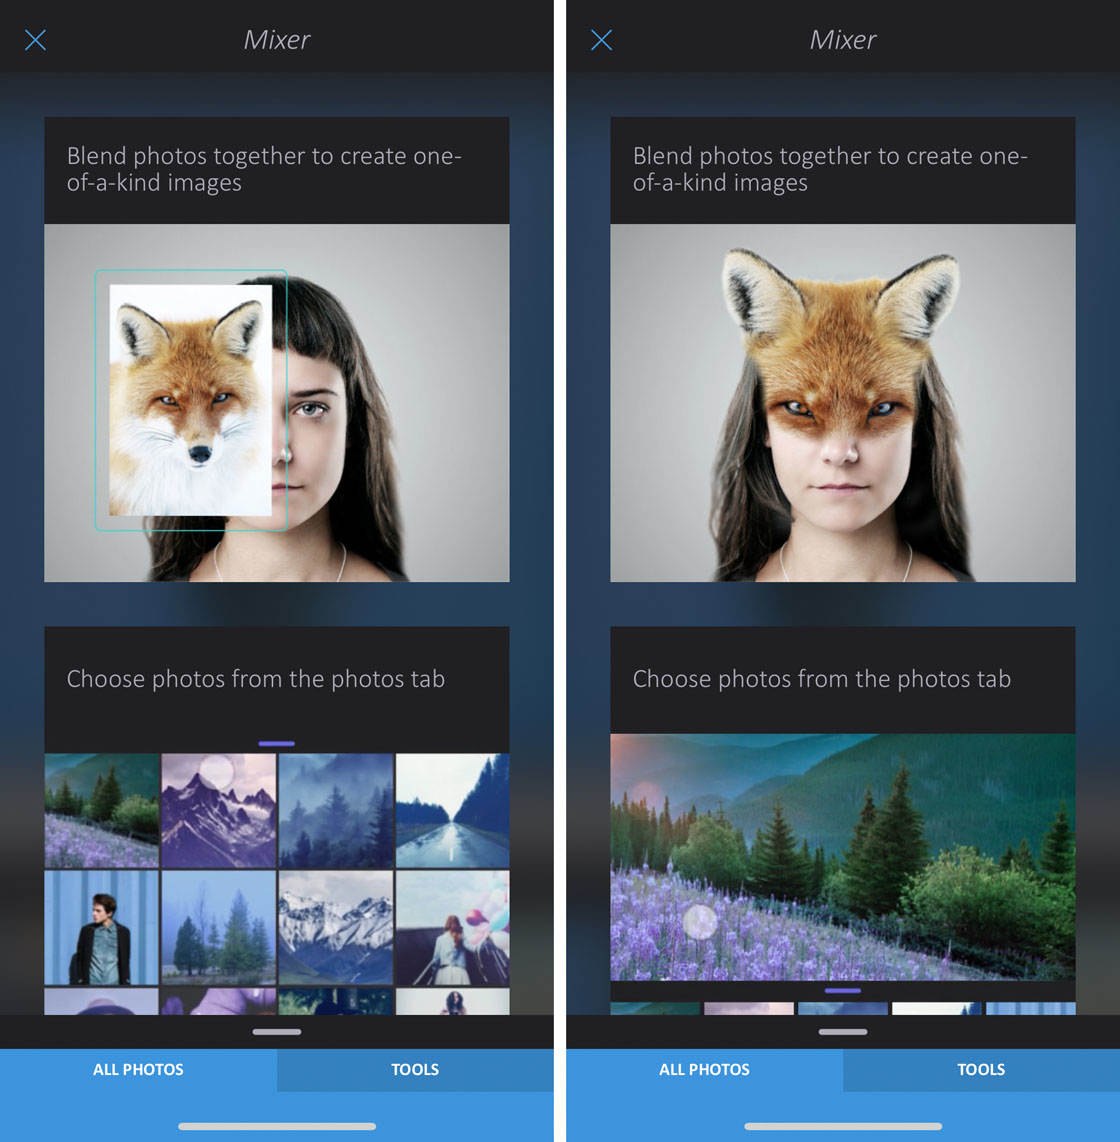
This tool doesn’t offer the same amount of control as dedicated blending apps like Superimpose X. But it’s a great introduction to double exposure photography.
Open the first image that you want to use in your double exposure, then go to Tools > Mixer. Select the second image that you want to use. The second photo appears on top of the first one.
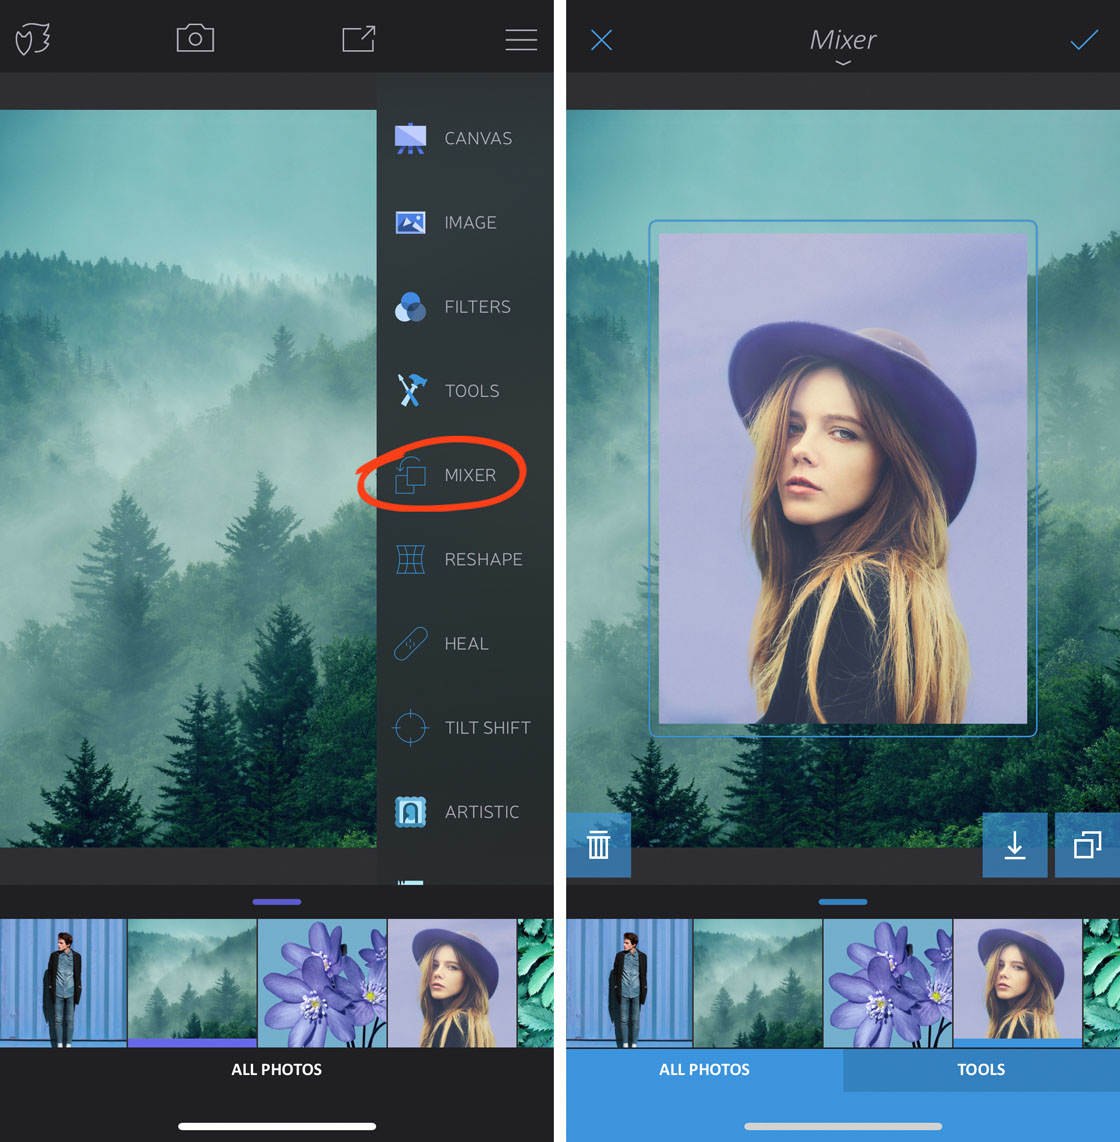
Resize the top image by pinching with two fingers. Drag the image to change its position.
Open the Tools tab at the bottom of the screen, and select Blending. Try the different blending modes, such as Overlay, Soft Light or Screen.
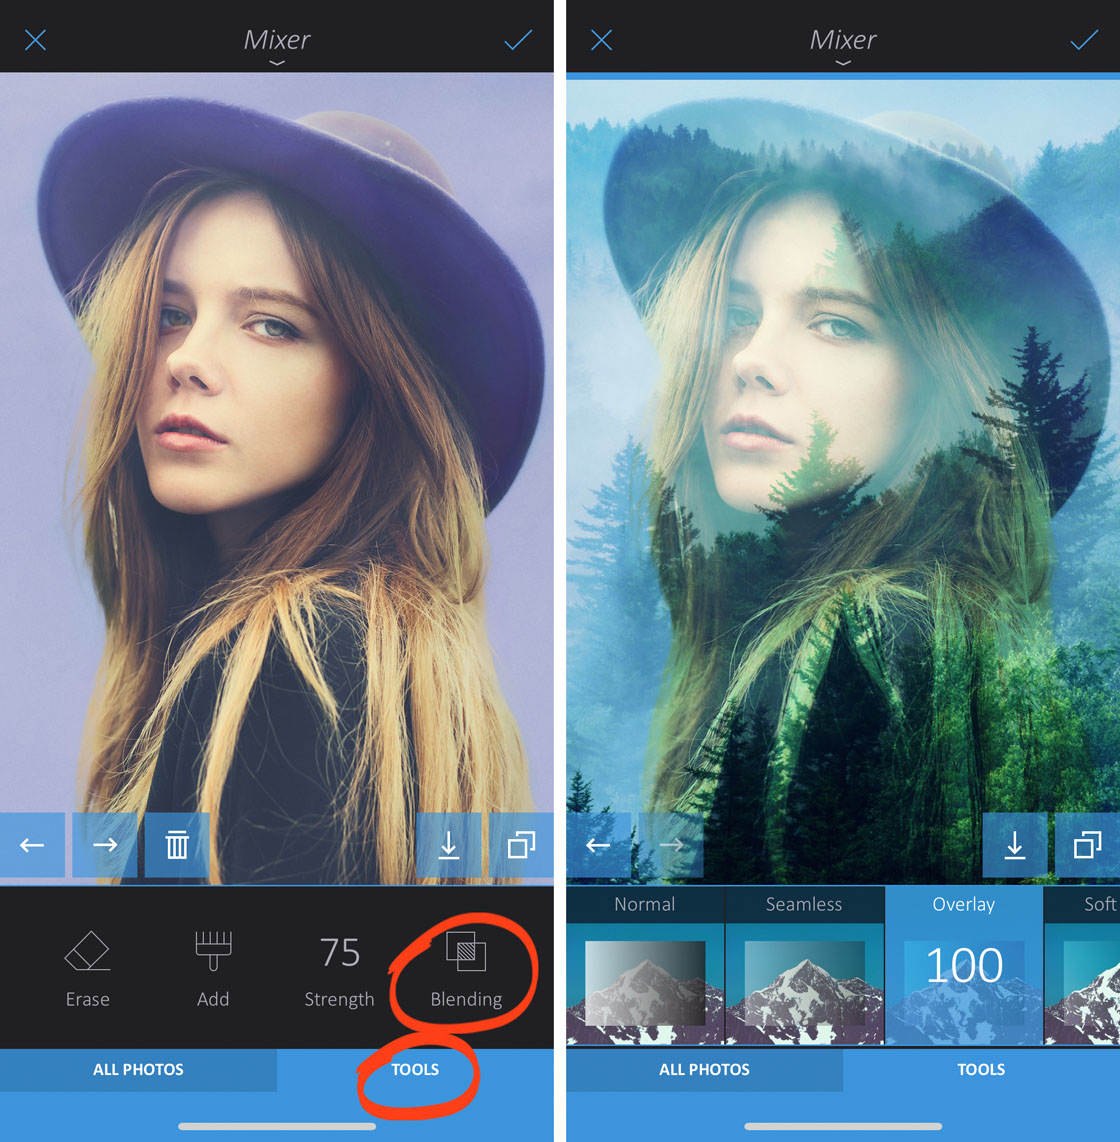
Swipe left or right to adjust the strength of the blending mode. The screenshots below show the Screen blending mode applied at a strength of 100 and 75.
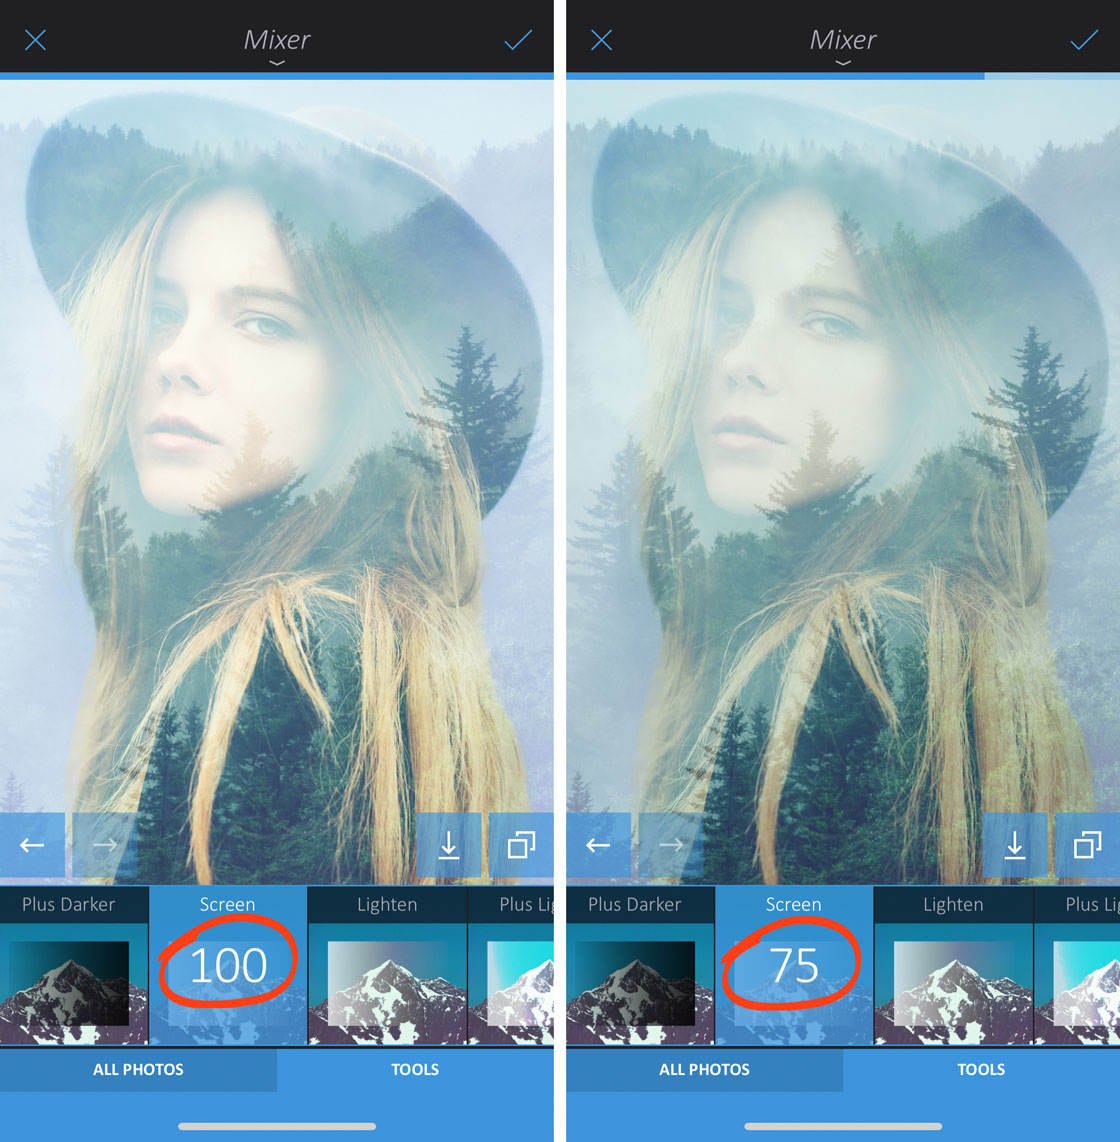
If you want to erase part of the top image, tap Tools at the bottom of the screen. Then use the Erase tool to brush over any areas you want to erase.
5.2 Reshape Tool
The Reshape tool is for stretching and reshaping elements in your photo.
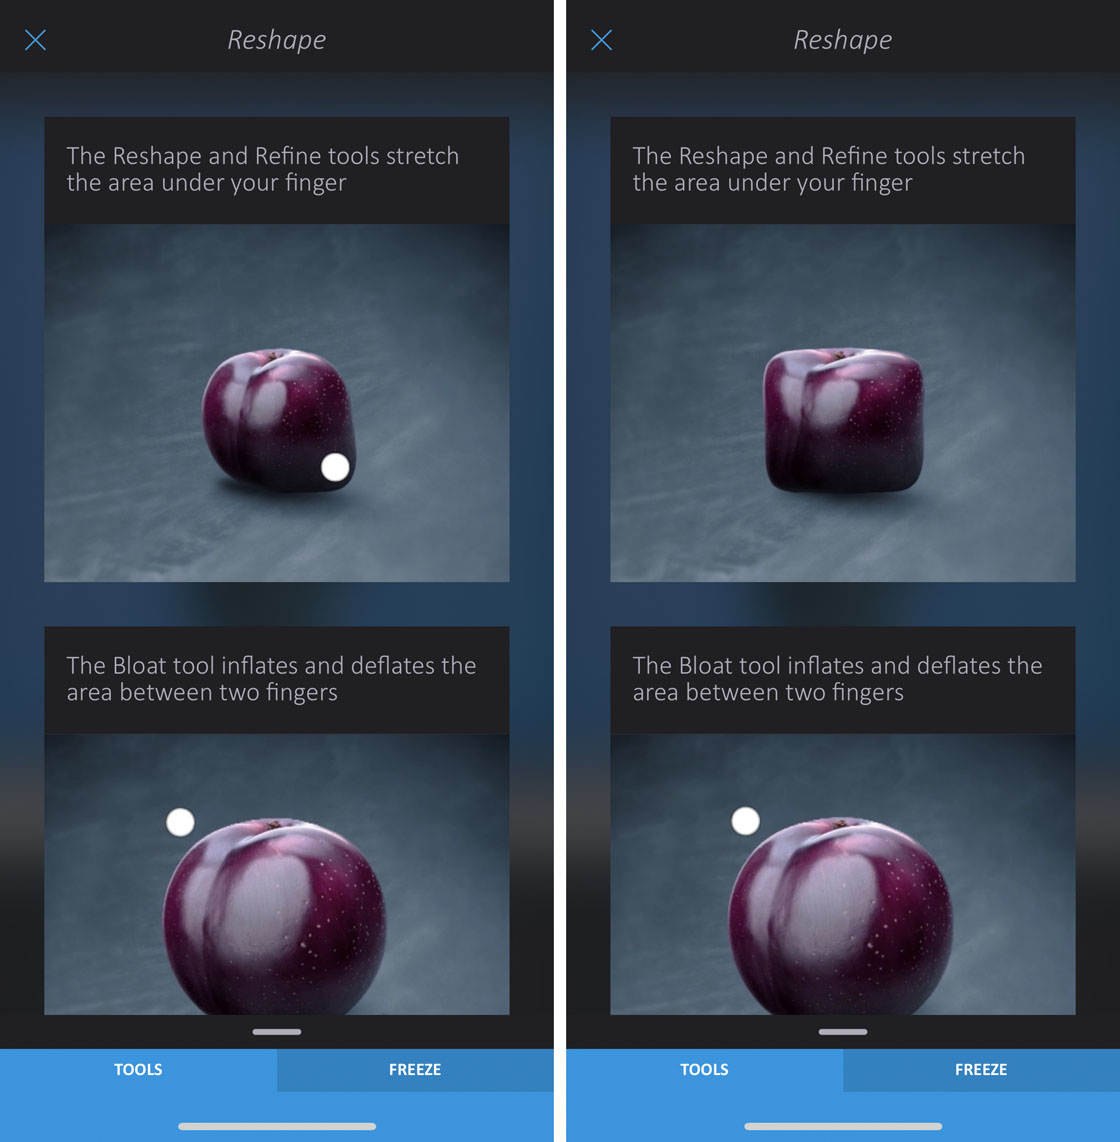
This isn’t a tool you’ll need in everyday photo editing. If you do use it, only make small changes to avoid distorting the subject. Of course, you can also use it to produce fun or surreal effects.
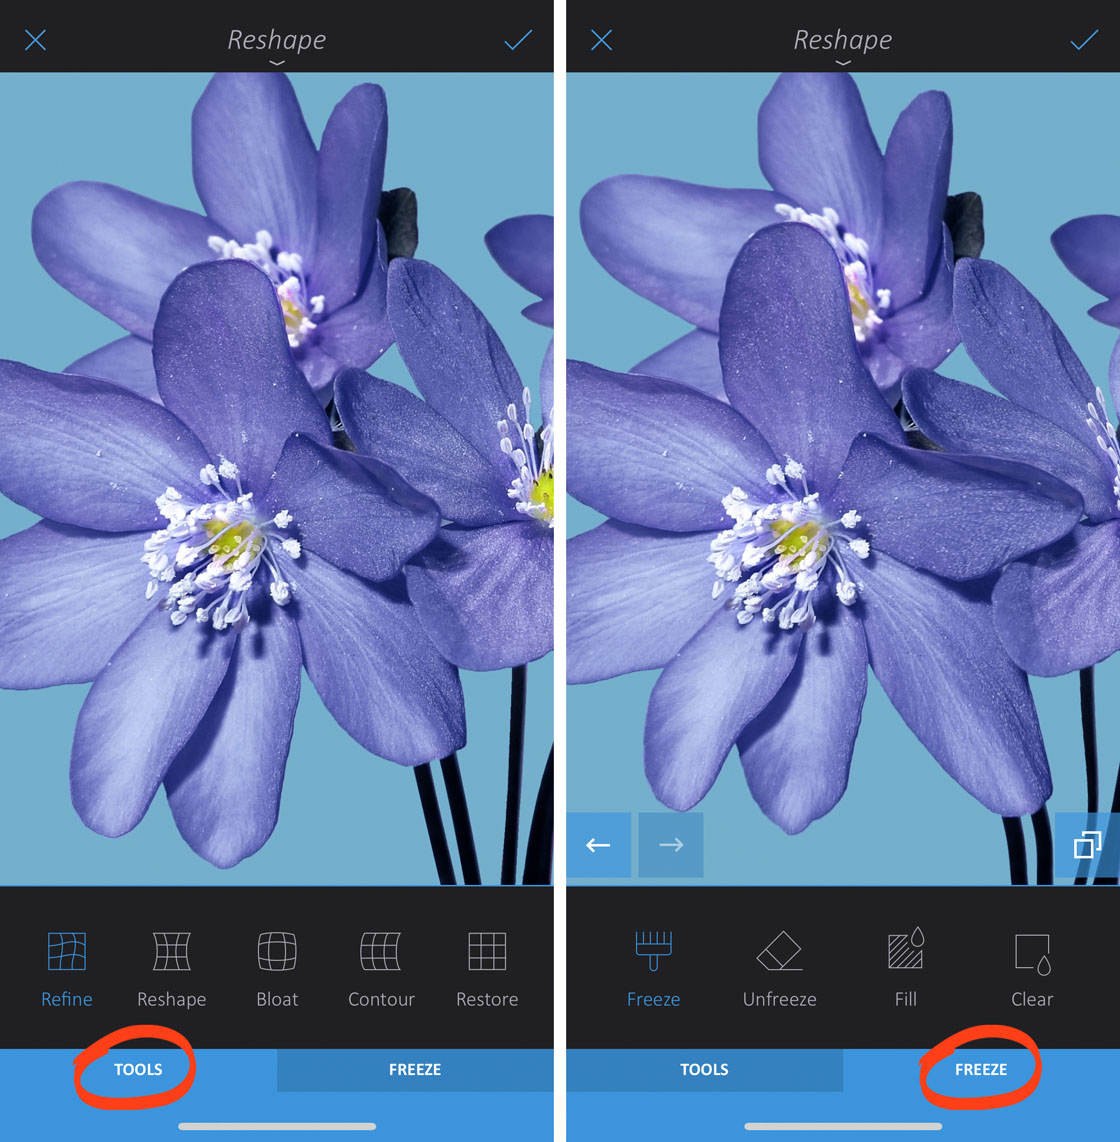
Go to Tools > Reshape. Tap Tools at the bottom of the screen to access the reshaping tools. Drag over an object to reshape it.
To avoid reshaping certain areas, tap the Freeze tab. Ensure the Freeze tool is selected, then brush over the areas you don’t want to reshape.
5.3 Heal Tool
The Heal tool lets you remove unwanted objects and blemishes from your photos. It works by replacing one area of the image with pixels from another area.
In the example below, areas of the sky were used to replace the bird and the tree.
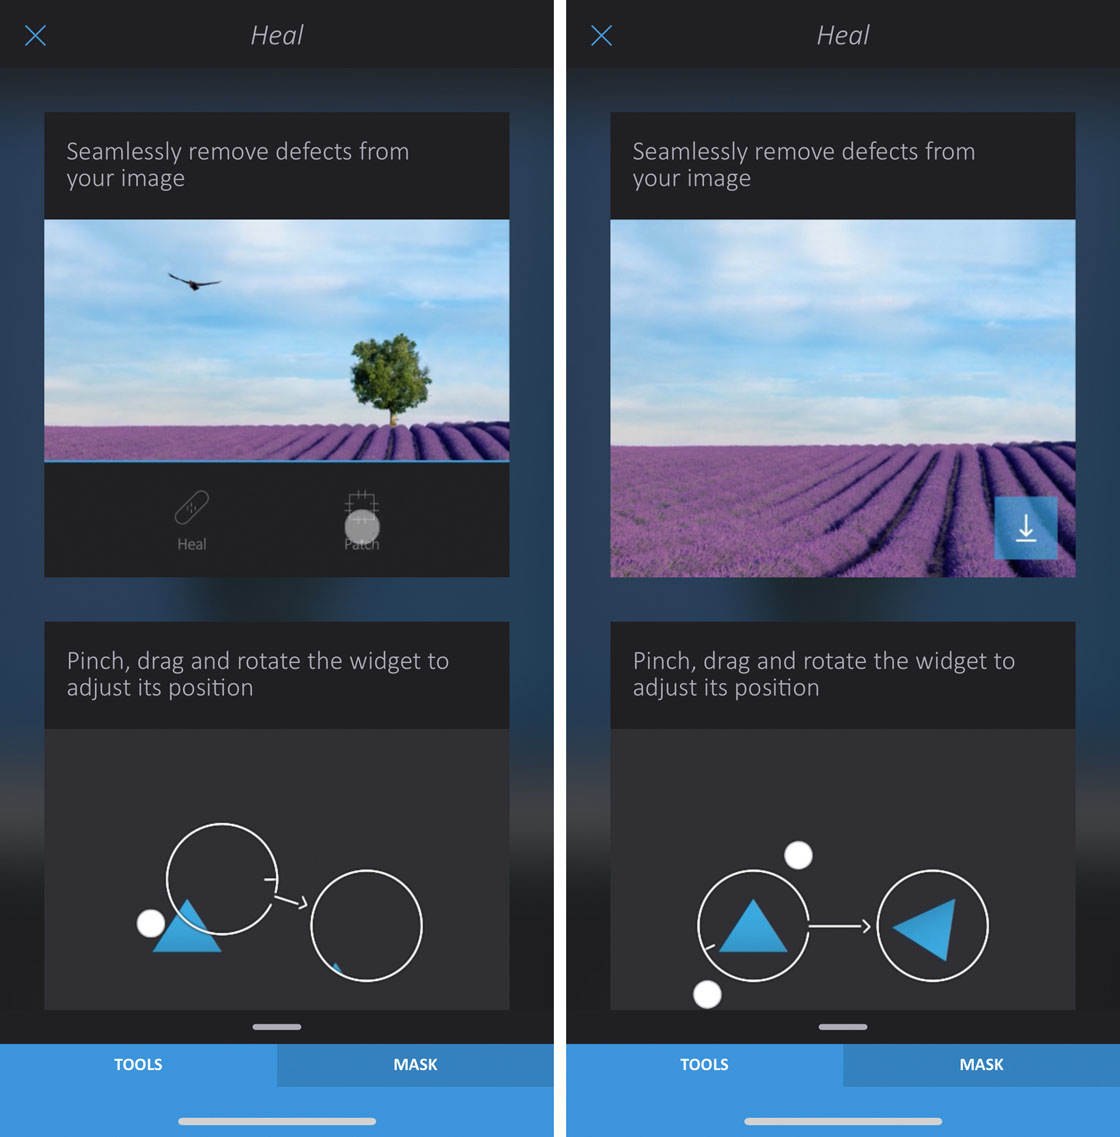
Go to Tools > Heal. The healing tools appear at the bottom of the screen.
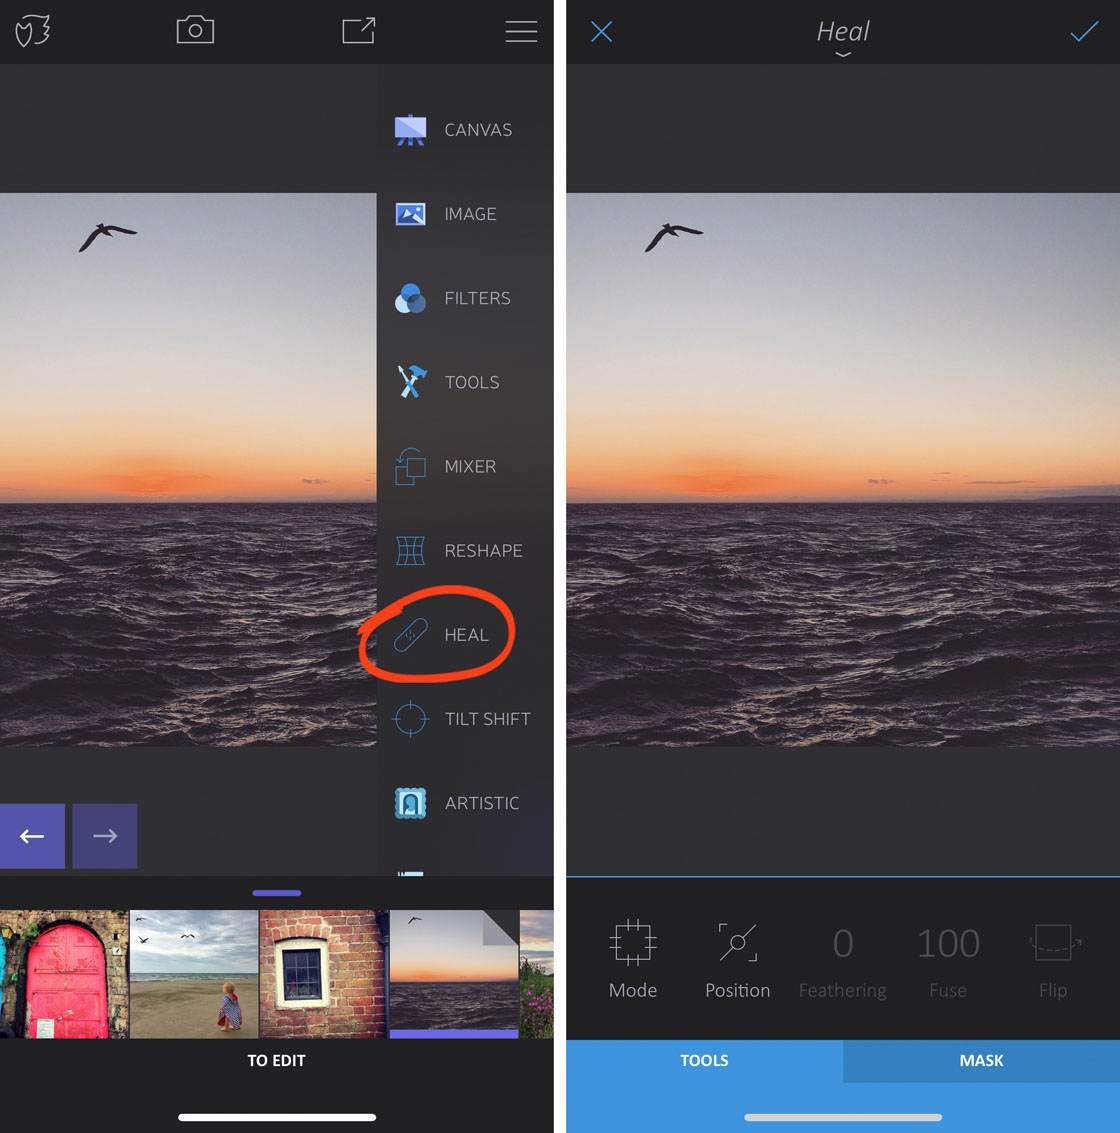
Tap Mode at the bottom of the screen to access the two different healing modes: Heal and Patch.
Select Patch to copy pixels directly from one area of the photo to another. Select Heal to create a blended version of the two areas. The Patch option works best in most situations.
Now you need to move the two circles. Position the circle with the arrow pointing to it over the object you want to remove, e.g., the bird. Place the other circle over the area you want to use to replace the unwanted object, e.g., the sky.
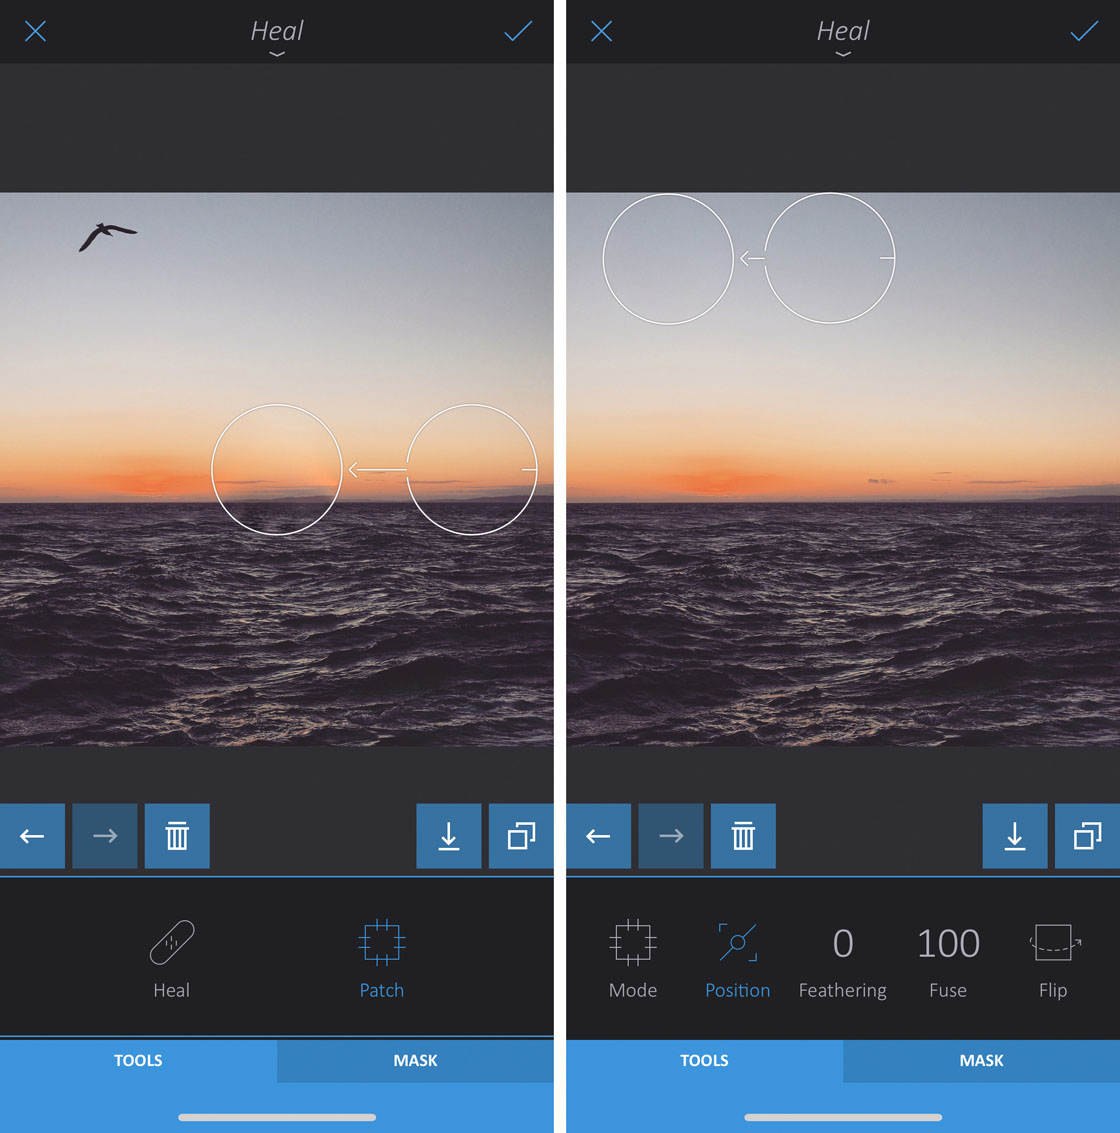
Use the Feathering and Fuse options to ensure the area you replace blends seamlessly with its surroundings.
5.4 Tilt Shift Tool
The Tilt Shift tool lets you selectively blur your image in a number of ways. The most common use of this tool is to create a tilt shift effect where the scene looks like a tiny scale model.
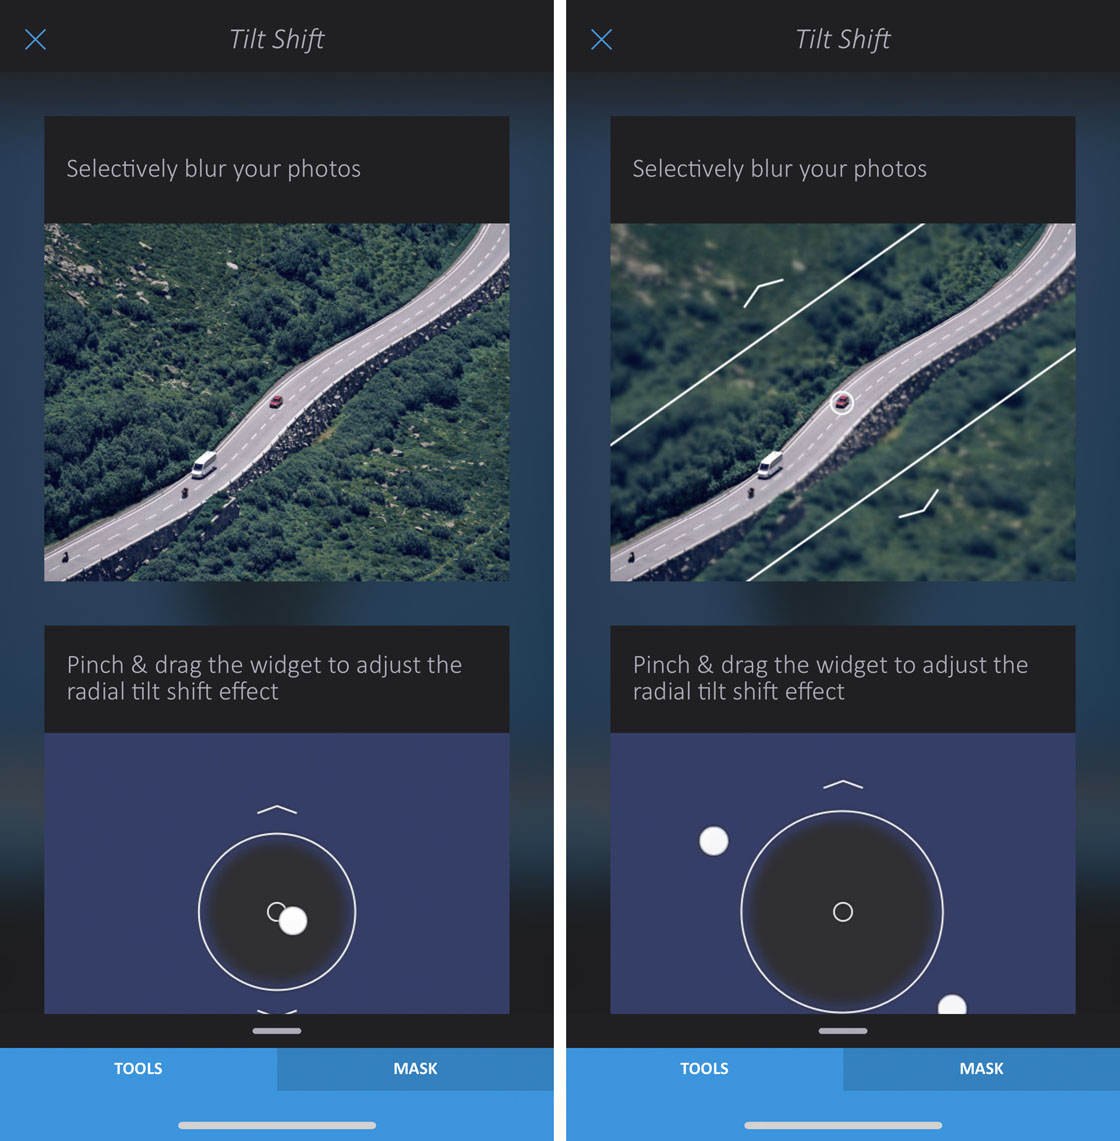
You can also use the radial blur option to create a blurred vignette around the edge of your photo.
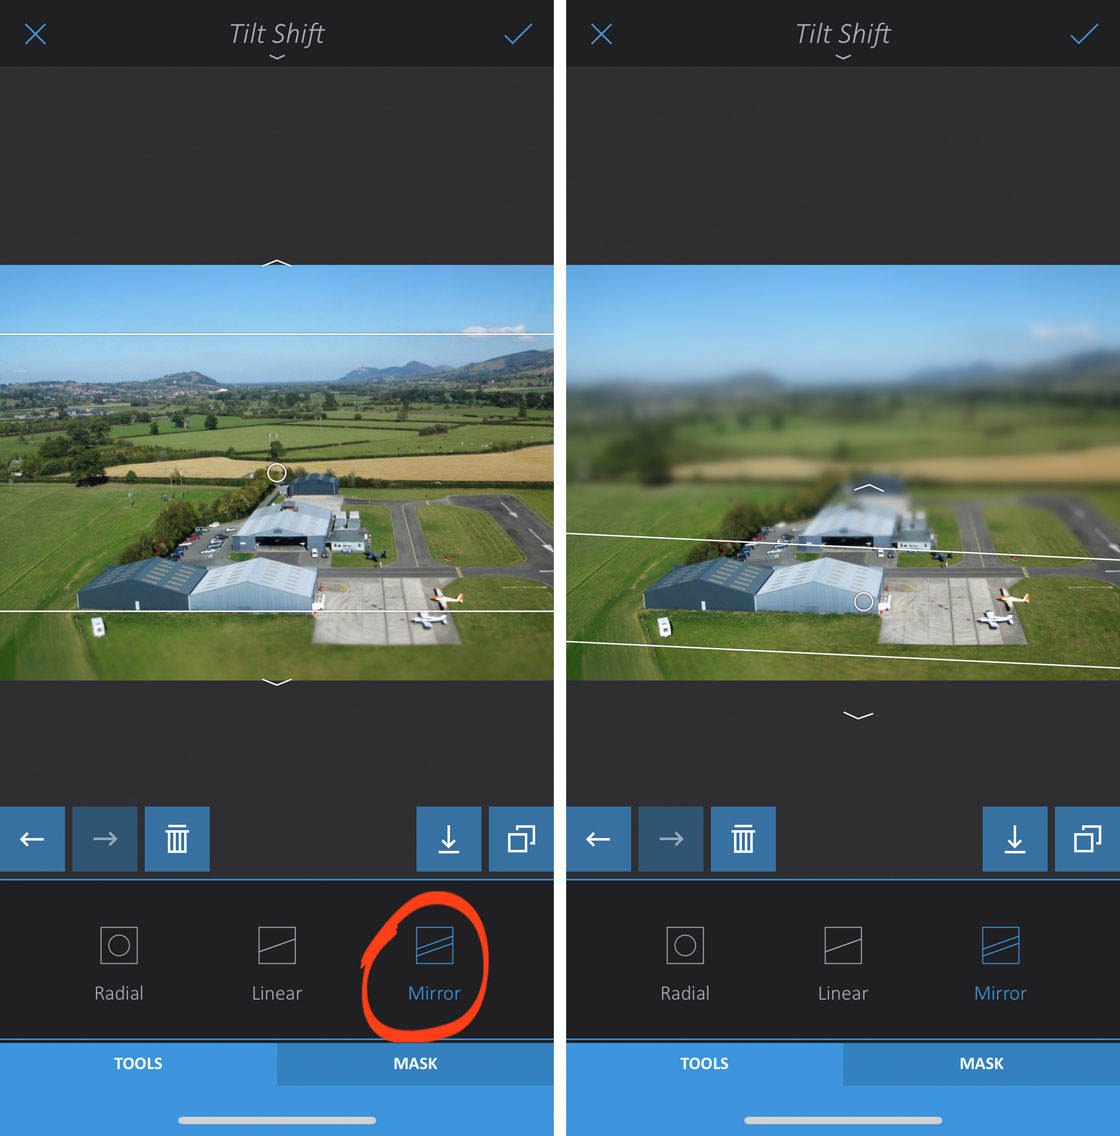
To create a fake miniature tilt shift photo, go to Tools > Tilt Shift. By default, the radial (circular) blur is applied to your photo. Tap the Shape option at the bottom of the screen.
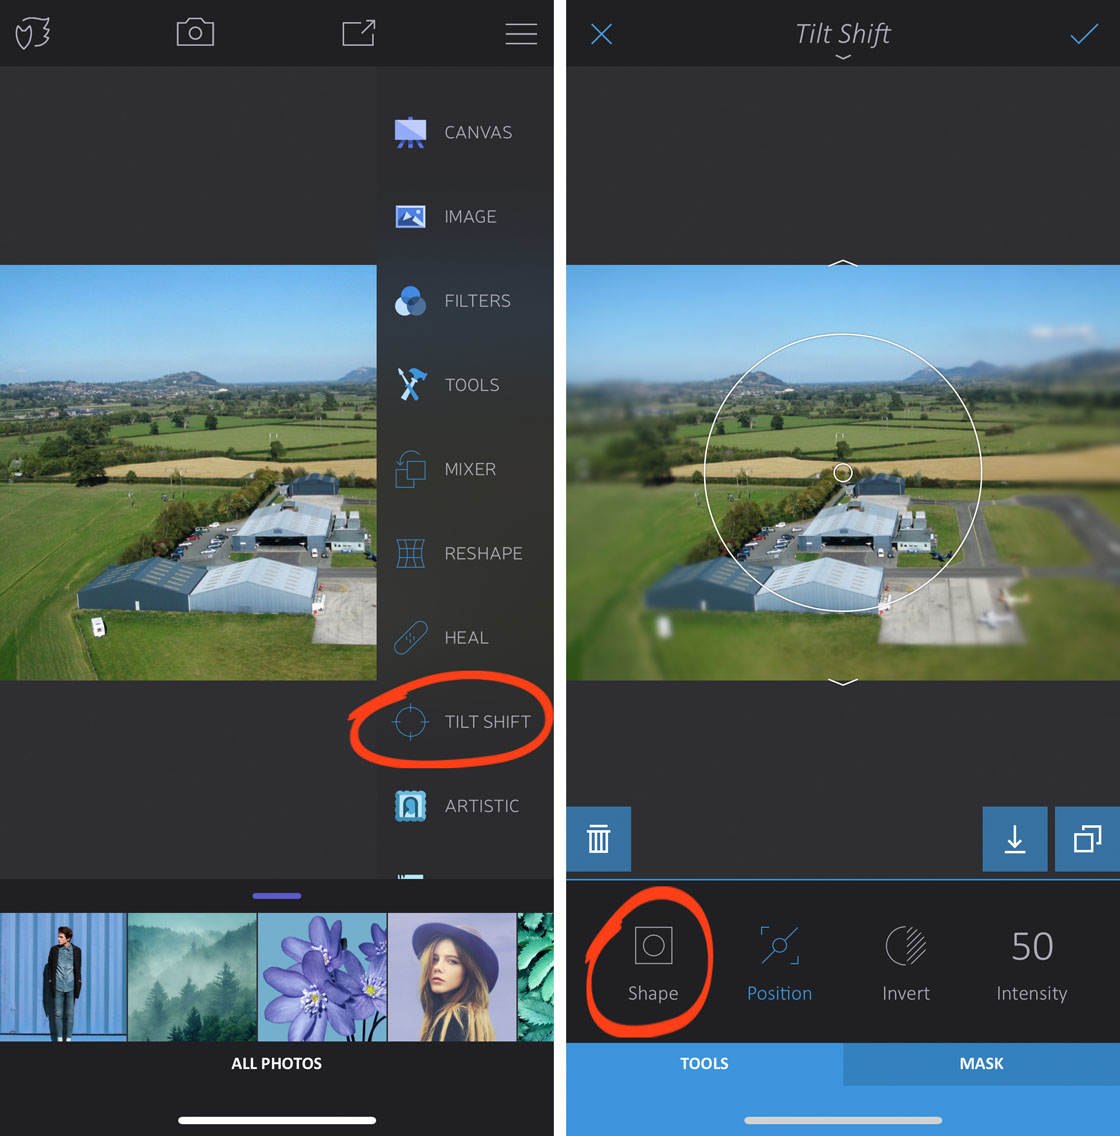
Select the Mirror option. This creates a central area that remains in focus. Everything outside of the two lines will be blurred.
Pinch the two lines to adjust the distance between them. Drag the lines to ensure the focus area is in the correct position.
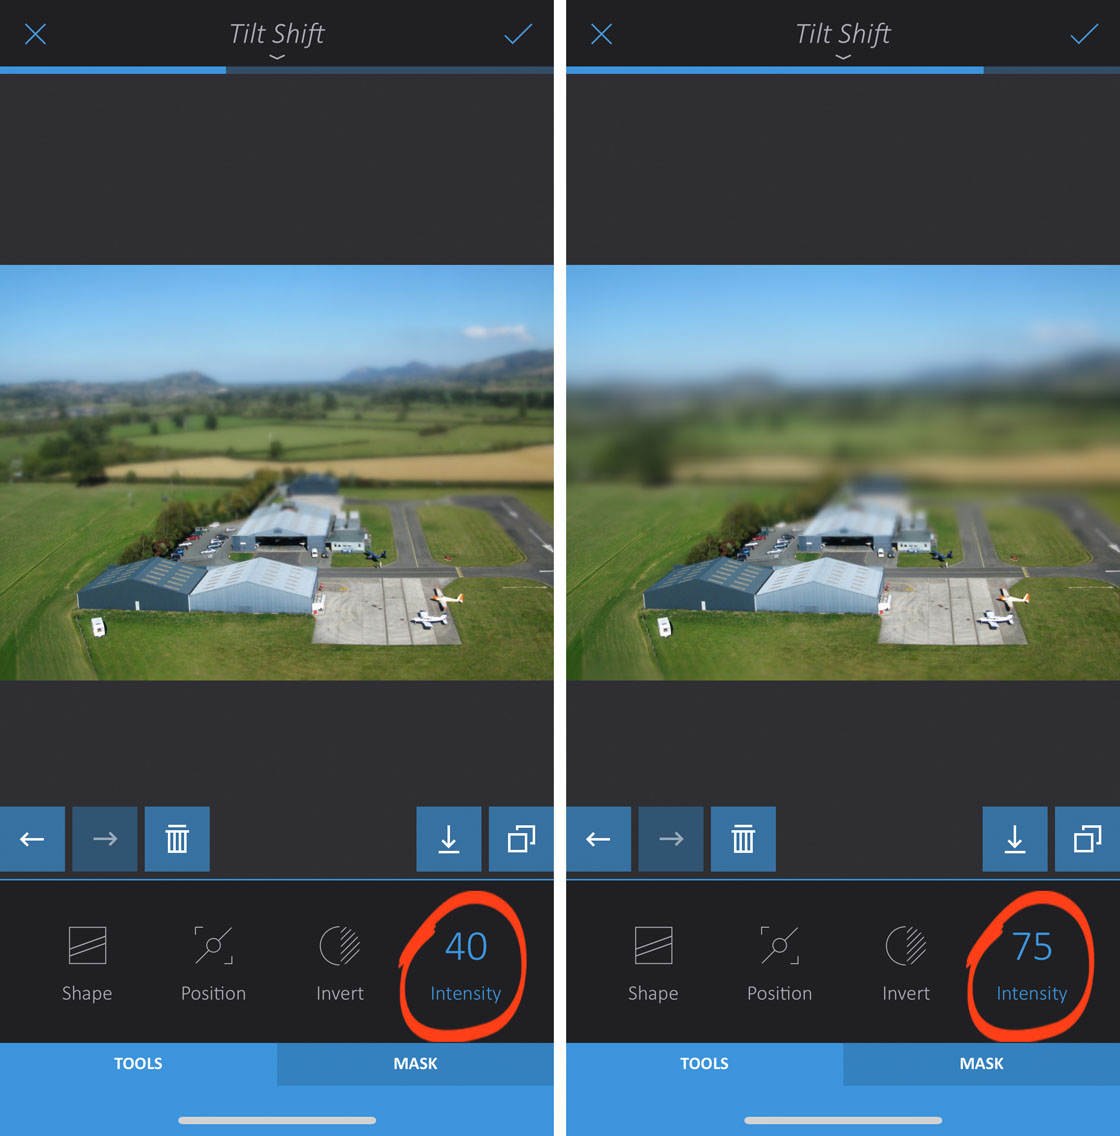
Tap the Tools tab, then select Intensity. Swipe left or right over your photo to adjust the strength of the blur.
6. Artistic: Apply Paint & Sketch Effects
Do you want to push your creativity even further? You should definitely try out the Artistic tools in Enlight. These tools let you quickly transform your photos into stunning digital art.
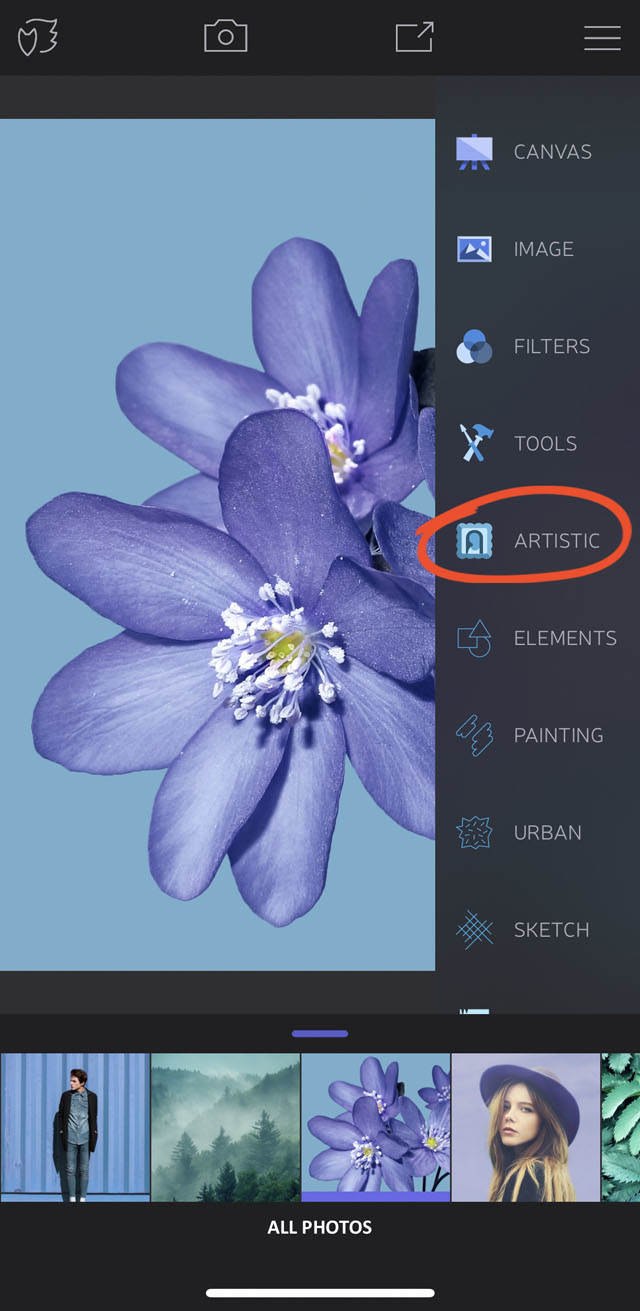
Open the tools menu, then tap Artistic. There are four tools in this category: Elements, Painting, Urban, and Sketch.
In this video, you’ll discover how to create unique art with your iPhone photos using the Artistic tools in Enlight.
6.1 Painting, Urban & Sketch Tools
The Painting, Urban, and Sketch tools all work in a similar way.
Open Artistic from the Enlight menu, then select the tool you want to use. In the example below, we’ll use the Painting tool. Next, select an effect from the presets beneath your photo.
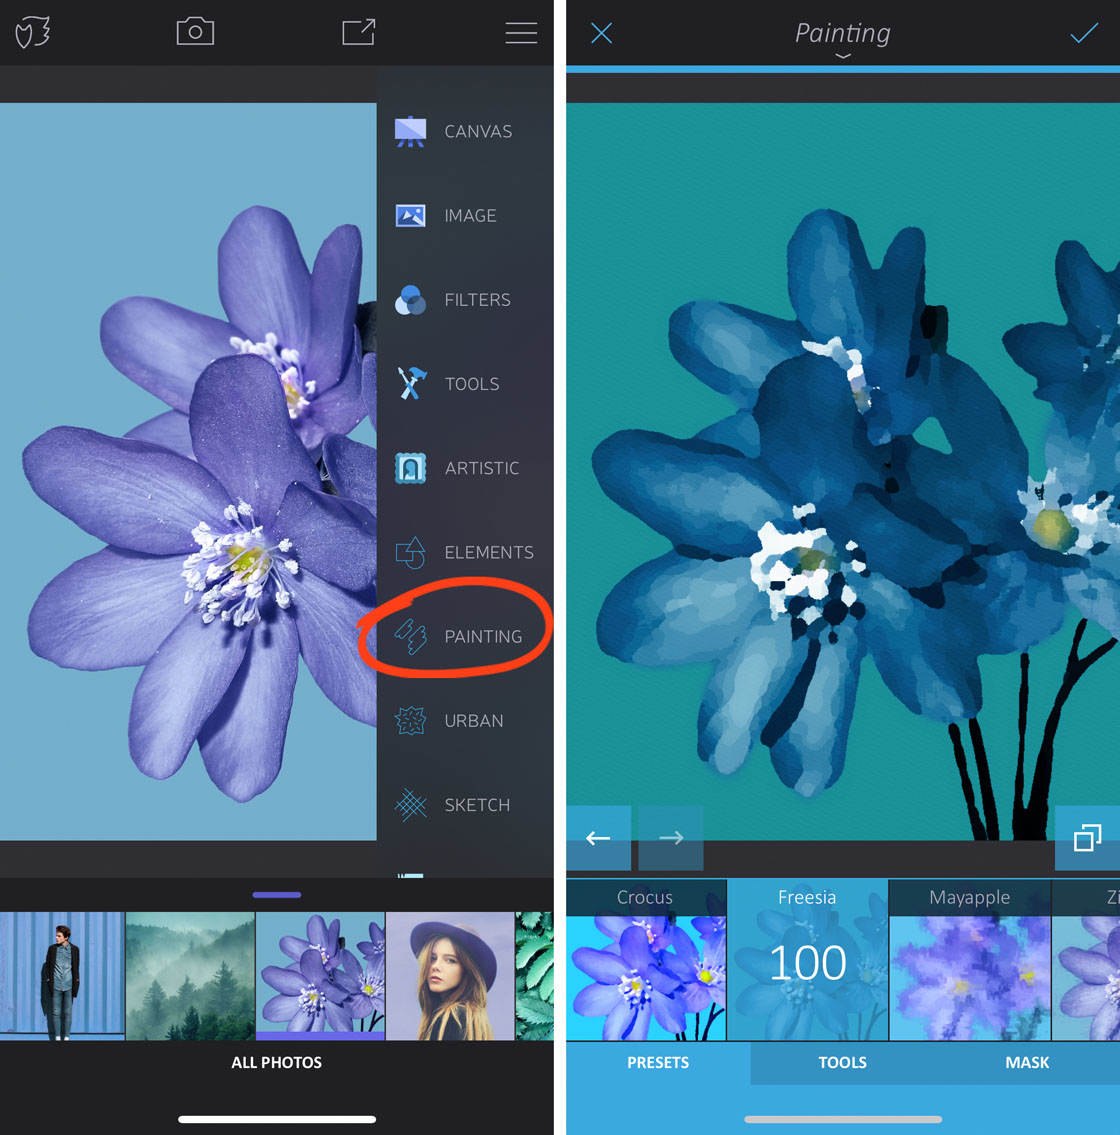
Tap the Tools tab at the bottom of the screen. Use the options beneath your photo to customize the artistic effect. Just like the other Enlight tools, you adjust the intensity of an effect by swiping left or right over your photo.
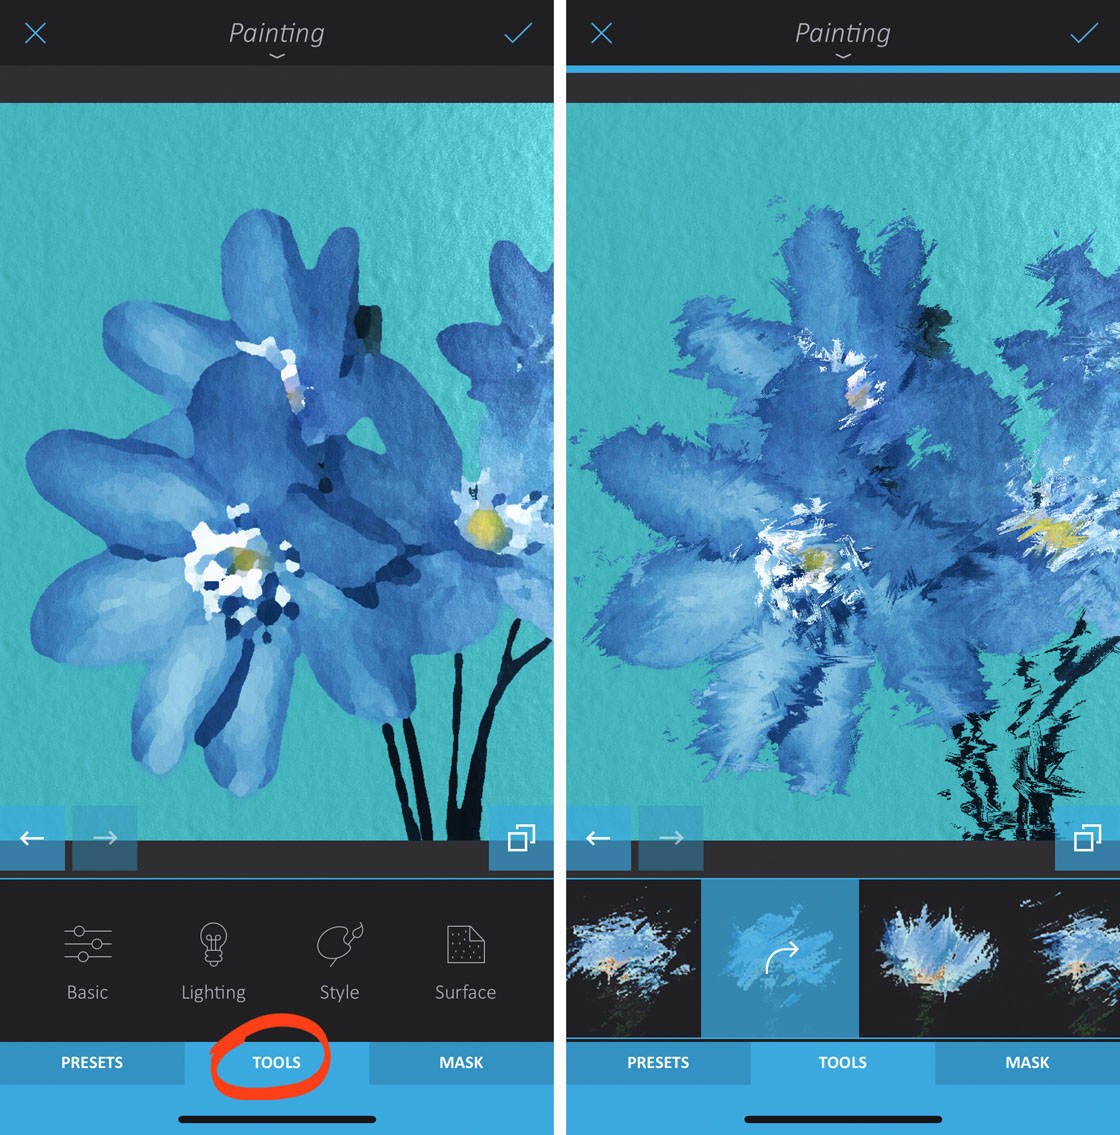
Below are some examples of the artistic effects you can create with the Painting, Urban, and Sketch tools.
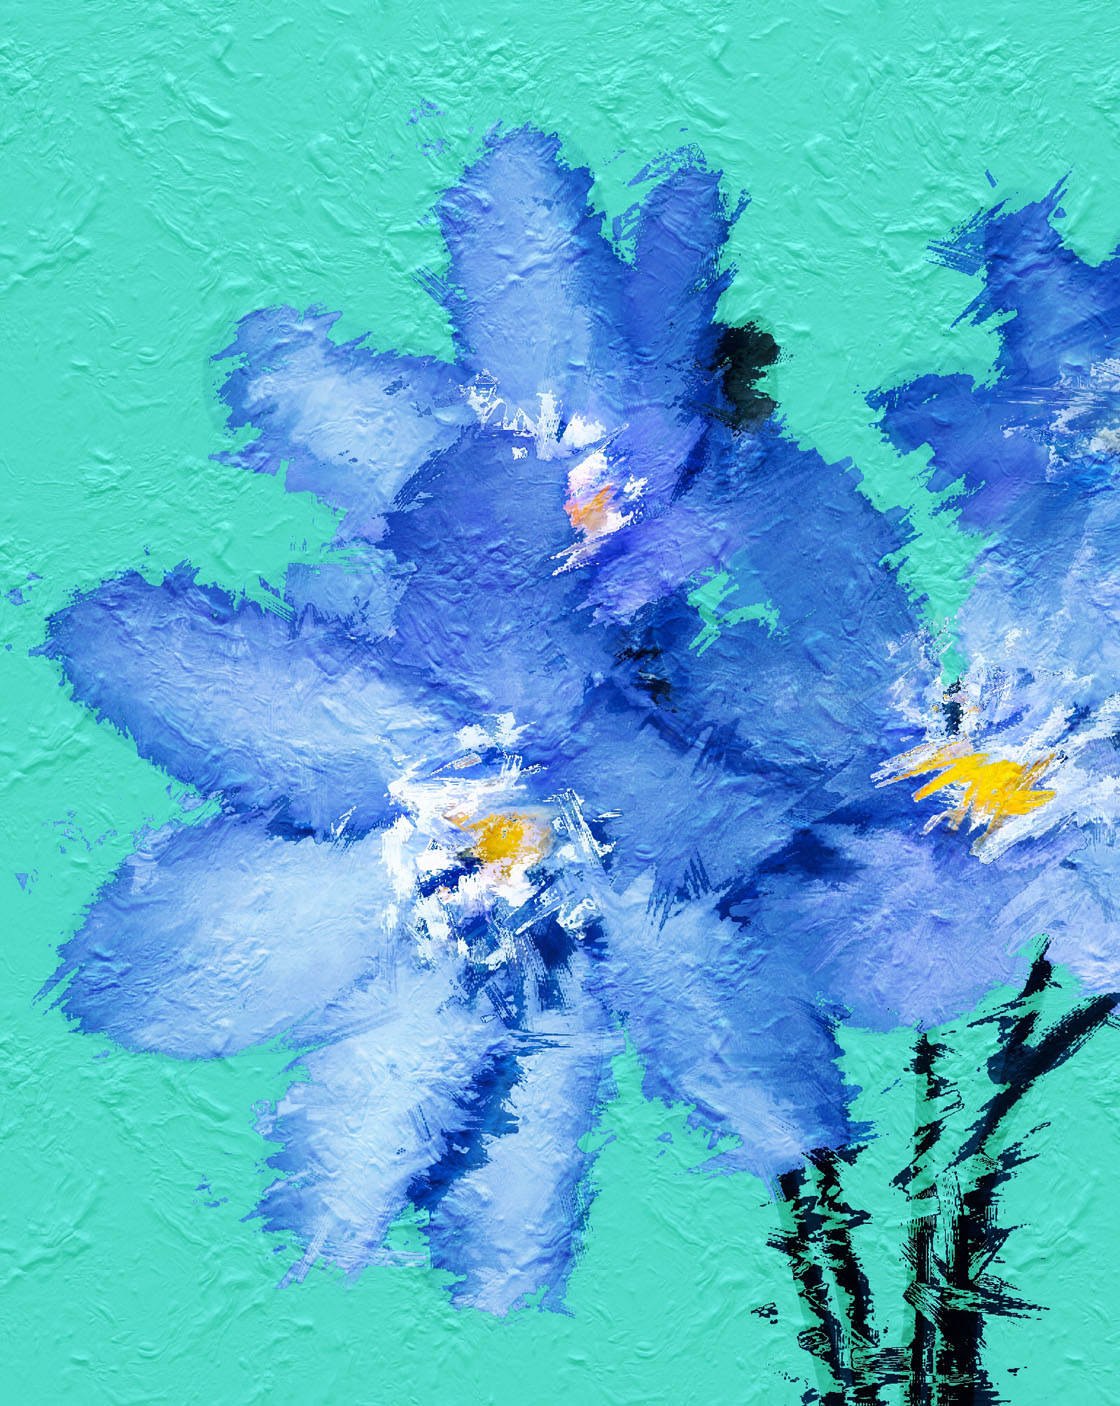
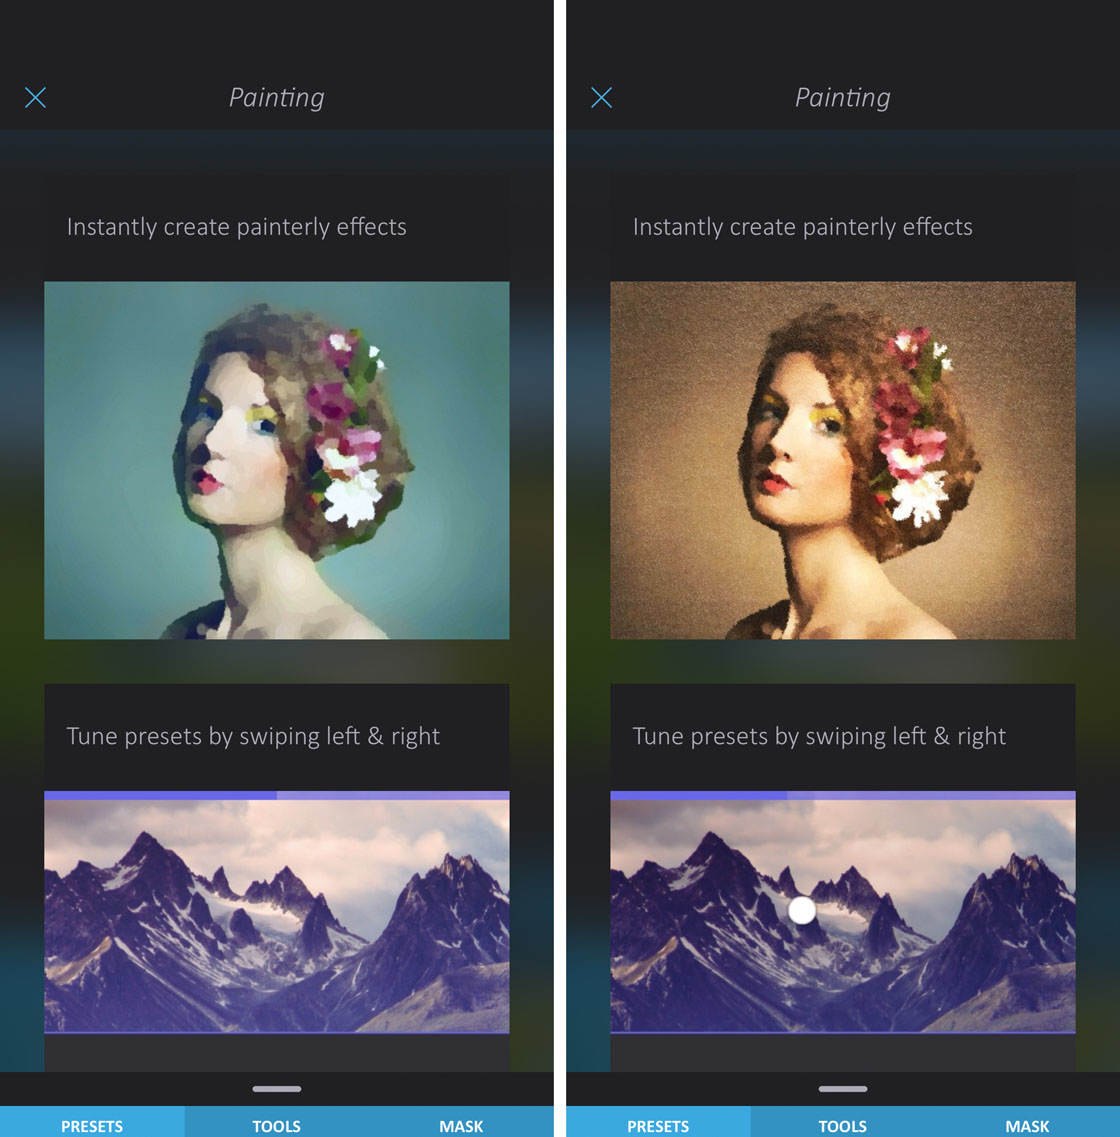
The Painting tool has a range of painterly effects. Use these to make your photo look like a painting.
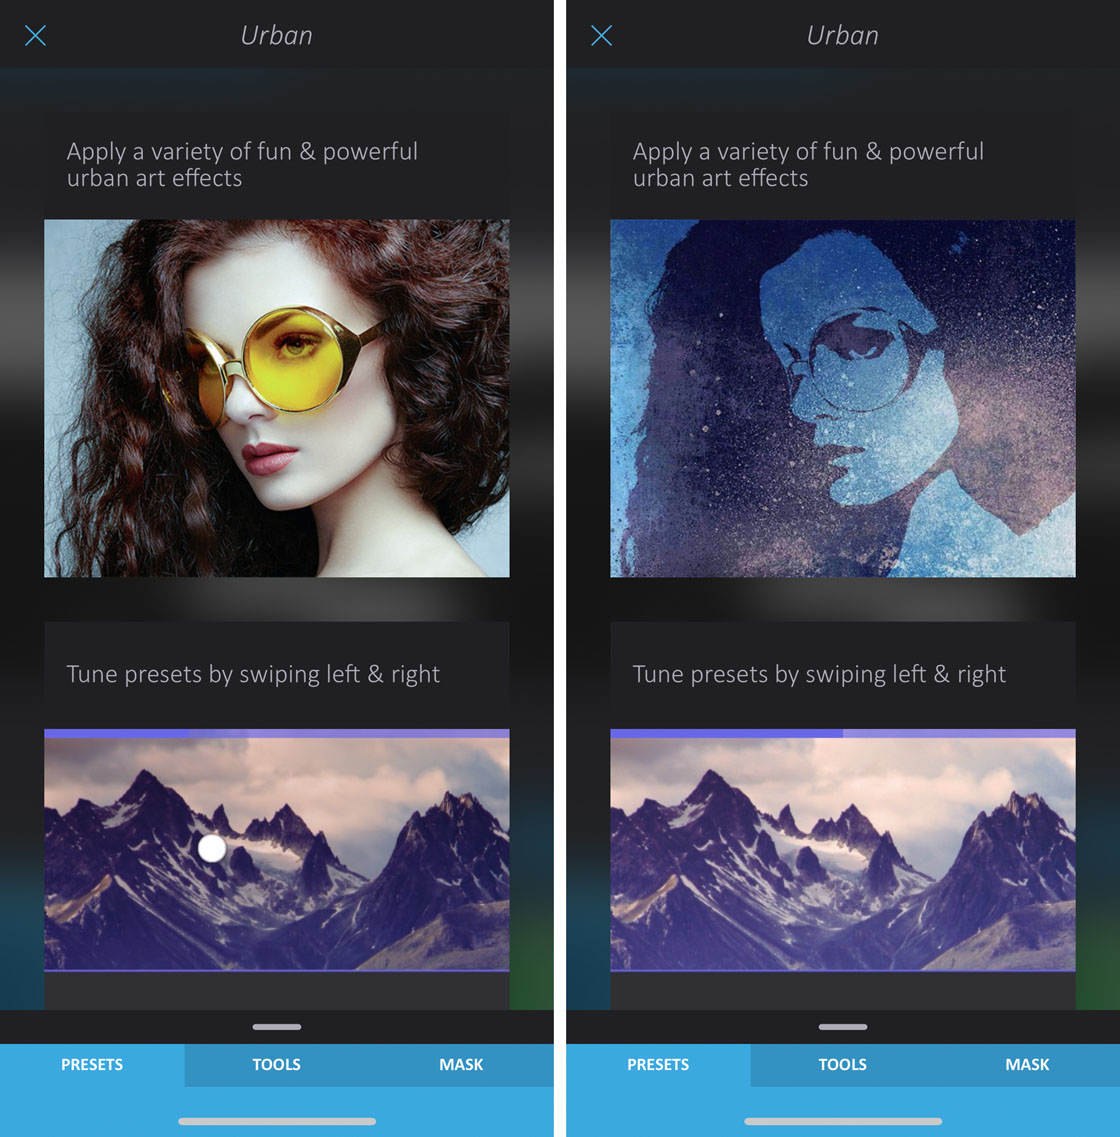
The Urban tool has a selection of urban-style art effects, from grungy textures to graffiti-like art.
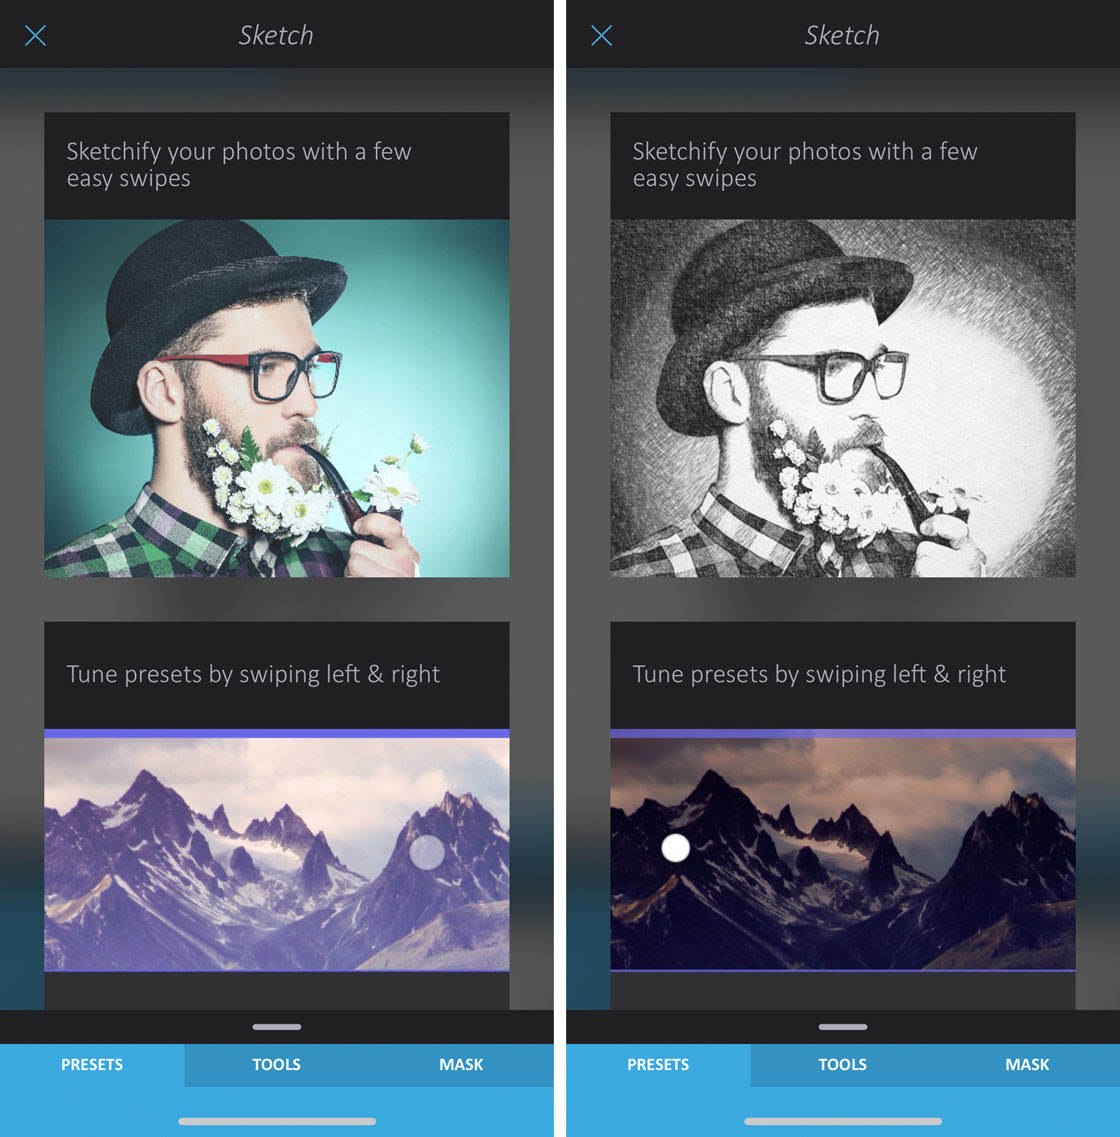
The Sketch option turns your photo into a drawing. There are different styles of pencil and crayon sketch effects to choose from.
6.2 Elements Tool
The Elements tool adds shapes and graphical elements to your photos. This is a fun way to add extra visual elements to your images.
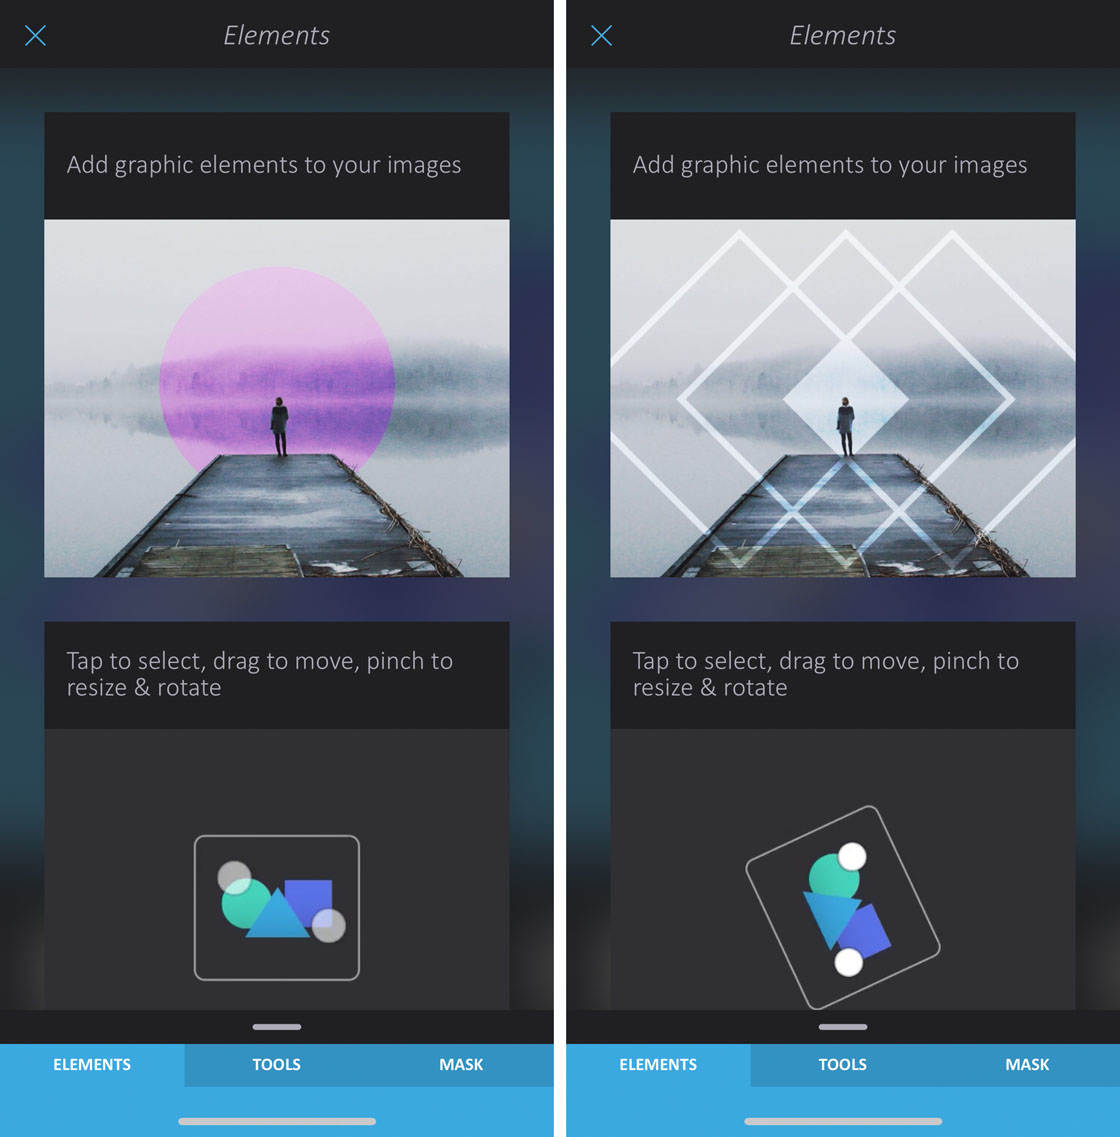
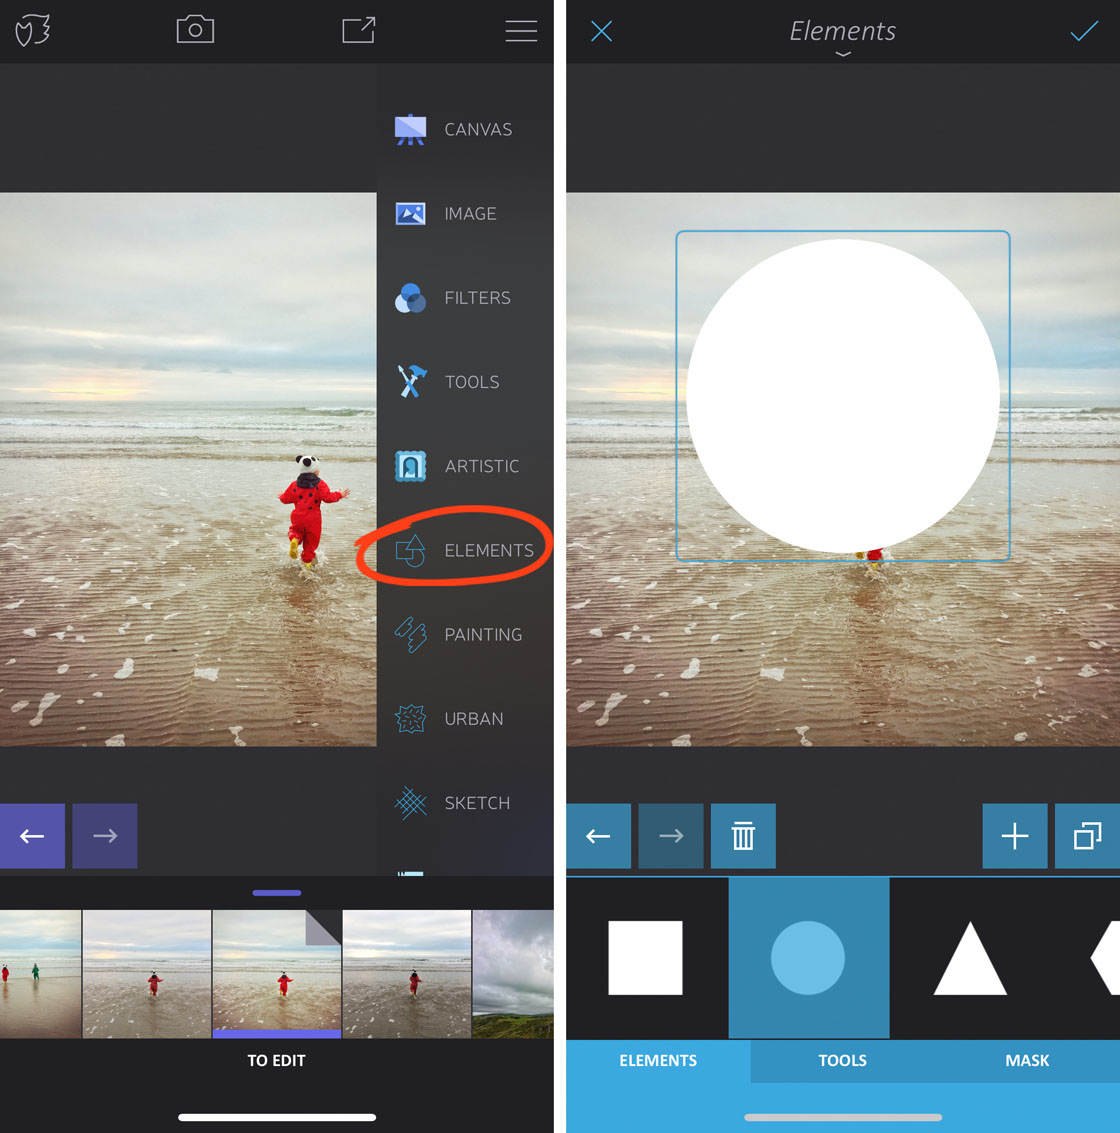
Go to Artistic > Elements. Select an element shape from the options beneath your image. Drag to move the element, and pinch to resize it.
To customize the element, tap the Tools tab at the bottom of the screen.
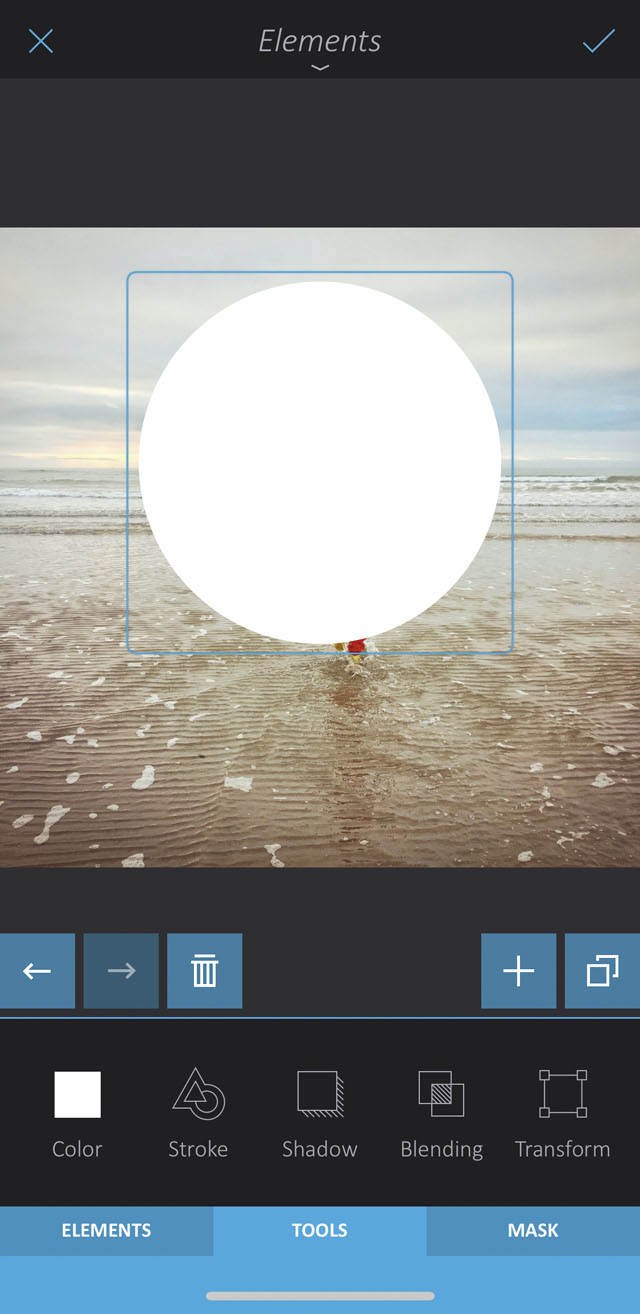
Use the Blending option to change how the element blends with your image. In the example below, the Soft Light blending mode made the element semi-transparent.
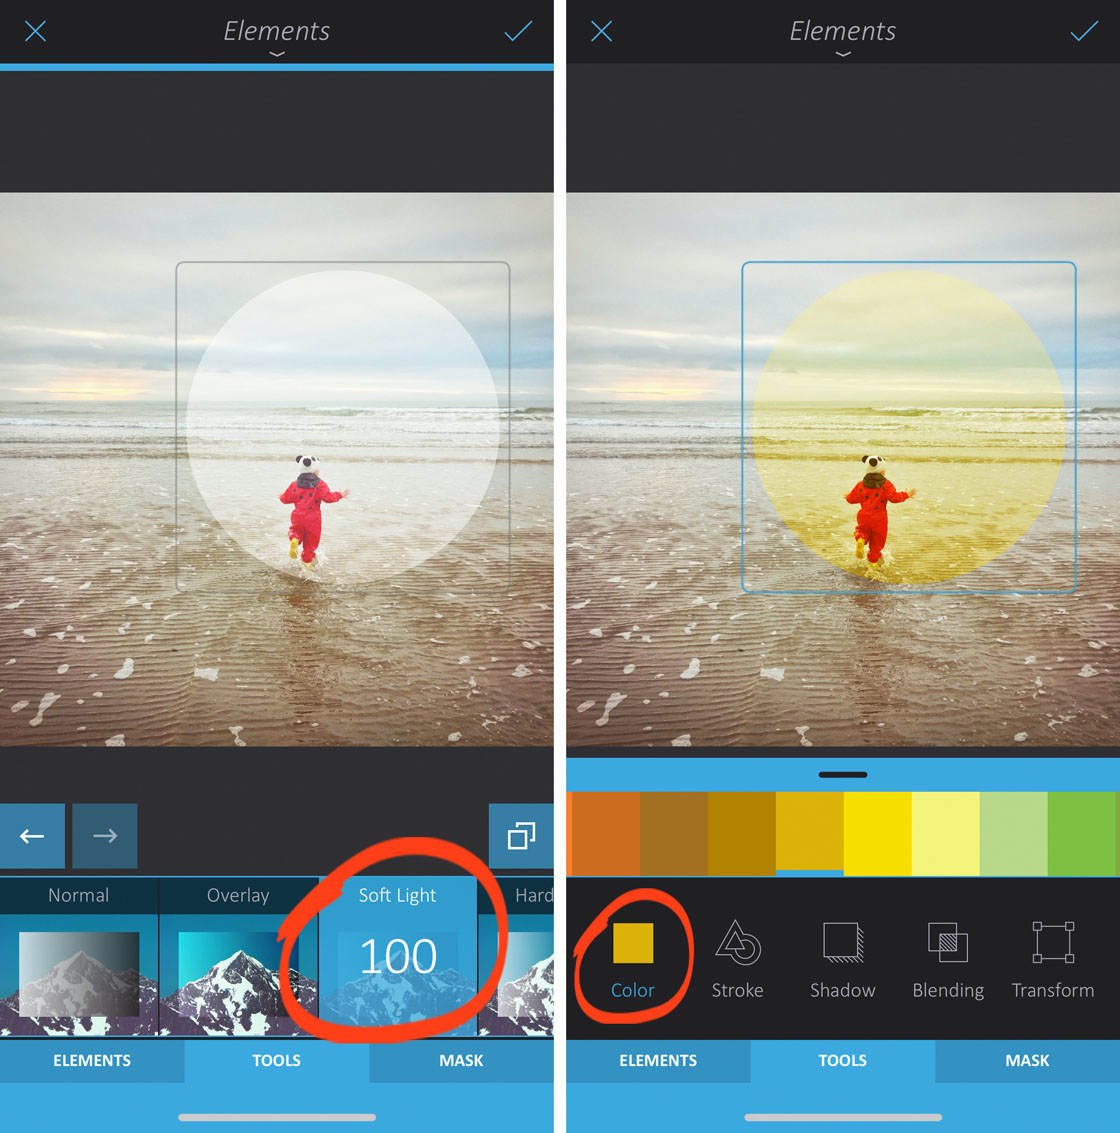
Use the Color option to change the color of the element. You could also try adding a stroke (outline) or shadow to your element.
7. Mask: Apply Your Edits Selectively
Have you noticed the Mask option at the bottom of the screen when you’re using certain tools? This is a powerful feature that lets you selectively apply your edits to certain parts of the image.
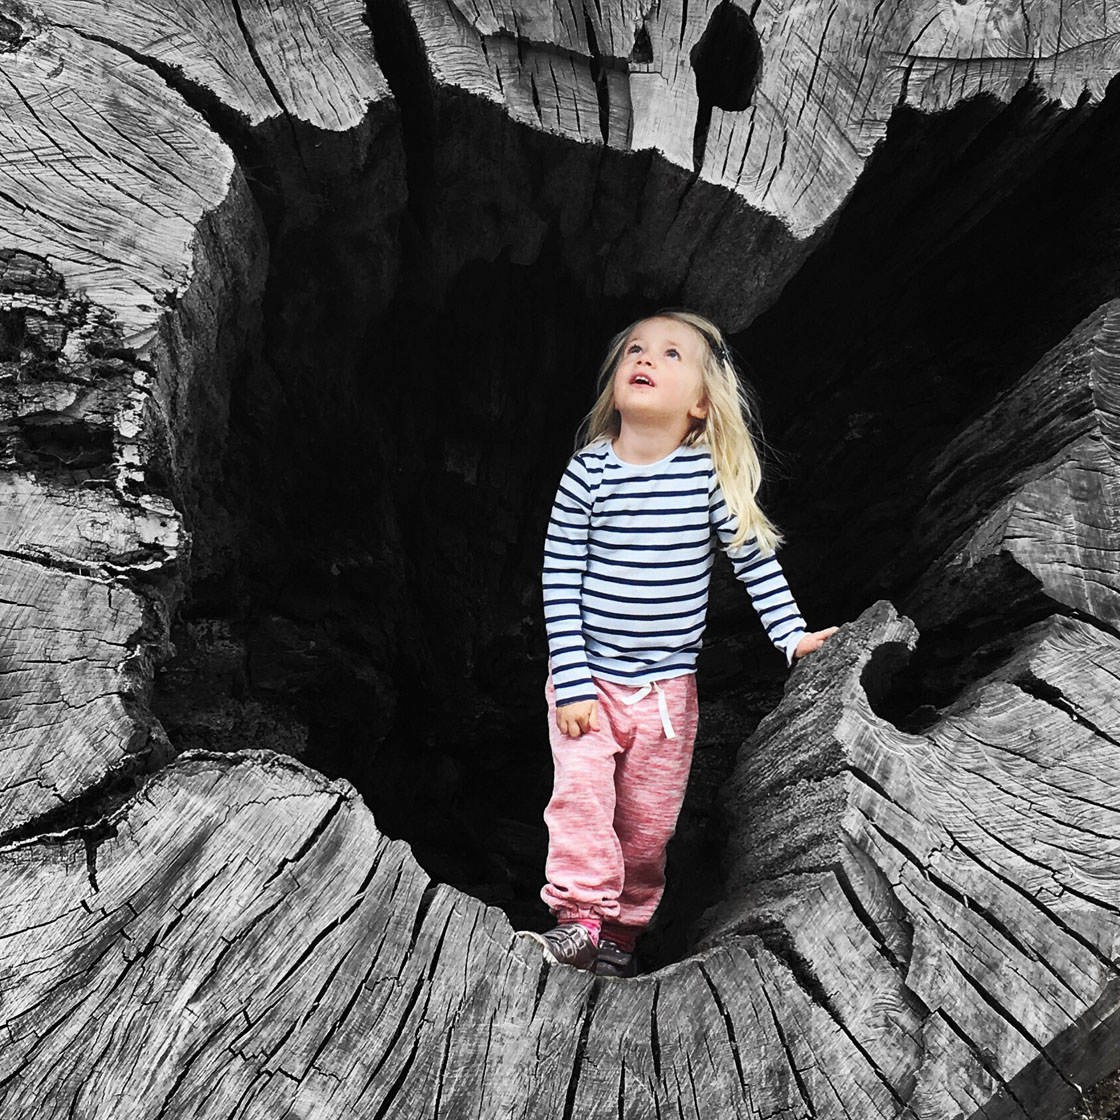
For example, you could apply a black and white filter to certain areas of your photo, leaving the rest in color.
Simply apply the effect you want to use on your photo, then tap Mask at the bottom of the screen.
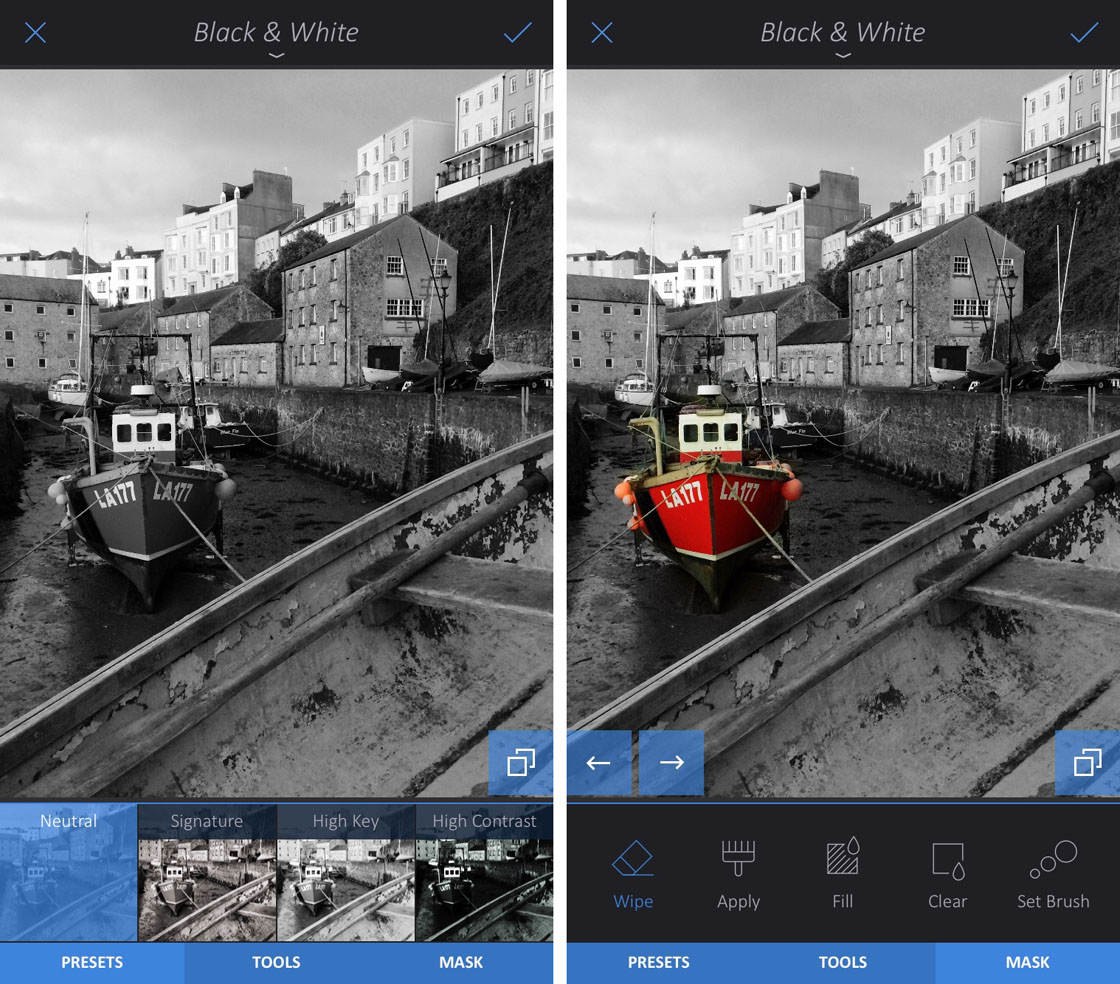
Select the Wipe tool. Now, use your finger to brush over the areas you want to remove the effect from. In the example above, I brushed over the boat to erase the black and white effect from this area.
If you make a mistake, tap Apply, then brush over the area to bring back the effect. You can change the size of the brush by tapping Set Brush.
Watch the video below to learn how to use the Mask tool to apply selective edits to your iPhone photos.
As you grow more comfortable with Enlight, you’ll find the Mask tool to be one of its most powerful features.
8. Brushes: Draw Special Effects On Your Photos
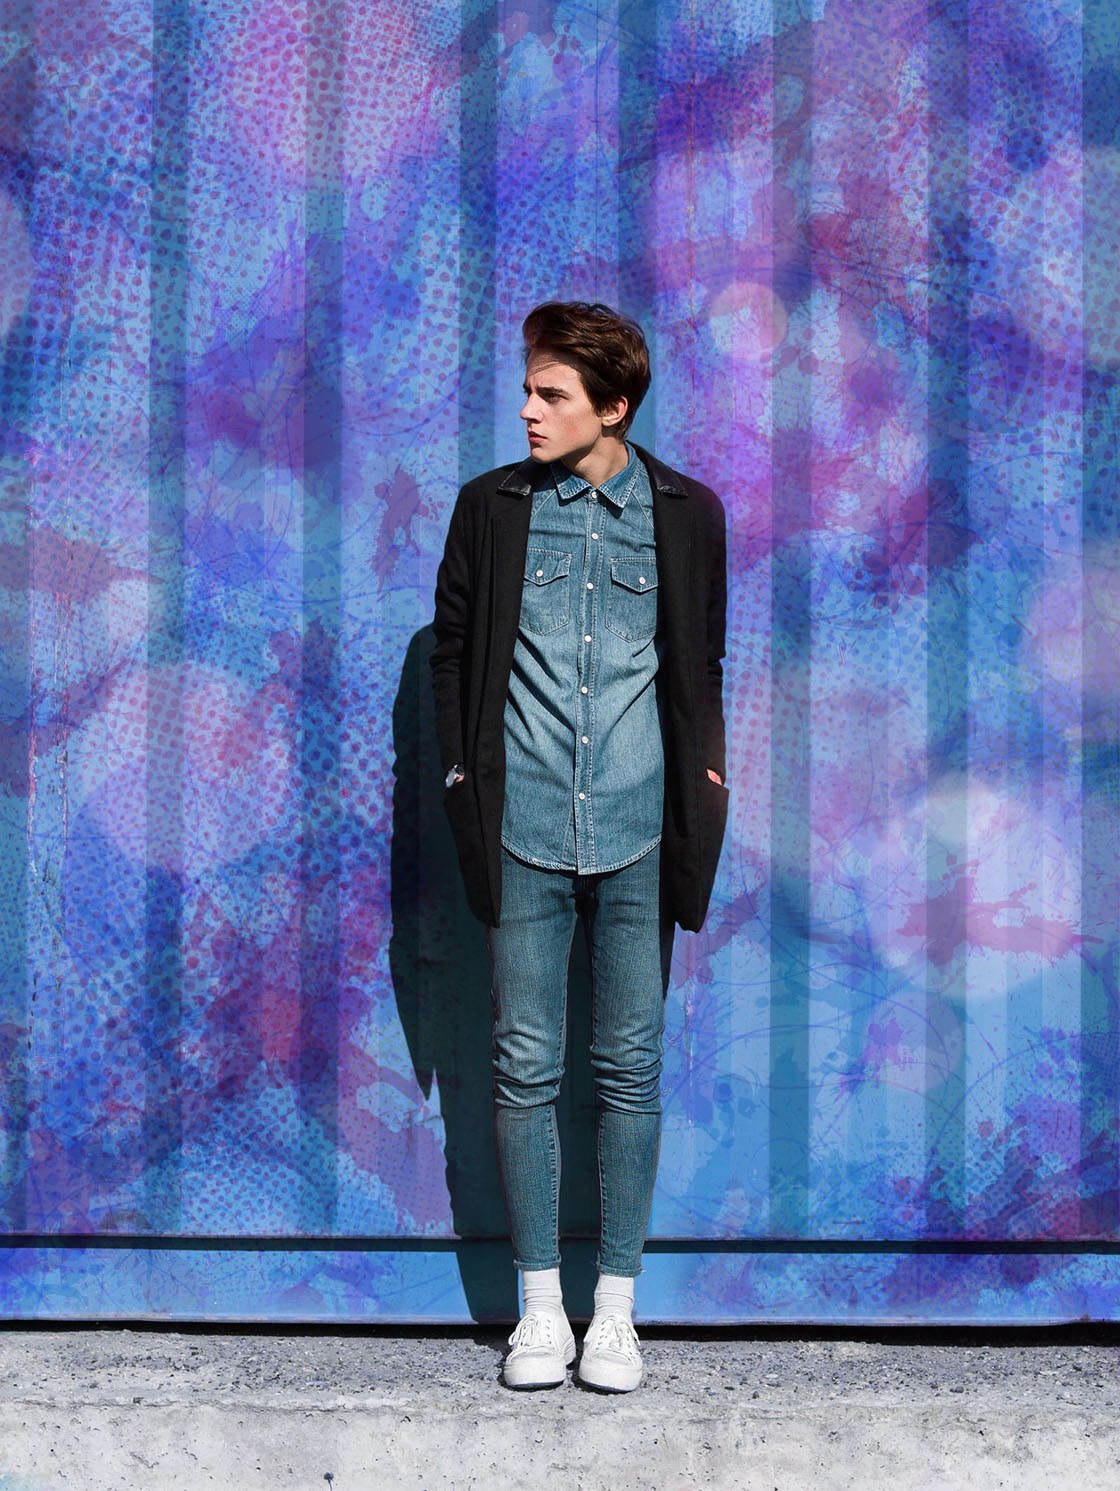
The Brushes tool lets you draw or paint special effects on your photos. In the photo below, the purple paint pattern was applied using this tool.
8.1 Doodle & Effects Tools
Open the tools menu, then tap Brushes to access the following tools: Doodle and Effects.
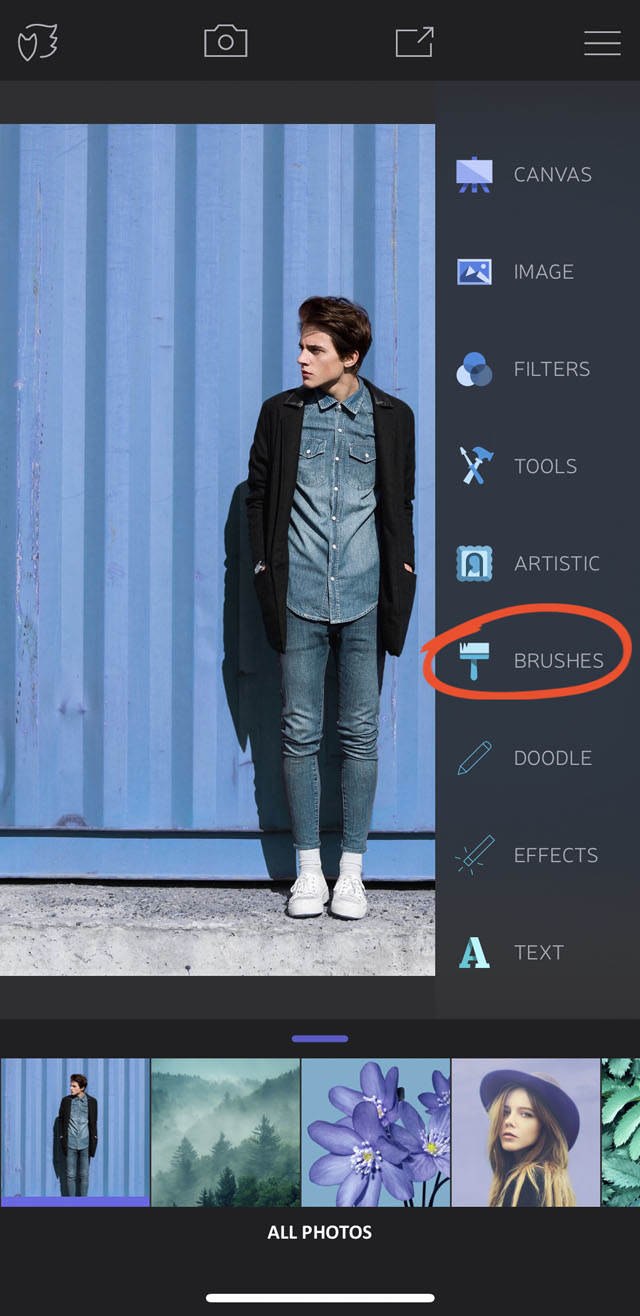
The Doodle tool lets you draw freehand on your photos. The Effects tool has a collection of different graphics that you “brush” onto your photo. These include abstract patterns, bubbles, hearts, snowflakes, leaves, and birds.
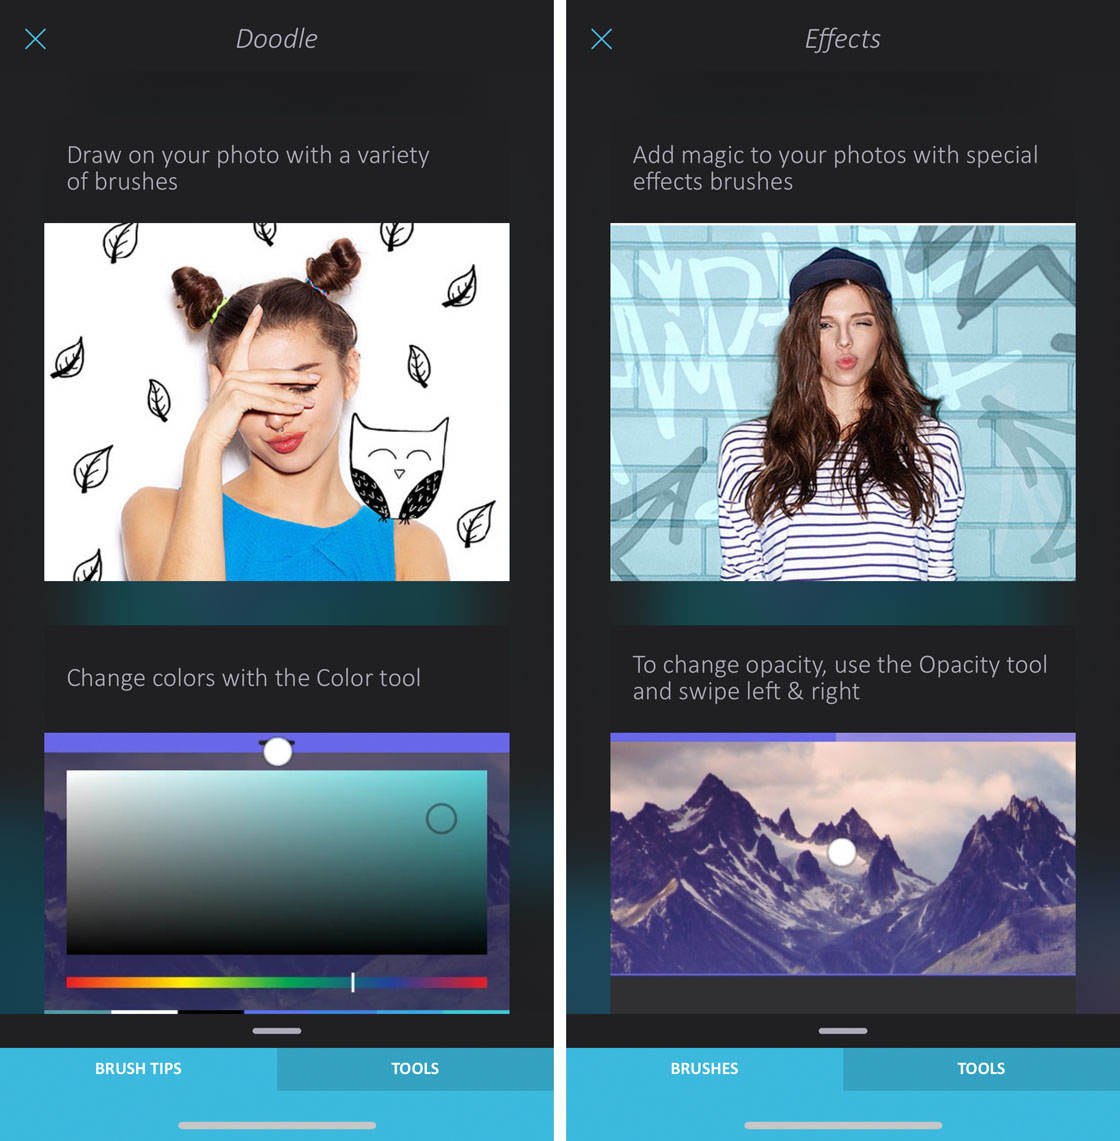
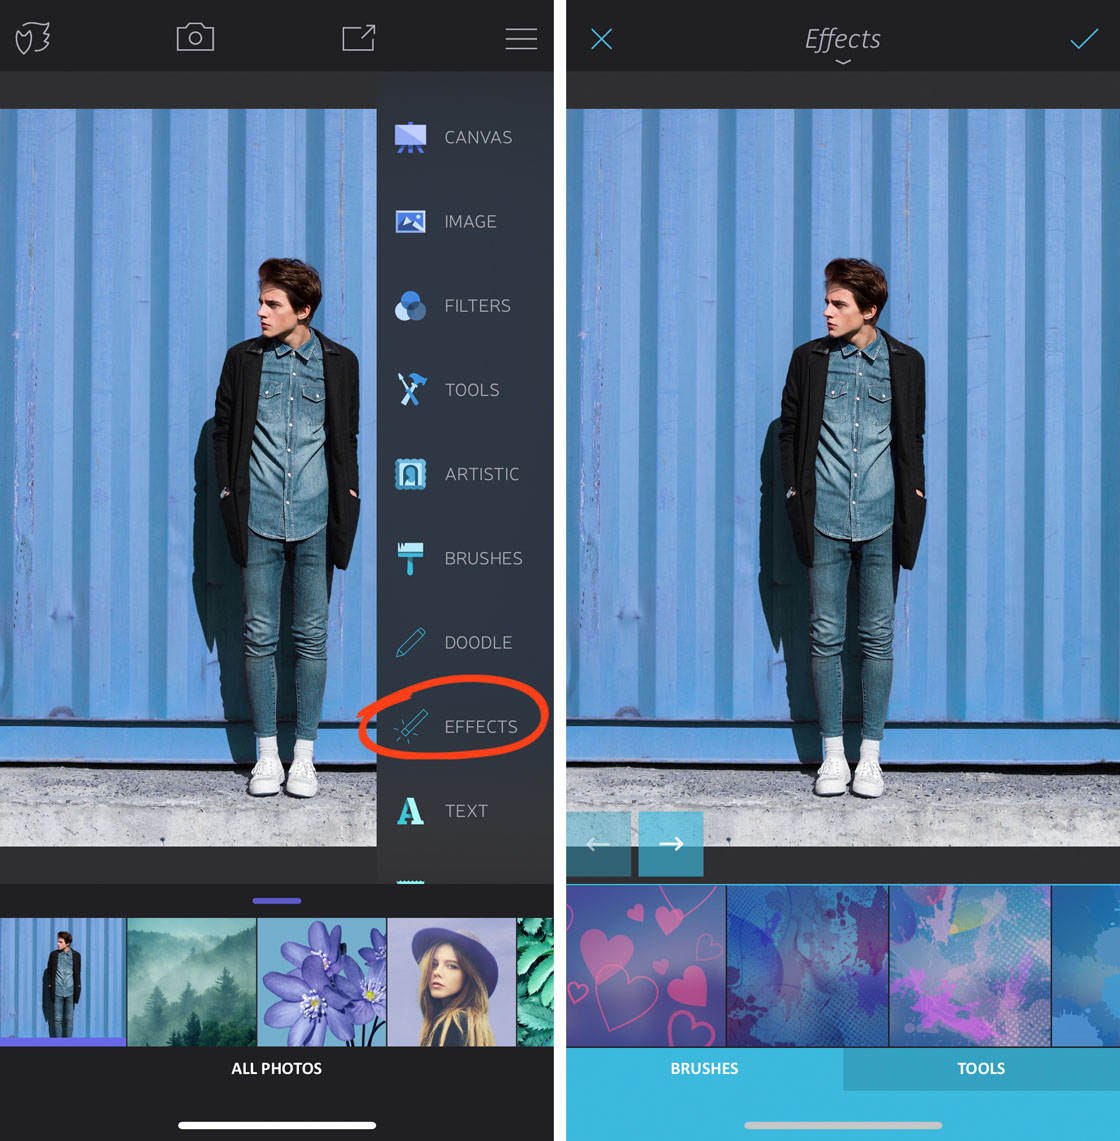
The example below shows you how to apply an abstract paint pattern using the Effects tool. The Doodle tool works in a very similar way.
Go to Brushes > Effects. Select the effect you want to use from the options beneath your photo.
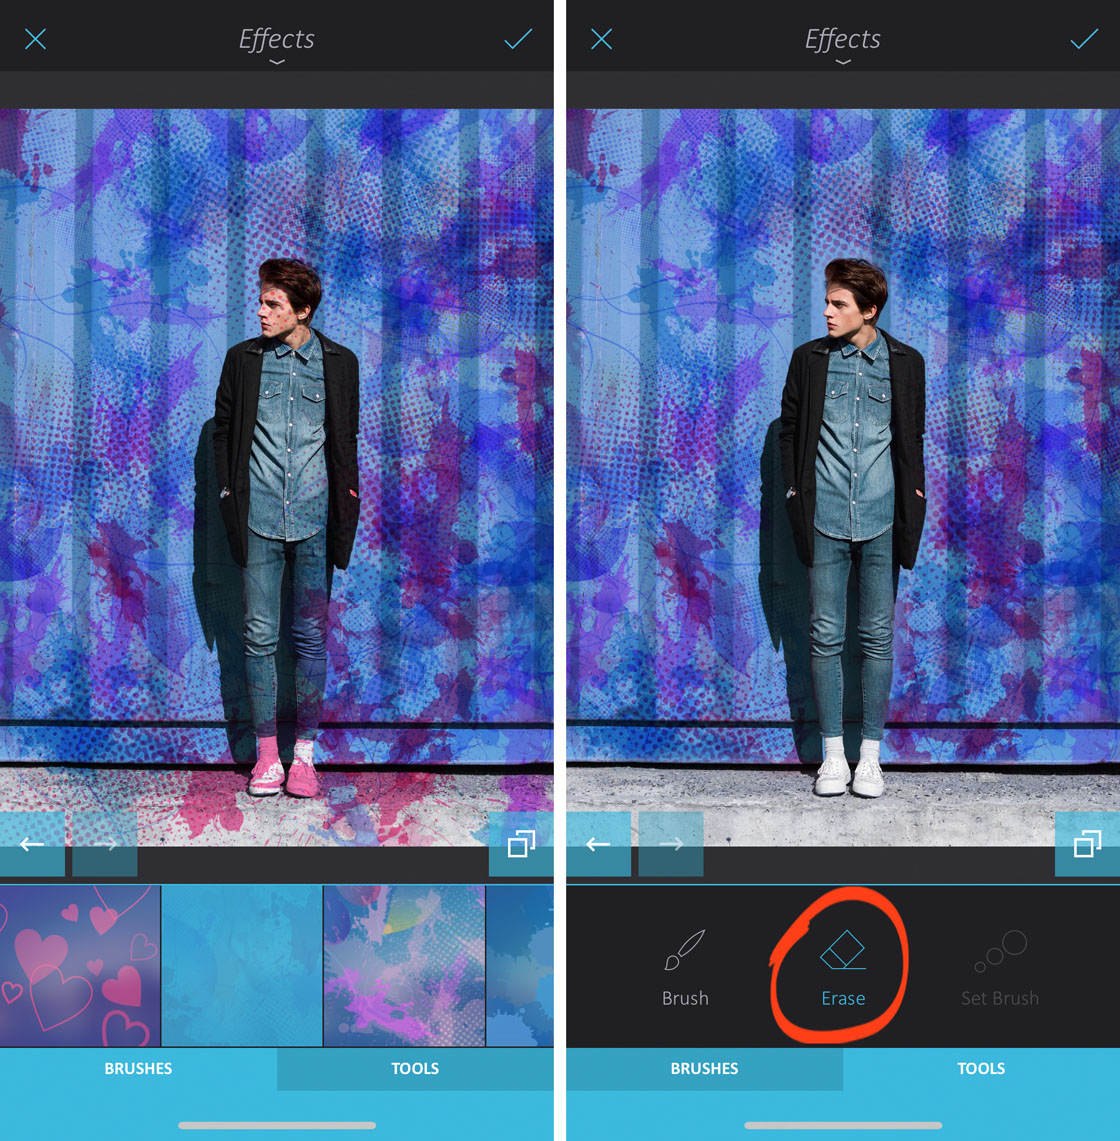
Use your finger to brush over the areas you want to apply the effect to. You can remove the effect from certain areas of your image by going to Tools > Erase. In Erase mode, brush over the areas you want to remove the effect from.
9. Text: Add Text & Captions To Your Images
Do you like to add text or captions to your photos? Enlight’s Text tool offers a range of options for this purpose.

Open the tools menu, then tap Text. There are three text tools: Type, Decals, and Meme.
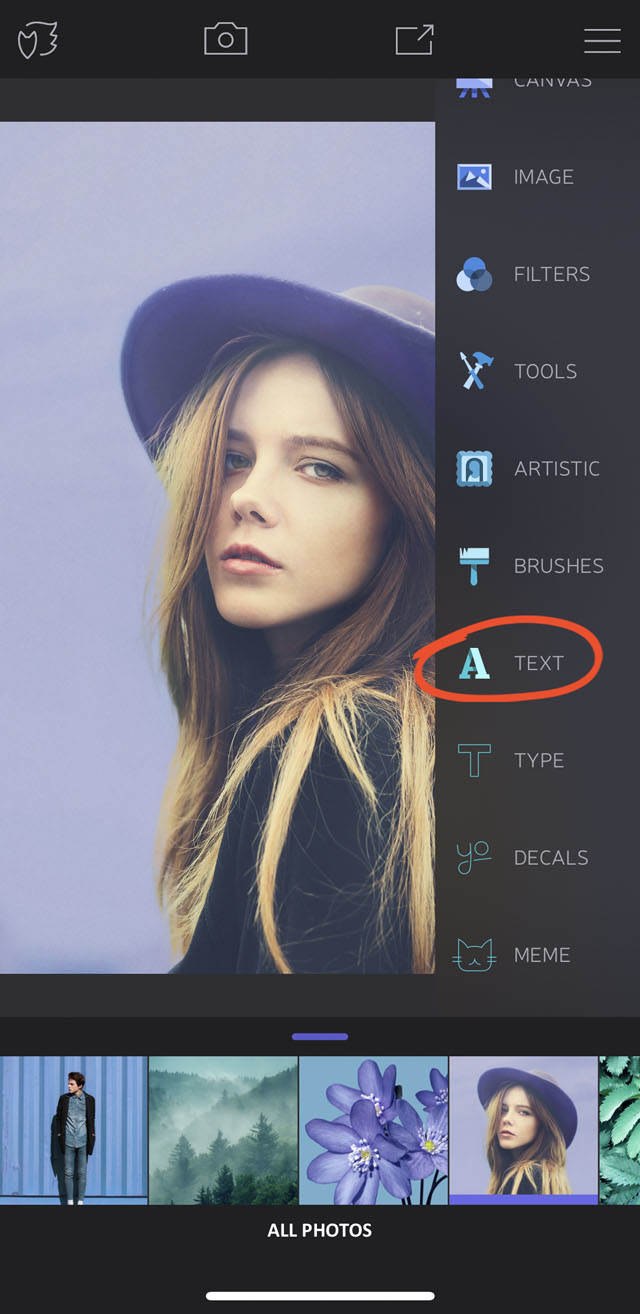
9.1 Type Tool
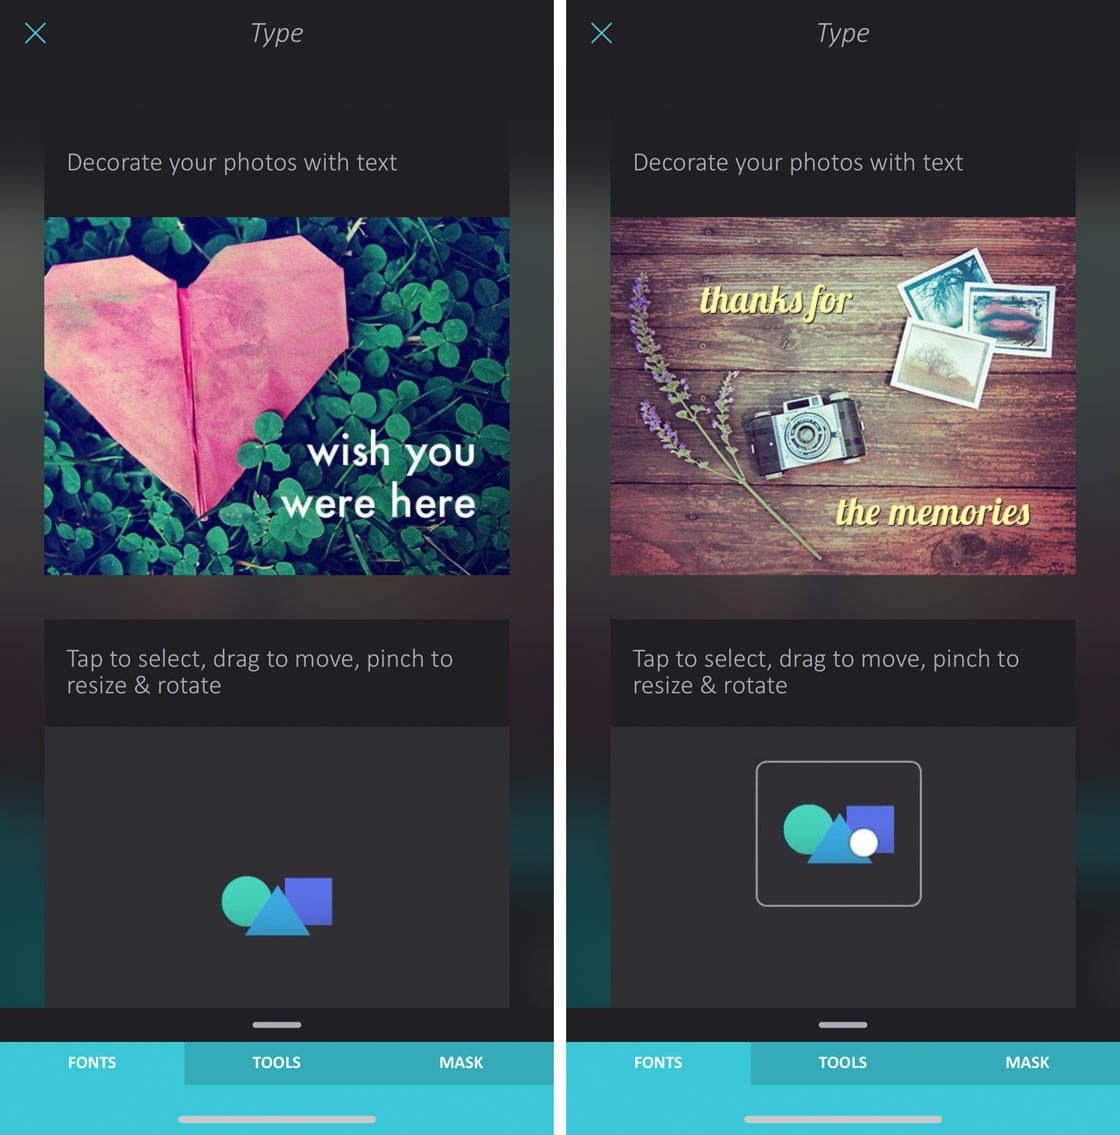
The Type tool offers full control over the wording and style of your text.
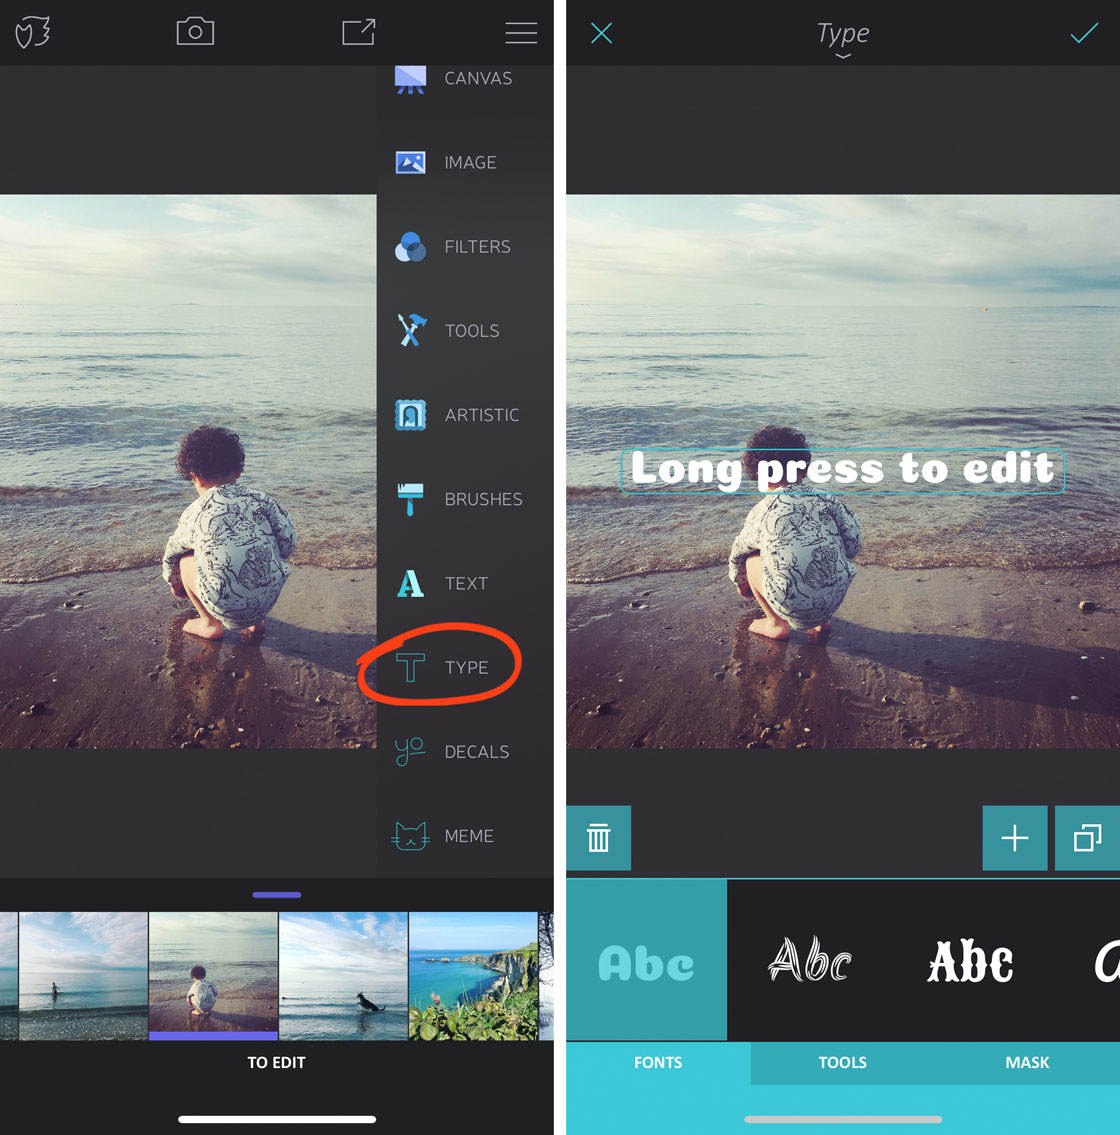
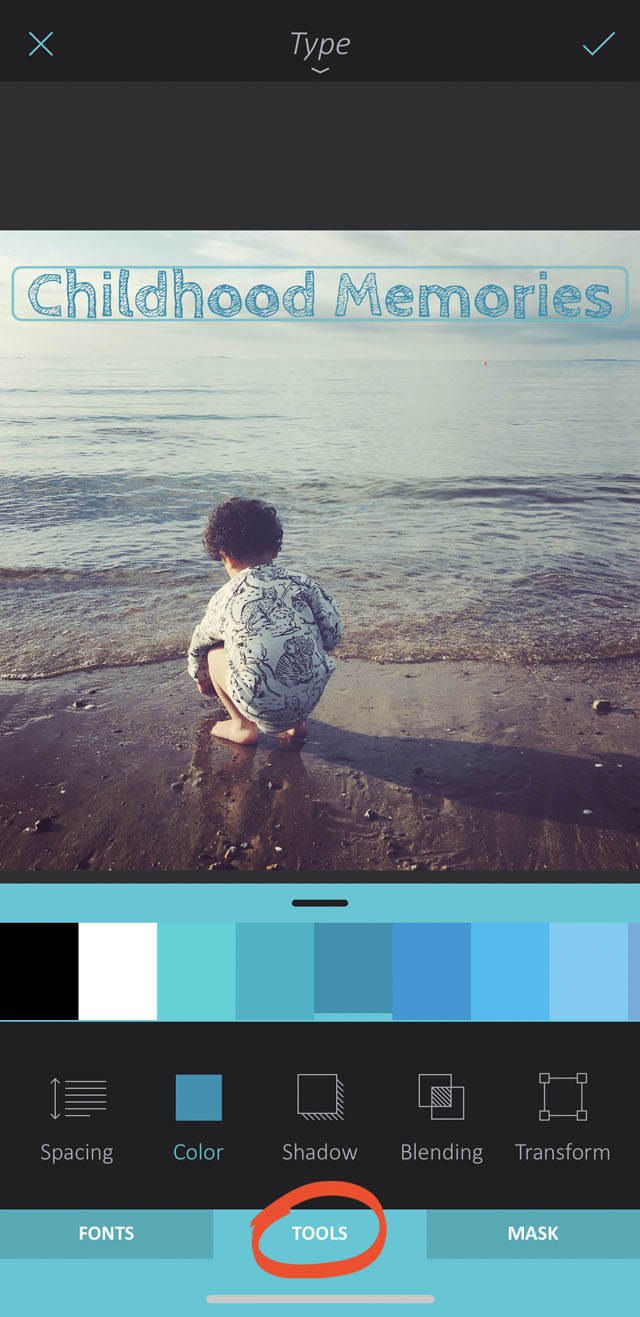
To add text to your photo, go to Text > Type. Tap and hold on the text that says Long press to edit.
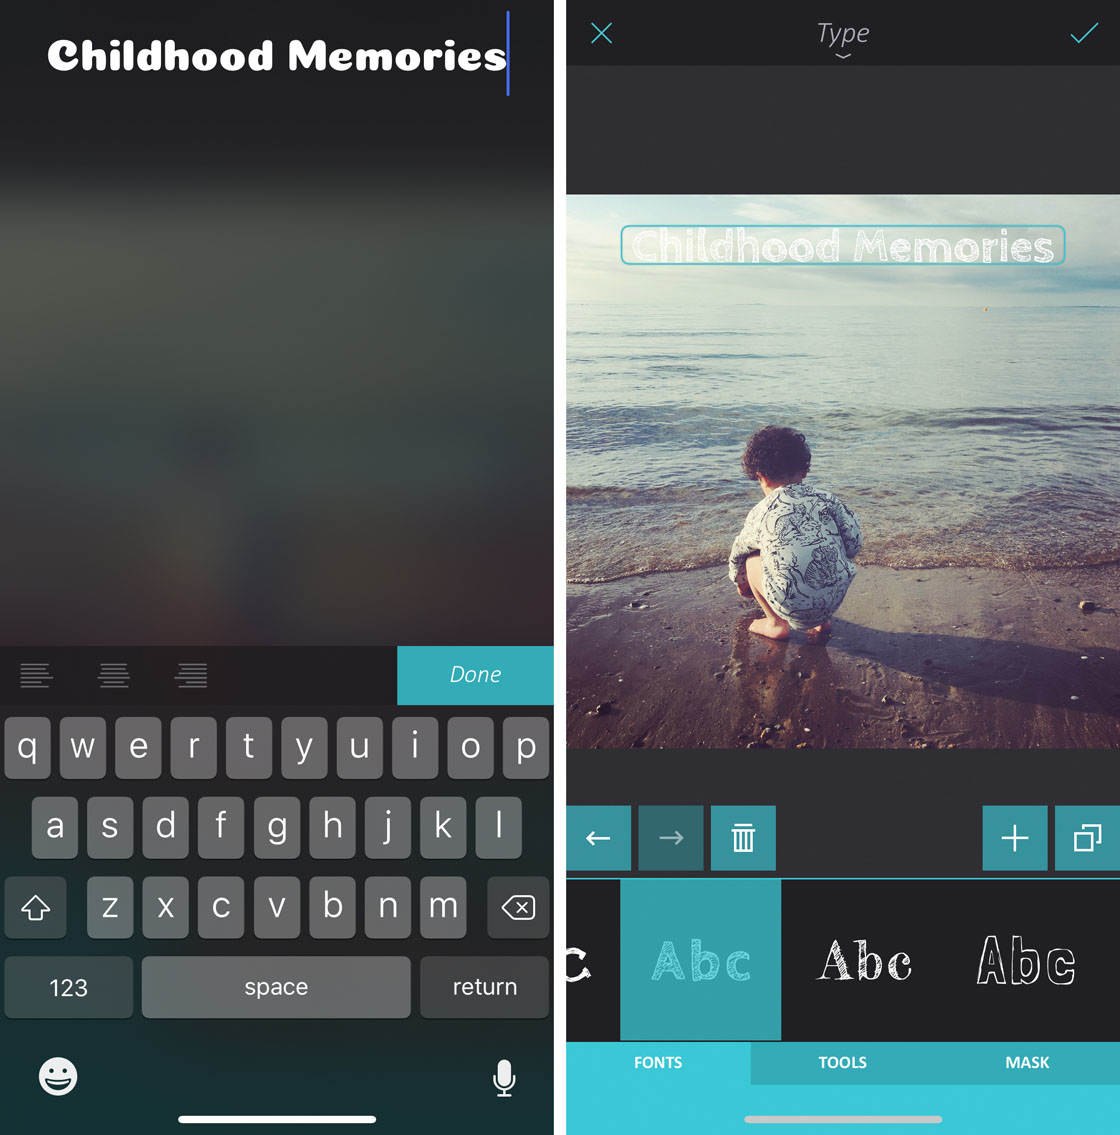
Type your text, then tap Done. Choose a font style from the options beneath your image. You can drag the text to a different position, and pinch to resize it.
Tap the Tools tab at the bottom of the screen to further customize the text. Try changing the text color, adding a shadow, or using a blending mode to blend the text and the photo.
9.2 Decals Tool
If you’d prefer your text to be more stylized, the Decals tool is a great option. It has a range of pre-formatted text with a variety of common phrases.
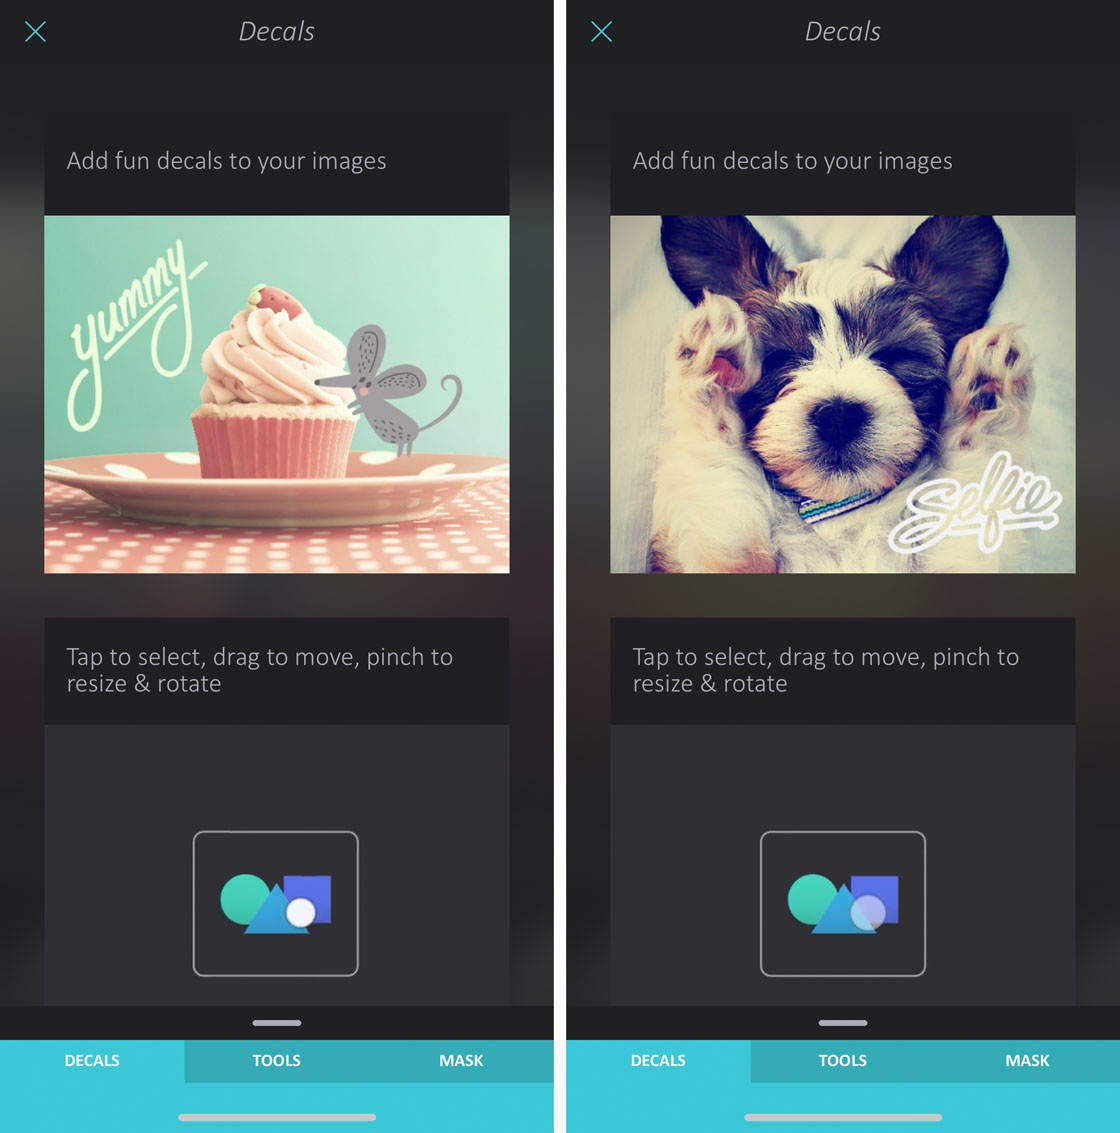
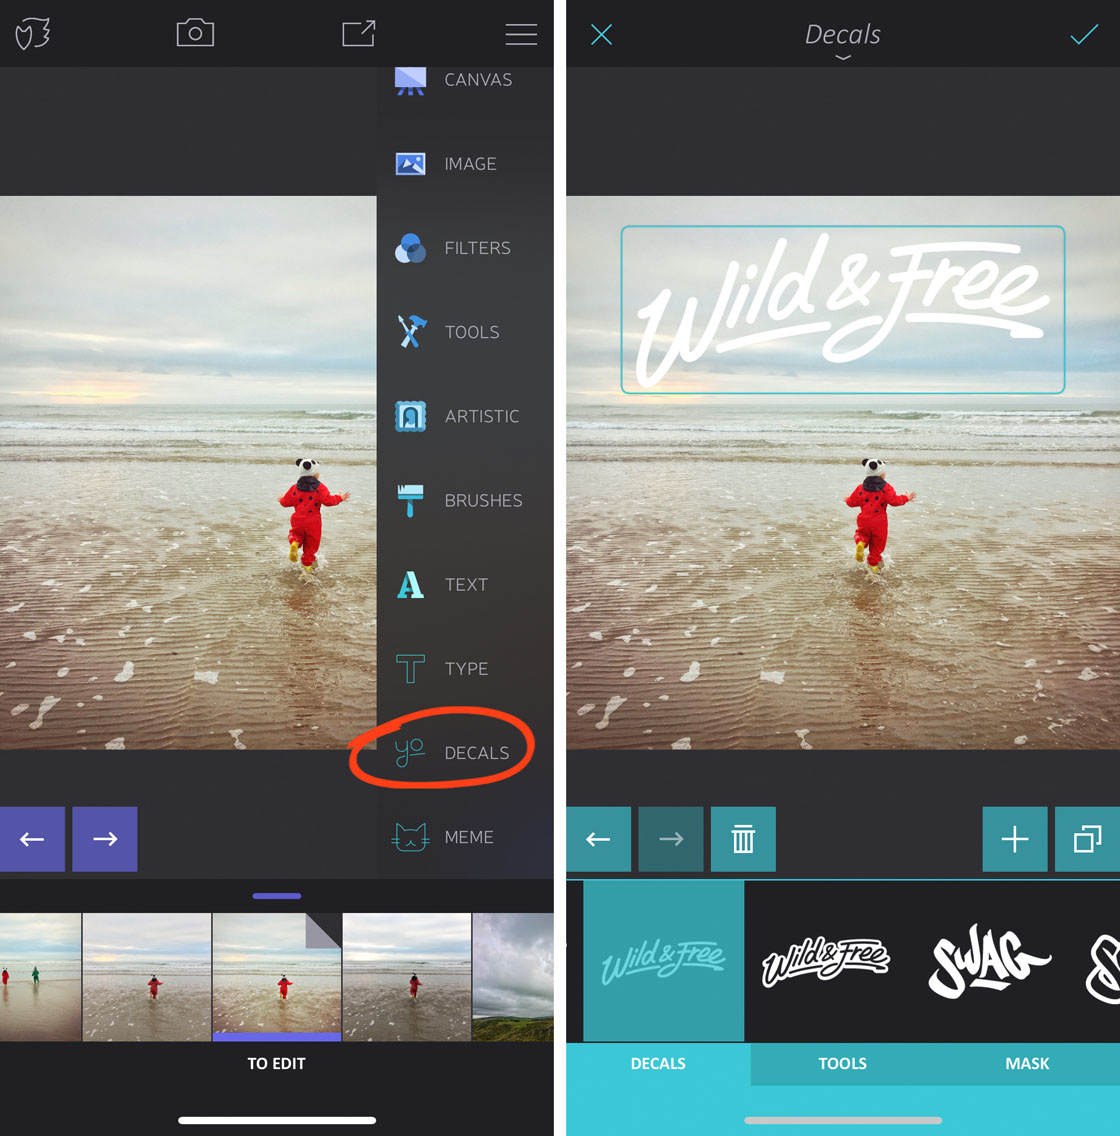
To use the Decals tool, go to Text > Decals. Select a decal text template from the options beneath your image. Drag or pinch to move or resize the decal.
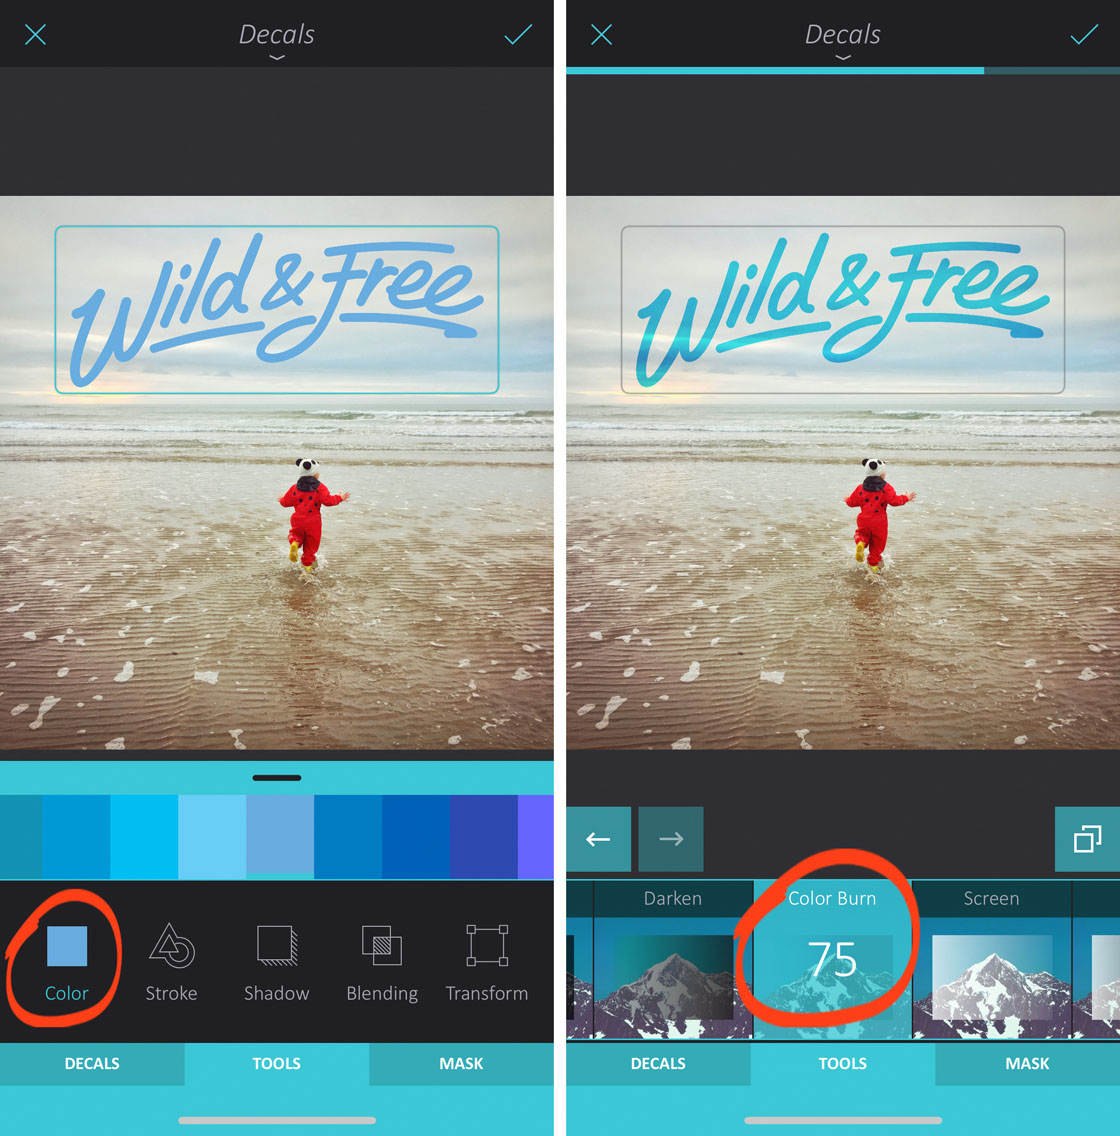
To customize the decal, tap the Tools tab at the bottom of the screen. Here you can change the color of the text, and add a stroke (outline) or shadow.
And you can also try out different blending options to blend the text with your image. In the example on the right below, the Color Burn blending mode was selected.
9.3 Meme Tool
The Meme tool in Enlight lets you create your own memes with the white blocky text that you see on social media. This can be a fun way to share an image with a humorous caption.
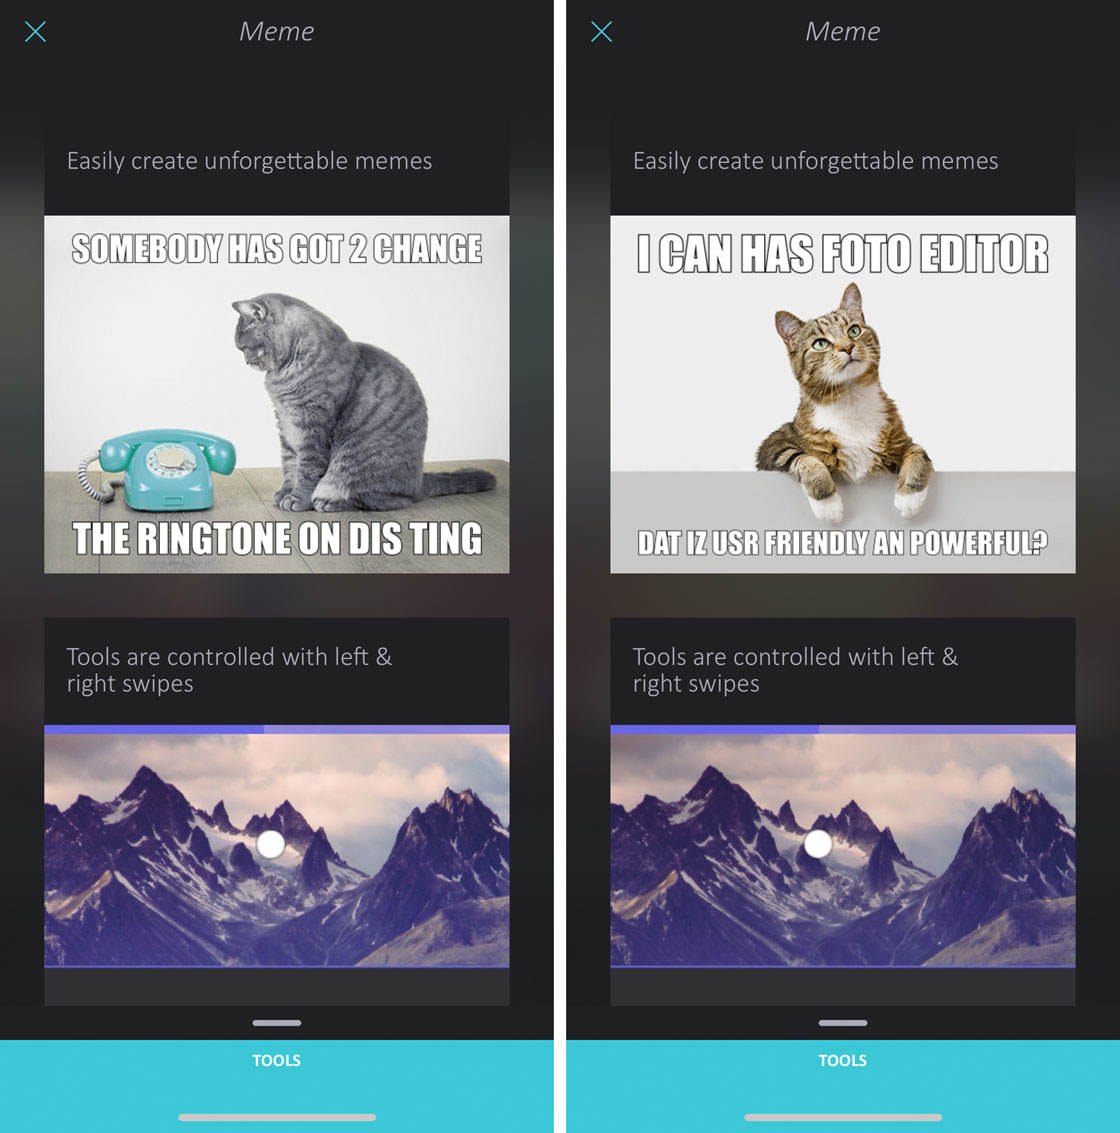
To create your own meme, go to Text > Meme. Tap the Top Text or Bottom Text icon, then use the keyboard to type your own text.
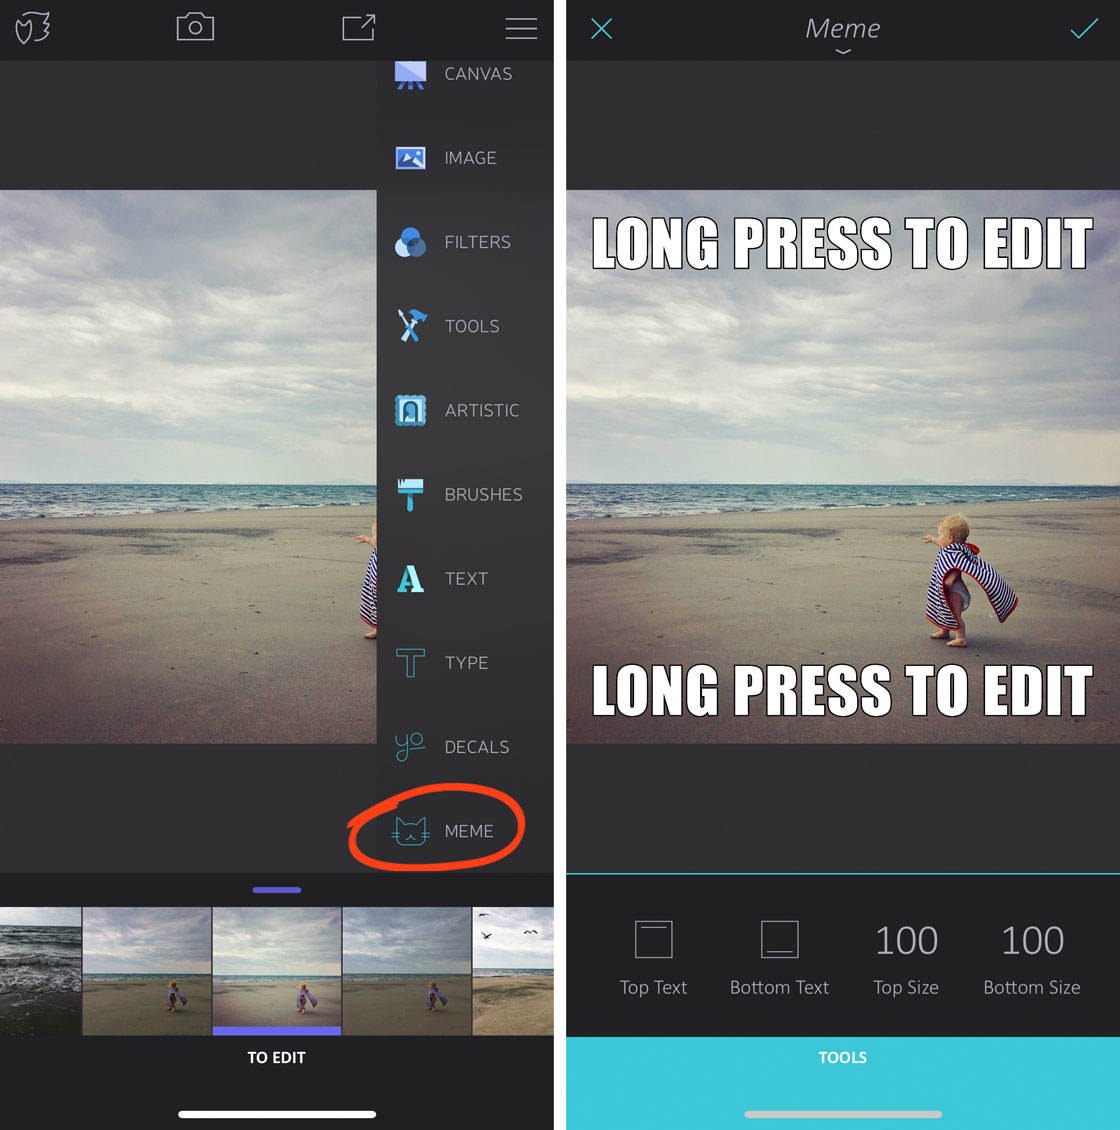
The only customizing you can do with a meme is to change the size of the top and bottom text. Tap either the Top Size or Bottom Size icon, then swipe left or right over your photo.
10. Finalize: Add Borders Or Create A Collage
The last tool in the Enlight menu is Finalize. This tool has options for adding borders and creating photo collages.
Open the tools menu, then tap Finalize. There are four tools to choose from: Border, Frame, Instafit, and Collage.
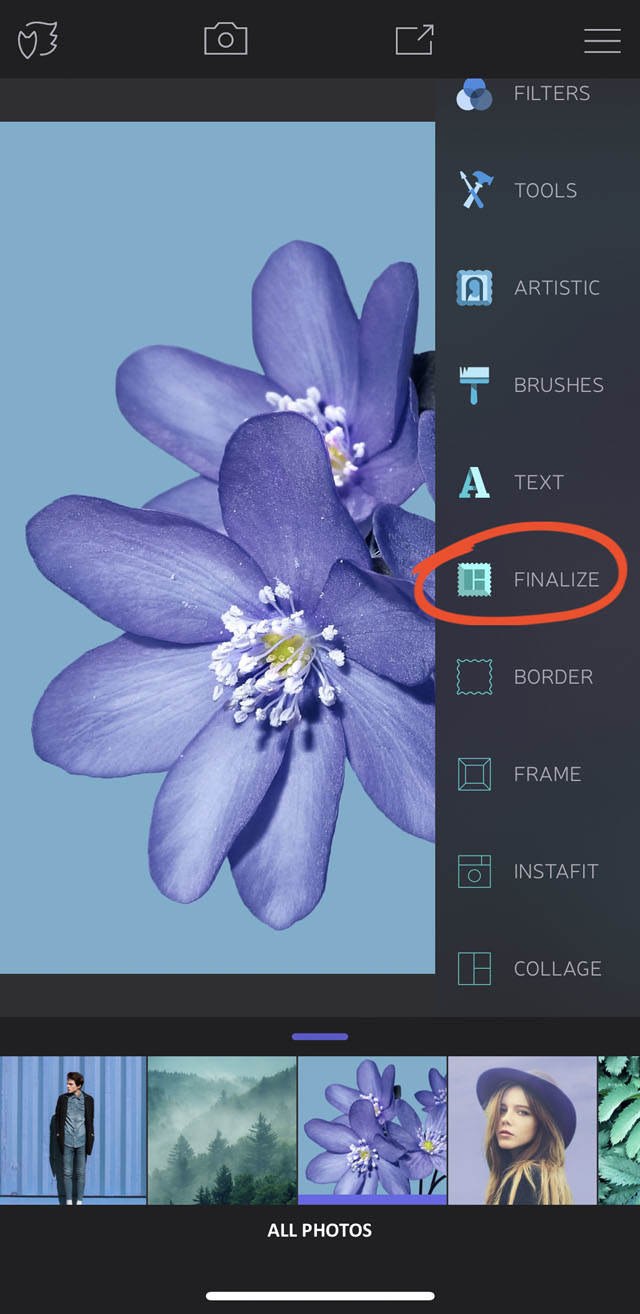
10.1 Border & Frame Tools
The Border and Frame tools allow you to apply a plain or decorative border to your photos.
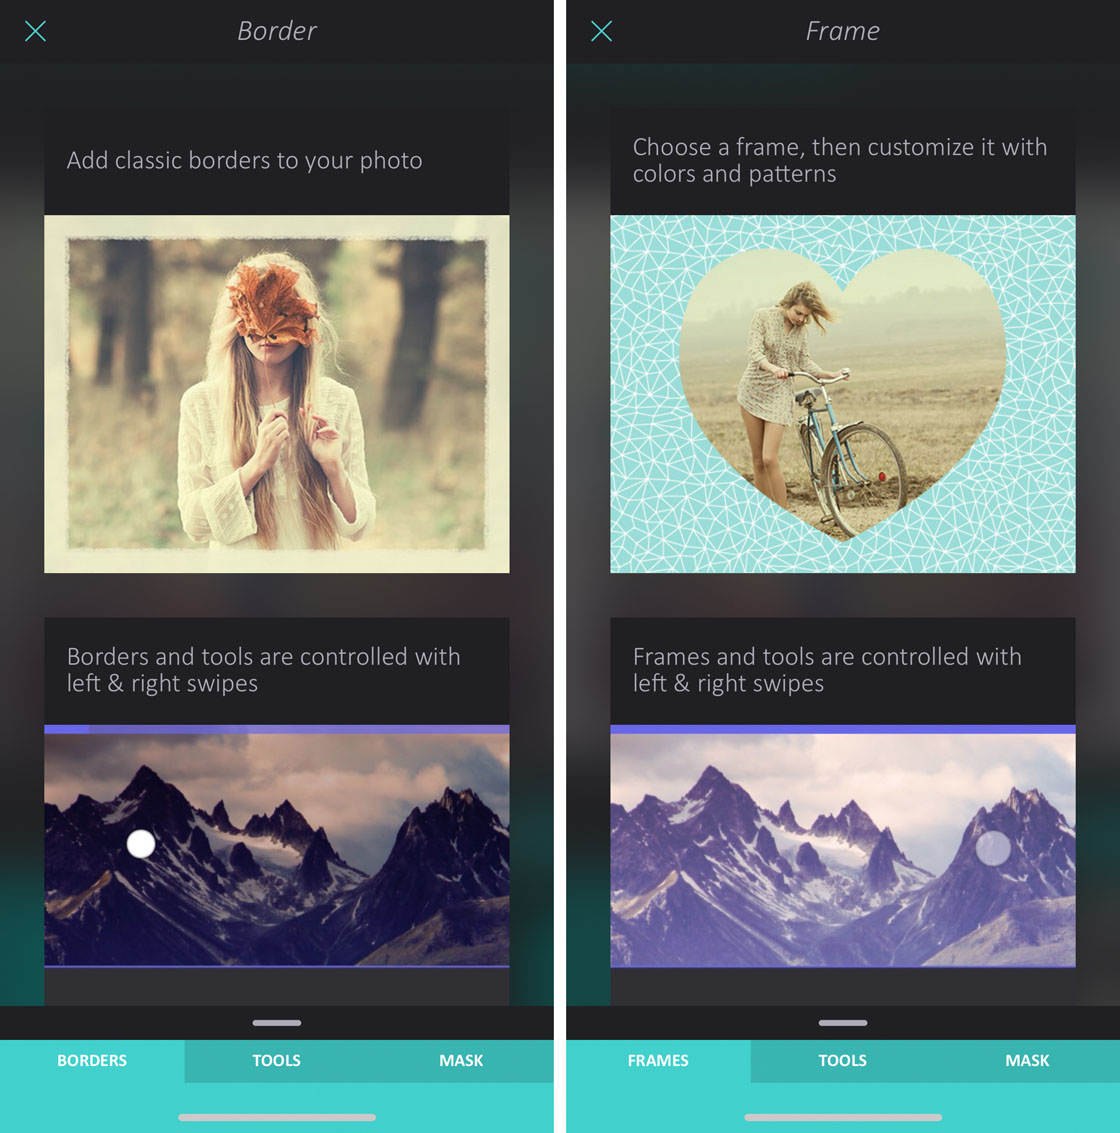
Both of these tools work in a very similar way. The example below shows you how to use the Frame tool.
Go to Finalize > Frame. Select a frame from the options beneath your image.
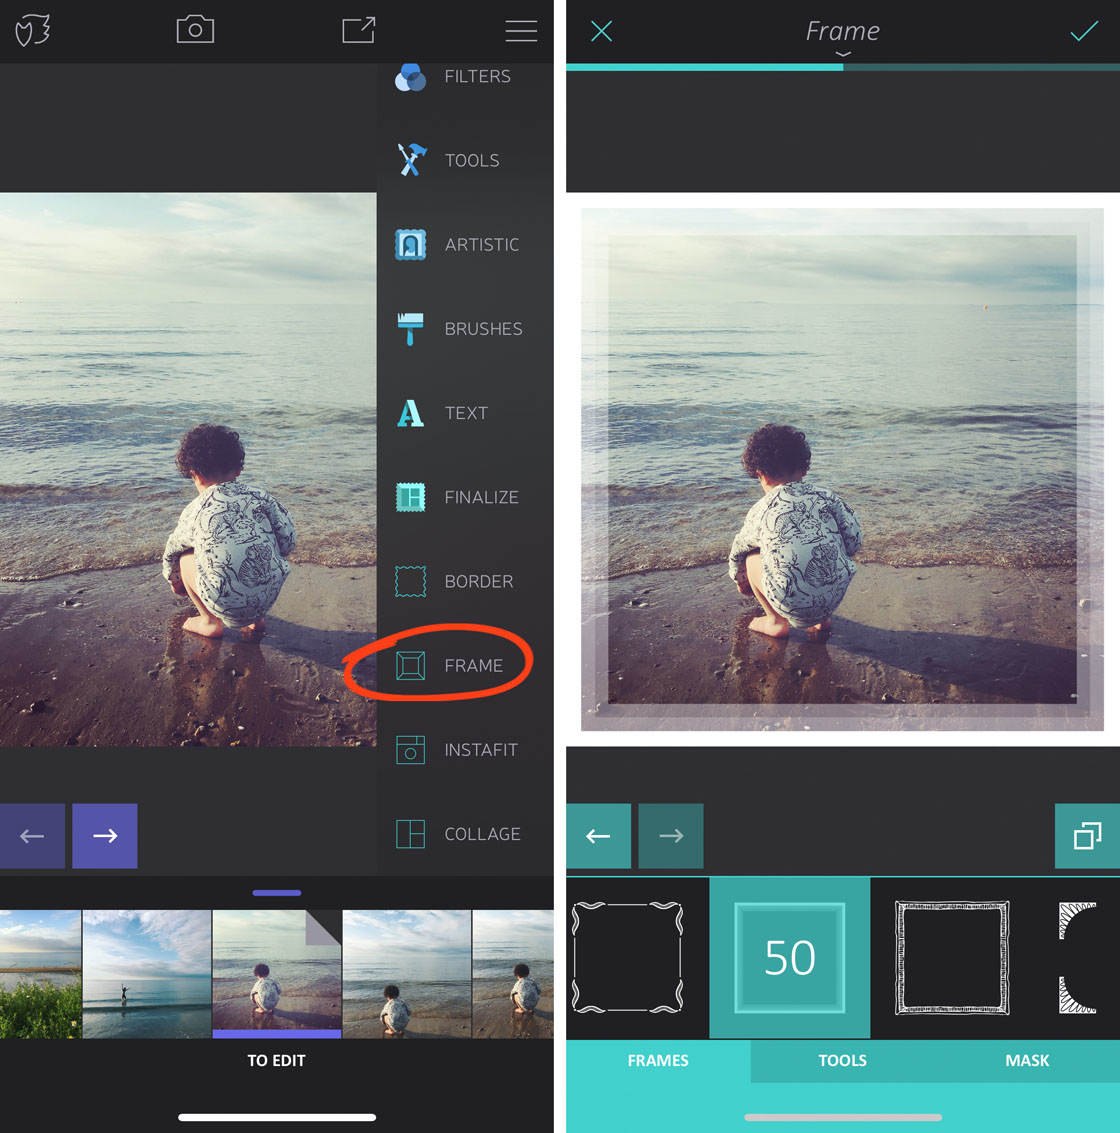
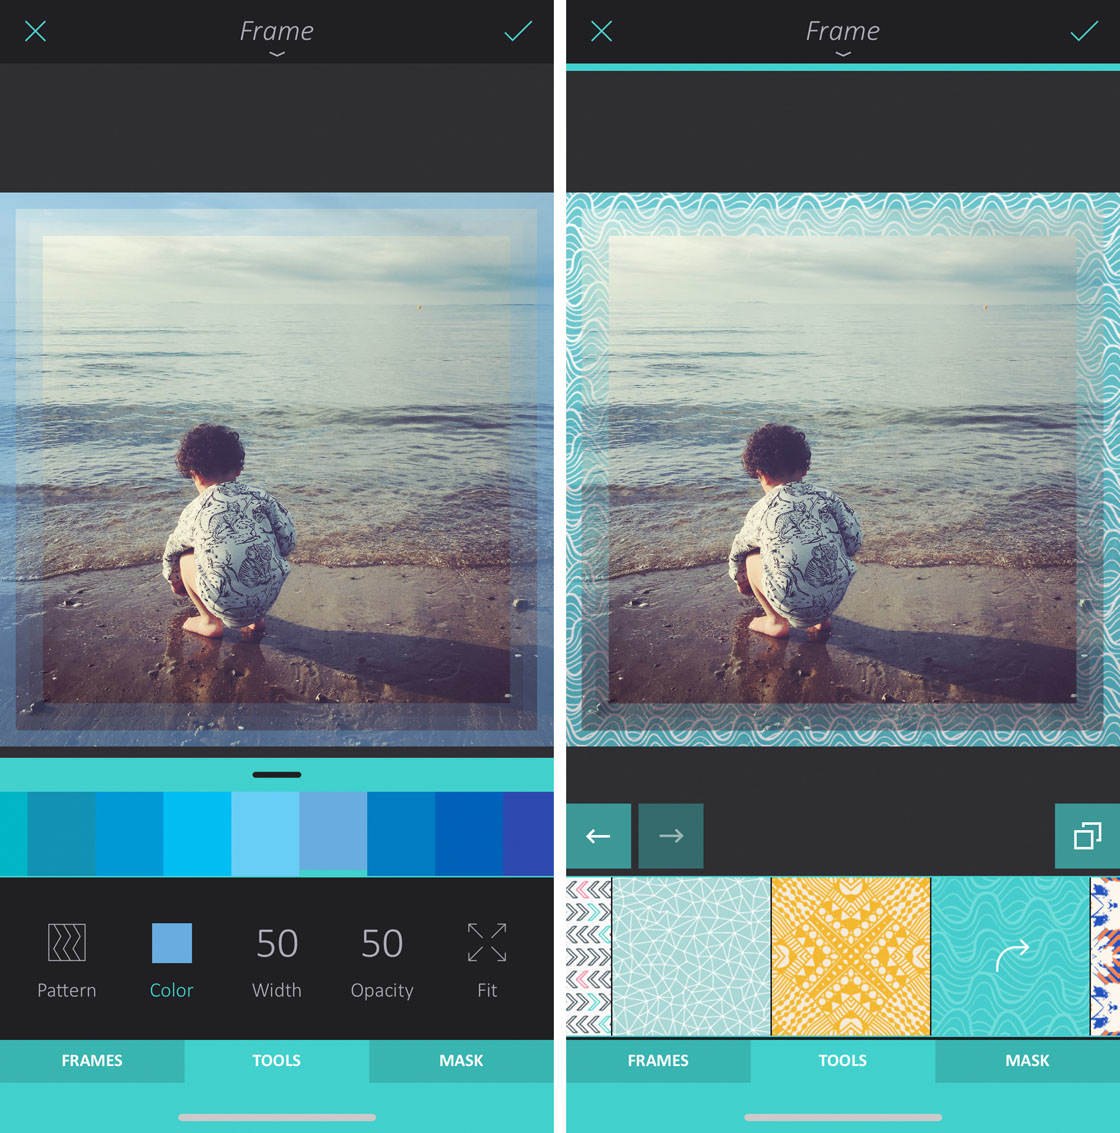
To customize the frame, tap the Tools tab at the bottom of the screen. Here you can change the color, width, and opacity of the frame. You can also add a pattern to your frame.
10.2 Instafit Tool
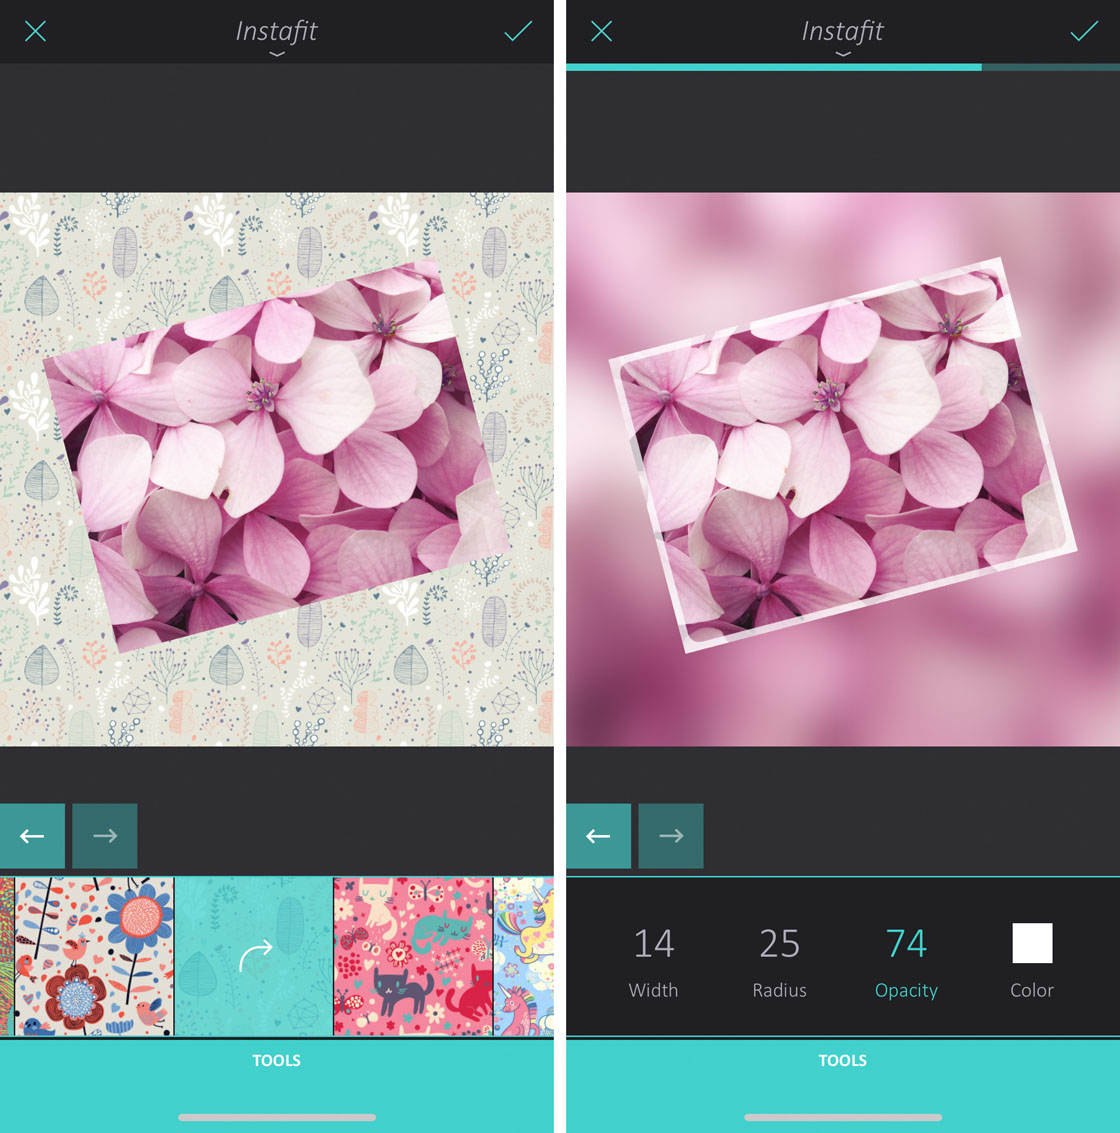
The Instafit tool lets you position your photo on different backgrounds. The background can be a solid color, a pattern, or a blurred version of your photo.
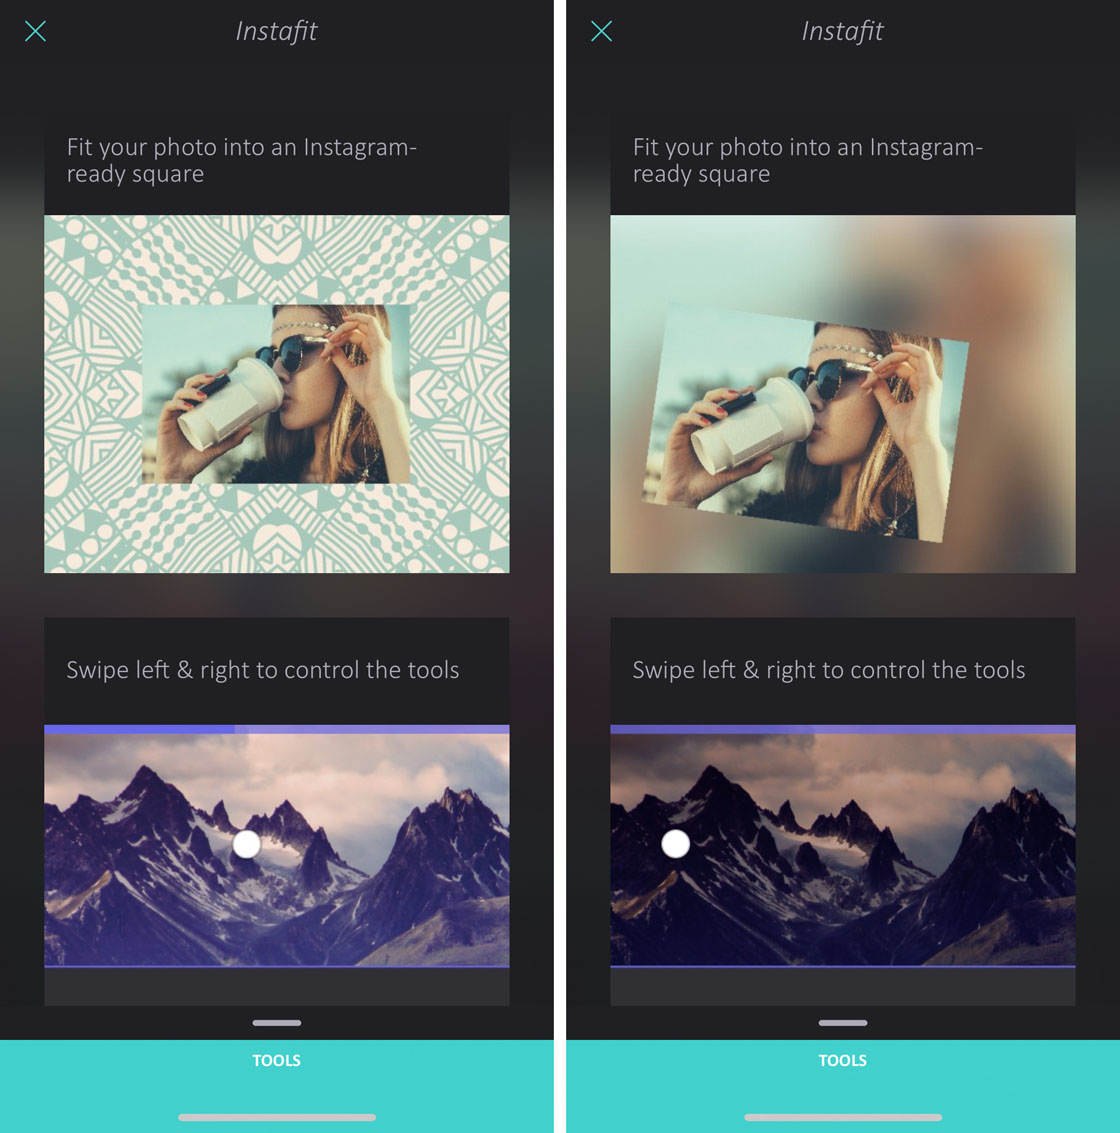
Go to Finalize > Instafit. Pinch to resize and rotate the image. Drag to move its position.
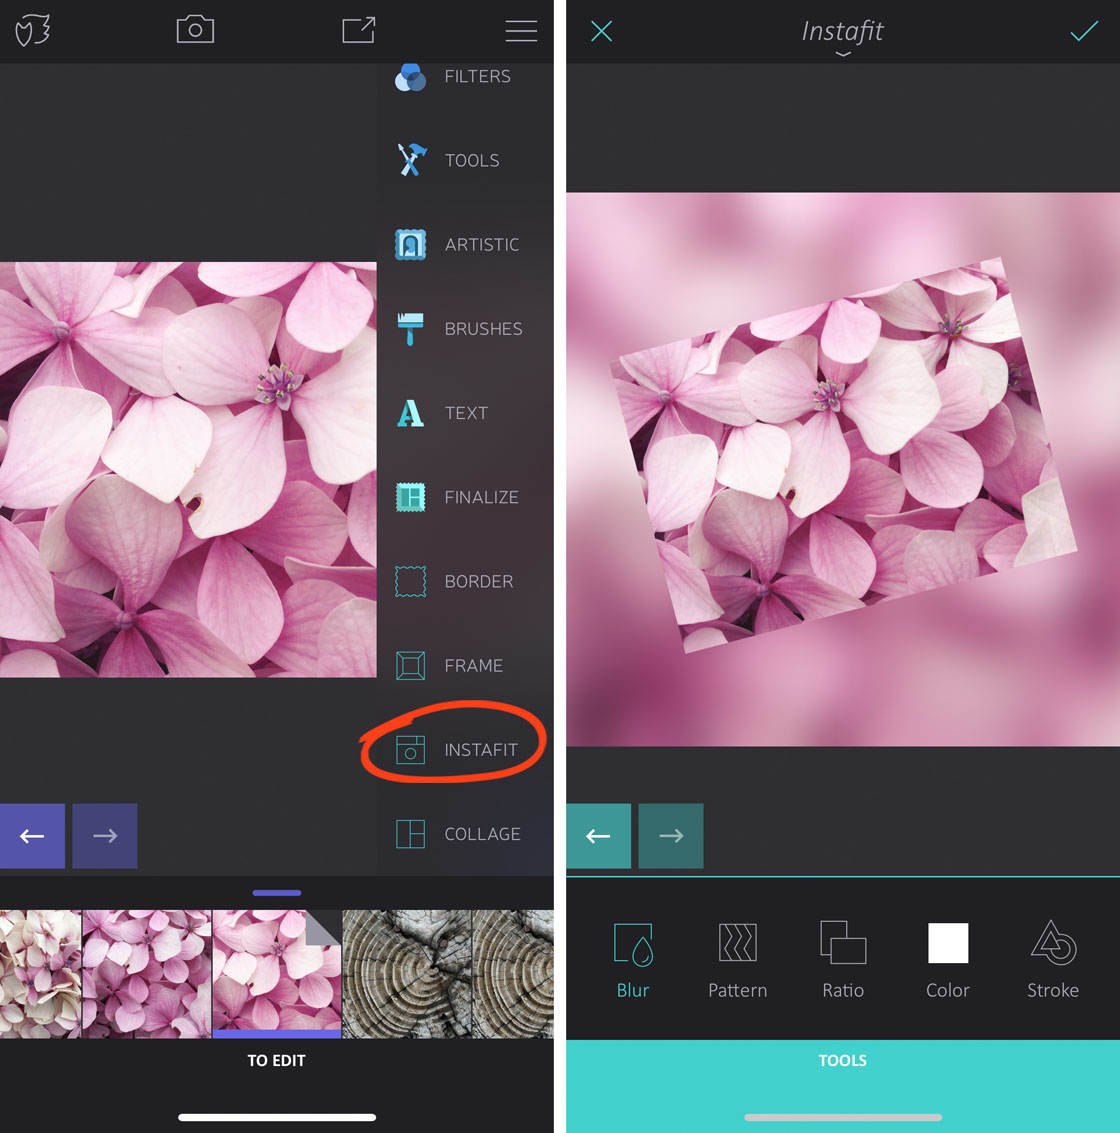
The default background is a blurred version of your photo. If you want a plain colored background, tap Color. For a patterned background, tap Pattern.
You can also use the Stroke option to add an outline around your photo as shown on the right below.
10.3 Collage Tool
Finally, the Collage tool lets you combine several photos into a collage. This is a great option if you have a collection of photos that look good together.
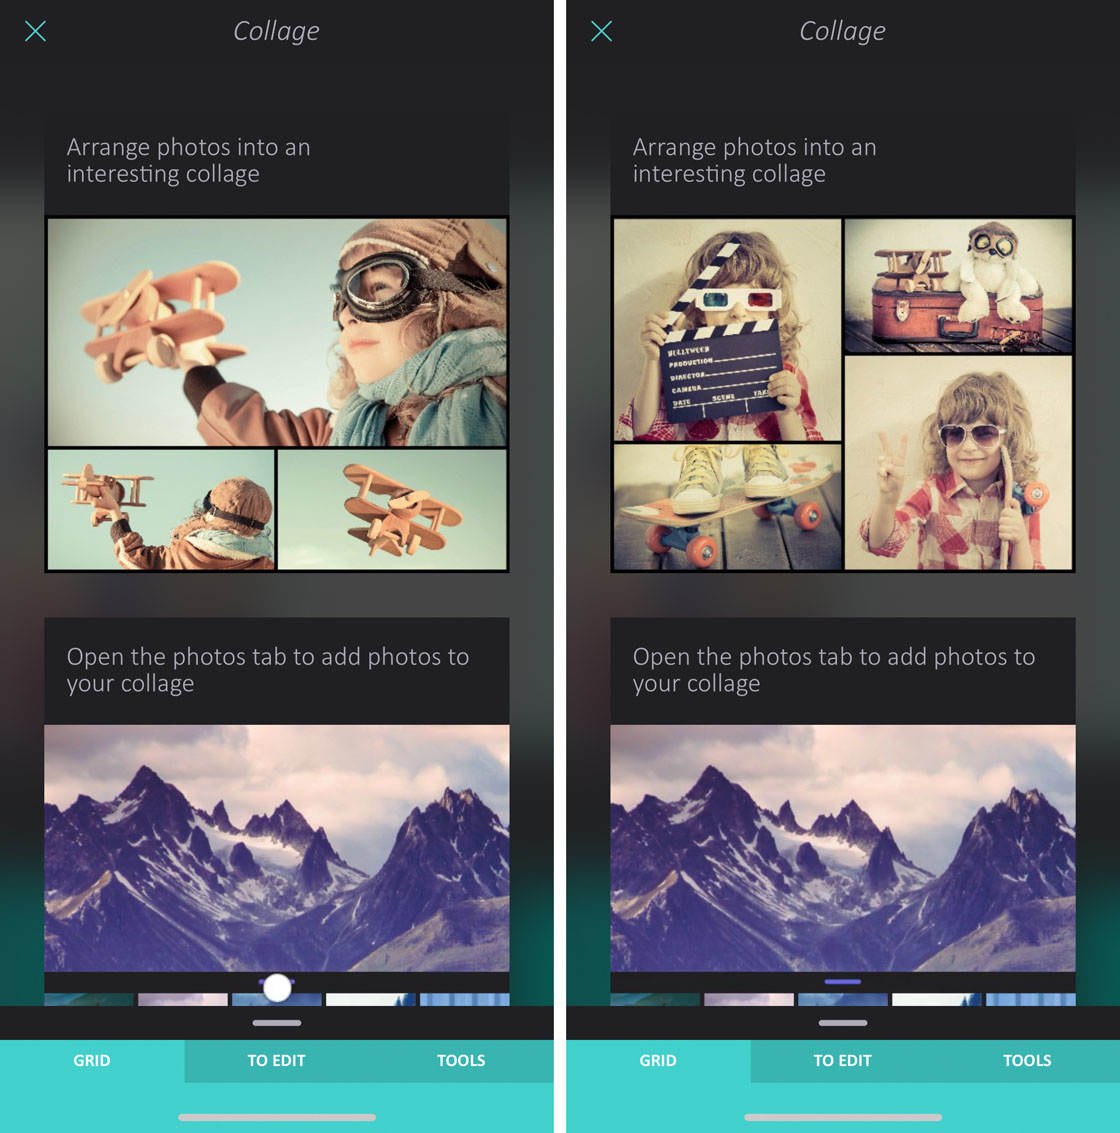
Open the first photo you want in your collage, then go to Finalize > Collage. Select a layout from the options beneath your photo.
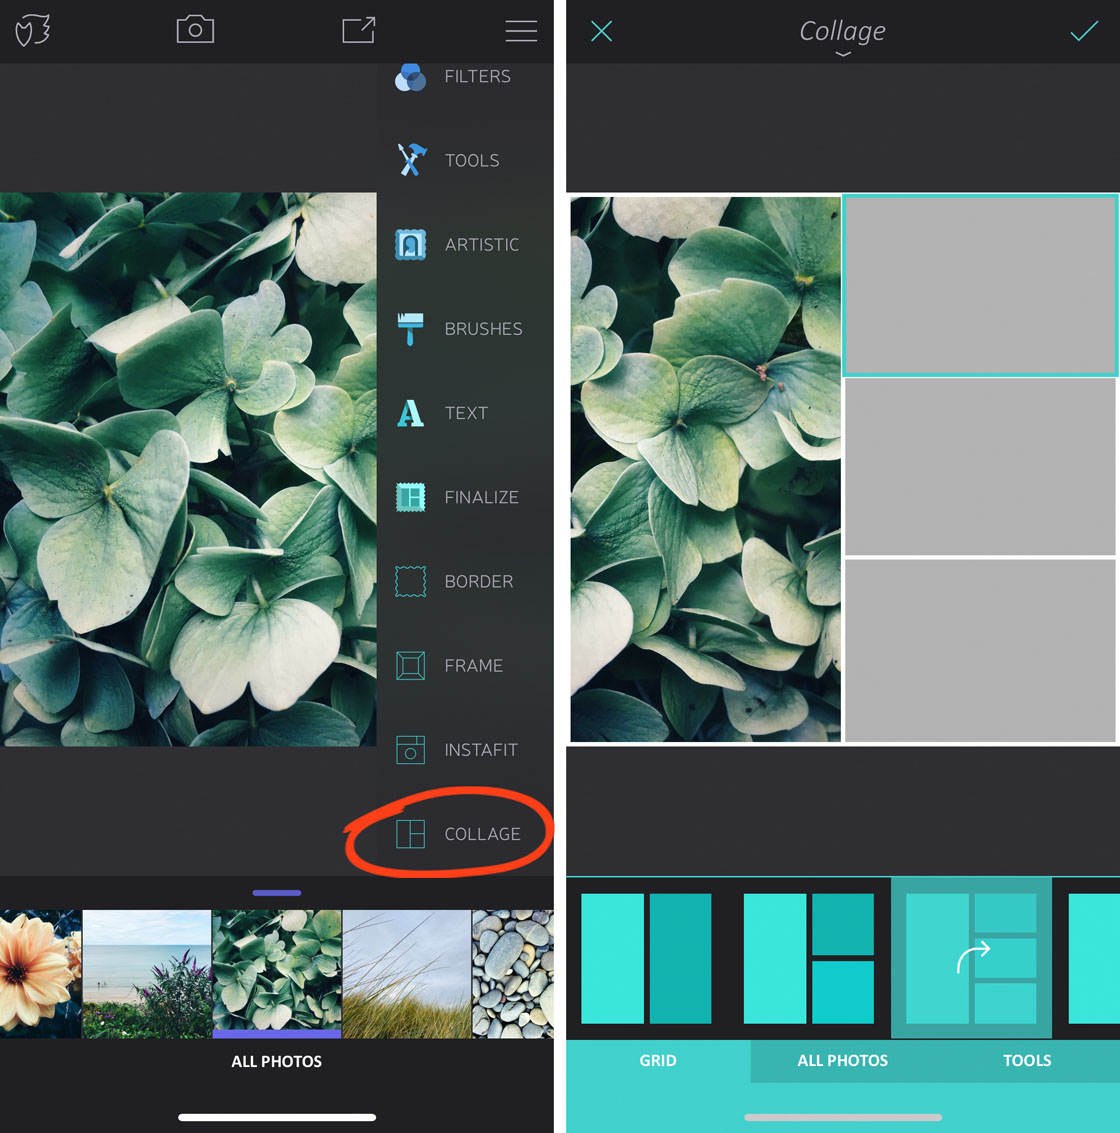
To add another image, tap on one of the blank placeholders in your collage. Then tap the middle tab at the bottom of the screen. This tab will have the name of the album you selected the first photo from, e.g., All Photos. Select an image, then repeat for the other blank placeholders.
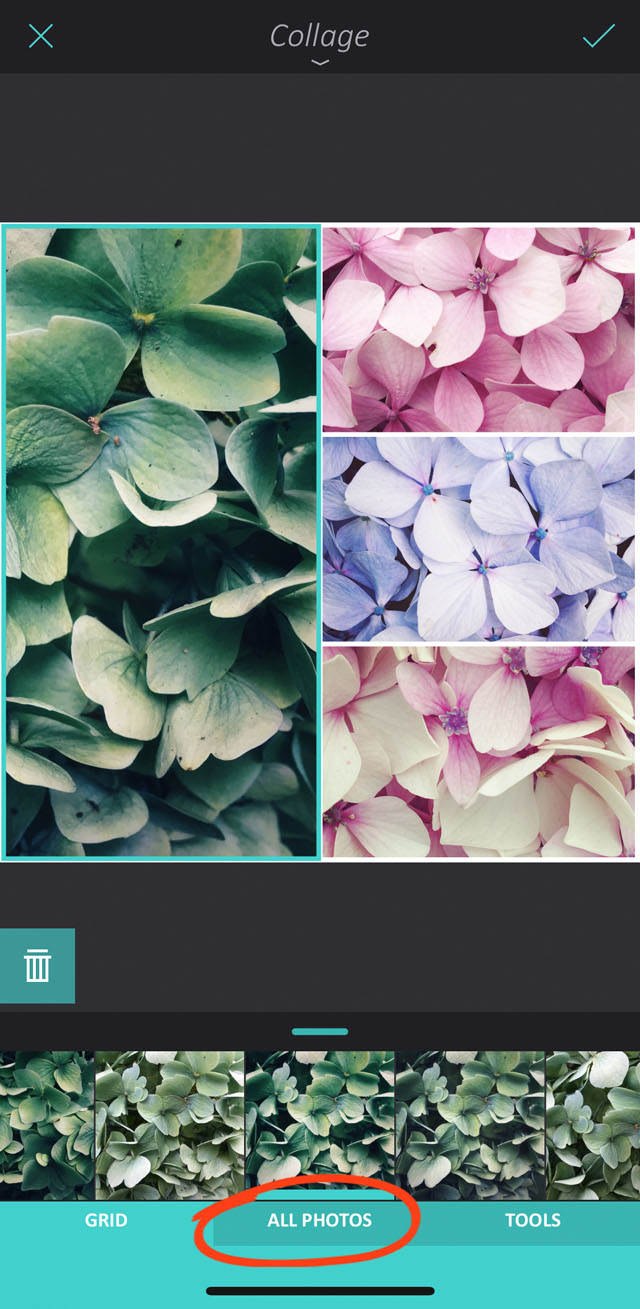
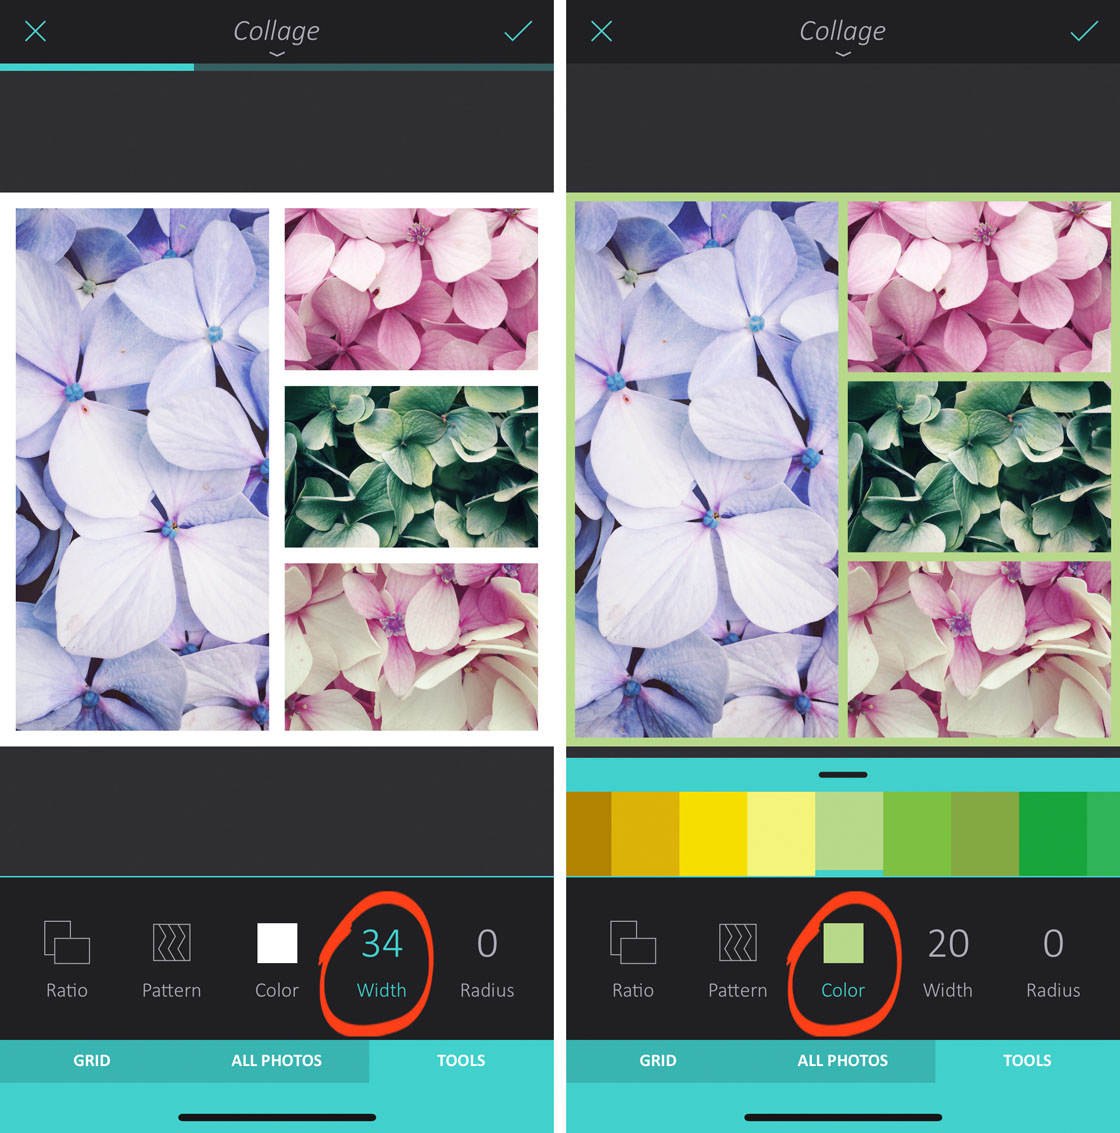
To customize the borders in your collage, tap the Tools tab.
To change the width of the borders, tap Width, then swipe left or right over the photo. Tap Color to create colored borders, or Pattern to apply a pattern to the borders.
11. Save Your Edited Photo
When you’ve finished editing your image in the Enlight photo app, don’t forget to save it.
Tap the Share icon (rectangle with arrow) at the top of the screen, then tap Save Photo.
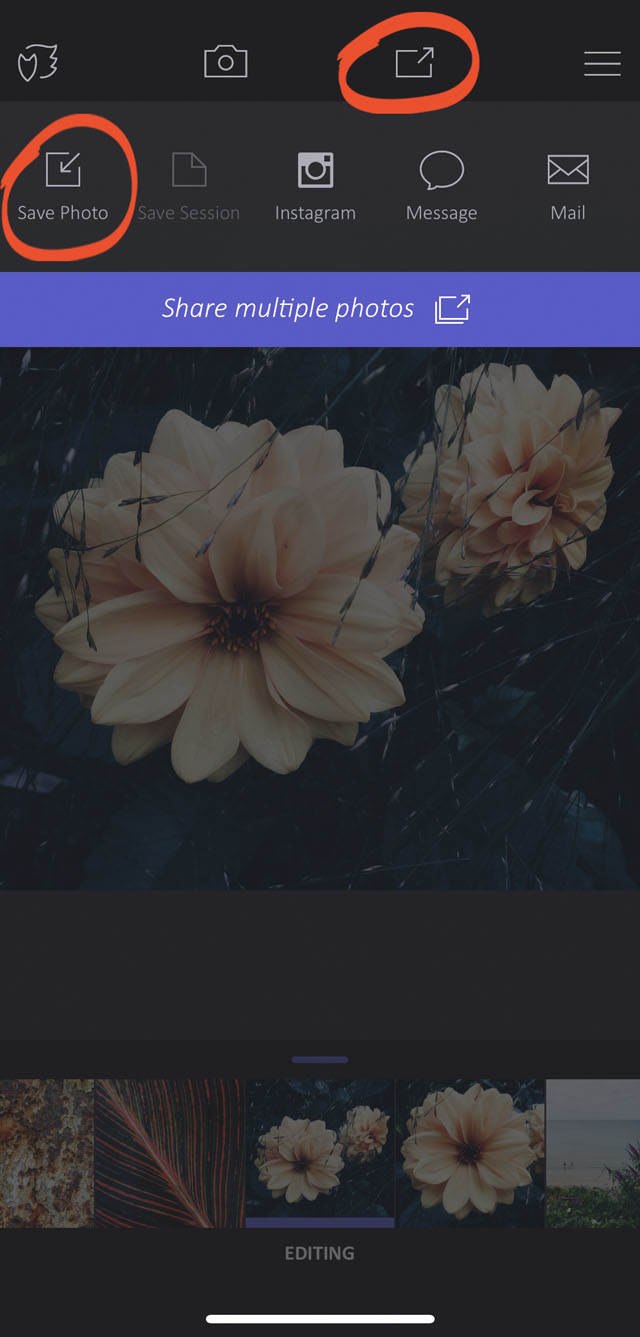
Your edited image will now be stored in the built-in Photos app on your iPhone.


Was wondering whether to get this app. Think I will now. This is a great article. Cheers Rob!
Thanks Elaine! I have a feeling that Enlight will be well-suited to your style too. Let me know what you think! 🙂
I learned something today. Another great utility that is must have for digital photography is Binfer. A nice photo sharing tool to add to the list.
Adrianna,
I’m not familiar with that app, nor can I find it on the app store. If you have a link, please share it so that we can check it out. Thanks!
is it better than snapseed??? i mean its a paid app 3.99. what features are so unique to this app. and does it justify the cost? its it the ultimate editing app on the iphone? i’m a little apprehensive
just purchased the app, i am not so impressed with its price, i will stick with my snapseed and camera + editing features. this app crashes too much on my 4s when i try to save. only the mask feature is intesting to me, the rest is easy found in free apps. i do hope this app gets improved with additional features with time. i consider my purchase as an investment for future updates and knowing the price will be up soon
Hi Fardeen,
The app store does indicate that Enlight is optimized for iPhone 5 and newer, so that might be part of the problem. It also required iOS 8.1 to function properly. Is your phone fully updated? Are you planning to upgrade your iPhone in the near future? If you are, I’m sure that you will have a much better experience with Enlight after doing so.
While this app does a lot, no app is perfect for everyone. That’s one of the things that is so great about mobile photography. There are so many apps available that we are all almost sure to find a handful that work well for our individual needs. Snapseed and Camera+ are also great apps. If the large number of free apps offer enough functionality to meet your editing needs, then that’s great! It’s all about what YOU need as a photographer.
I would be hard pressed to say that ANY app is the “ultimate” editing app for iPhone users. It really depends on your needs. To be honest, while Enlight has quickly found a permanent place on my iPhone, it still hasn’t replaced my go-to app for 90% of my editing. That’s not to say that Enlight can’t do what I want it to do–it certainly can–it’s more a matter of my typical workflow and how I prefer to manage my editing process.
Let me know if you have any specific questions regarding the app, and I will be happy to help you out in any way that I can. Cheers!
Thanks a lot 🙂 I do plan to upgrade in the future. I do love the masking feature.
There are 2 Enlight apps in the App Store by different developers. Both have the exact same information and photo examples. One is for iPhone and the other is for both iPhone and iPad. What is going on?
Hi Denise, I don’t see the other version that you are referring to. Did you use the link in the article above? I’ve checked the app store on my iPhone, iPad, and Desktop just in case one of the versions you mention was device-specific (as often happens), but I still couldn’t find the other version. Can you provide a link? Thanks!
Thanks for the tutorial! I bought the app Friday and spent the weekend playing with it. Love it and can’t wait for part 2.
Great tutorial. Thanks Rob.
Hi Rob – I seem to be acquiring a number of apps as I work my way through the available tutorials. You mentioned in this one on Enlight that while you use it, it hasn’t replaced the one you use for 90% of your editing, care to share what that one is? My hope is to develop a good workflow that has me well versed in 3 or 4 apps. Thanks for a great tuturoial, next up putting it into practice.
Hi Rob, is it possible to remove people that are in the picture? I hope you can help me?
Anyone know how I delete an entire photo?
One point to note when considering this app alongside others (e.g. Snapseed) is that it can’t export full high resolution images (e.g. Those from a dslr). The image resolution is limited to iPad or iPhone res.
At a purchase price of almost $7 Australian I am a little concerned about the comment regarding the export resolution. Can you tell me at what res we can export please and where in the app can we change this. Great informative tutorial.
Hi Christina. I’m glad you enjoyed the tutorial. Images are saved at full resolution, so if you edit an image in Enlight it will be saved with exactly the same number of pixels as the original image. You can change export quality in Enlight’s settings by tapping the far left icon at the top of the screen and then going to Settings. Hope that helps.
Hello – is there a way to view a photo’s edit history? I have customised a duo filter for a photo a few months ago and I would love to get the parameters to apply the same filter to a few other ones.
Thank you!
Can I add Enlight as a photo extensions under More in the native Photo App on iOS 10?
Can I use Enlight to crop photos to other shapes – like circles or ovals?
Enlight doesn’t have this option, but the Frames tool in the Afterlight app lets you crop to different shapes. Here’s a tutorial that shows you how to do it: http://iphonephotographyschool.com/afterlight/
Thanks Kate, I’ll definitely check that out. I’m finding that cropping to shapes other than the traditional photography rectangles or squares is a little harder to find. I appreciate your post.
Can u save or send ur work to google drive or email
How do I change the background so that it is one color covering the entire background?
I can’t find my saved pics in Enlight
Is there a way to flip a photo in the opposite direction?