The key to a successful Instagram account is posting beautiful, high-quality photos that really catch the viewer’s eye. While it’s vital that you shoot good pictures to start with, creating stunning edits will give your images that extra wow factor! In this tutorial, you’ll learn how to make full use of Instagram photo editing tools and filters, so that your iPhone photos always look amazing when you share them.
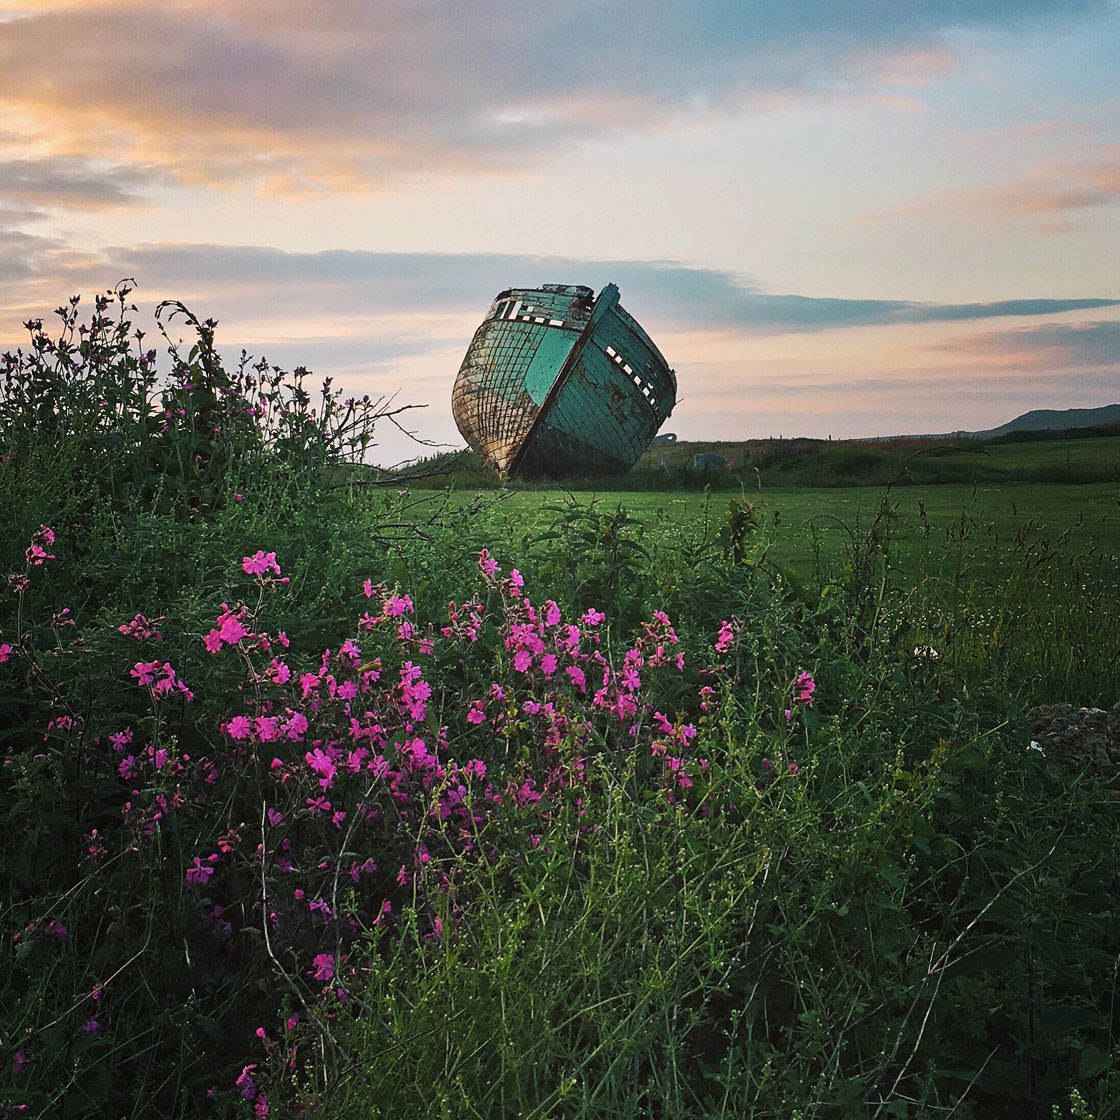
1. Start With A Great Photo
While image editing apps can really enhance your iPhone photos, no amount of editing can turn a bad photo into a good one.
If you want people to like your photos and follow you on Instagram, you should only post your very best photos. That means they should be great quality and eye-catching before you even begin editing them.
So what makes a great photo worthy of sharing on Instagram?
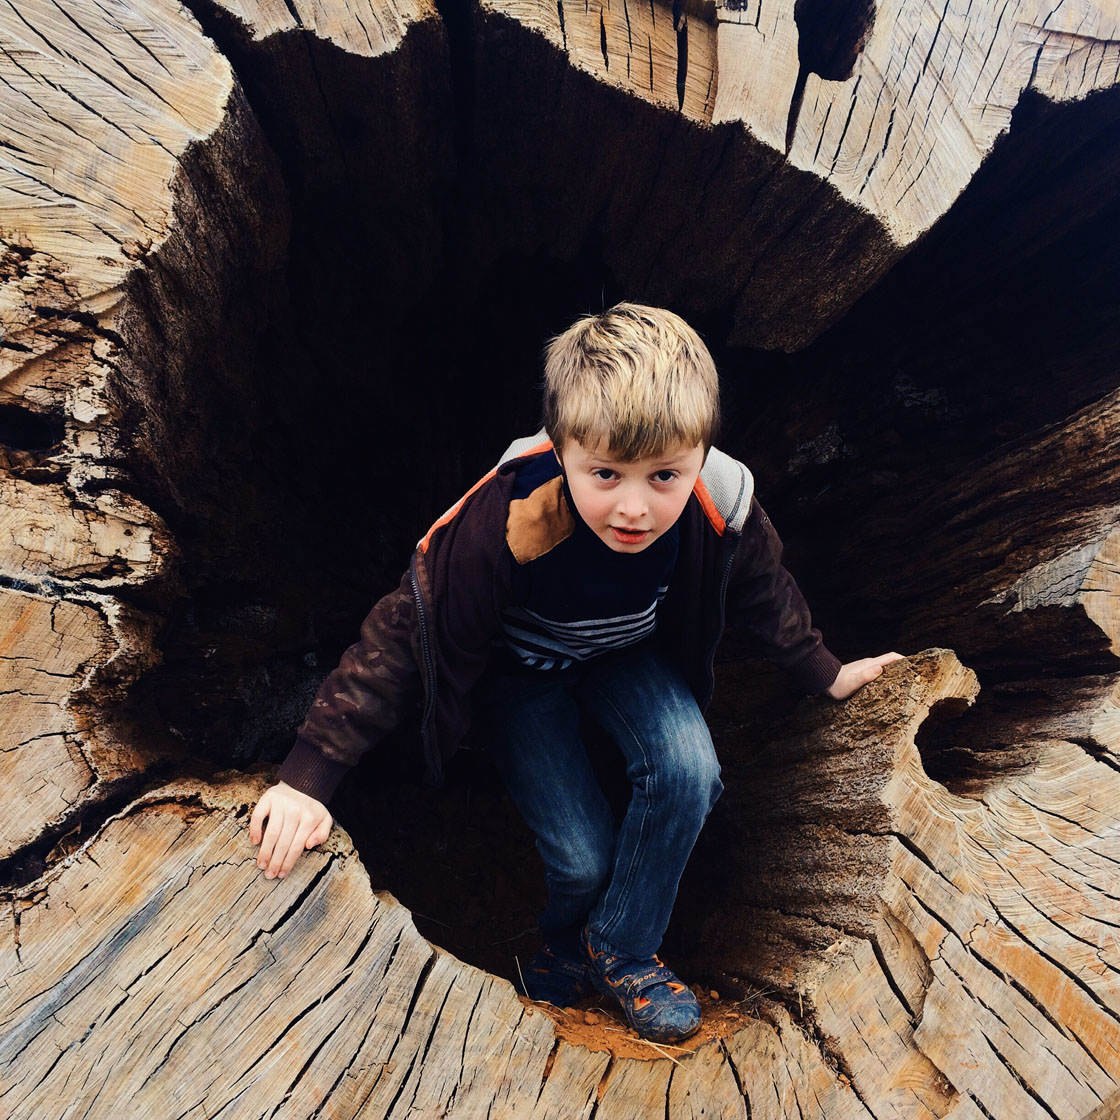
First of all, it should be sharp and in focus. So make sure your photo isn’t grainy or blurred.
While lighting and color problems can often be fixed in post-processing, a photo that’s extremely under-exposed (far too dark) or over-exposed (far too bright) is unlikely to work.

So choose photos that have a fairly balanced exposure where you can see plenty of detail in the shadows (dark areas) and highlights (bright areas).
The exception would be if you are sharing a silhouette or shadow photo. In that case, you don’t want detail to be visible in the darker areas of the scene.
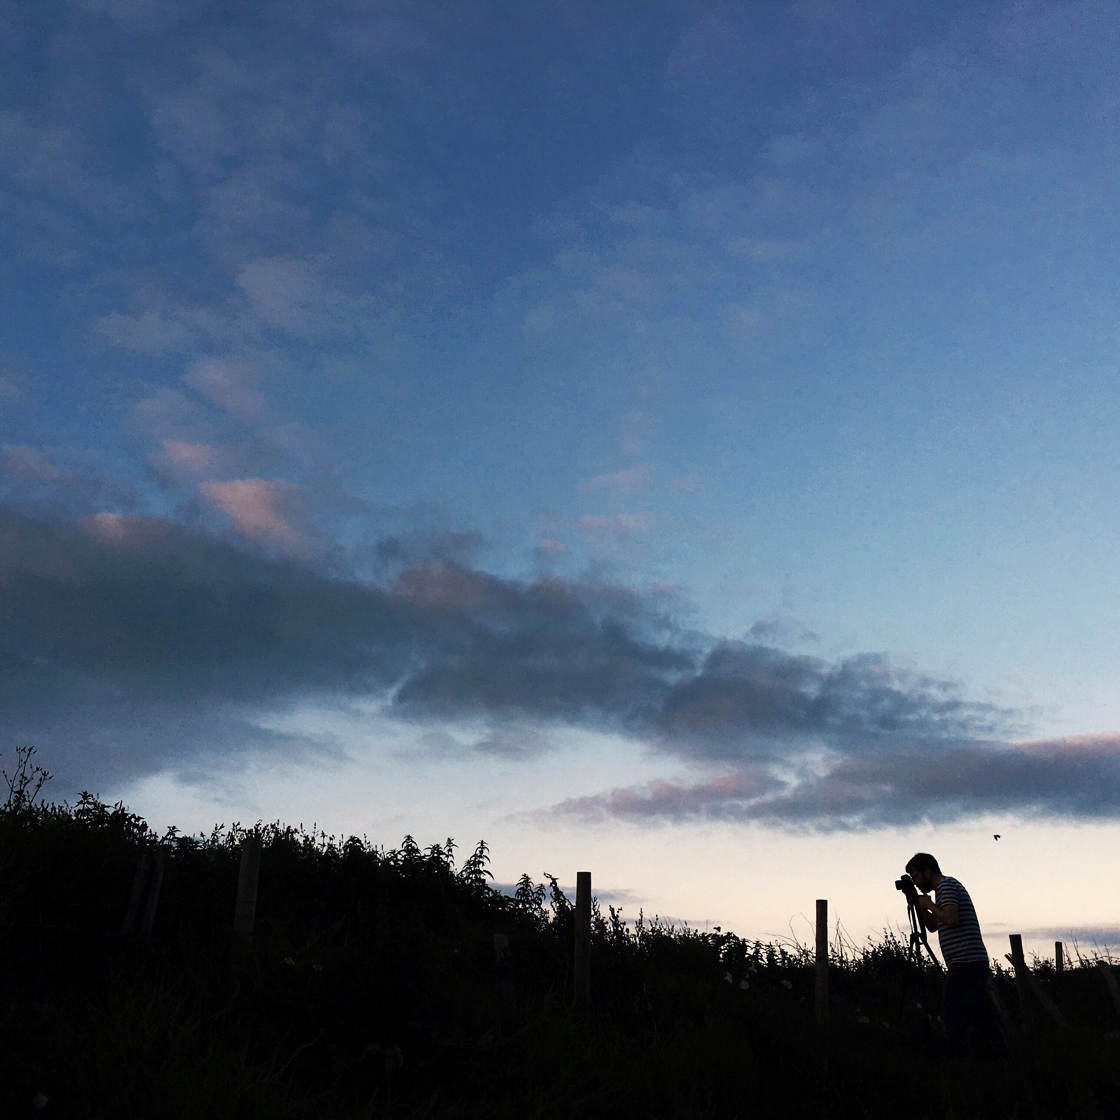
You should also make sure that your photo has an interesting subject or focal point, and that it has a strong composition.
Remember that your images are often seen only as small thumbnails on Instagram, so they need to stand out visually to the viewer.
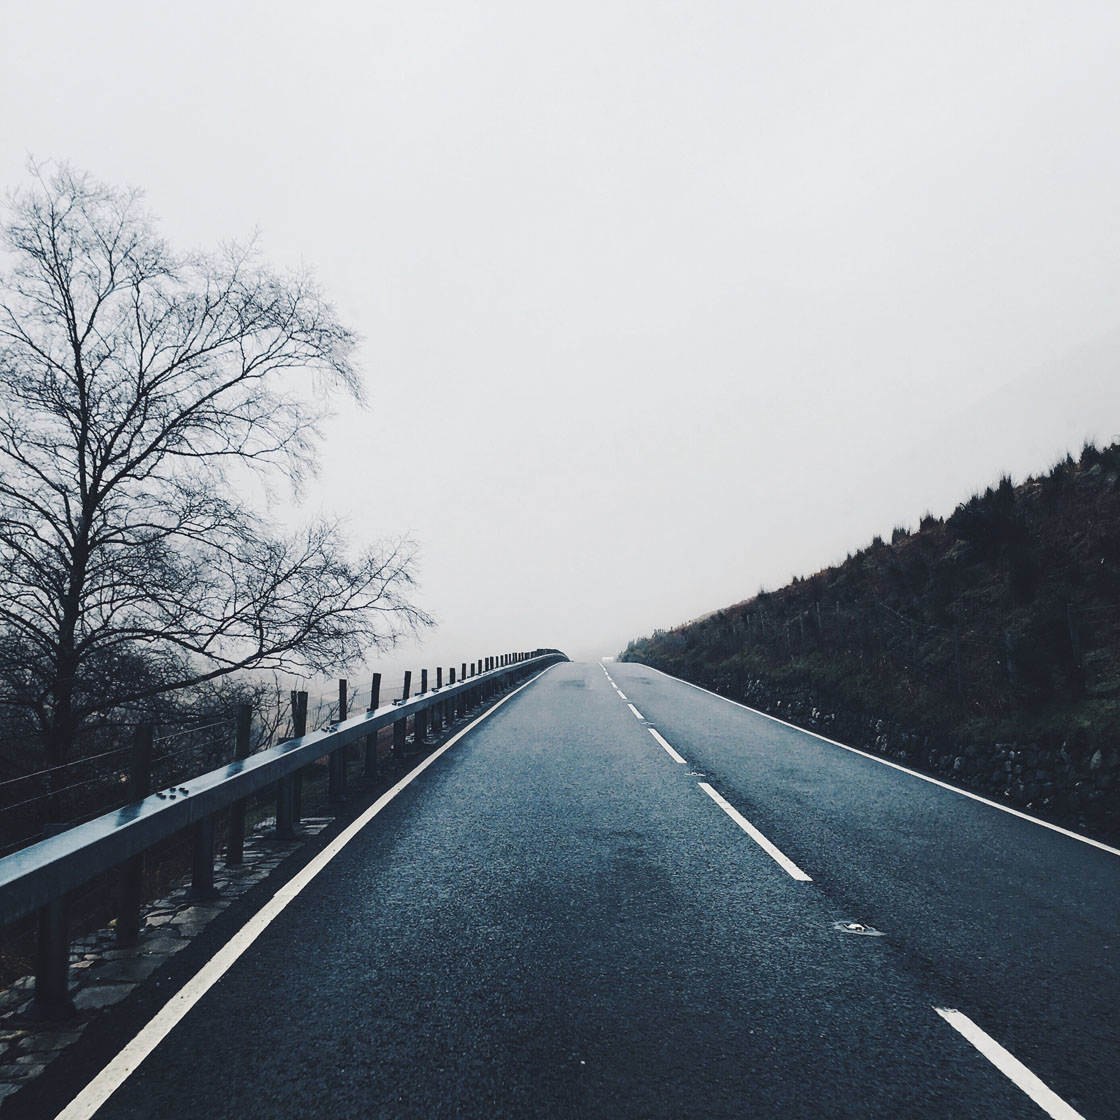
Photos that make use of leading lines, symmetry, bold shapes, patterns, color, or contrast have the best chance of standing out on the small screen of the iPhone.
Once you have a great photo that you’d like to share, you’re ready to start editing.
2. Edit First With Your Favorite App (Optional)
While Instagram has a great collection of editing tools and filters, you may prefer to perform certain edits to your photo within a different app such as Snapseed, VSCO, Enlight, etc.
This is especially important if you want to make selective adjustments, since Instagram doesn’t have any selective editing tools.
For example, you might want to use the Selective or Brush tools in Snapseed to adjust exposure or color in certain parts of the photo.
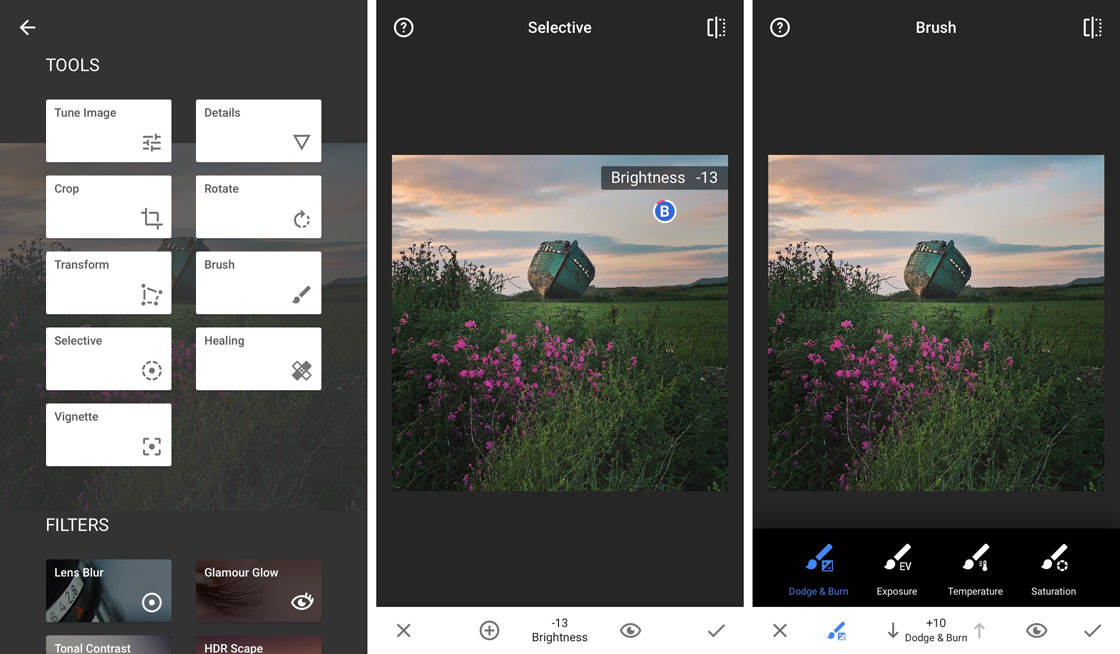
Maybe you need to use the TouchRetouch app to remove unwanted objects from the scene. Or perhaps you have a favorite VSCO filter that you’d like to use.
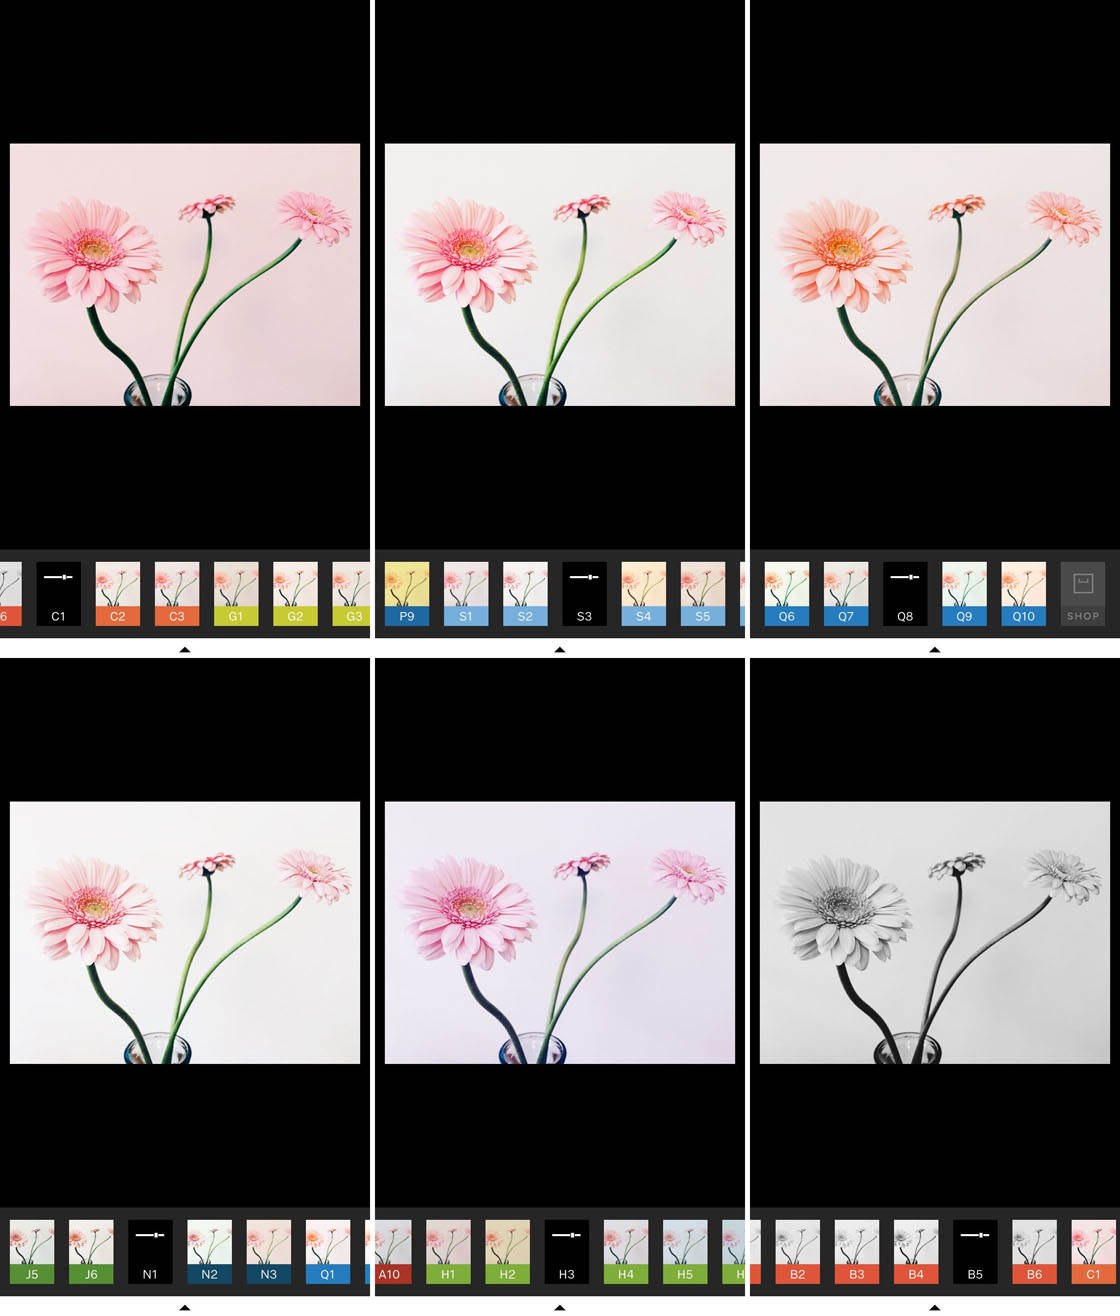
Once you’ve made these edits, you can then apply additional filters and edits within the Instagram app. Alternatively, you can start your edit from scratch using the Instagram tools.
3. Import Your Image Into Instagram
When you’re ready to edit your photo in Instagram, open the app and tap the camera icon at the bottom of the screen.
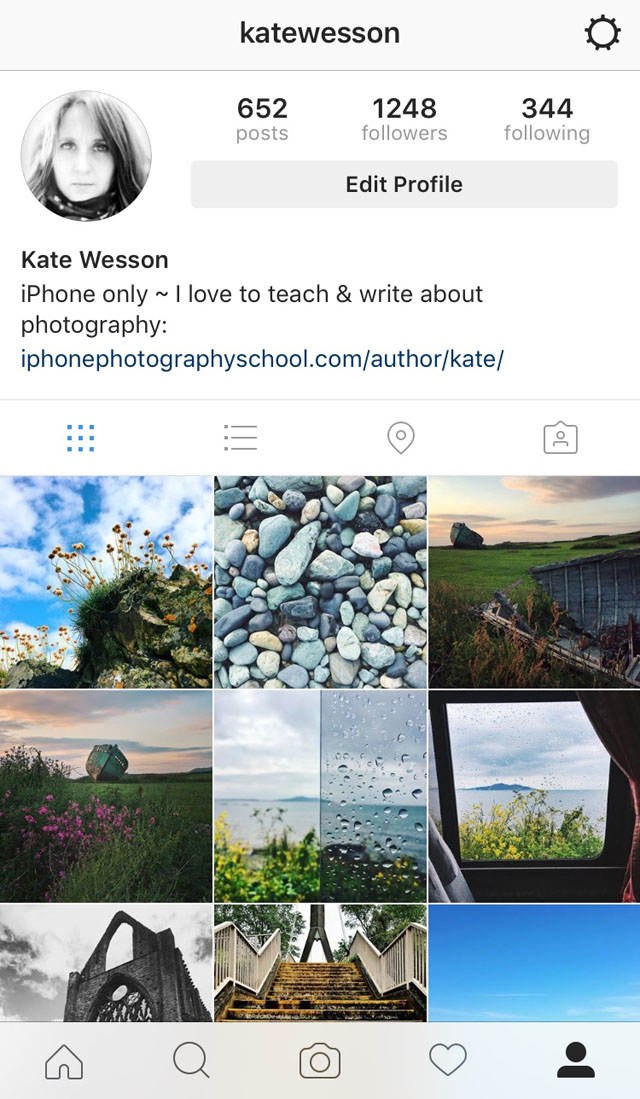
To select an image from your iPhone’s photo library, ensure the Library option at the bottom left is selected (Photo is for taking a picture with the Instagram camera, and Video is for video uploads).
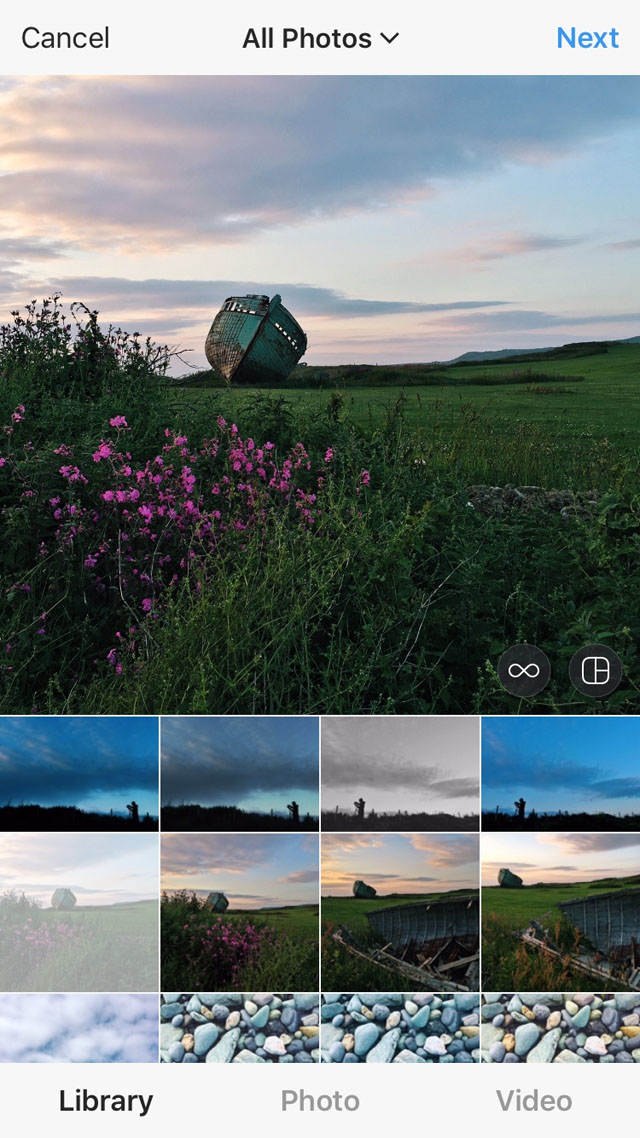
If you’ve organized your photos into albums, or you want to access an image from the Favorites album, tap the current album name at the top center of the screen, then select the album you want to open.
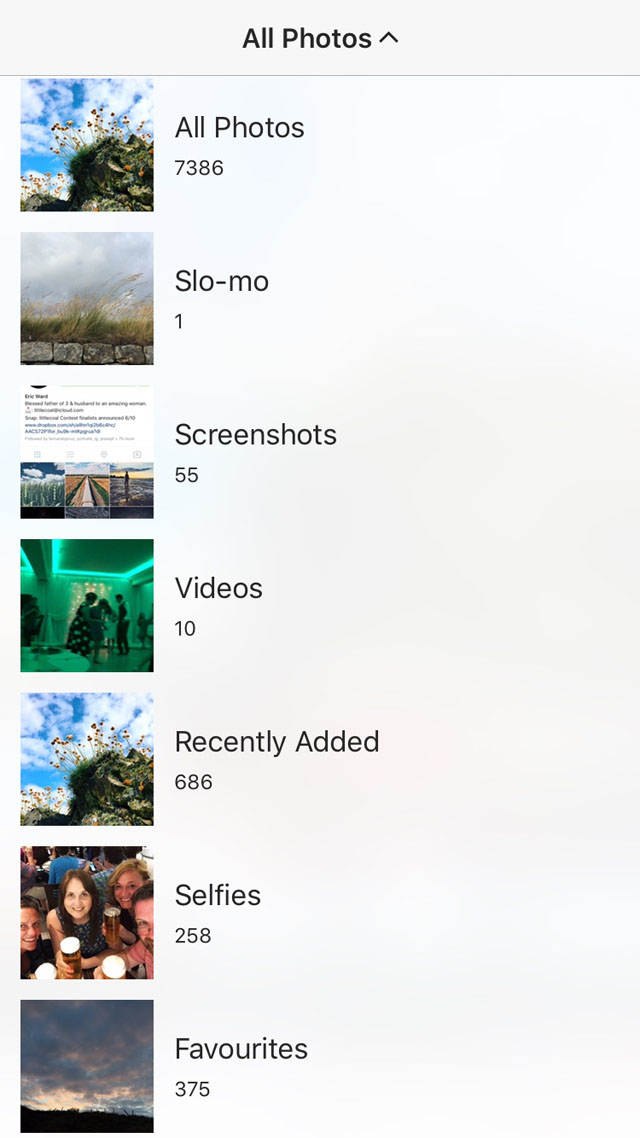
You can now scroll through the image thumbnails at the bottom of the screen, and tap on the photo you want to edit and share.
4. Use Instagram Photo Editing Tools To Crop The Image (Or Not)
In the image preview at the top of the screen, you’ll notice that your photo has been cropped to square format.
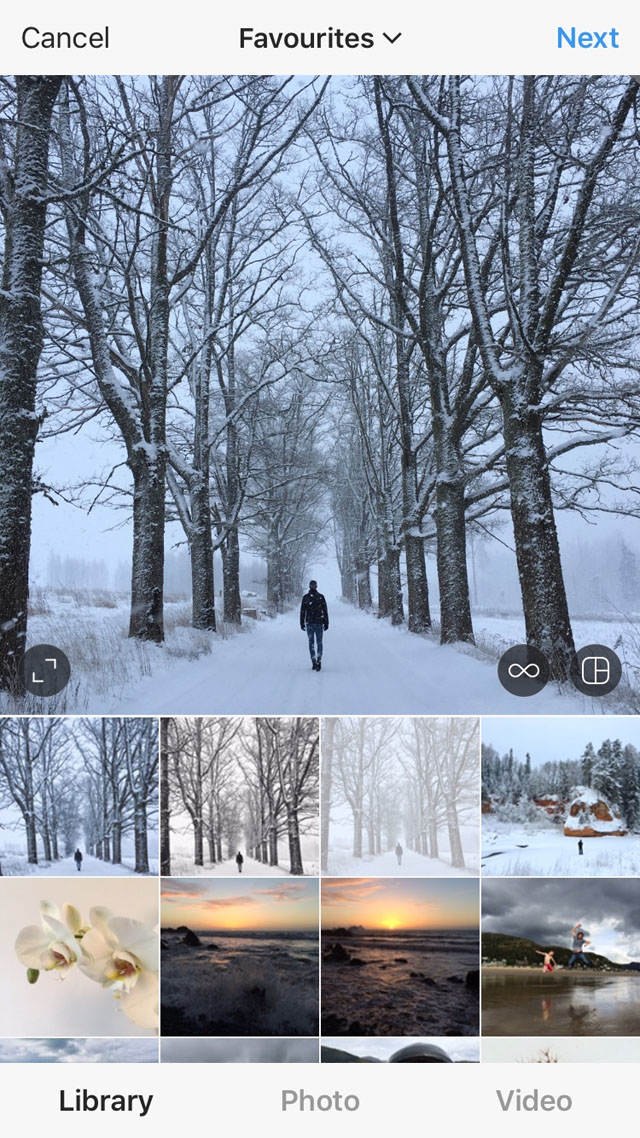
For many years Instagram only allowed you to post square format photos, but this restriction no longer applies.
If you want to share a rectangular photo, whether it’s in portrait or landscape orientation, simply tap the circle with two arrows at the bottom left of the image.
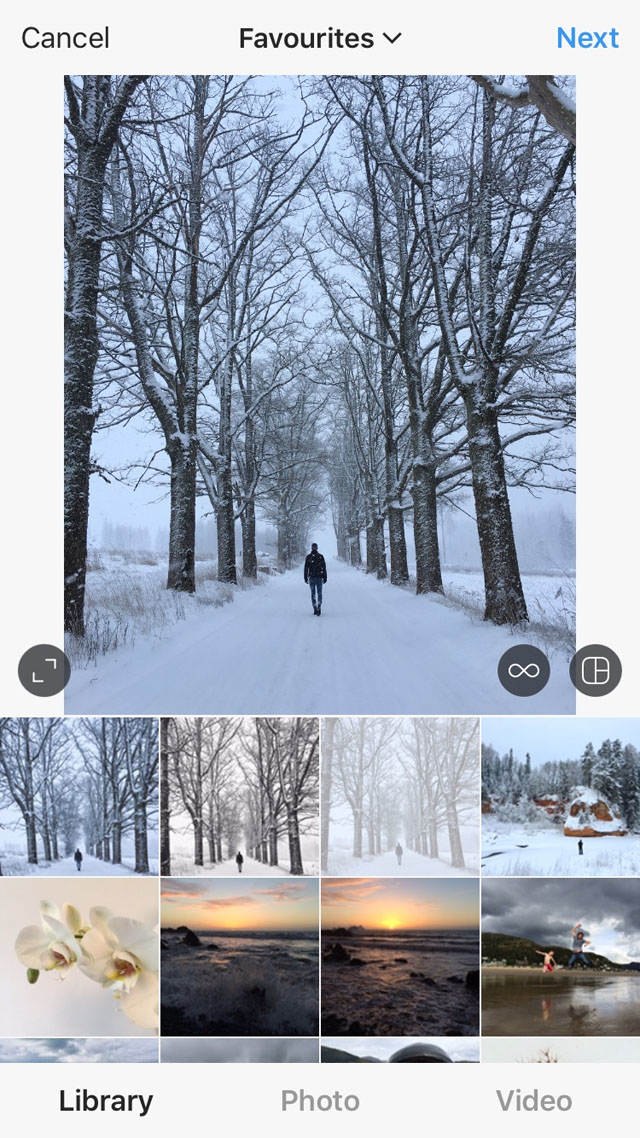
If you prefer to your image in square format, tap the circle with arrows again. You can then zoom in to crop the image further if you wish by pinching outwards with two fingers.
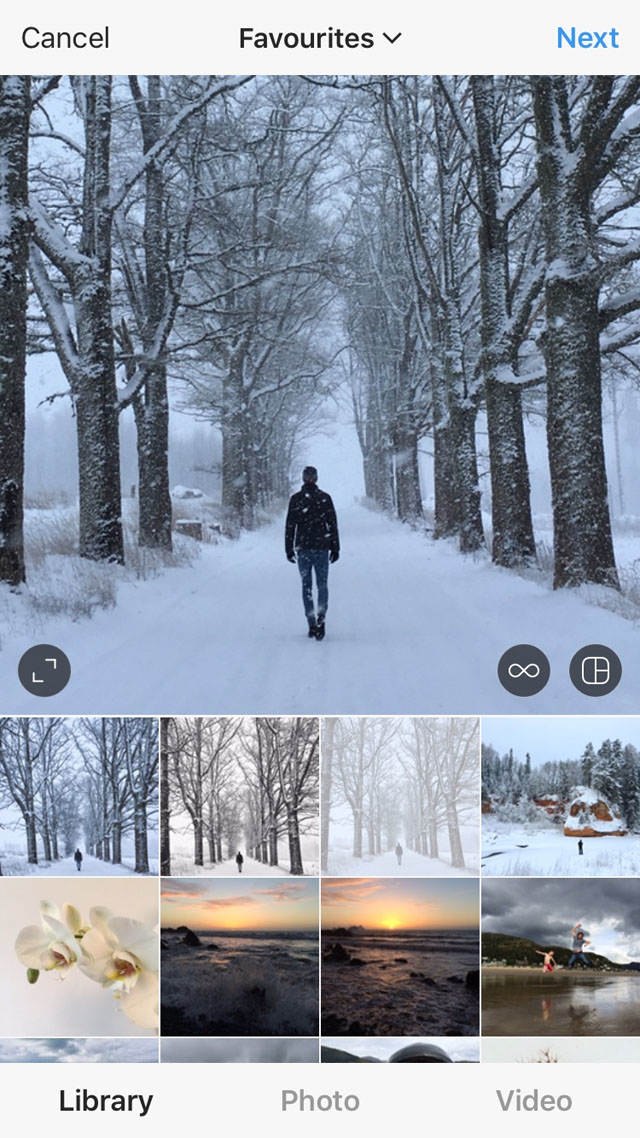
After zooming in, you can drag the image around to get just the part you want to keep. To zoom back out again, pinch inwards with two fingers.
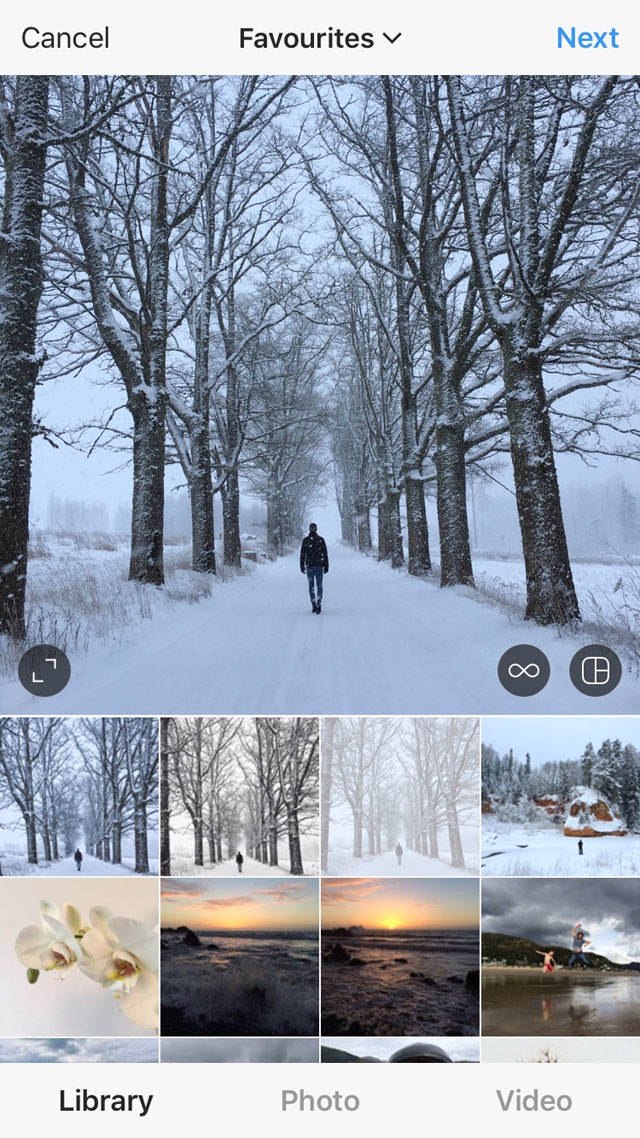
When you’re happy with your crop, tap Next at the top of the screen to access the Instagram editing tools and filters.
5. Enhance Your Photo With A Filter
Instagram is one of the best photo filter apps for iPhone. When you import your image into Instagram, the Filter screen is displayed.
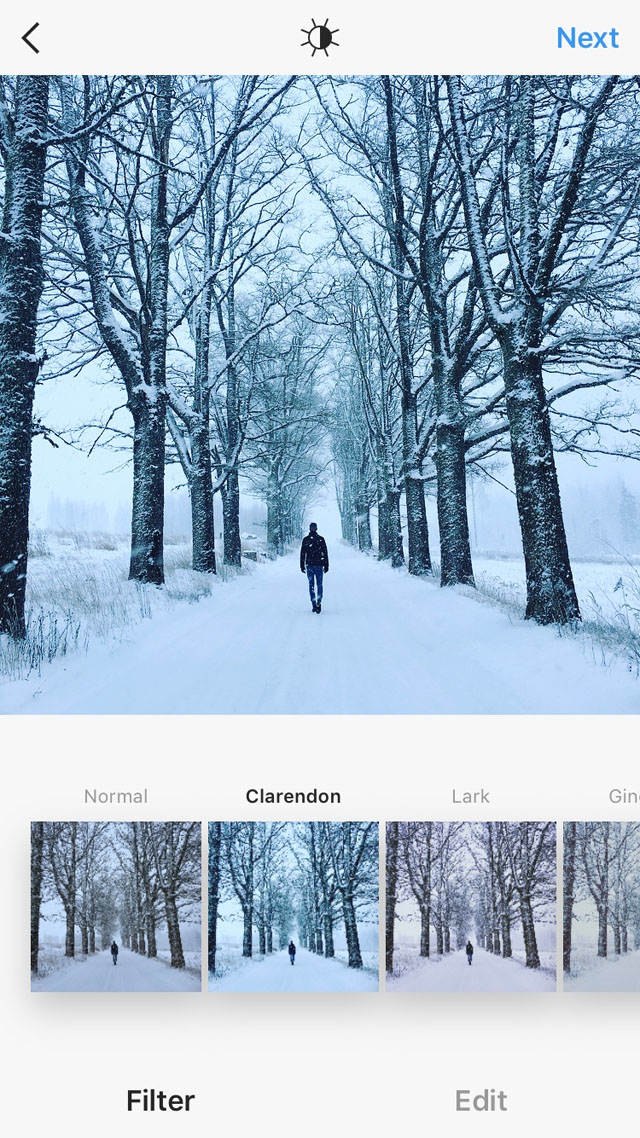
Filters are used to quickly and easily change the look and feel of your photo. Scroll across the filters at the bottom of the screen, tapping on any that you want to try out.
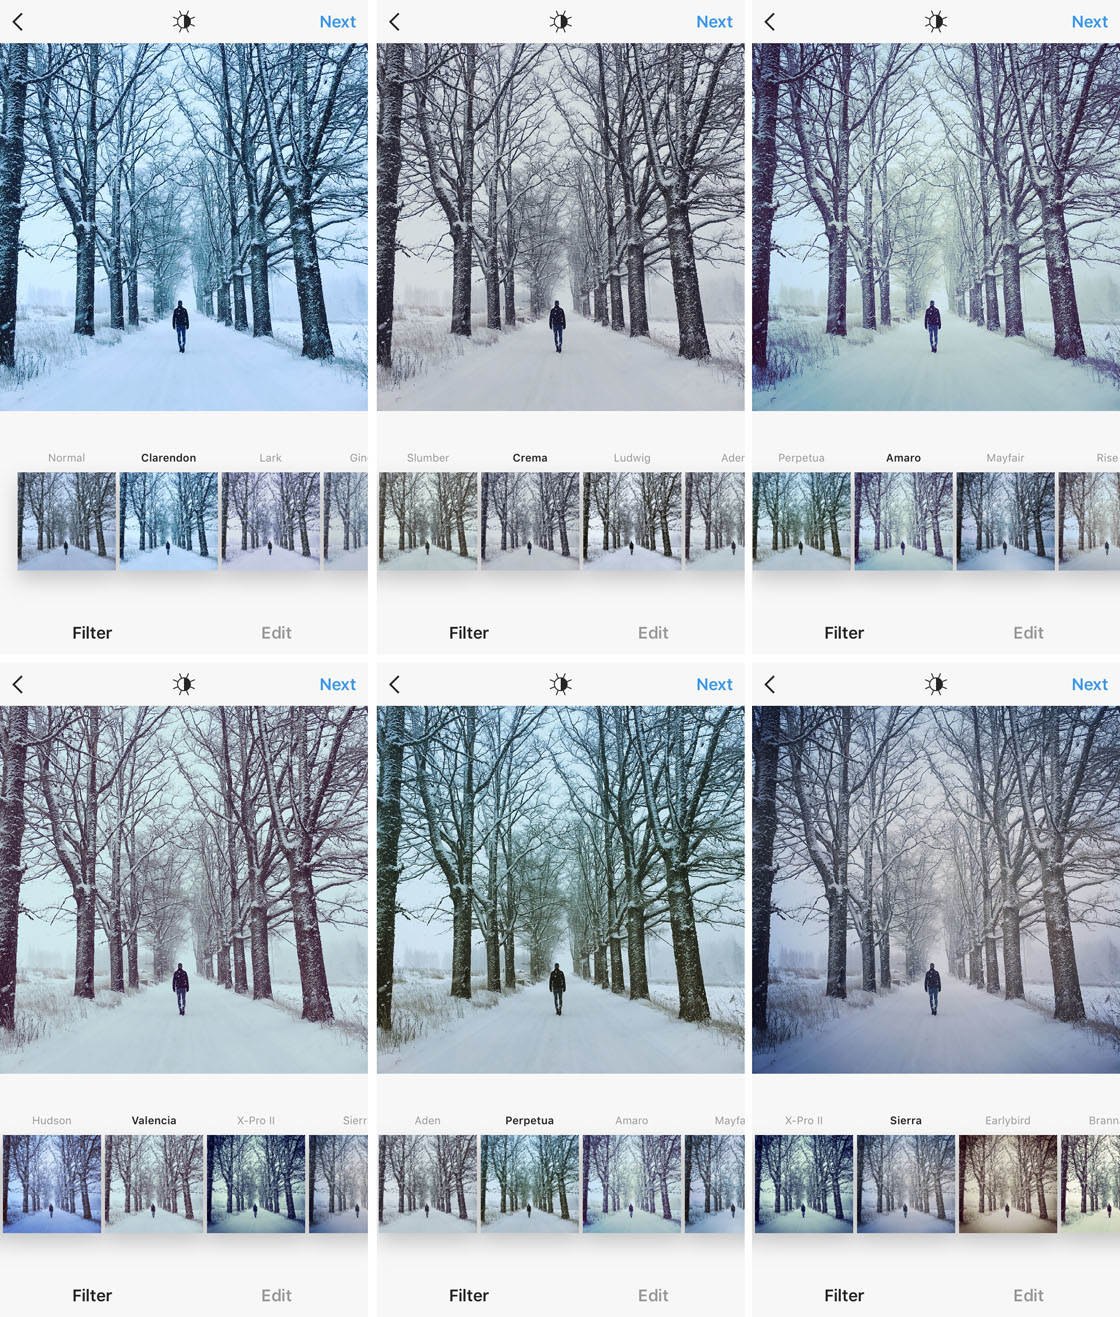
Below is a comparison of some of the filters used to alter a snowy scene. Notice how the colors look different in each one, thus changing the mood of the image.
And here are some more filters used on a different photo.
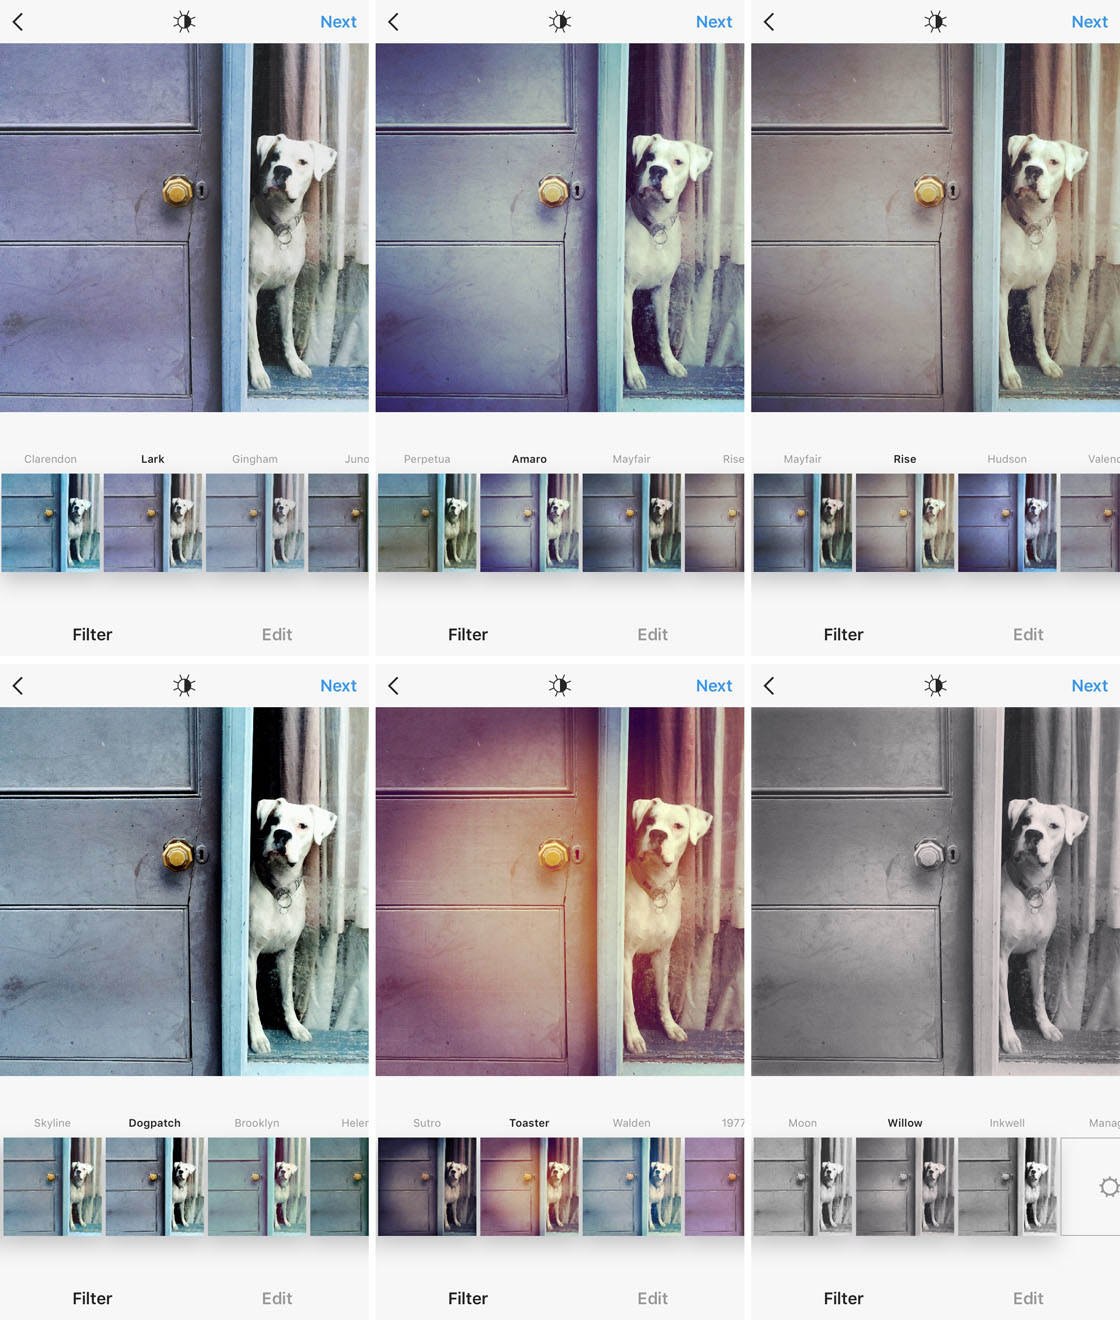
Note that when you first select a filter, it’s applied to your photo at full strength. If you find the effect overpowers your photo, you can easily tone it down.
Simply tap on the filter name again, then drag the slider to the left to reduce its intensity. When you’re happy with the strength, tap Done.
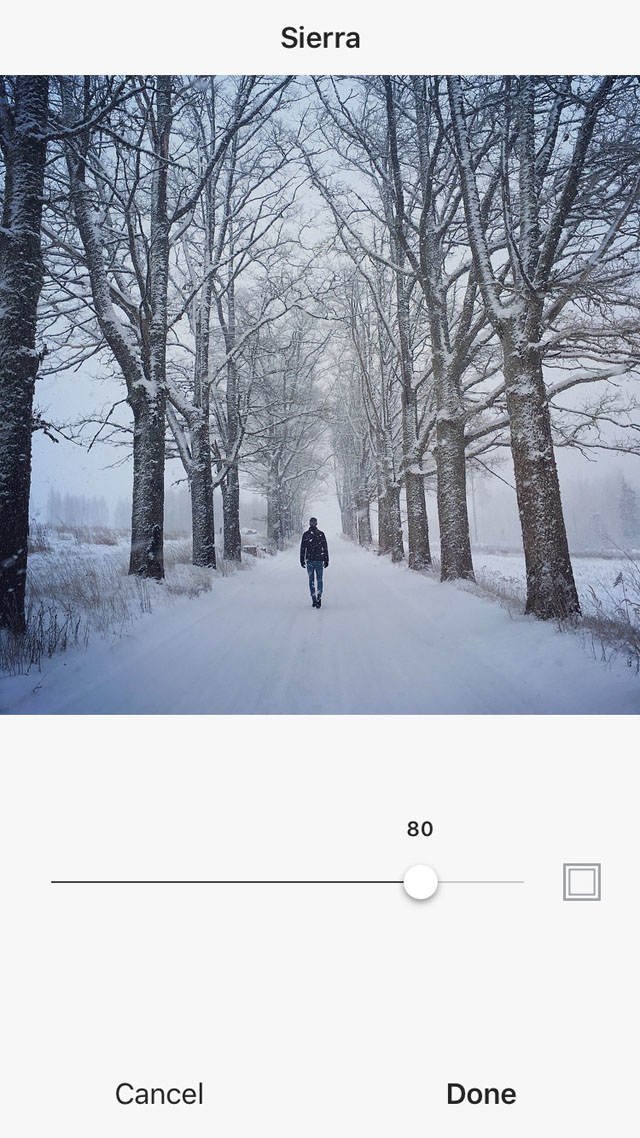
If you want to see what the original image looked like before you applied the filter, tap and hold on the photo. Release to see the edited version.
6. Learn How Filters Affect A Photo’s Mood
Rather than haphazardly applying filters to your images, try out each one and study what effect it has on your photo.
How does a particular filter affect the colors and tones in your photo? How does it change the mood of the image?

Edited with the Clarendon Instagram filter
Do you want to create a light and airy feel or a dark and moody atmosphere? Would cool or warm colors work better?
Would the image suit soft, muted tones? Or would it look better with vivid colors and high contrast?
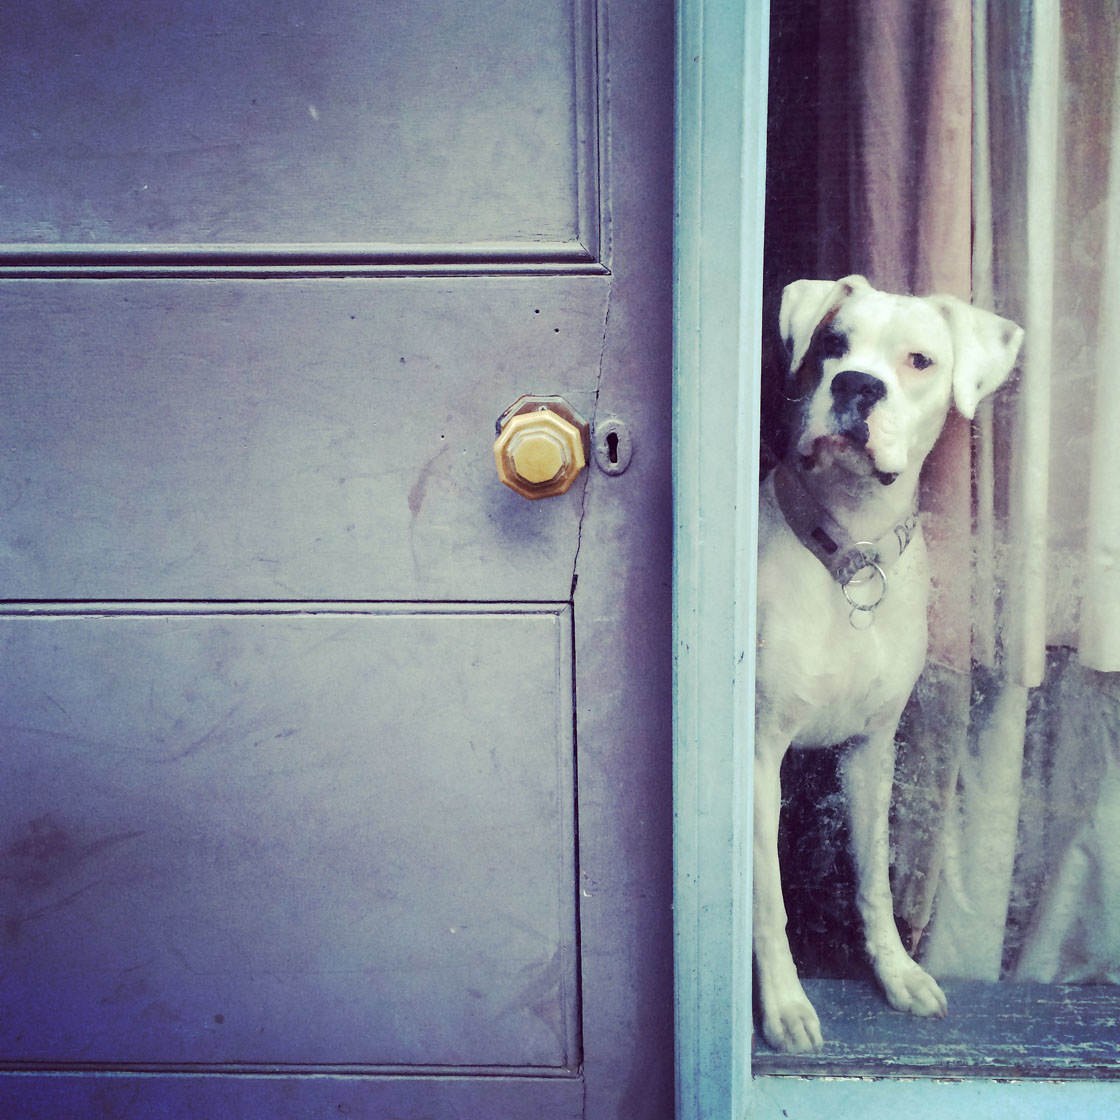
Edited with the Amaro Instagram filter
Maybe a filter with a subtle texture or light leak would add extra visual interest.
Or perhaps a dark vignette around the edge of the frame would add more drama to the scene.
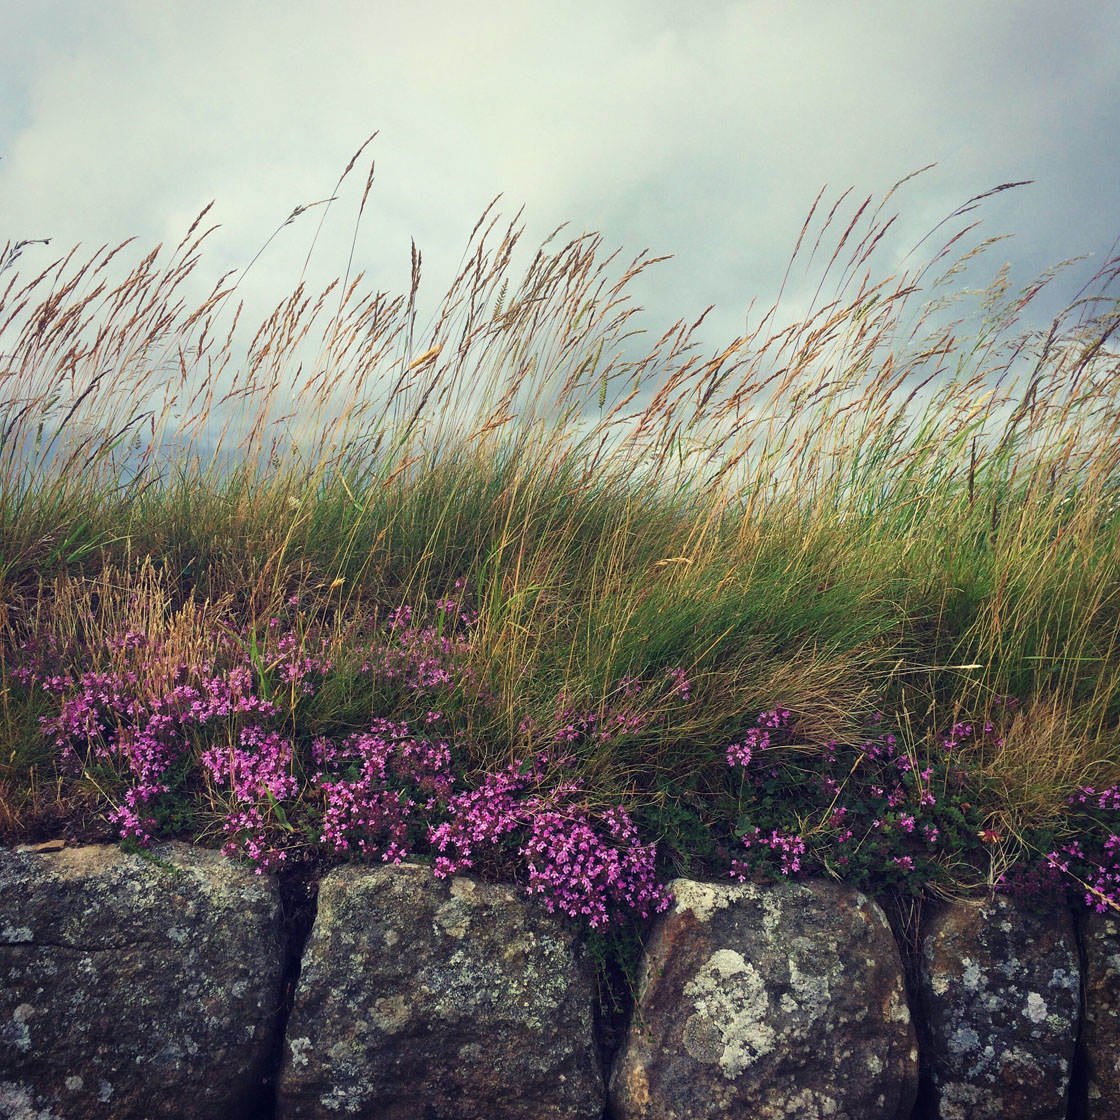
Edited with the X-Pro II Instagram filter
Once you start using Instagram filters, you’ll develop a handful of favorites and discover which ones suit particular types of images.
Less is often more with photo editing. Unless you’re trying to make an artistic statement (as in the photo below), use subtle filters that enhance rather than overpower your image.
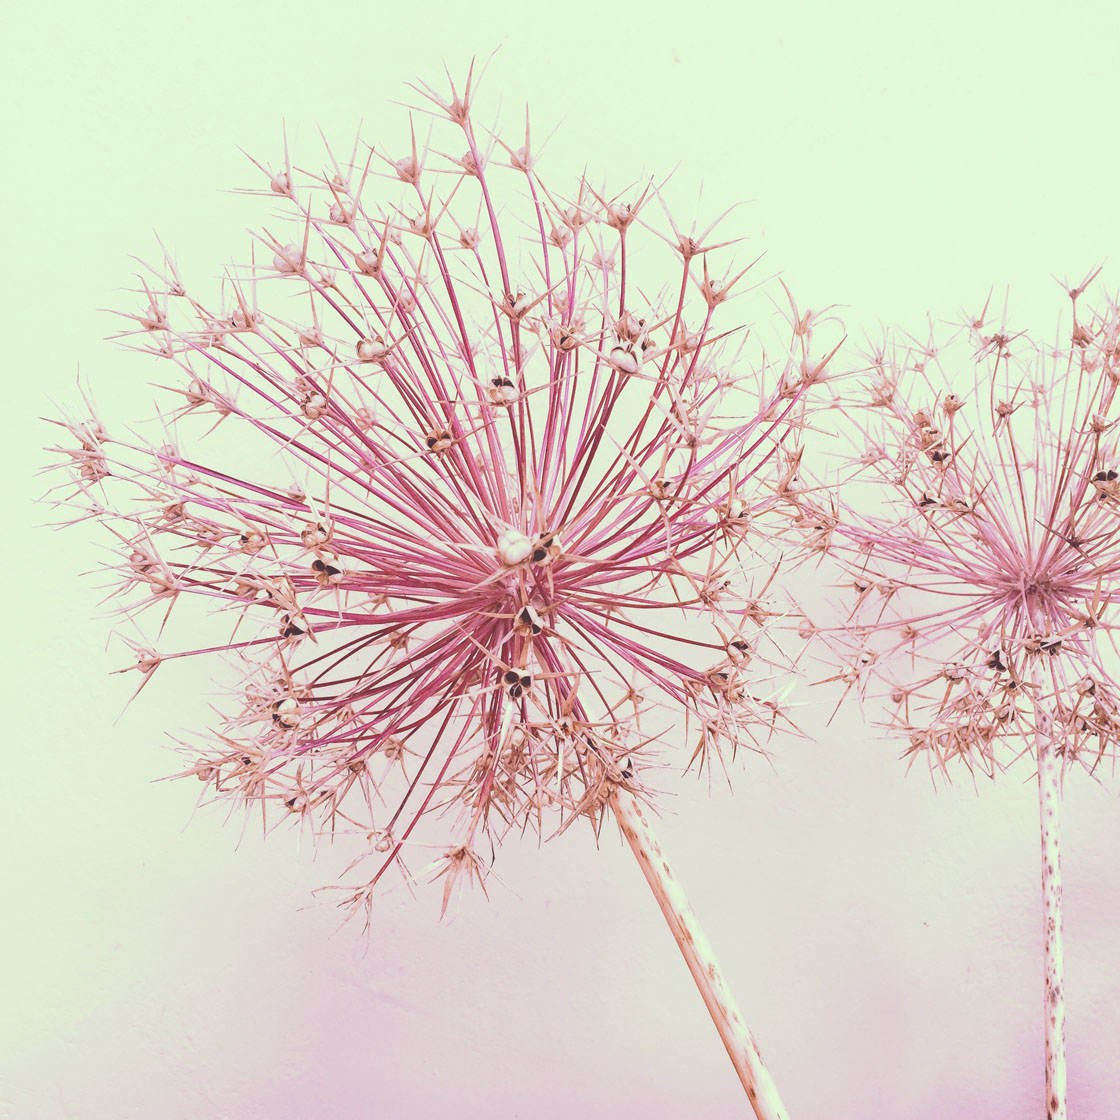
Edited with the 1977 Instagram filter
If you’ve already edited your photo or applied a filter in a different app prior to opening it in Instagram, you may decide not to apply an Instagram filter at all.
While filters can definitely improve an image, only use them if they enhance the look and feel of your photo.
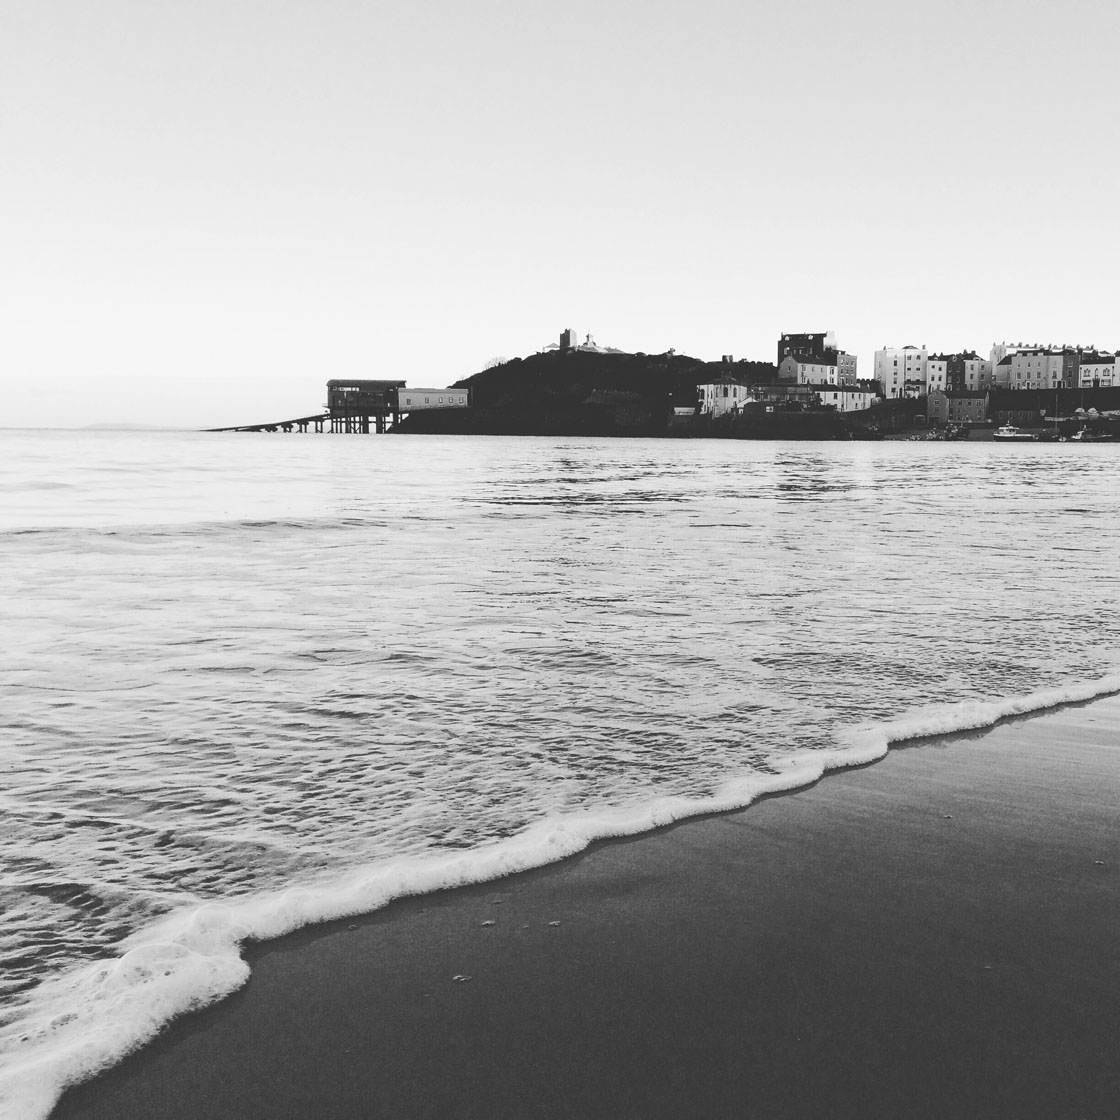
Edited with the Moon Instagram filter
7. Reorder & Hide Filters
As you develop a preference for certain Instagram filters, you might want to make use of the Manage Filters option.
This allows you to reorder the filters so that you favorites are at the beginning of the list. You can even hide filters that you don’t use, or reveal filters that may not appear on your screen if you’re new to Instagram.
Scroll across to the far right of the list of filters, then tap Manage:
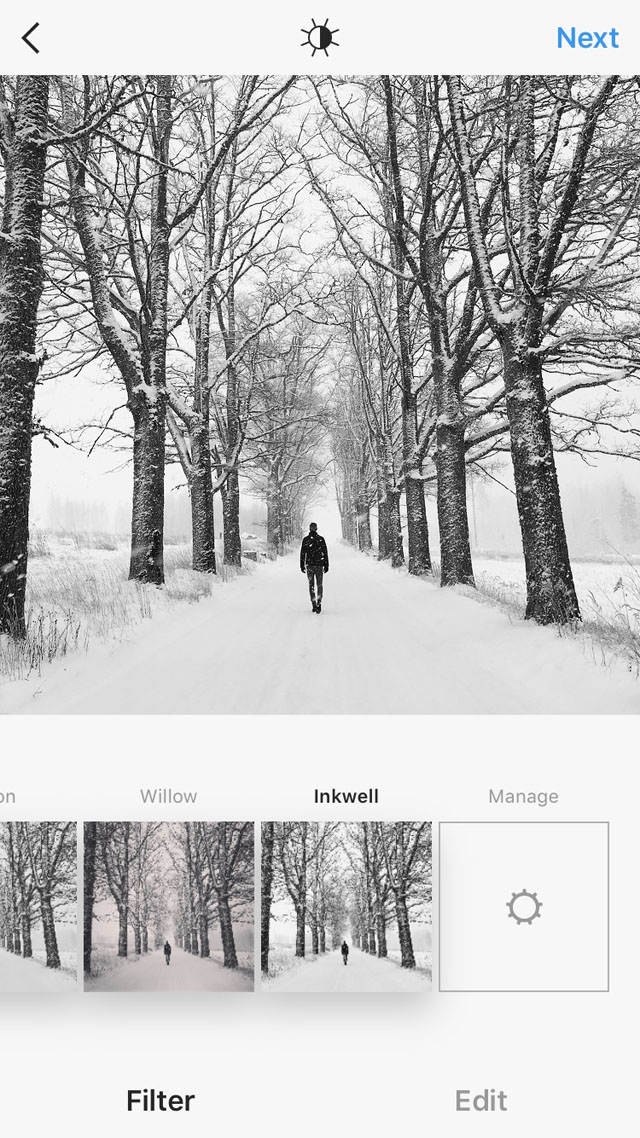
To move a filter up or down within the list, hold down on the three gray lines to the left of the filter name, then drag it to change the order:
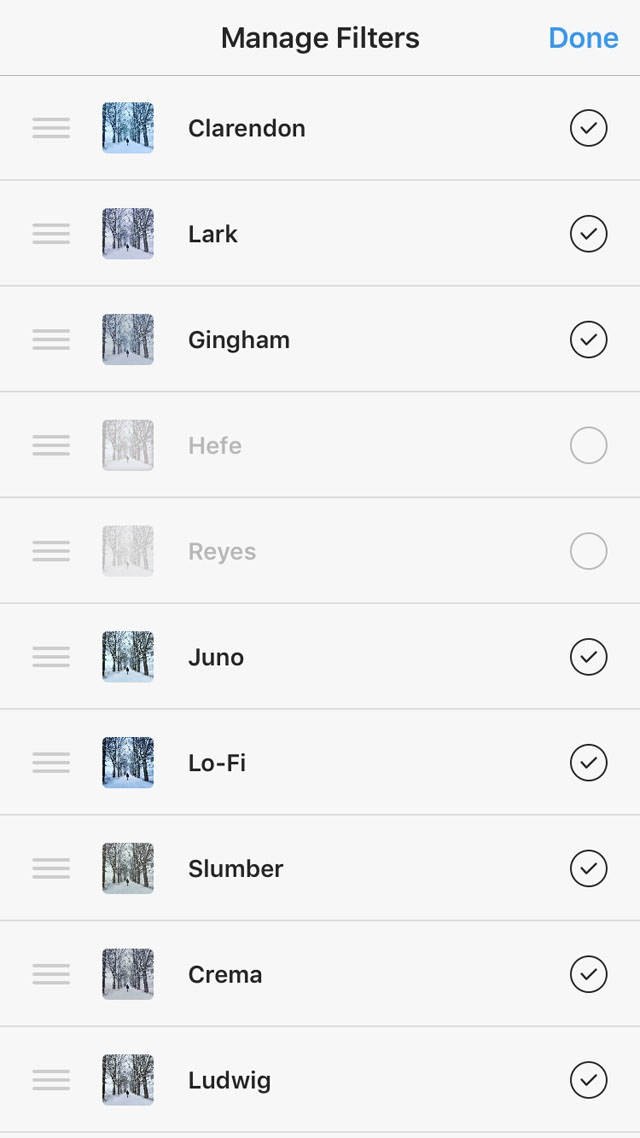
To hide a filter that you don’t use, tap the checkmark to the right of the filter name so that the circle appears empty. You can always add it back into the list by tapping the circle again.
Tap Done when you’ve finished reordering and hiding filters.
6. Adjust The Lux Setting
Instagram’s Lux tool is often overlooked, but it’s a useful setting for making your photo more vibrant (or less vibrant if you wish).
To open the Lux tool, tap the sun icon at the top of the screen:
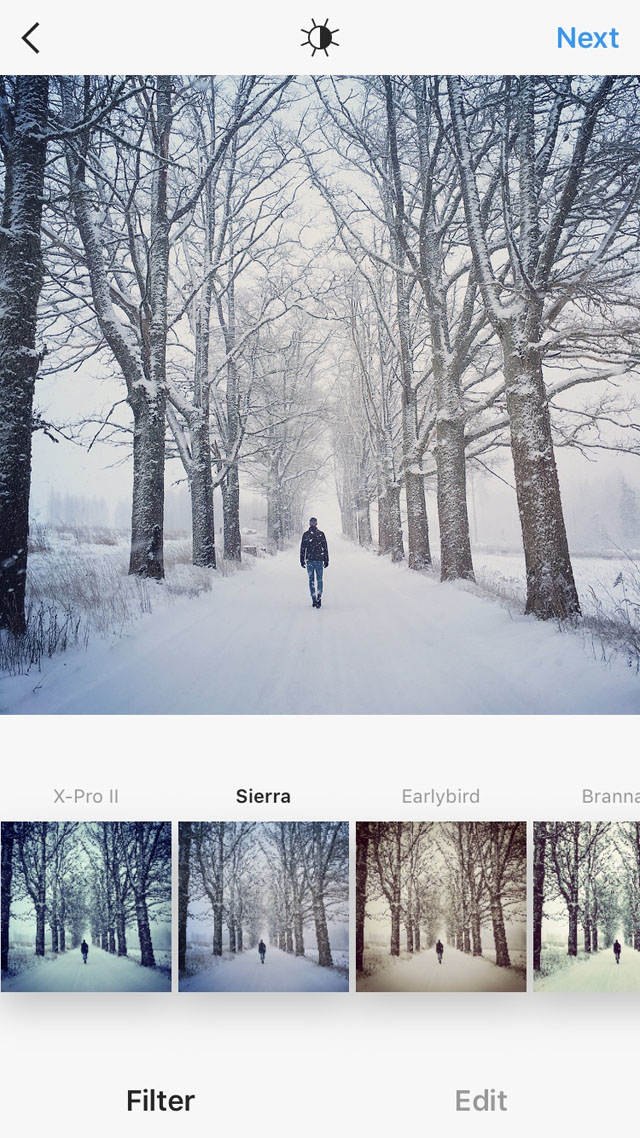
The slider is set to the center point to start with. Drag the slider to the right to increase contrast and vibrancy, or to the left to reduce contrast and give the image a faded look:
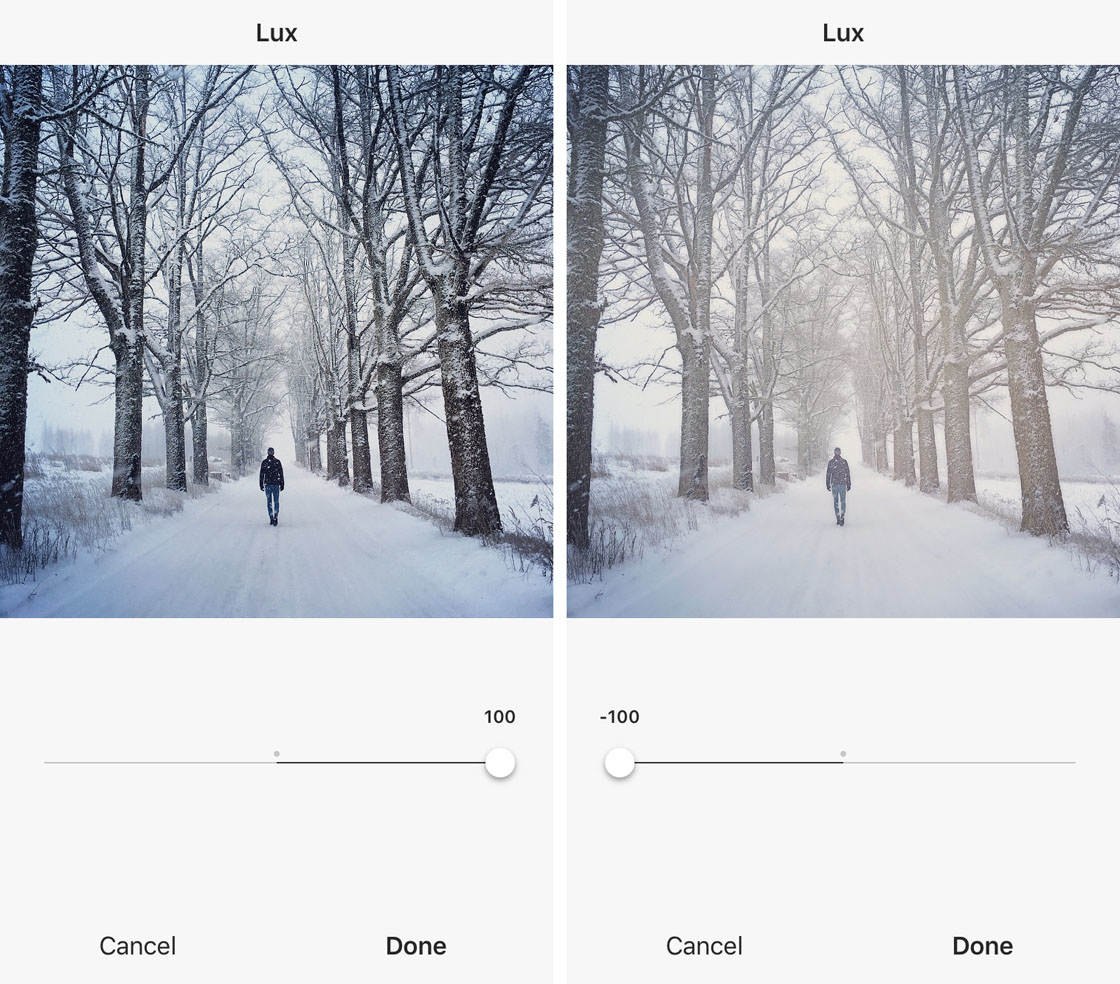
In most cases, you’ll want to drag the slider to the right.
Of course, you wouldn’t usually apply the Lux setting to the extreme ends of the scale. Often, just a little increase is all you need to make your image “pop.”

Don’t worry if the exposure (brightness) of your photo isn’t perfect at this point. You can fix that when we start using the Instagram editing tools in the next section.
Tap Done when you’re happy with the Lux setting.
7. Use Instagram Photo Editing Tools To Fine Tune Your Image
In addition to the preset filters, Instagram also has a collection of manual adjustment tools for fine tuning your photo.
You can rotate or straighten the image, adjust vertical or horizontal perspective, tweak exposure and color, and sharpen the photo to bring out detail. It also has tools for adding fade, vignette and tilt shift effects.
Note that these Instagram photo editing tools can be used before or after applying a filter.
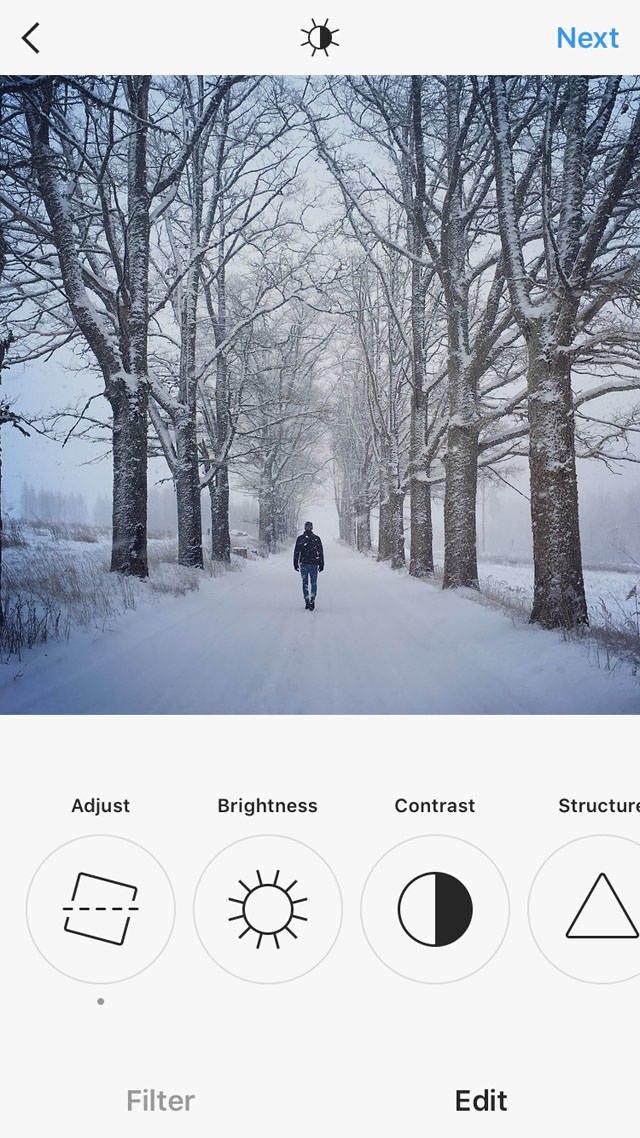
To access the editing tools, tap Edit at the bottom right of the screen. A list of editing tools will appear along the bottom of the screen. You can swipe across to see more icons:
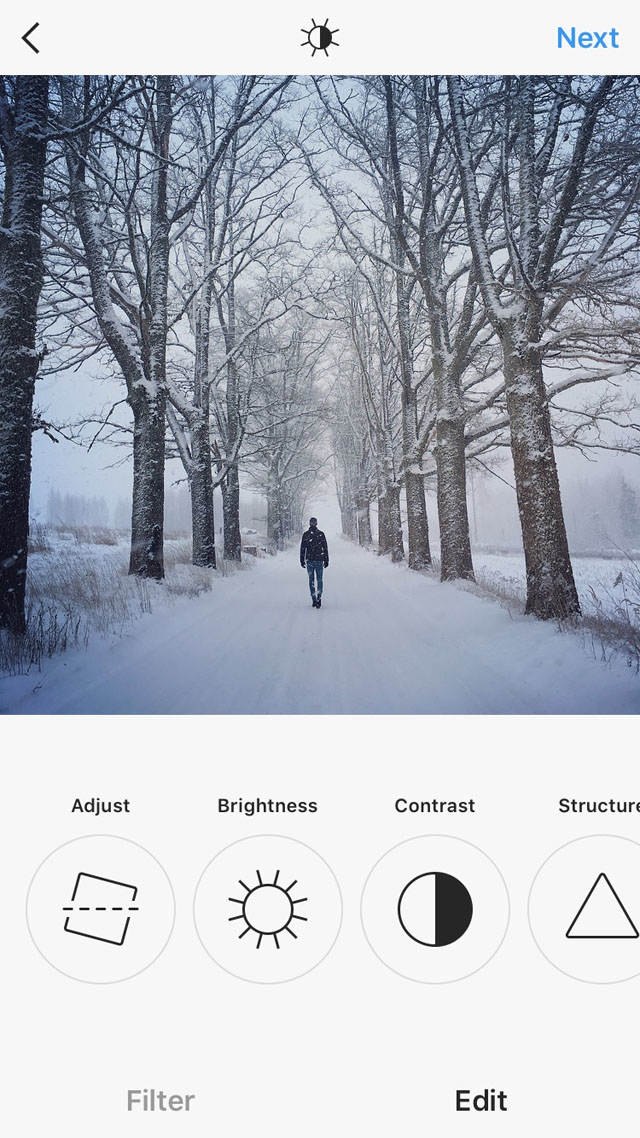
Let’s now take a look at each of the Instagram editing tools so that you can learn how to use them on your photos.
Adjust Tool
The Adjust tool is used for rotating and straightening your photo. Tap the Adjust icon to access the following screen:
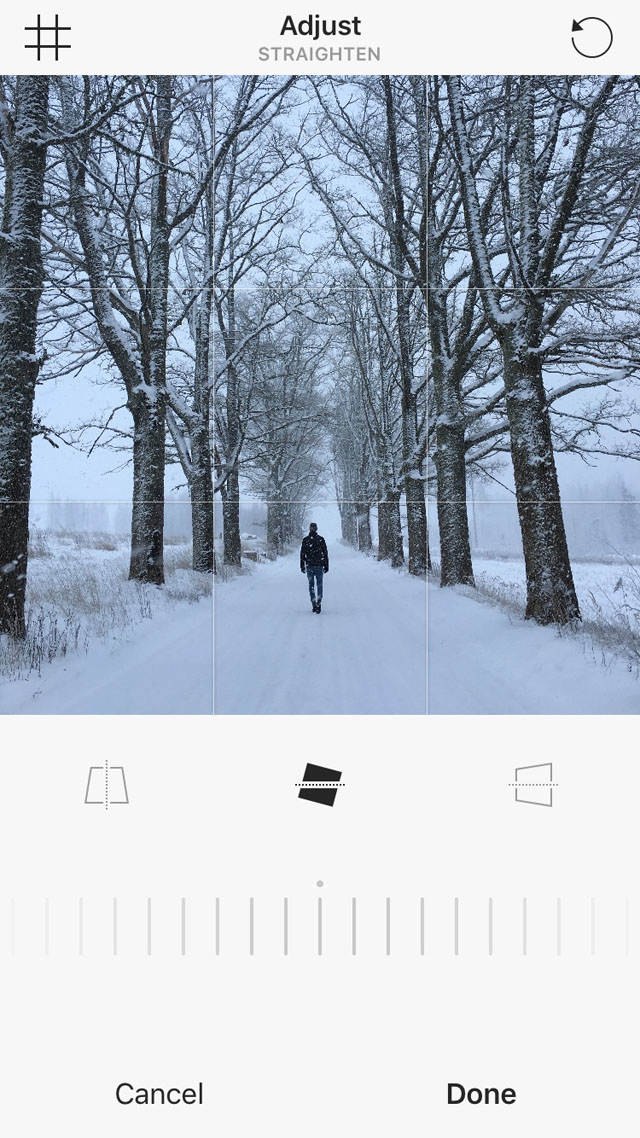
The circular arrow at the top right is for rotating the image by 90 degrees at a time.
The grid icon at the top left allows you to change the display of gridlines overlaying the photo – keep tapping the icon to toggle through the different gridline views. Gridlines are helpful for lining up horizons so that they’re perfectly straight.
To straighten an image, e.g. if the horizon is on a slant, ensure the middle icon beneath the image is selected. Now use the slider at the bottom of the screen to tilt the photo left or right. Use the gridlines to help you line up the image.
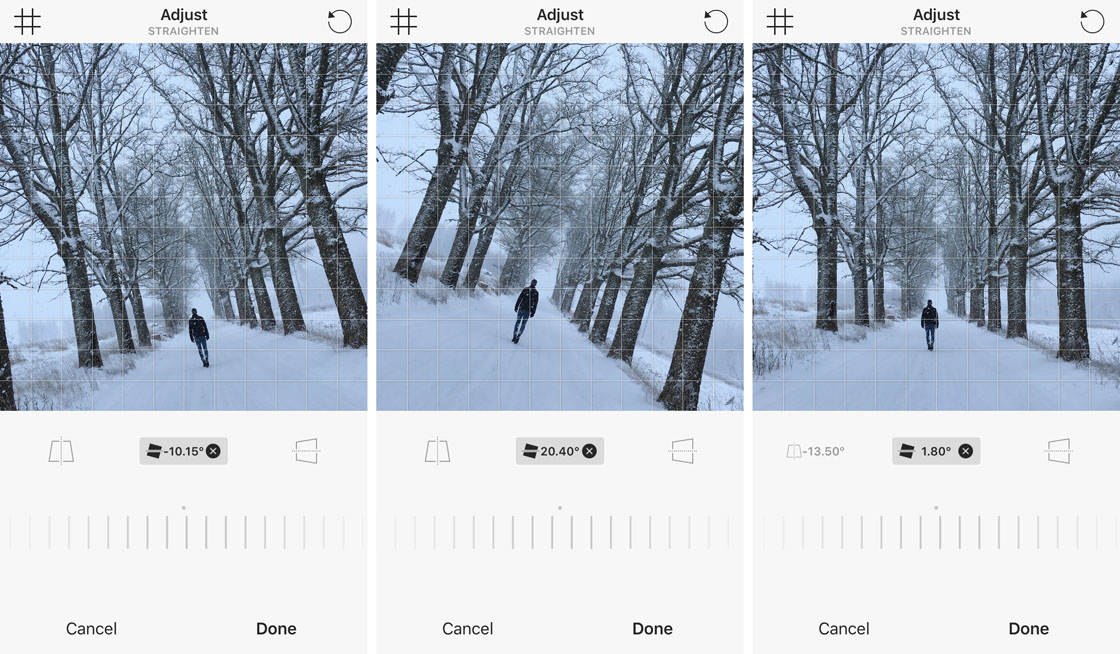
The left-hand icon beneath the photo allows you to change the vertical perspective by stretching out the top or bottom of the image. Use the slider to make your adjustments.
This tool can be used to straighten up tall objects like buildings or trees that are converging towards the top of the frame. Be careful to avoid distorting the other objects in your photo too much.
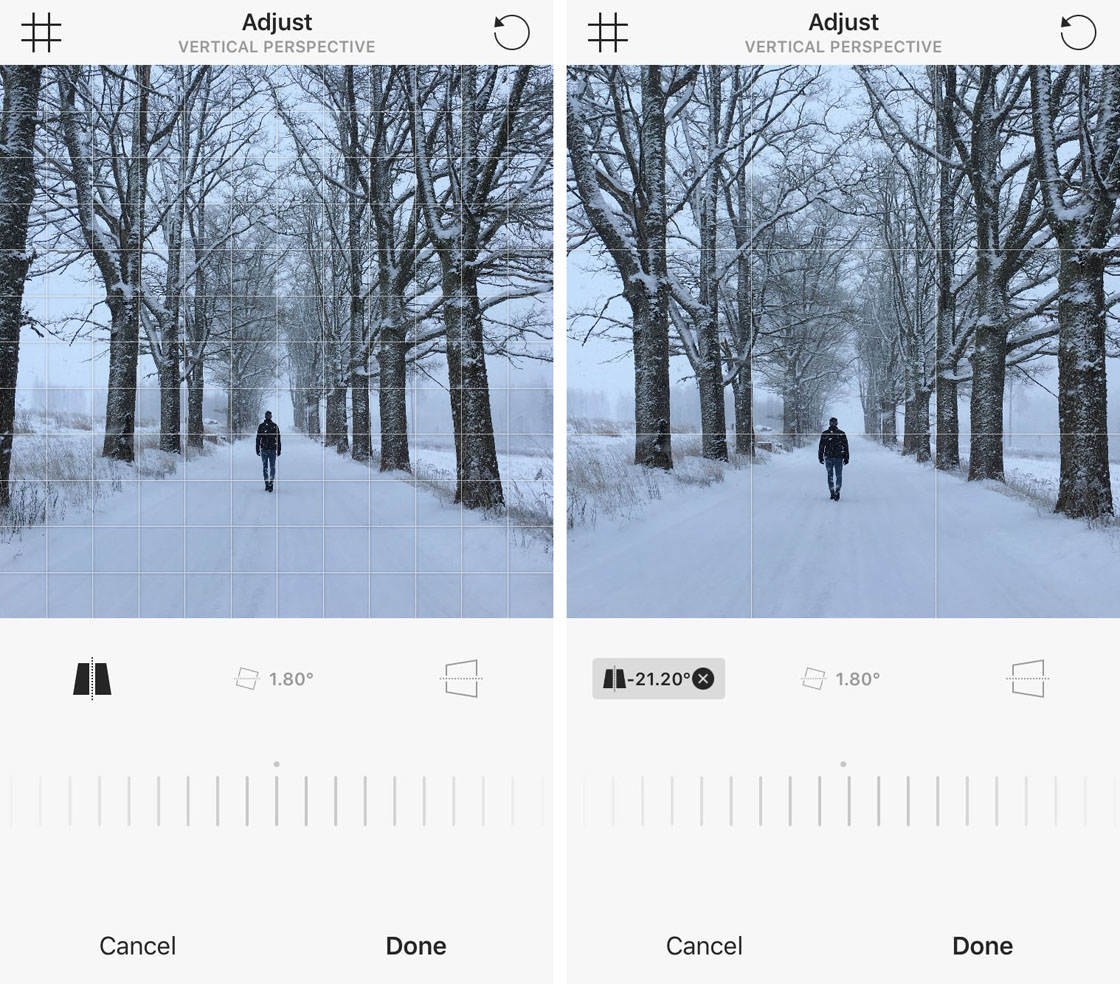
If you want to alter horizontal perspective to stretch out the left or right edge of your image, tap the right-hand icon beneath the photo, then drag the slider left or right.
Tap Done to save the adjustments that you’ve made (or tap Cancel to exit the Adjust tool without saving the changes).
Note that when you’ve used a tool to edit your photo, you’ll see a small gray dot beneath the icon as shown below. This is handy for knowing which adjustments you’ve made to your image.
Brightness Tool
If your image is under-exposed (too dark) or over-exposed (too bright), you can often fix it using the Brightness tool.
Drag the slider left to make the photo darker, or right to make it brighter.
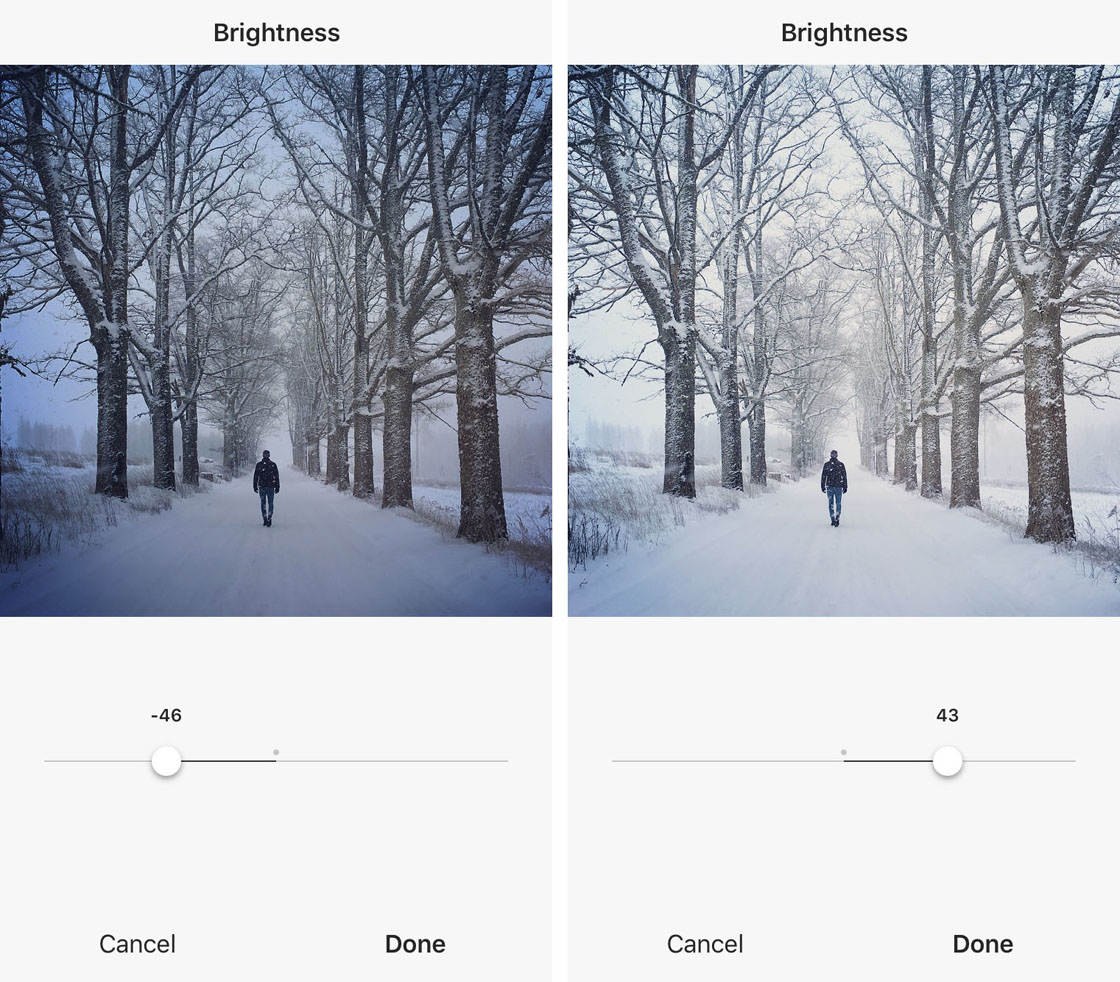
Always tap Done to save the changes that you make with each editing tool.
Contrast Tool
Contrast refers to the difference between the dark and light areas of an image. The Contrast tool allows you to increase or decrease the level of contrast.
Dragging the slider left will decrease contrast and make the image appear more faded. Dragging right will increase contrast, making the shadows darker and the highlights brighter.
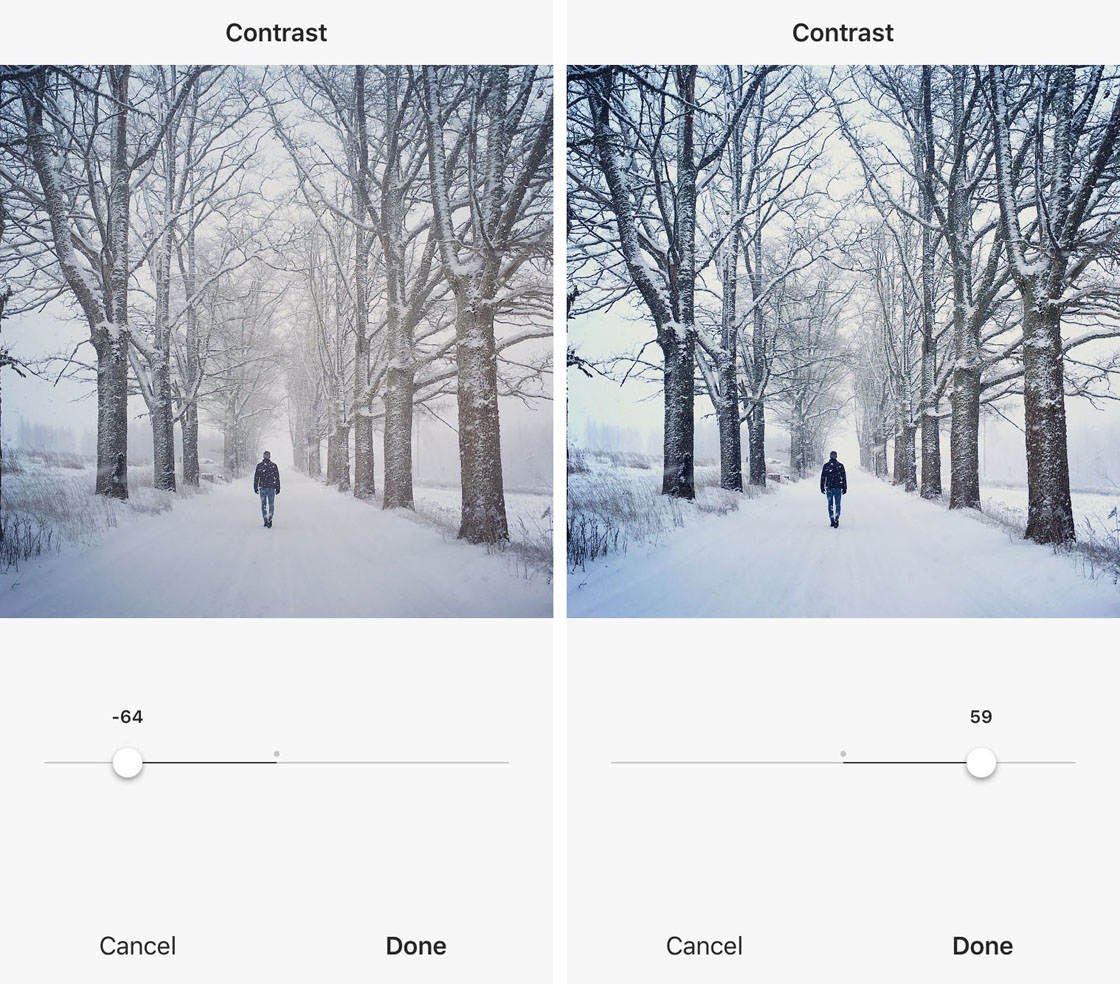
In general, increasing the contrast is usually the better option as it helps to sharpen the detail and make your image “pop.” However, if you’re going for a soft, romantic or vintage look, you may want to decrease the contrast a little.
Structure Tool
The Structure tool is for bringing out detail in your photo. Drag the slider to the right and watch how the fine detail in your photo becomes more prominent.
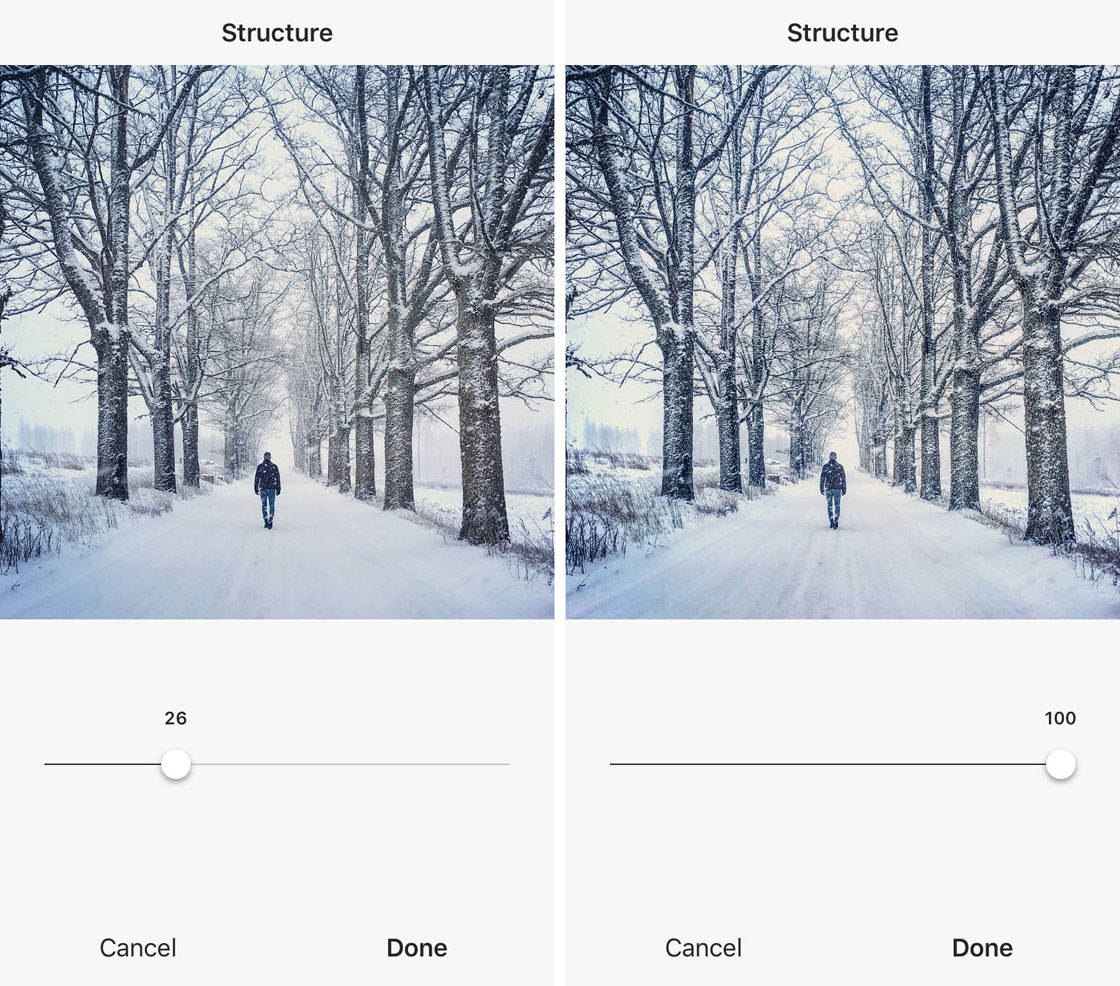
Be careful not to overuse this tool as it can make your photo look unnatural.
Warmth Tool
The Warmth tool is for adjusting the color temperature of your photo. Dragging the slider to the left makes the colors cooler (more blue), while dragging to the right makes them warmer (more orange).
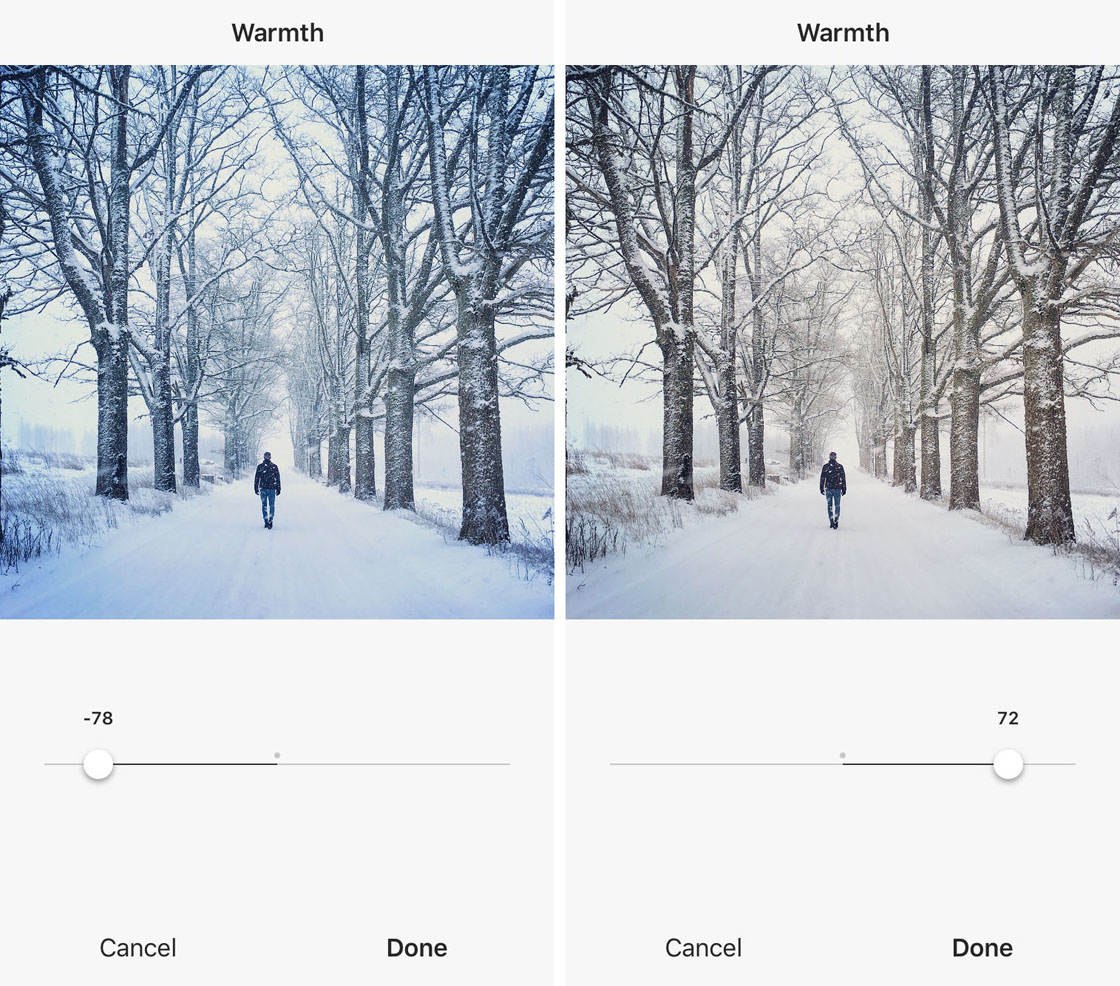
Adjusting the warmth can have a big impact on the overall mood of the photo. Warm colors are great for sunny days, and they tend to create a feeling of happiness and energy.
Cool colors emphasize the coldness of a scene, and can evoke feelings of calmness, serenity, and even sadness.
Saturation Tool
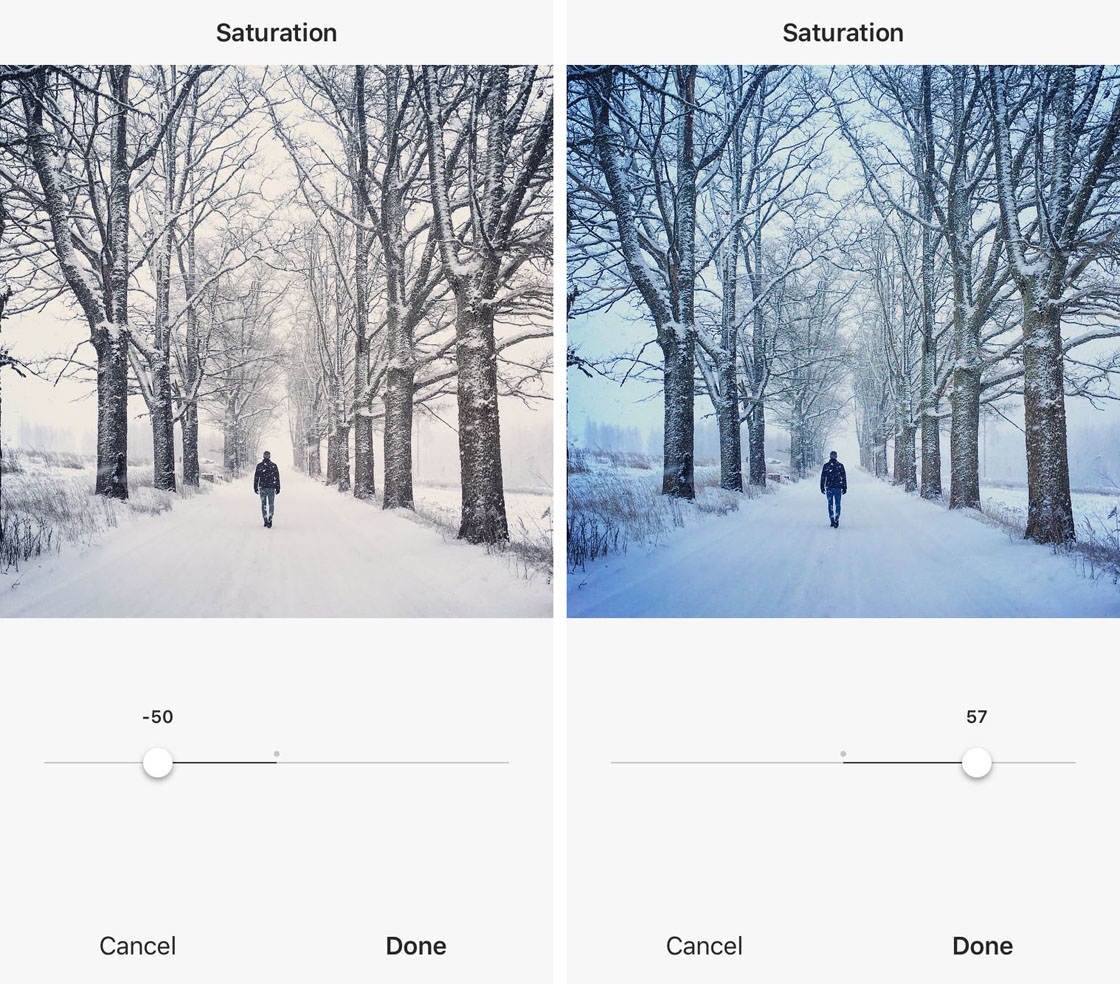
Saturation refers to the vividness of the colors in your photo. Use the Saturation tool to make the colors more vivid or less vivid, depending on the look and feel you want to create.
Drag the slider left to reduce color saturation, making the colors more muted. Or drag right to increase color saturation, making them more vivid.
Color Tool
The Color tool allows you to have a lot of fun with selectively adding color tints to either the shadows or highlights of your image.
Beneath the image, select either Shadows or Highlights, depending on whether you want to add a color tint to the dark areas (shadows) or bright areas (highlights) of your photo.
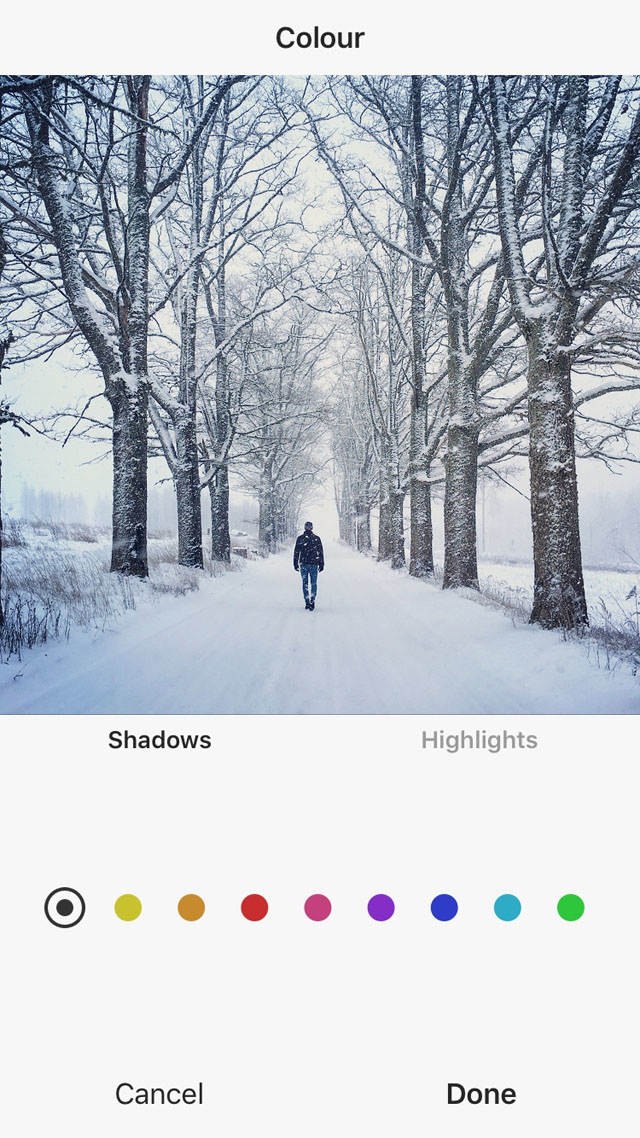
In the example below, I selected the Highlights option as I wanted to add a color tint to the bright areas of my image. Tapping on the different colored dots applied the color to just the brighter areas in the scene, i.e. the snow and sky.
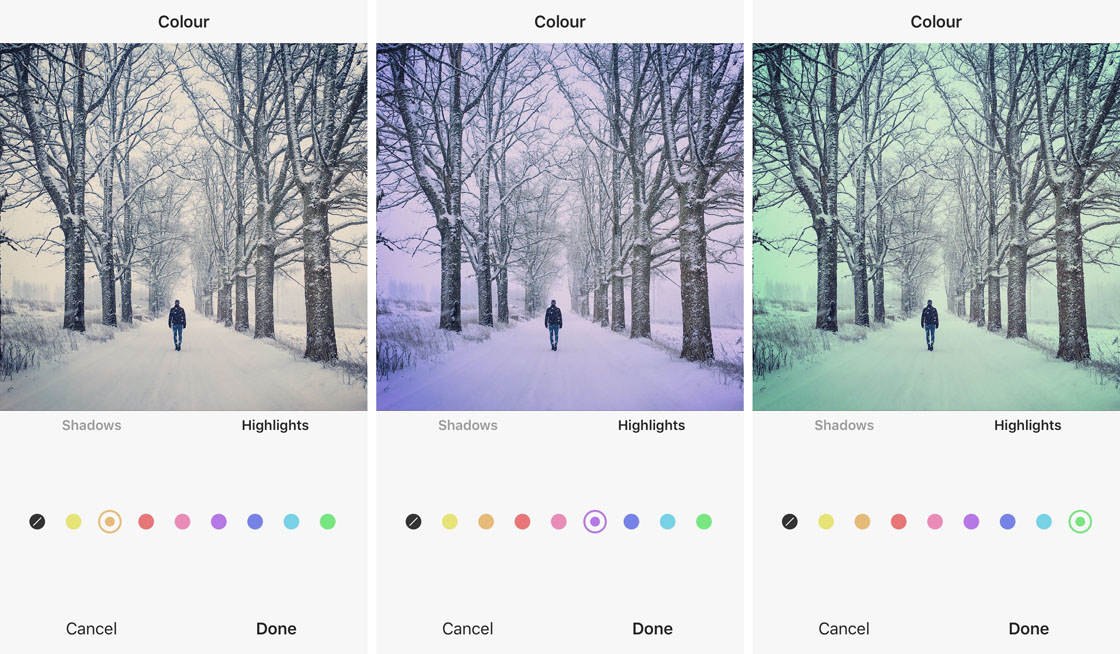
To adjust the intensity of the color, tap the colored dot again, then use the slider to reduce or increase its intensity.
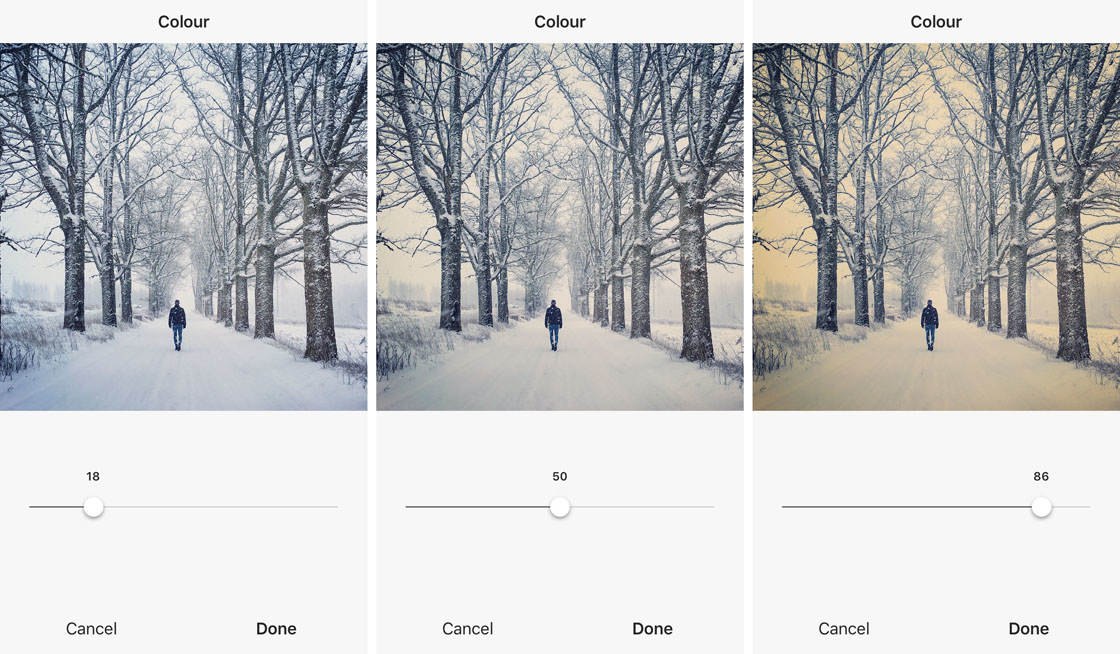
Remember that less is often more with photo editing. Keep things looking natural and just add a hint of a color tint to slightly alter the color tone of the image.
Fade Tool
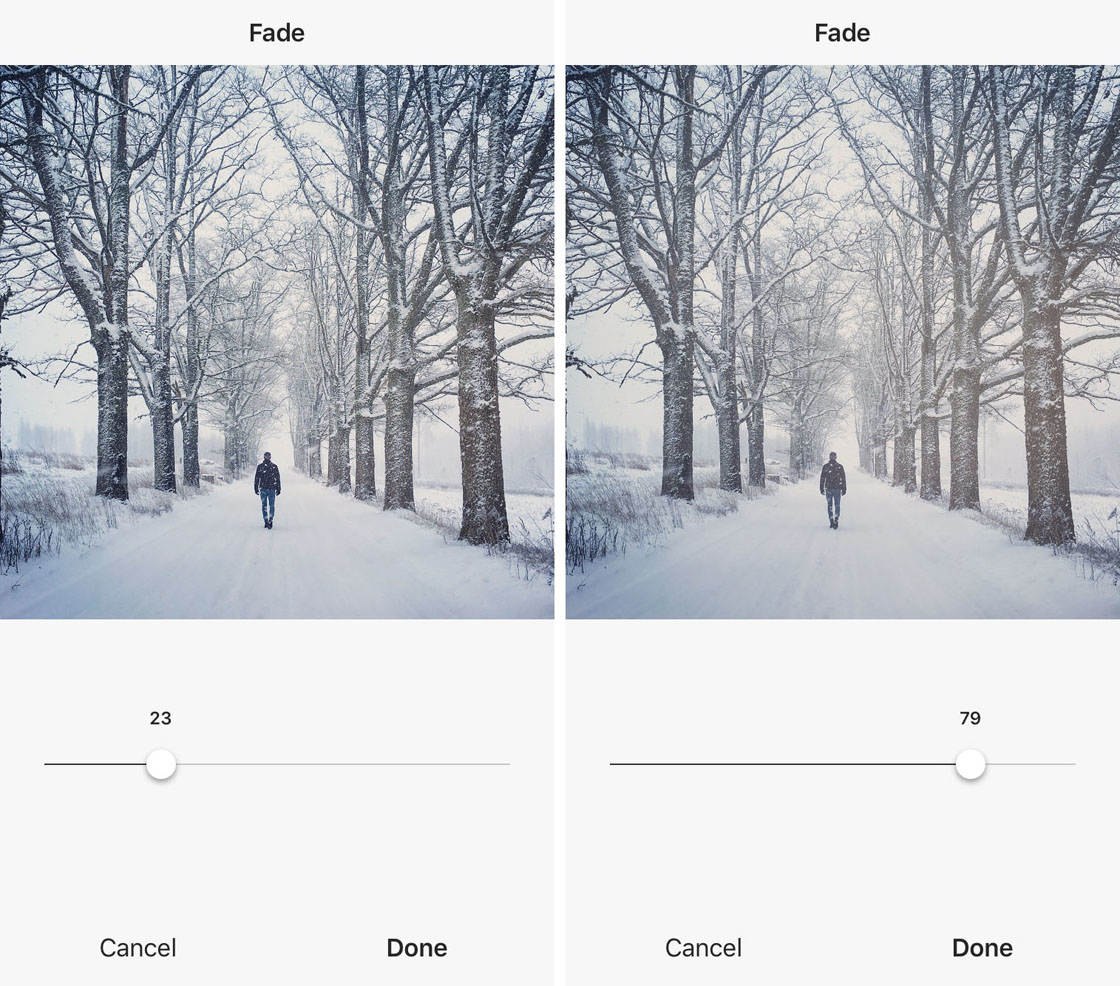
The Fade tool is used for fading or washing out the colors in your photo. A little bit of fade can soften your image, creating a romantic or vintage feel.
Drag the slider slowly to the right until you get just the right amount of fade. Usually, just a little bit of fade is all you need.
Highlights Tool
Use the Highlights tool if you want to darken or brighten just the highlights (brighter areas) in your image.
Drag the slider left to darken the highlights, or right to make them brighter.
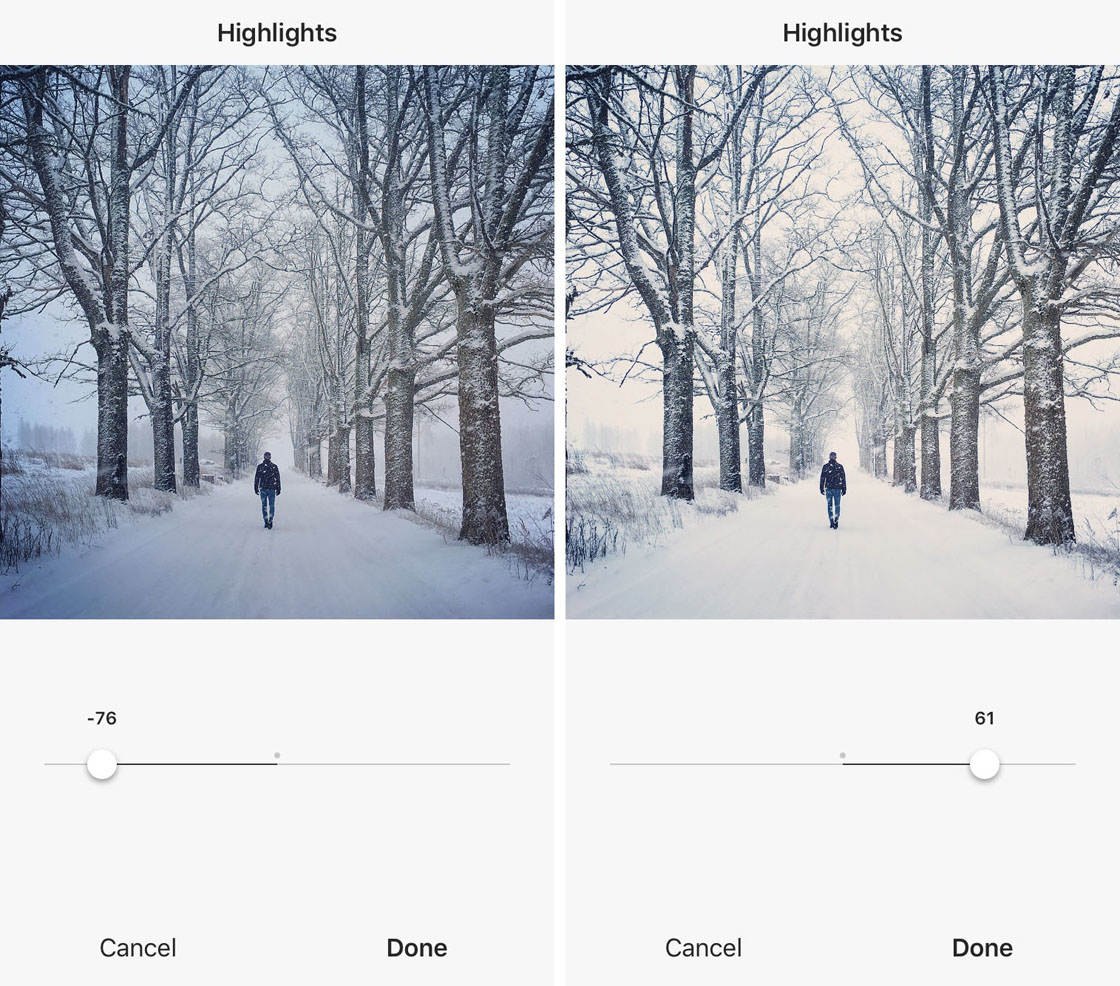
Notice that the shadows (darker areas) aren’t affected by this adjustment.
Shadows Tool
The Shadows tool allows you to darken or brighten just the shadows (darker areas) in your photo.
Drag the slider left to darken the shadows, or right to make them brighter.
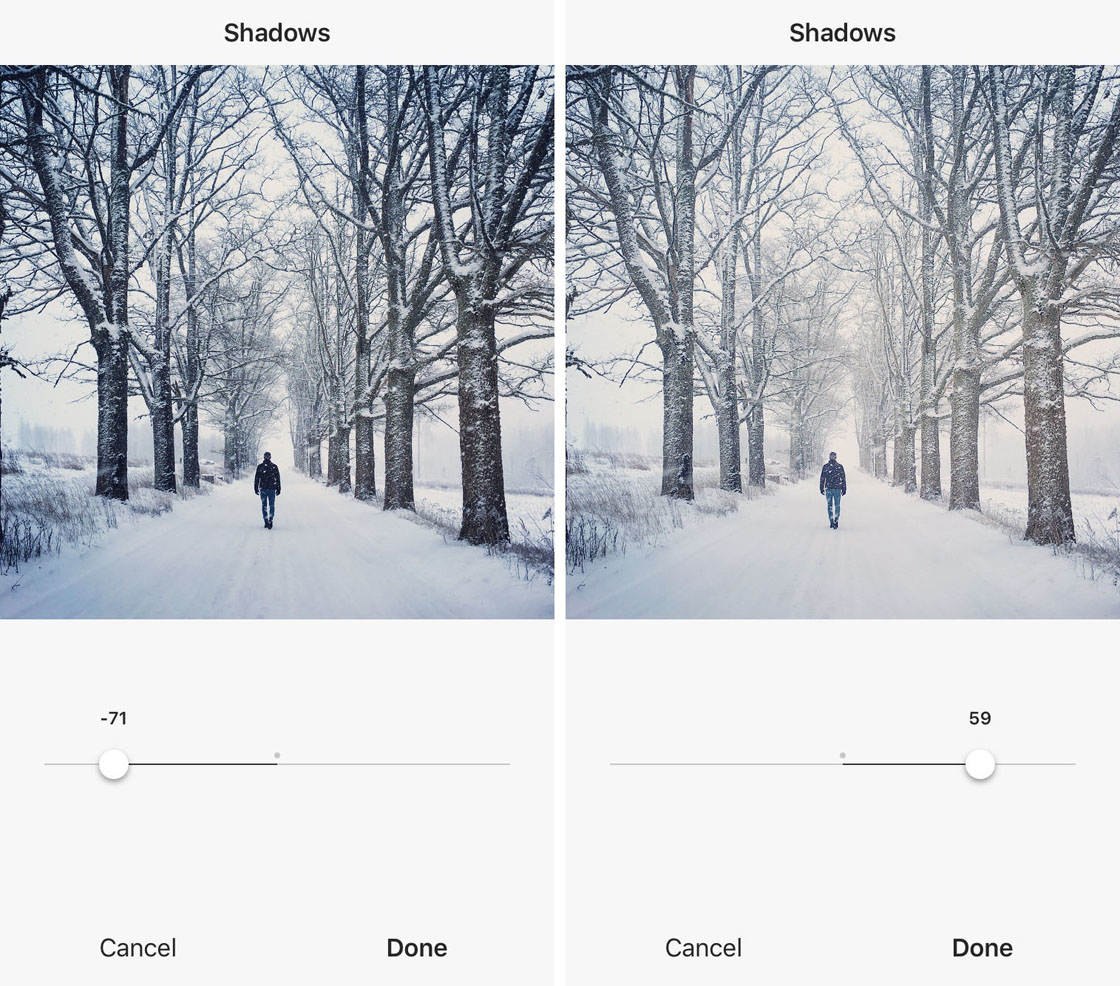
Notice that the highlights (brighter areas) aren’t affected by this adjustment.
Vignette Tool
The Vignette tool is for creating a dark vignette (subtle border) around the edges of your image. Drag the slider right and notice how the edges gradually become darker.
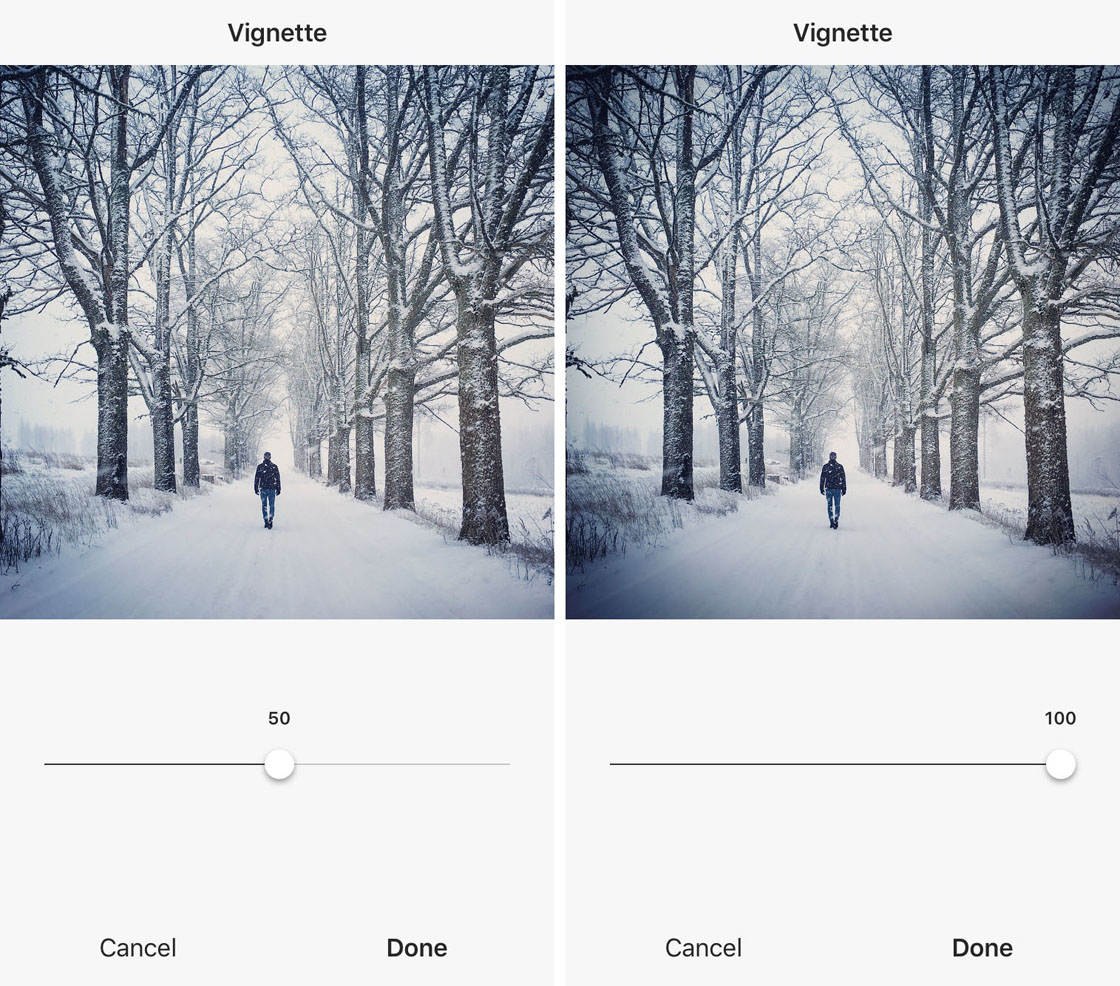
Vignettes can be useful for drawing the viewer towards the focal point as your eye is automatically drawn to the brighter part of the scene.
As always, keep the edit subtle to prevent the effect from dominating your image.
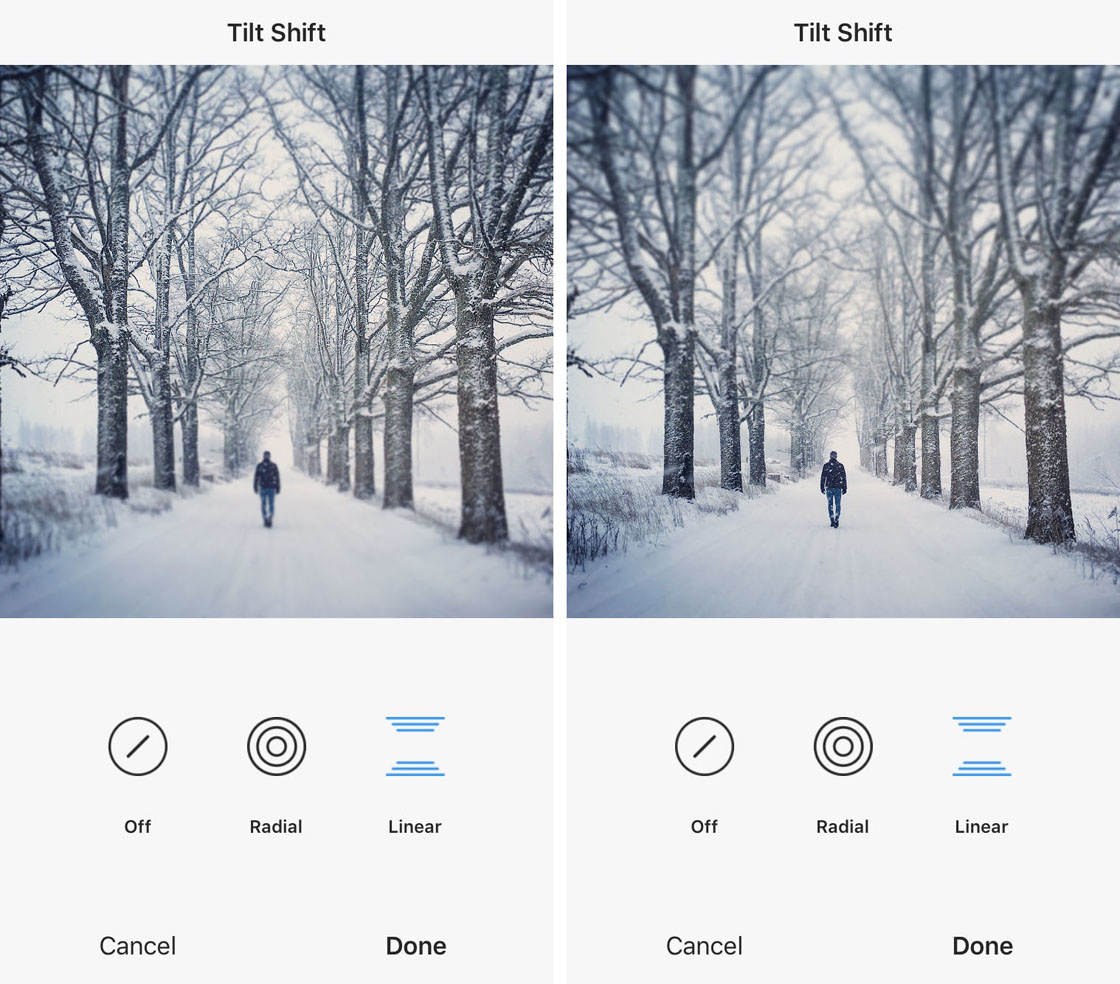
Tilt Shift Tool
Tilt shift allows you to blur a part of the image, often to simulate the kind of depth of field you could achieve with a DSLR camera. There are two tilt shift options: Radial and Linear.
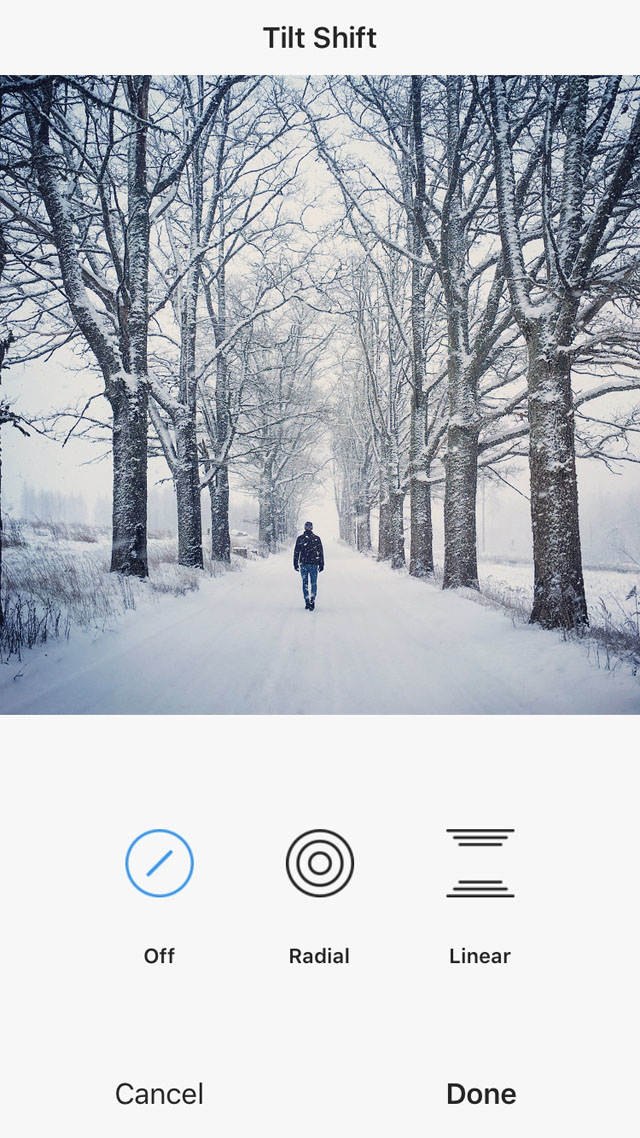
The Radial option blurs everything around the edges of the image, keeping a circular shape in the center in sharp focus. You can drag the sharp area to a different part of the scene to ensure your subject is in focus. You can also pinch-zoom to make the sharp area larger or smaller.
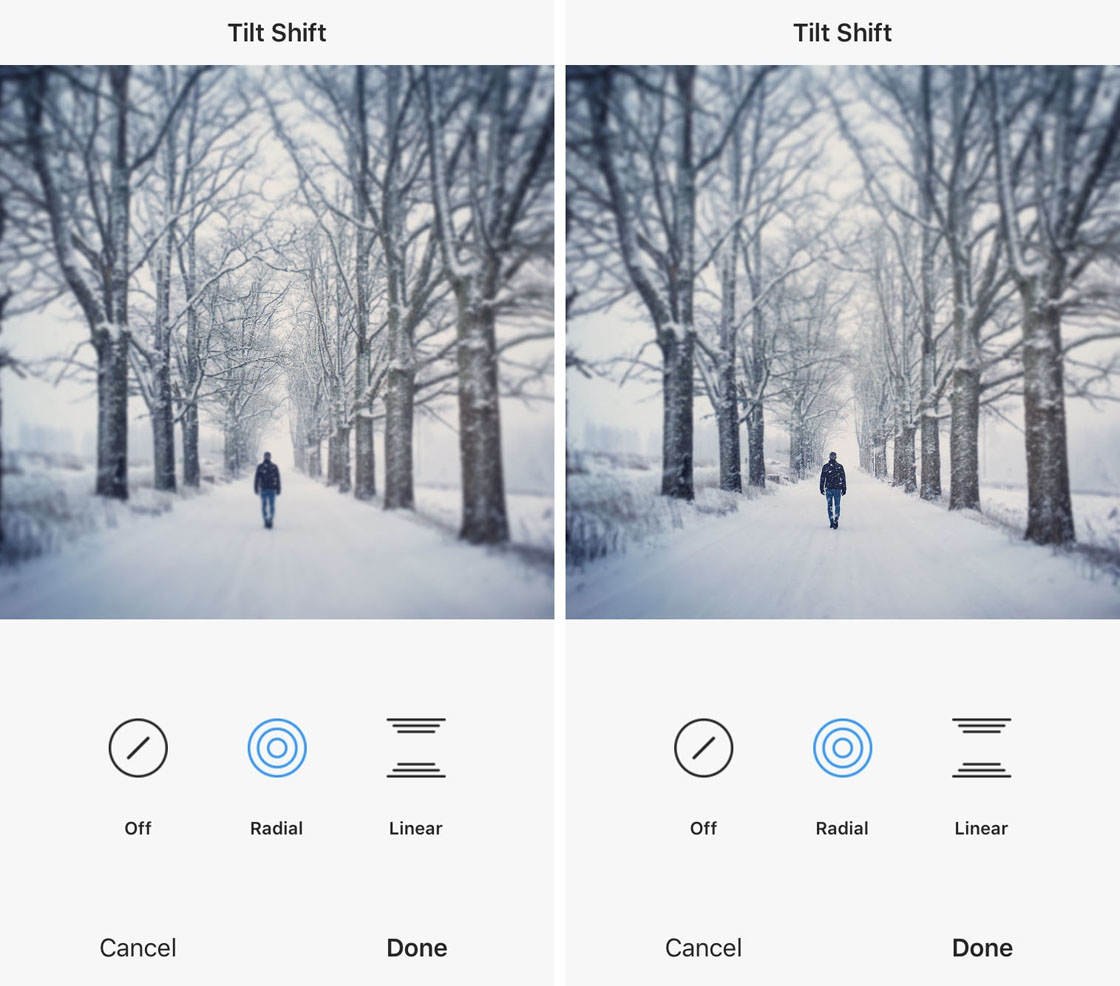
The Linear option blurs the top and bottom sections of the image, leaving the central strip in sharp focus. Again, you can drag the focus area and pinch-zoom to resize it.
Sharpen Tool
The final editing tool in Instagram is Sharpen. Increasing sharpness a little bit can bring out the fine detail in your image.
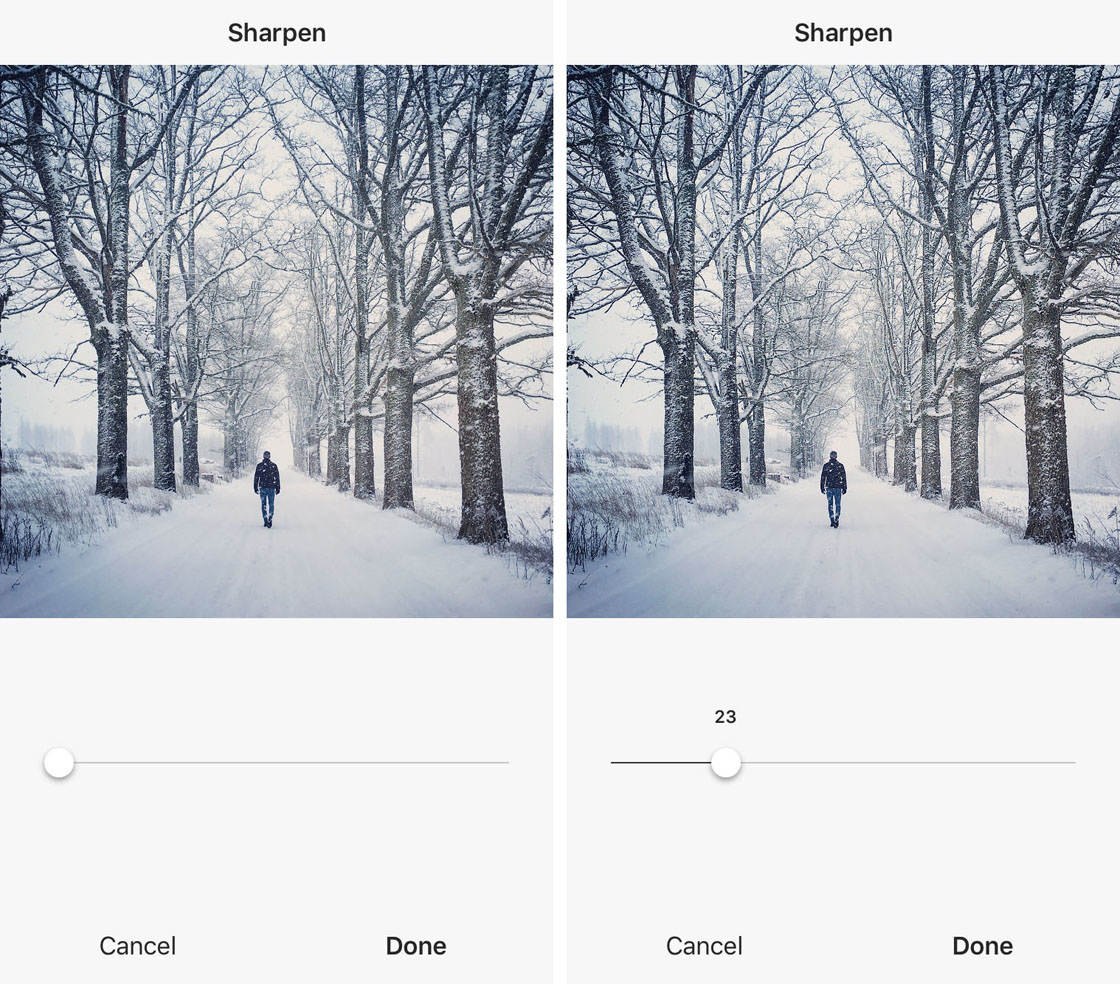
Be careful not to over-sharpen your photo. Too much sharpening can degrade the quality of your image and make it appear grainy:

8. Perform Any Final Editing Tweaks
You may find that after making adjustments using one tool, you then want to go back and make small adjustments to one of the other settings. For example, after adjusting highlights and shadows, you might want to go back and tweak the contrast.
Once you’re happy with your edits, you might also go back to the filters screen and tweak the intensity of the filter you applied. In fact, you could even change your mind and choose a completely different filter.
Once you’re happy with your edits, you’re ready to share the photo on your Instagram feed. Here’s the final edit created using Instagram filters and editing tools:

9. Share Your Image
The final step is to share the photo with your followers. Tap Next at the top of the screen. Write a caption, tag people and add a location if you wish, then tap Share:
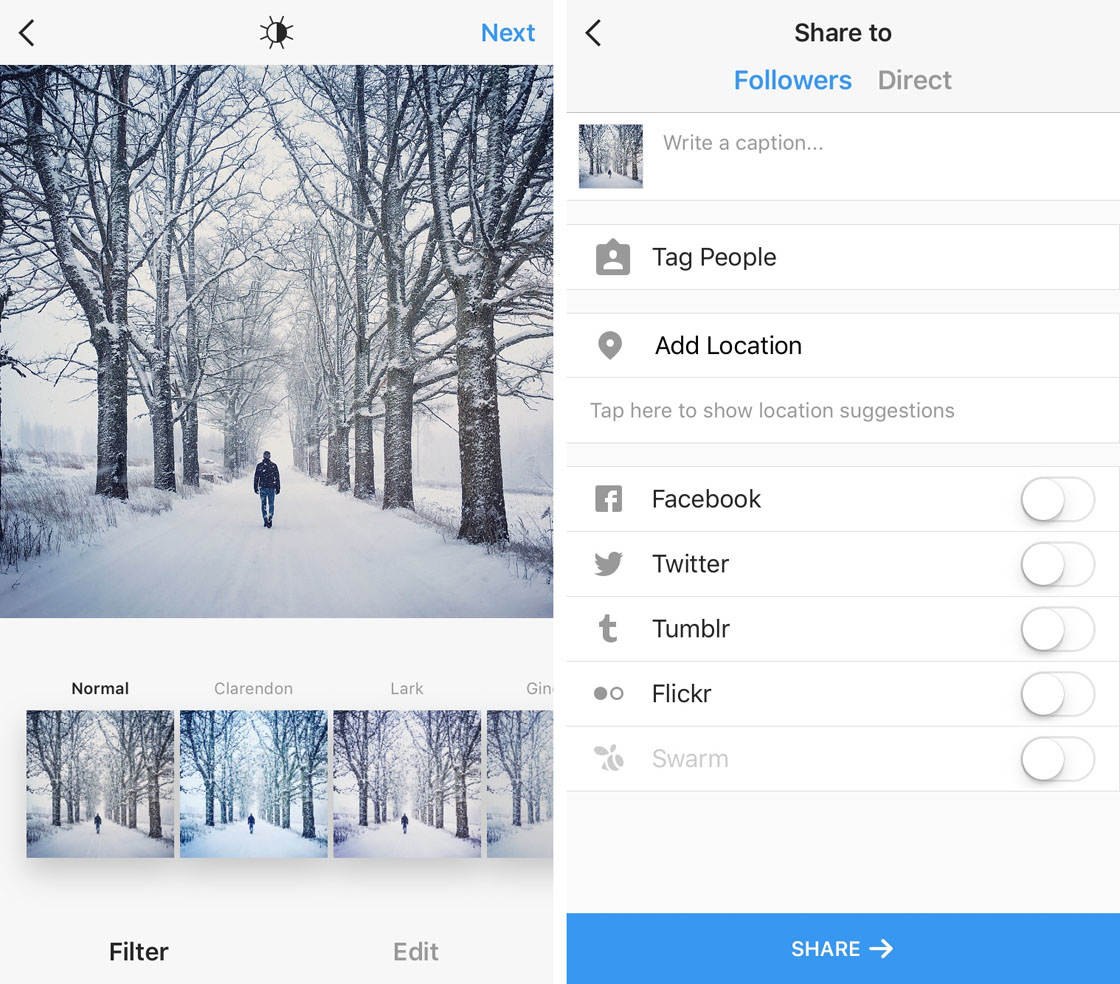
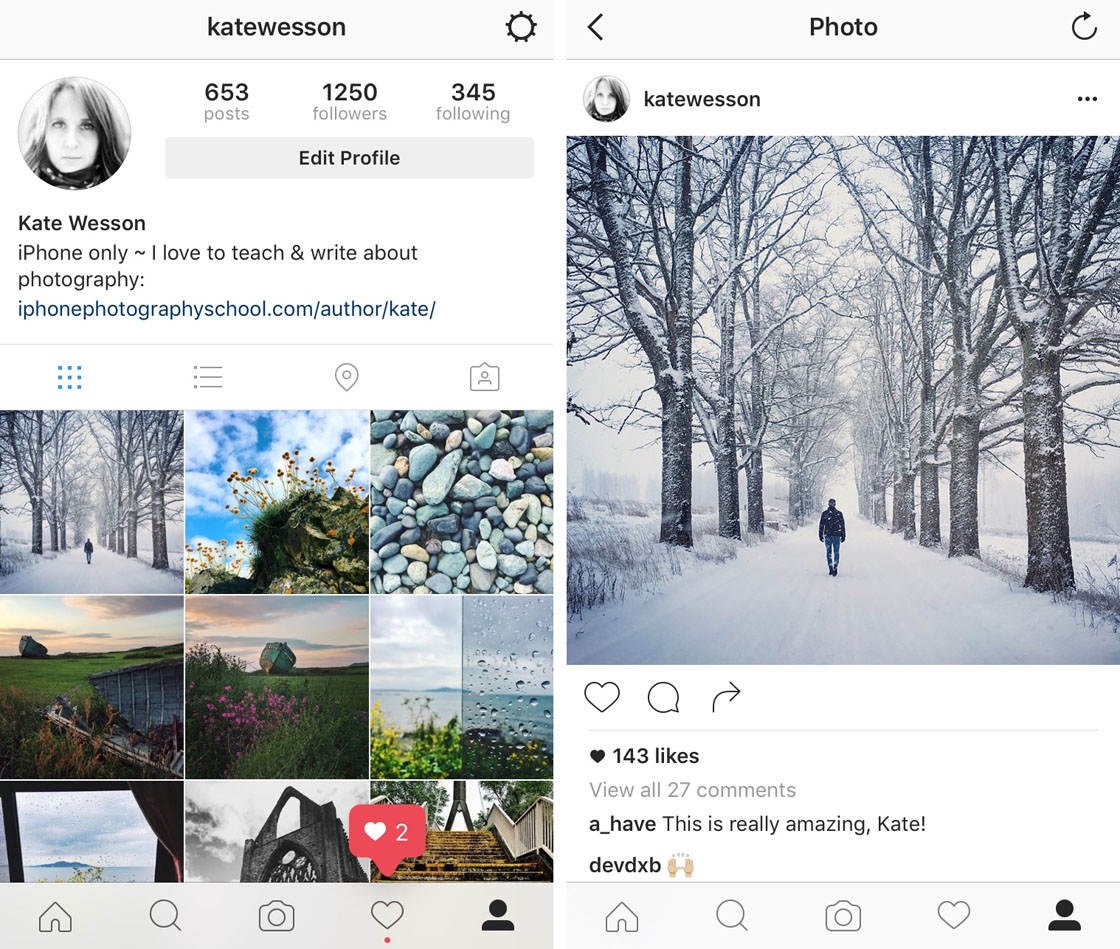
Your image will be posted to your Instagram feed, where hopefully it will attract lots of likes and positive comments!
Are you looking to discover other apps that will help you produce stunning edits? Check out our article on the best photoshop apps for iPhone!

The editing is really good as well as the photos taken using iPhone. Its not looking photos taken using any DSLR. If you are good enough in photography then even iPhone can provide the best shot.
If I had to rate this article, I would say its extraordinary. They way you put each step and described them accordingly is fantastic. Really descriptive and informative article. Though most of us use Instagram on daily basis, but very few of them are familiar with all these editing features. Really appreciate your work. Thanks a lot.