Have you ever found yourself enjoying a magnificent view that you would love to capture, only to discover that you can’t possibly fit it into a single photo? This is when panorama photos come in handy.
Creating panoramas used to be a lot of hard work and only tech-savvy photographers knew how to do it. Luckily, things have changed in the recent years, and now it’s very easy to crate beautiful panorama photos right on your iPhone. Forget about manually stitching photos on your computer. The iPhone can do it all for you.
In this article you’re going to learn how to take panorama photos using the iPhone’s built-in camera app, as well as using third-party panorama applications. We will also compare the results to find out which of these options provides the best results.
Option 1: The iPhone’s Built-In Panorama
Since the introduction of iOS 6 it’s possible to take great panorama photos right inside your iPhone’s native camera app. The panorama feature only works with iPhone 4S, iPhone 5 and the latest generation iPod touch, so if you have an older device you have to use another panorama app.
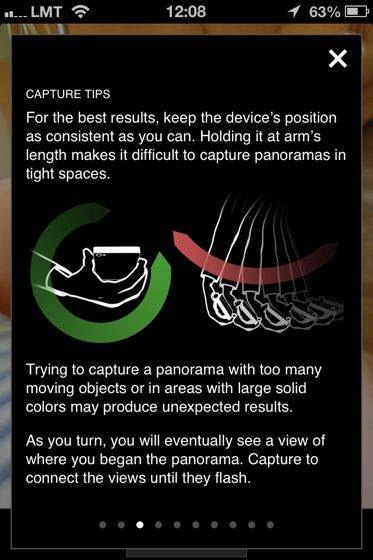
In order to access the panorama feature, open your iPhone’s Camera app, tap on Options, and choose Panorama. This will launch the panorama mode, which is explained in more detail in the following video.
Here is the panorama photo that was captured in this video (click to enlarge).
In general, the iPhone’s built-in panorama does a great job at stitching together multiple images. As you can see above, all transitions are done flawlessly, thus making the built-in panorama feature a good choice in most situations.
However, the iPhone’s built-in panorama has two disadvantages. First, it tends to struggle with exposure in scenes that have a high dynamic range. As you can see above, the central part of the photo is largely overexposed and all the detail in the sky is lost.
The other disadvantage is that the height of your image is limited by how much you can see through the lens of your iPhone in portrait orientation. Other panorama apps allow you to create higher panorama photos, but this feature is not available in the iPhone’s built-in panorama mode.
Option 2: 360 Panorama App
Another way to crate panorama photos with your iPhone is using the 360 Panorama app. This is a paid app, and it’s currently selling for $.99 on the App Store. The following video will show you 360 Panorama in action.
Here is the panorama image that was captured in this video (click to enlarge).
In general, I was rather disappointed by how 360 Panorama performed. The sky is severely overexposed and the coastline in the center of the photo is not stitched accurately.
On the other hand, the “virtual reality” panorama viewer that I mentioned in the video is really cool. If you want to play around with it and have some fun, you should buy this app. Otherwise it’s probably not worth it since the stitching algorithm is quite inaccurate.
Option 3: Photosynth App
Another way to capture panorama photos is using the Photosynth app by Microsoft. This app is currently free and it also offers advanced panorama functionality. The following video will show you how to use this app.
This is the first photo that was captured inside the video (click to enlarge).
This photo has been stitched very accurately, and the exposition is accurate throughout the image. The iPhone’s built-in panorama mode did an equally good job at stitching, but Photosynth appears to be better at maintaining proper exposure throughout the scene.
Here is the second image that was capture inside the video.
Here I have captured the same scene, this time adding more space in the sky. As expected, this panorama doesn’t look as good as the previous one since it’s a combination of many more photos. In general, the stitching is done accurately, but there are significant issues with color and brightness in the central part of the image.
It appears that the app had a hard time dealing with the extreme dynamic range in the central parts of this photo. The results would probably be better in a scene that has more even light.
Verdict
From the panorama apps that were tested in this article, Photosynth seemed to perform best. It’s stitching was very accurate, and it was able to maintain a proper exposure throughout the scene better than the other alternatives. And best of all, it’s free. You will get the best results with Photosynth if you only stitch images horizontally, and not vertically.
The iPhone’s built-in camera app is also a good option, but it seems to perform worse than Photosynth when the exposure has to be very different throughout the scene.
Extra Tips
You should avoid moving subjects when taking panorama photos. Since panorama photos are stitched together from multiple separate images, you are going to have problems if the scene is changing while you’re taking a panorama. Similarly, you should not move much since your own movements will change the angle from which the photos are taken.
These principles are nicely explained in the help section of Photosynth.

With that said, it’s practically impossible to keep your iPhone in the exact same position while you keep moving around to capture a panorama. However, you can minimize the impact of inadvertently changing the position of your iPhone by only capturing distant views. The further your subjects are from you, the less worried you have to be about moving your iPhone too much.
Finally, panorama images allow you to get creative in ways that wouldn’t be possible otherwise. Have you ever wanted to have the same person casually appear in your photo twice? With panorama photos you can do exactly that…
This image was taken in Copenhagen using the iPhone’s built-in panorama feature. I started the capture on the left side of the image and told my friend to remain perfectly still. As soon as he was out of the frame, he walked around me from behind and stopped to the right of me, where he once again remained still so that I could finish the panorama.
Gallery
Here are a three more panorama photos that I took on my recent trip to the United States. These photos were all taken using the built-in panorama mode of my iPhone 4s. I hope they inspire you to go out and take your own panorama photos.
This is the Pacific Ocean in La Jolla, California. A truly amazing place.
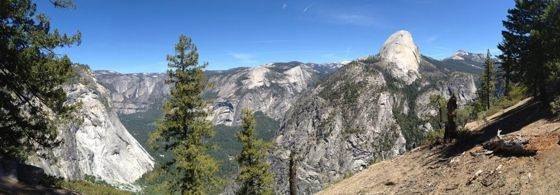
This is Yosemite, one of the greatest natural wonders in the world. Half Dome is prominently seen on the right. If you click on the image to make it larger, you’ll also see Yosemite Falls on the left.
This is a harbor in Monterey, California. Do you see the Fisherman’s Wharf on right? They serve the best clamshell soup I’ve ever had.


I have an iPhone 5 and I can’t get it to do panorama photos. I have followed the instructions but when I move the phone to include a larger picture, the little vertical window doesn’t expand to the photo is limited to the last frame in the little window when I release the shutter. Can someone help please?
Are you holding your finger down on the shutter button when you take the photo? Or do you tap the shutter button once at the start and then tap it again at the end?
Try taking parallel photos ( as the pano app in iPhone does not have to be rotated just moved to take a panorama ) photos of images behind glass lose the reflection and increase contrast.
Great guideline for beginners who attempts to capture their own panorama photography. Anyways Thanks for sharing,
I just shot this one yesterday. More on http://pixeldo.com/aerial-panorama-india/
Beautiful photo, Jagdish. 🙂
Glad you find this article helpful!
Unfortunately photosynth isn’t available in the US :'(
I deliberately moved the phone up and down while taking a photo, this was the shot I took in Italy, I think it has a Picasso quality
The other thing you can do is swing the camera on an arc
Photo 1 is moved in an arc
Photo 2 is normal
Photo 3 is moved up and down
https://uploads.disquscdn.com/images/dc5882f987ede0c082c21851028afe17bad950b8e6e313d01ece5e795b392b11.jpg
https://uploads.disquscdn.com/images/b62261ca3071da4f928739cccf585827c8c8fb10a90c0d23ce6114c918261734.jpg
https://uploads.disquscdn.com/images/0537cc52876377e216c3660f1a9368c5498919ff7ac0f7569fd1e358dc8cce4b.jpg
It’s great to experiment with different techniques isn’t it? You never know what the result might be! 🙂
The arc technique can be used both ways, swing up to down, and down to up
Try lining up the top edge when swinging down to up, and the opposite lining up the bottom edge when swinging up to down
The photos below are of a Roman columns in Milan
https://uploads.disquscdn.com/images/6b6d9b03307973fb28500212953c057c7ca1a41c9878d2b43db07cc88cde97ba.jpg
https://uploads.disquscdn.com/images/15df3982ed4d6f73cc05271f9dbb7da28700481d42263ba6f6fa23928ef324b7.jpg
PS, my last post didn’t appear, so this might end up as a double post
Hi. What’s your opinion of Instapan and the “Ken Burns” feature of iMovie? The “Ken Burns” feature is very annoying in iOS10 because it doesn’t start at the left edge nor finish at the right edge. Instapan only has three speed settings.