Have you ever found yourself trying to photograph a beautiful wide landscape, only to find that you can’t fit it all into a single photo? Or you’ve attempted to take a group photo but can’t fit everyone into the frame? In these situations you can get around this problem by creating extra-wide panoramic shots. In this tutorial you’ll discover how to creating amazing panoramas with your iPhone.

What Is A Panoramic Photo?
A panoramic photo is typically a photo that is much wider than it is tall. Although you’ll see later that we can also create vertical panoramic photos which are much taller than they are wide.
Panoramas are a great way of capturing scenes which are too wide (or too tall) to fit inside the viewfinder of a conventional landscape or portrait layout.

Panoramic pictures can be created by taking several photos of the scene from a single viewpoint, and then stitching these images together to create a much larger single image.
Luckily for you as an iPhone photographer, you don’t have to stitch your photos together manually which would likely end up with messy joins between each photo.

Instead, you can use the excellent Pano feature in the iPhone’s native camera app. This feature is very easy to use and produces great results, as long as you follow a few simple guidelines which we’ll look at shortly.
What Makes A Good Panoramic Photo?
As with any photograph, there should be a reason for including (or excluding) subject matter. A short, round tree probably doesn’t lend itself to being a great panoramic subject. But there are many subjects and scenes that look great as a panorama.

For example, a beautiful landscape, a wide beach scene, a large group of friends or family, a long vehicle or ship would all make excellent panoramic photographs.

A panoramic shot doesn’t have to be super wide – you may want to use it just to get a slightly wider angle of view than your camera will normally allow. This is especially useful indoors when you want to get more of the room into the frame.
Always consider what each part of the scene contributes to the photo. Once you know what you want to include (and exclude) from the scene you’re ready to proceed with taking your panoramic shot.
How To Capture A Panoramic Photo
While there are many panoramic apps available to download in the App Store, the Pano feature in the native camera app does a great job of creating panoramas. So that’s what we’re going to concentrate on using here.
Below I’ll guide you through each step of creating a panoramic photo, including shooting tips and making sure you get the exposure right.

1. Open Pano Mode
Start by opening the native camera app, then swipe through the different shooting modes, e.g. Video, Photo, Square until you have Pano mode selected.
2. Do A “Dry Run” Of Your Shot
Before you start shooting your panorama, it’s best to do a “dry-run” of your shot to plan how your final photo will end up. To create a horizontal panorama, hold the camera upright in portrait orientation.
Now pan the camera from left to right (or right to left) across your scene. Note where you want the photo to start and end. It’s best to choose something interesting to start and end on.
3. Lock Exposure
It’s important to set the exposure correctly when shooting panoramas. The camera will choose it’s exposure based on how light or dark the scene is at the start of the panoramic shot.
If the start of the shot is much darker or lighter than the rest of the scene, you will end up with some parts of the panorama noticeably under or over-exposed. It’s usually best to expose for an area of the scene with medium brightness.
When you’re doing your “dry-run” try to notice where the scene is bright and where it is dark. It’s best not to expose for a very bright or very dark area of the scene as this will likely end up under or over-exposing your image as you pan.
What you’re looking for is a part of the scene that is not too dark and not too light – this is the area of the scene that you should normally expose for to get a balanced exposure.
Once you’ve found an area of medium brightness in the scene, point your iPhone at it, then and tap and hold the screen at that point. This will lock your exposure for the entire panoramic shot.
4. Set The Panning Direction
If you want to start your panoramic shot from the left, ensure the arrow is pointing to the right. If you want to start from the right, ensure the arrow is pointing to the left. If it’s pointing the wrong way, simply tap the arrow and it will switch direction.
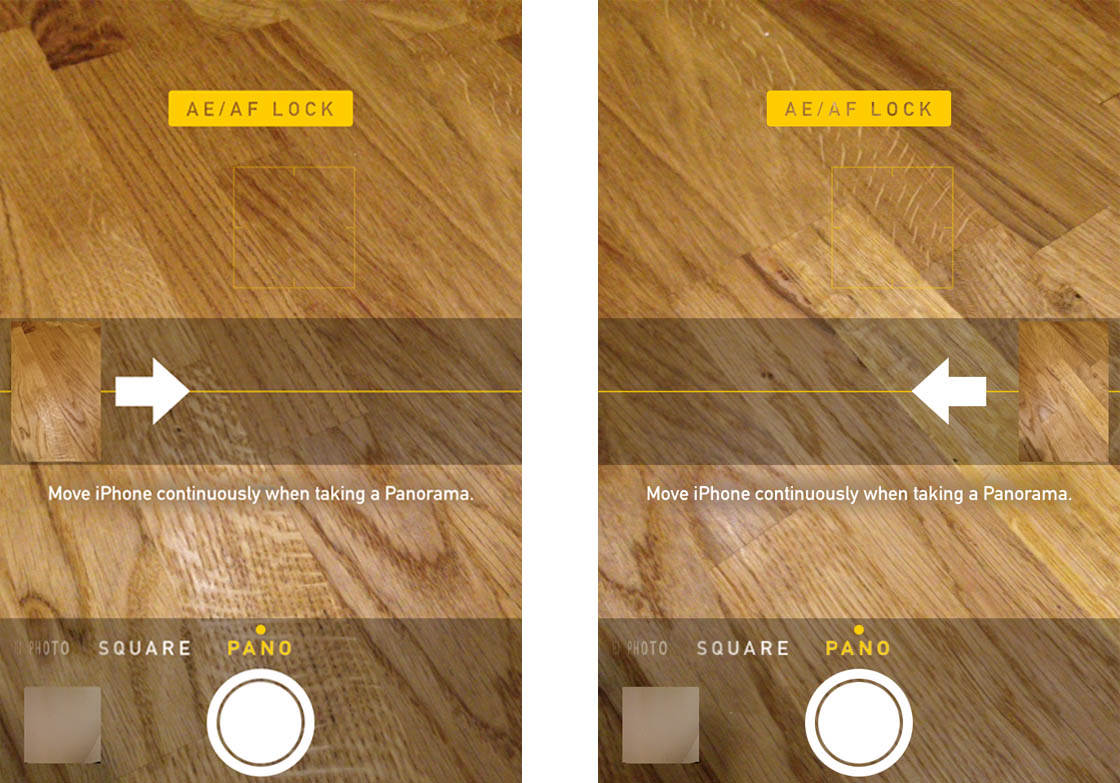
5. Shoot Your Panorama
Point your iPhone at the starting position of your panoramic photo and press the shutter button to start shooting. Slowly pan your iPhone towards your end position.
Make sure you keep moving and that you keep the arrow on the line displayed. The iPhone will tell you if you deviate too far from the line – or if you go too fast. If that happens, just follow the instructions on the screen.
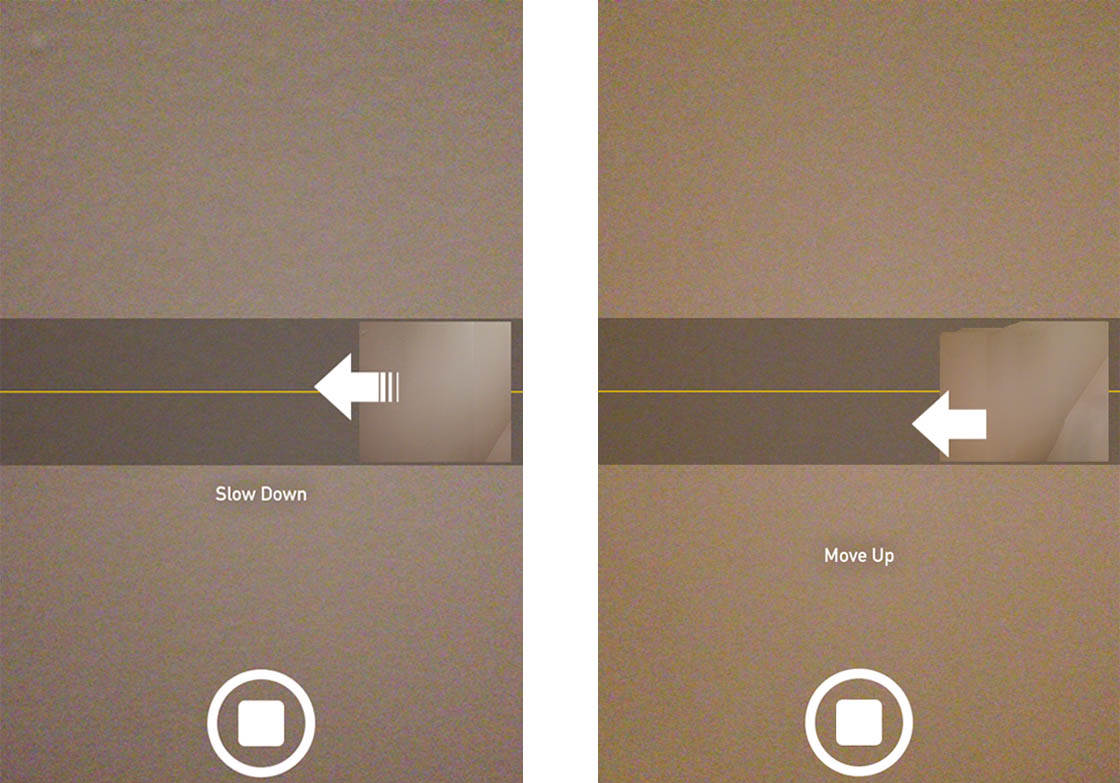
Once you reach your end position you can stop the procedure in one of two ways – either press the shutter button again or reverse the panning direction by moving your camera back a short way in the opposite direction.
The latter method is preferred because you are less likely to shake the iPhone and it doesn’t require you to change the position of your hands. Note that you can also simply keep panning until the iPhone stops automatically.
You’ve now created a panoramic photo with your iPhone! The photo is saved automatically to your Photos app.
Panoramic Photos Don’t Have To Be Horizontal!
It seems counter-intuitive, but it’s true – you can take vertical panoramic photos with your iPhone too. Simply rotate your iPhone horizontally so that you’re holding it in landscape orientation and instead of panning horizontally, pan vertically – from low to high or high to low.
The Pano feature behaves exactly the same way as when you’re shooting a horizontal scene – you start and stop it the same way, you keep the arrow close to the line and you keep the iPhone moving until you’ve finished.
In the example photos below you’ll see that you can use this vertical panoramic technique to create a sense of drama or scale.
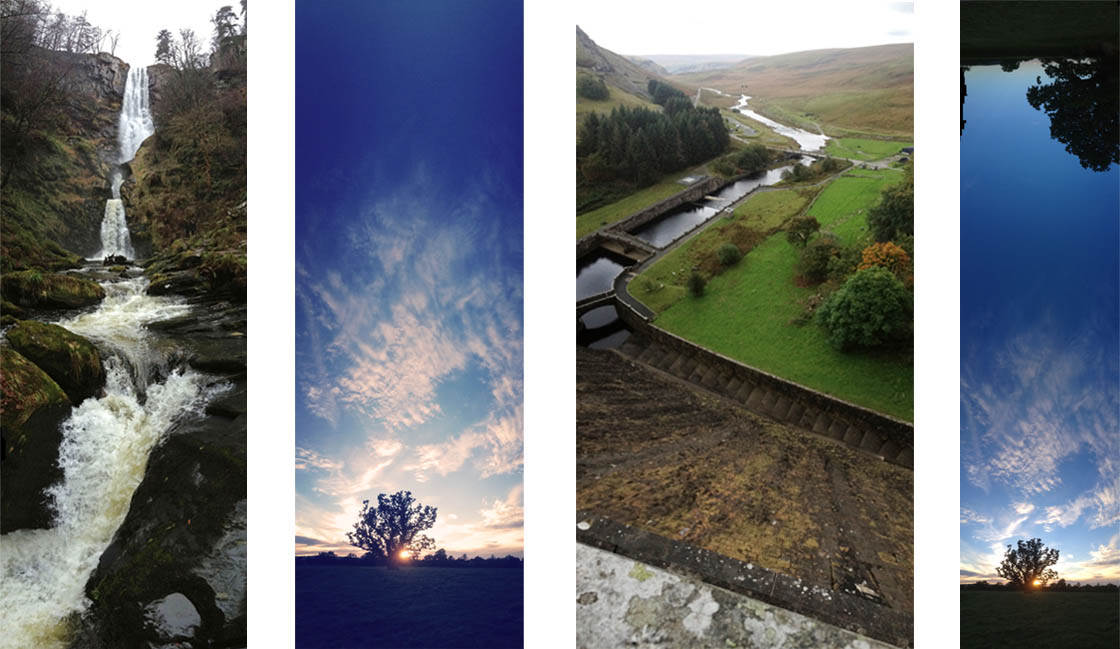
The example on the far right tends to create a feeling of discomfort or unsteadiness as the ground appears at both the bottom and the top of the photo.
This 180 degree panoramic view was created by panning up from the ground, and then over in an arc across the sky above, and finally back down to the ground on the opposite side to the start point.
Keep Your Camera Steady
The iPhone’s camera app copes very well with hand-held panoramic photography, but if you’re struggling to hold the camera steady enough to keep that arrow on the line, you may need some extra support to prevent the camera from shaking about too much.
The most obvious way is to use an iPhone tripod and iPhone tripod mount. Remember that you still need to allow the camera to rotate and pan freely, so ensure your tripod isn’t locked up too tightly in the horizontal plane (or vertical if you’re doing a vertical panorama).
If you don’t have a tripod to hand, don’t worry – there are other ways to keep the camera steady. Look for something that will swing/turn in the direction you need, such as a house door, a car door, a garden gate, a record turntable (without the record on!), a rotary washing-line, etc.
Hold your iPhone against your chosen support and check that the support swings far enough to include all of your subject.
Something Fun To Try!
As well as taking dramatic, wide landscape shots, you can also have a lot of fun with the iPhone’s panoramic feature. With the help of a friend, you can take a wide angle shot with the person in the frame multiple times.
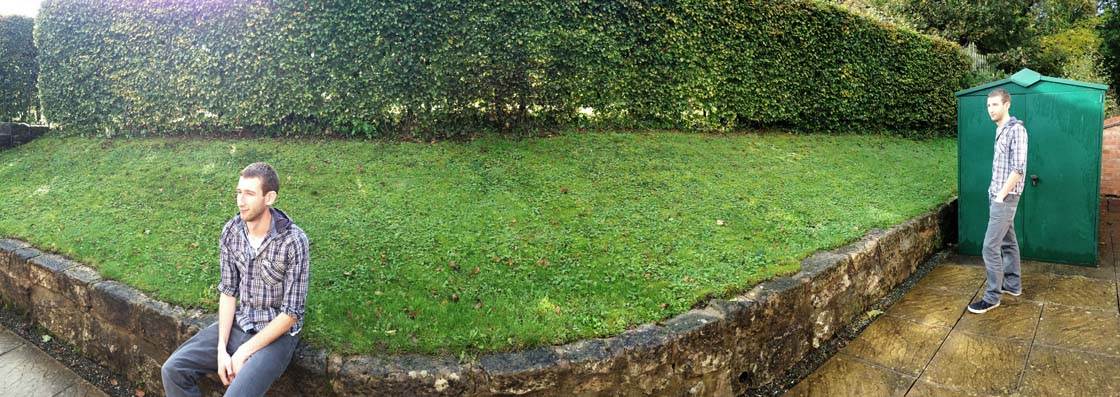
Ask your friend to stand in the scene to the extreme left of the frame. Start your panoramic capture and slowly pan to the right. As soon as the person is out of the frame, ask them to run round behind you and find somewhere to stand to your right.
Pretty soon the person will appear in the frame again as your iPhone pans towards their new position. When you stop the panoramic capture you’ll see that the person appears in the photo twice!
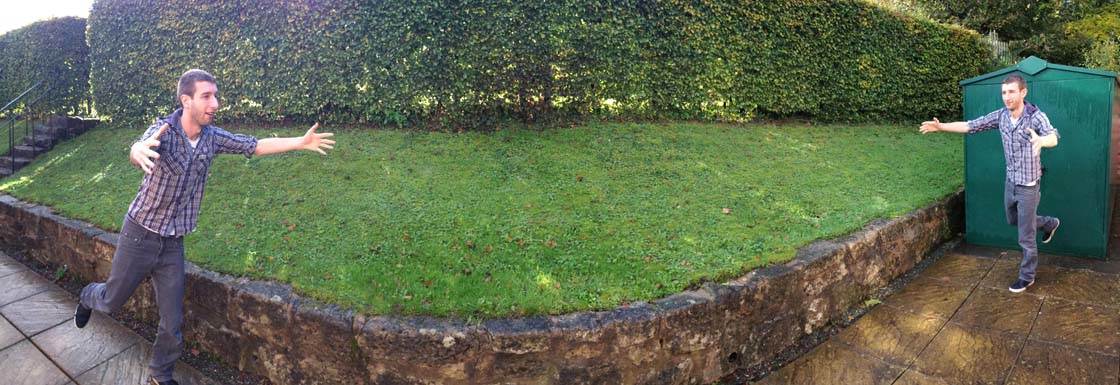
If you pan for long enough and your subject is quick enough, you might even be able to get them in the frame more than twice! Experiment with this for some fun and interesting effects.
Finally, there’s one important consideration to bear in mind when taking panoramic photos. The files sizes of these pictures will be considerably larger than an ordinary photo due to its increased number of pixels. Therefore it is advisable to delete any unwanted panoramas from the Photos app.


Thank you for those tips. I never thought of using pano for group shots or waterfalls. I just tried it with a group of friends and it turned out perfectly!
I’ve taken a few panoramic shots with my iPhone. Really happy with this on taken on Mt. Katahdin in Maine.
Ok Fine but it is locked in the vertical position! How to use in landscape mode???????
You would only hold the iPhone in landscape orientation if you wanted to create a vertical panorama. For wide landscape panoramas you have to hold the iPhone in vertical portrait orientation. It sounds counter-intuitive I know!
When I first got the phone a month ago I was somehow able to shoot in
landscape mode FOR THE PANORAMA. This makes sense regardless rather then
portrait mode. how to get back to this Mode?
thanks Kate. You may say this is counter intuitive and it is, I just cant figure out how to get back to landscape mode for doing this, somehow the phone settings must have changed.