Have you ever tried photographing a straight facade of a tall building, but ended up with a photo where the vertical lines converge towards the top of the photo? Or maybe you’ve tried photographing a perfect symmetrical pattern, but it ended up slightly tilted. Photographing these kind of subjects can often be tricky as the perspective means that the lines won’t end up perfectly straight. In this tutorial you’ll learn how to quickly and easily correct perspective and lens distortion problems in your iPhone photos using the popular SKRWT app.
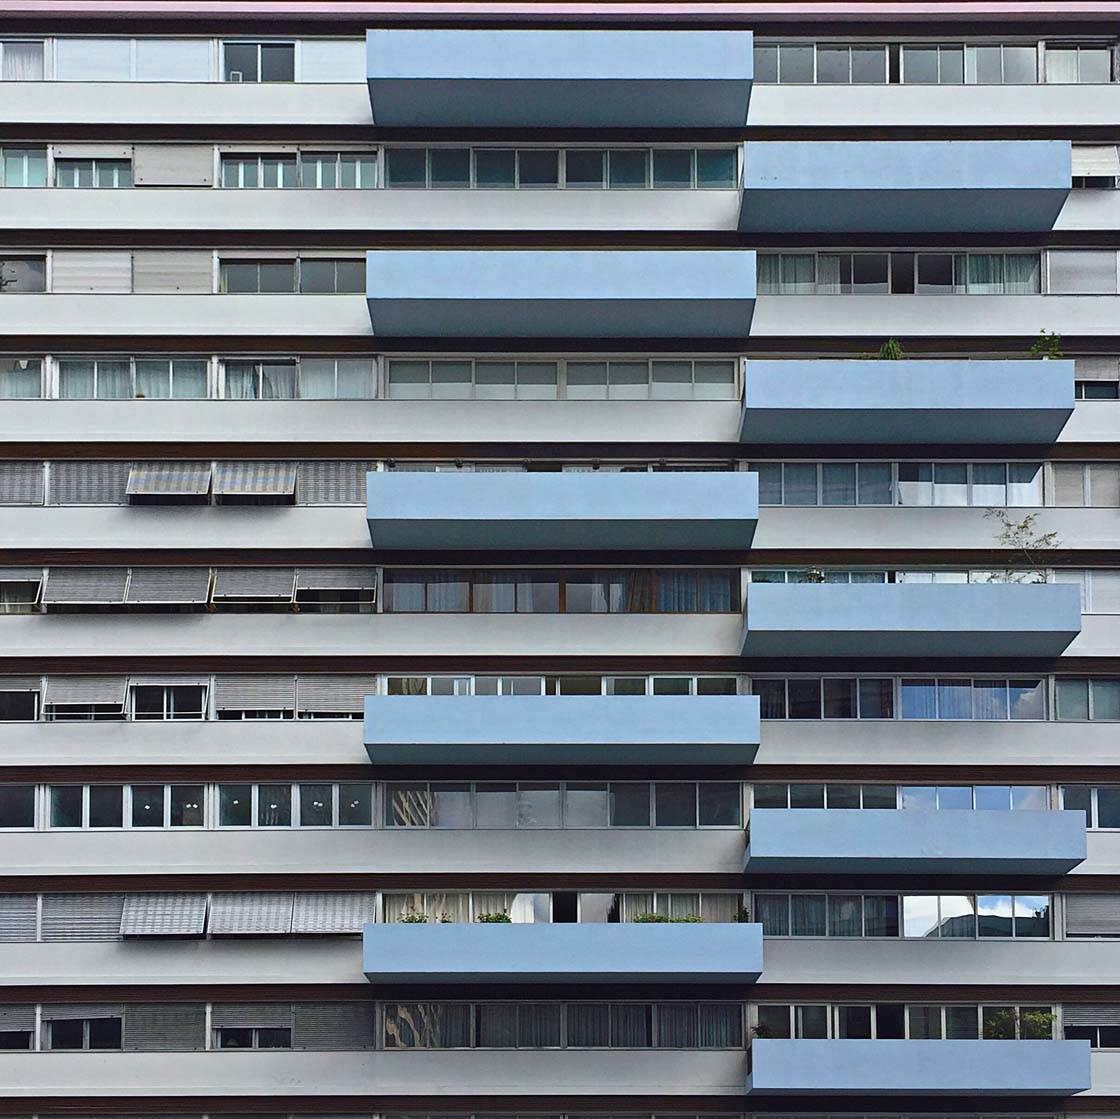
What Is SKRWT?
SKRWT (pronounced “screw it”) is a powerful photo editing app which costs $1.99 from the App Store. The app allows you to fix problems with lens distortion and perspective in your iPhone photos, straightening up the lines to make them look more natural and symmetrical. It uses a sensitive, precise and responsive dial to rotate and adjust the photo’s vertical and horizontal planes separately.
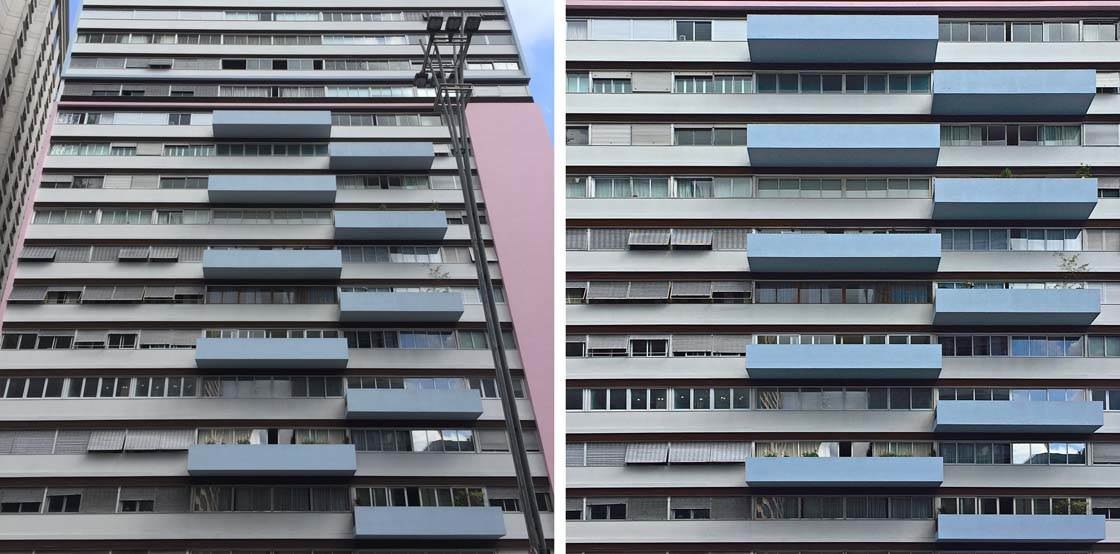
SKRWT is great for editing straight facades such as buildings. Because you’re shooting upwards, rather than straight on at the subject, you end up with a photo where the lines converge towards the top of the image, as shown in the left-hand photos in these examples. With SKRWT you can straighten up the converging lines, as shown in the right-hand photos.
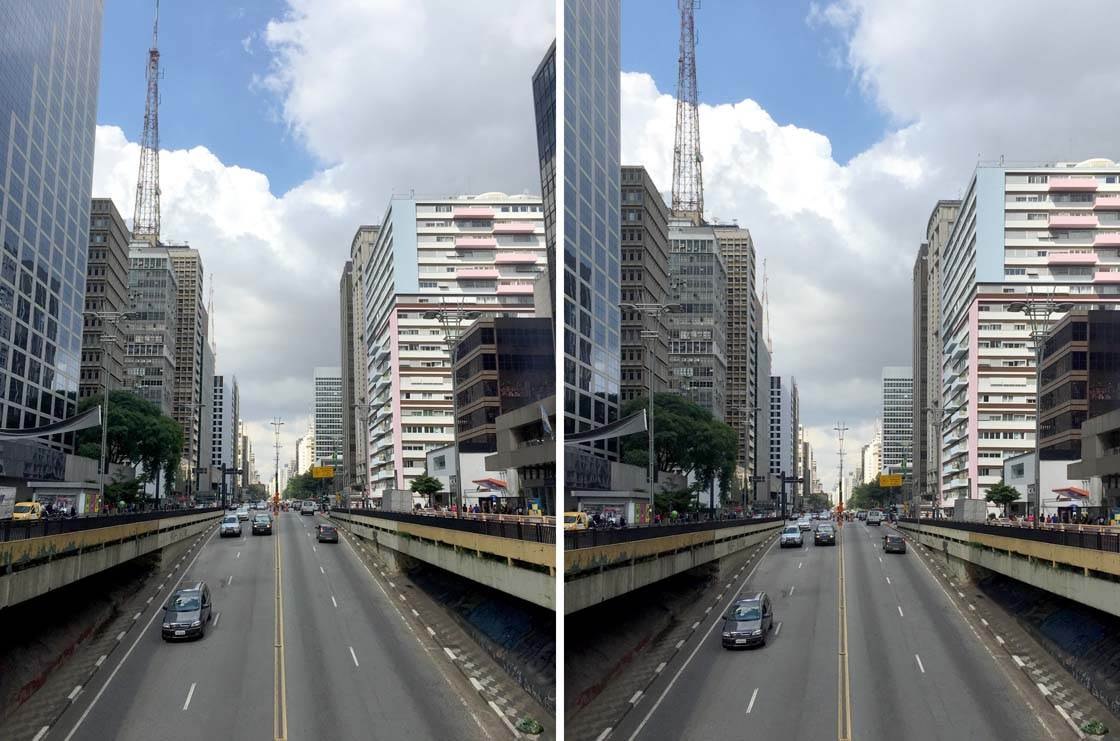
Below is another example of a photo where the vertical lines converge, but this time notice that the lines on the wall converge towards the bottom of the photo.
Below you can see the image after straightening up these vertical lines in SKRWT. The lines are now parallel rather than converging, which looks much more pleasing to the eye.
Overview Of The SKRWT Tools
Before we go through a step-by-step tutorial on how to fix perspective problems in your iPhone photos, let’s briefly look at the function of the tools that you’ll find in the SKRWT app. The tools are located at the bottom of the screen, and you can swipe left or right to access more icons.
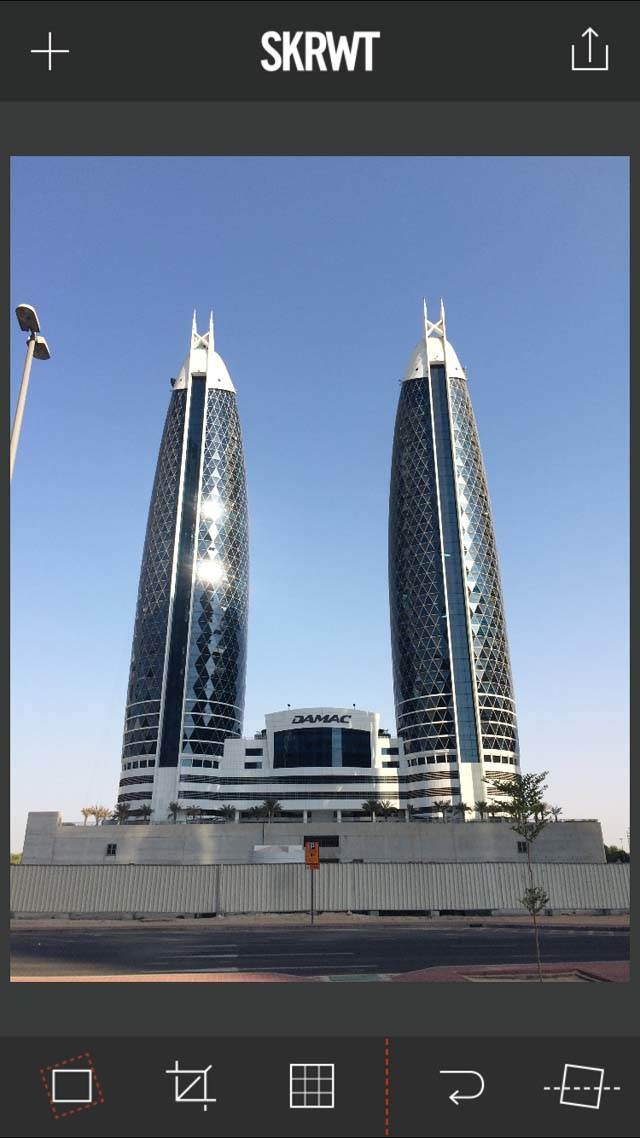
The tool icons don’t have names on them, but I’ll start with the tool to the right of the red dividing line as shown above, and then work my way towards the right.
Reset Tool
If you want to cancel all of the edits that you’ve just made and revert back to the original image, simply tap the Reset Tool (curly arrow) to the right of the red dividing line.
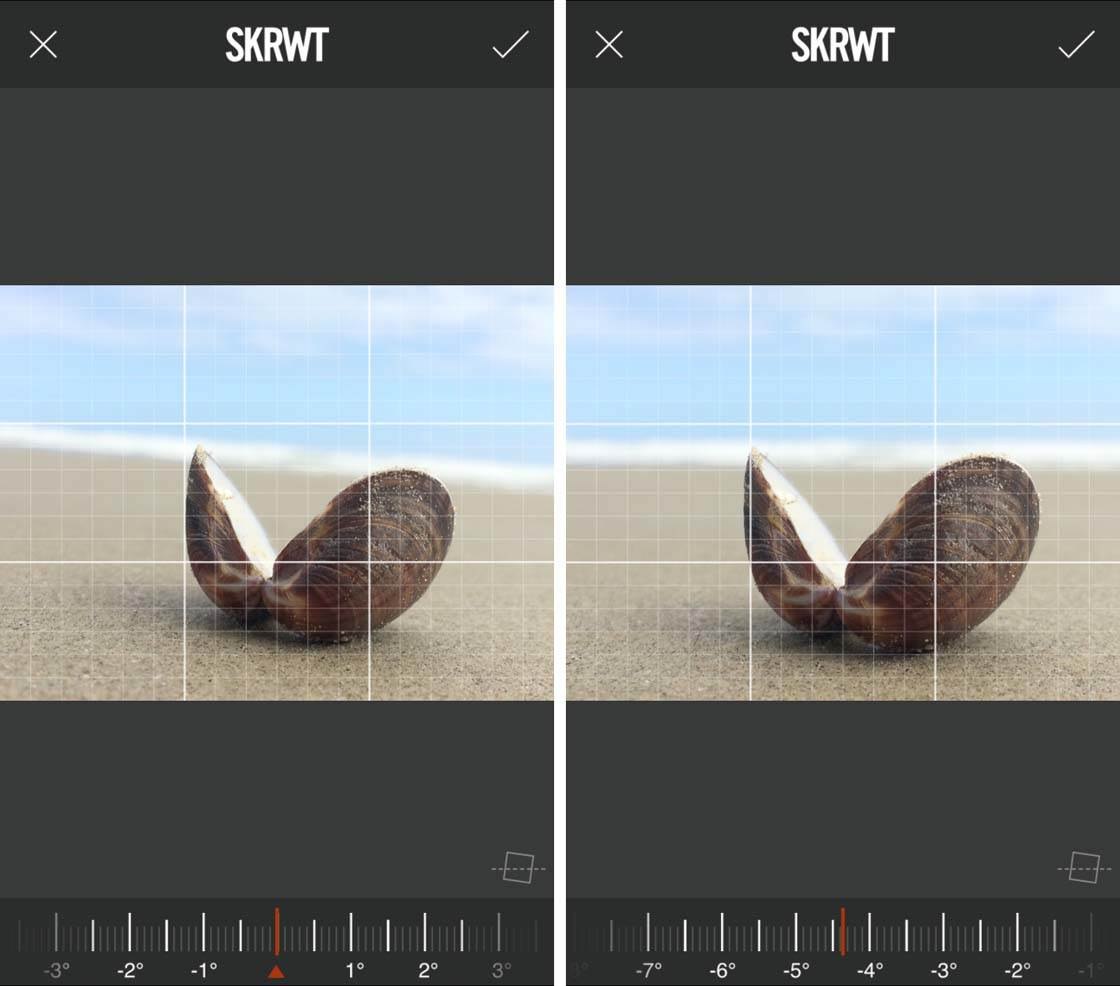
Straighten Tool
With the Straighten Tool you can level the horizontal lines in an image by slightly rotating the photo. So if you weren’t holding the camera completely level when taking your photo, you can easily straighten the image. This is great for straightening up horizons as shown below.
Horizontal Correction Tool
This tool is used for editing photos with horizontal perspective distortion, where the horizontal lines are converging towards the left or right of the frame. This tool helps you correct the angle of the lines by spreading certain corners of the image, making the horizontal lines parallel rather than converging.
Vertical Correction Tool
This is probably the most popular tool in SKRWT. It’s used for editing photos with vertical perspective distortion, where the vertical lines are converging together towards the top or bottom of the photo. It’s great for photos of buildings and other tall subjects.
The left-hand image below is a good example of this problem. You can see how the tops of the buildings converge together towards the top of the image.
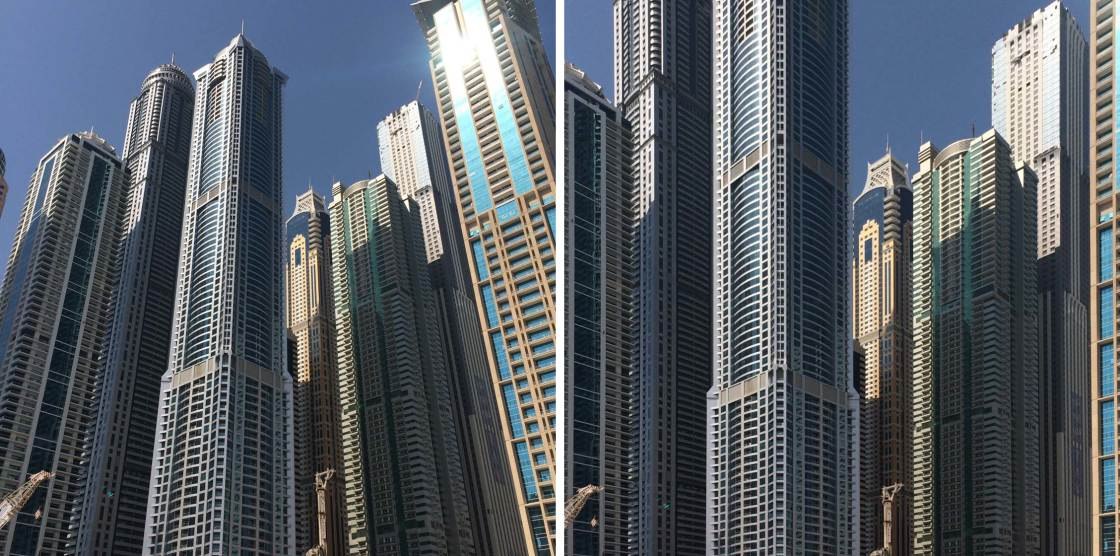
The Vertical Correction Tool helps you correct the angle of the lines and fix the perspective problem by spreading certain corners of the image, making the vertical lines straight and parallel, as shown in the right-hand photo above.
Lens Correction Tool
Depending on the lens that you shoot with, you can get different amounts of distortion in your image which will affect how straight the lines appear. If you shoot with a third-party wide angle lens attachment, you’ll notice a certain amount of “bulging” in the middle of the photo, and any lines in your photo will appear slightly curved.
Shooting with a fisheye lens will cause even more distortion. Even when shooting with the built-in lens of the iPhone, you can get some slight distortion as the angle of this lens is fairly wide.
With the Lens Correction Tool you can choose which type of lens you used to take the photo, e.g. iPhone, Wide Angle, Fisheye, etc. in order to correct the specific type of distortion that you get from that lens. Often, just a slight adjustment can correct the natural lens distortion and create perfectly straight lines in your picture.
Ratio Tool
This tool allows you to stretch your photo horizontally or vertically, making the scene appear taller or wider than in the original image.
Rotate Tool
This is a simple rotation tool that allows you to rotate your photo 90 degrees at a time.
Vignette Tool
This tool allows you to darken or brighten the edges of the image using a soft-edged vignette. You can use this tool to either add a dark vignette, or to remove the vignette effect that you get from certain lenses.
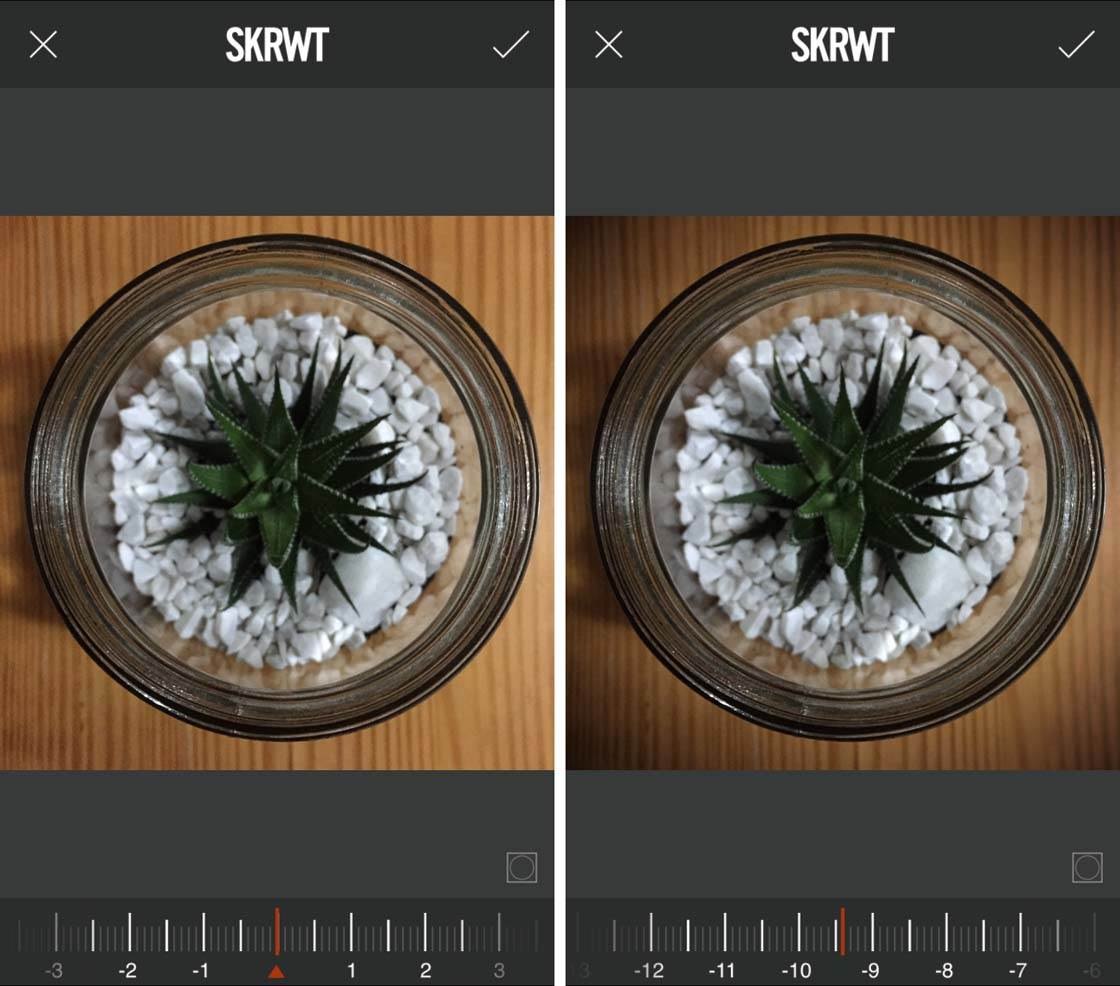
Auto-Crop Tool
When you use the perspective correction tools to straighten the vertical or horizontal lines, what you’re essentially doing is stretching out two corners of the image, while the other two corners appear pushed together in comparison. This creates a strange shaped image that is no longer rectangular.
The Auto-Cropping Tool allows you to automatically crop away the wider edges of the image to create a rectangular shaped photo. This tool is activated by default when opening a new photo, so if you don’t want to auto-crop your photo, simply tap the icon to deactivate this feature.
Note that if you don’t choose to auto-crop, you’ll end up with a black background around the narrower edges of the photo. You can then crop it yourself later, or fill in the empty corners of the image using a neat trick that I’ll show you later!
Crop Tool
The Crop Tool is used for cropping away any unwanted edges of the image. It works in a similar way to cropping tools in other apps but there are a few techniques that you need to know. Start by selecting an aspect ratio (Free, 1:1, 2:3, 3:4, 4:5, 9:16) – you can tap twice on your chosen ratio to switch the orientation between horizontal and vertical.
Using one finger, tap and drag a corner to adjust your crop area. You can use two fingers to move the crop area to a different part of the image.
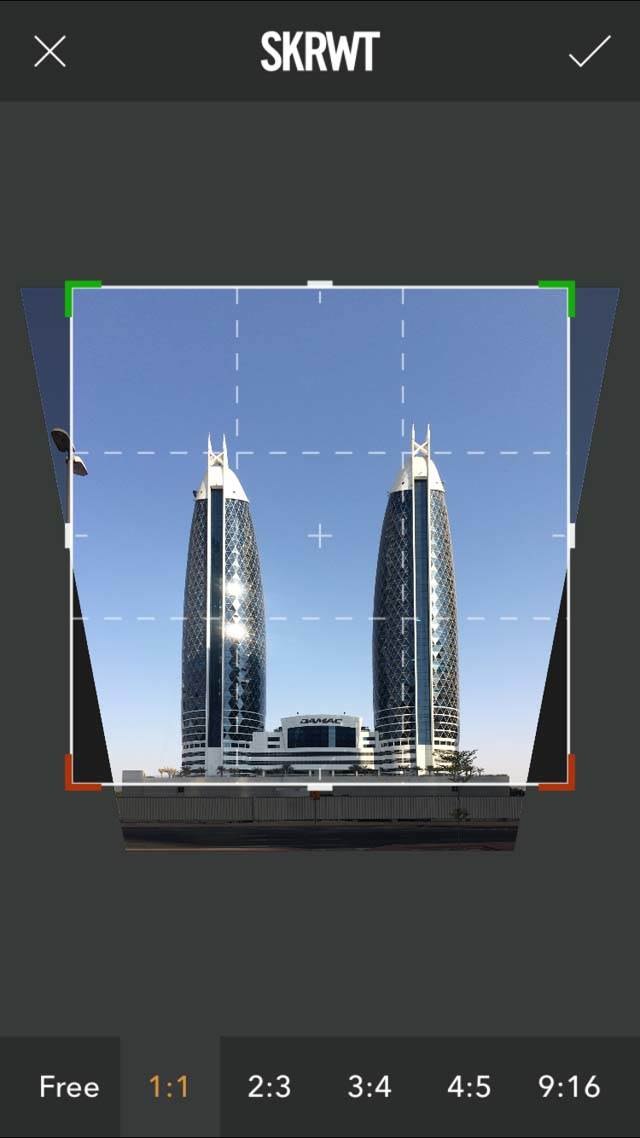
When entering the Crop Tool, you’ll notice that the corners are either green or red. A green corner means that the crop area is inside of the photo, and a red corner means that it’s outside (on the blank areas created when correcting perspective without the Auto-Crop Tool switched on).
You can crop the image even with a red corner, but remember that you’ll get a black background where there’s no image (this turns to a white background when saving).
Grid Tool
The Grid Tool is very useful when correcting perspective and straightening up lines as it gives you a visual guide that you can align your objects with.
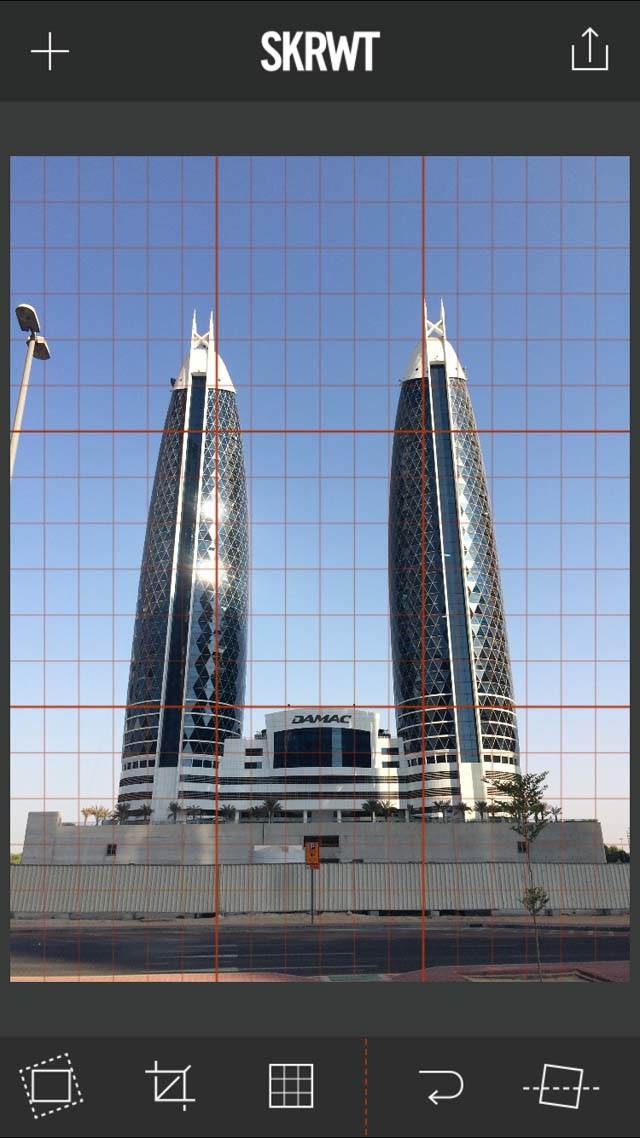
There are several different grids available – just keep tapping the Grid Tool to toggle through the options. Select the grid that contrasts best with the image so that you can see it clearly when editing.
How To Fix Vertical Perspective Distortion
Below I’ll show you the step-by-step process that I used to fix the vertical perspective distortion of this tall building that I photographed.
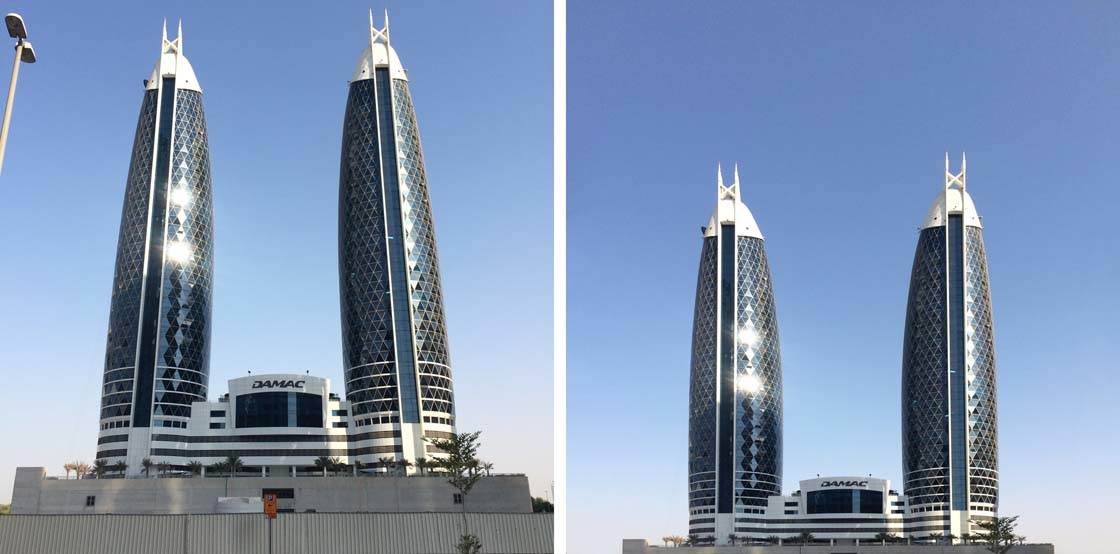
However, first let’s consider a few things to remember when you’re actually taking the photo. When taking photos of the straight facade of a building with your iPhone, it helps immensely if you switch on the grid in the camera app (Settings > Photos & Camera > Grid).
When you hold up your iPhone to frame the shot, the phone is going to be slightly tilted in order to get the tall building into the frame, and this is what causes the perspective distortion. Don’t worry about the converging vertical lines at this point – just make sure that the horizontal lines are aligned according to the grid.
Finding a visual guideline like a row of windows helps you to be more precise with your horizontal alignment. Don’t hesitate to use Burst Mode to capture a series of shots as you make slight adjustments to the angle.

Pay attention to where you’re standing – for best results, position yourself centrally right in front of the building. If necessary, back up and try capturing as much of the building as you can. Remember that you’re going to lose some of your image during the cropping process after correcting perspective.
Once you’ve taken your photo, you can now use the SKRWT app to correct the vertical perspective issues and straighten up the building as shown in the step-by-step instructions below.
Open the SKRWT app and tap the icon with the two overlapping squares (to the right of the camera icon) to import the photo from your Camera Roll. When the image is open, you can swipe across the icons at the bottom of the screen to find the tool that you want to use.

I usually tap on the Auto-Cropping Tool (far left icon as shown in the screenshot above) to deactivate this feature, ensuring that the image isn’t automatically cropped once straightened. I like to crop it myself later, or fill in the blank edges with another app.

Tap on the Grid Tool (middle icon in the screenshot above) to choose a suitable grid. Continue tapping until you find the one that best suits your photo (options in red, white and black). Select a contrasting color to make it easier to see.
Note that the grid disappears after a few seconds, but it will appear again when you start making corrections to the perspective. You can make the grid visible at any time by holding down two fingers on the screen. Tap and hold with two fingers again to make the grid disappear.
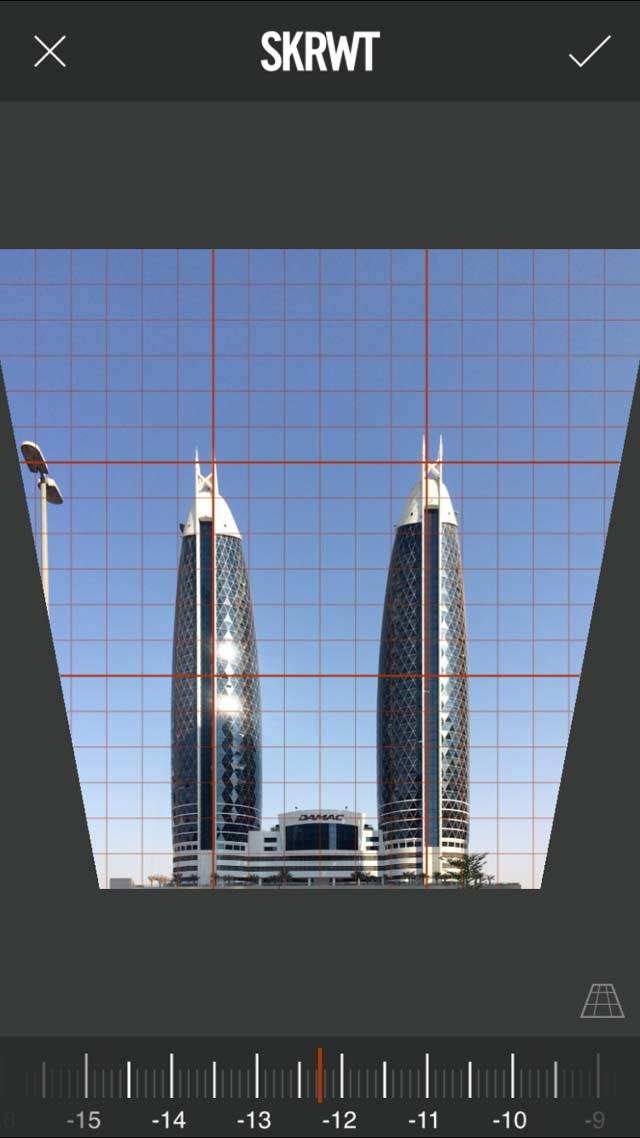
To correct the vertical perspective problem, tap the Vertical Correction Tool (icon that looks like a triangle with the top cut off). Now swipe left or right on the dial at the bottom of the screen to make the top of the photo wider or narrower.
If you need to make very small adjustments, you can tap the dial edges for high-precision editing. If you want to reset the dial counter back to zero, double-tap the red ribbon.

In this example -12.3 was enough to correct the perspective and make the vertical lines straight. If you max it out and still need more, you need to save and open the image again (this should probably be fixed in the next app update).
If necessary, double-tap the screen to zoom in on the photo to give you more precision. Use your contrasting grid color to see if the image is straight and aligned. Find a visual guideline, like a column or vertical building edges, to help you line up the vertical lines with the gridlines more precisely.
You can tap and hold the image to compare before and after versions of the photo. Once you’re happy with the correction, tap the checkmark at the top right to commit the changes.
If you have problems with the perspective of horizontal lines in your image, select the Horizontal Correction Tool (to the left of the Vertical Correction Tool), and use the dial to adjust the horizontal perspective.
The Lens Correction Tool (to the right of the Vertical Correction Tool) can be used to correct the natural lens distortion that you get from different lenses. Depending on the angle of view of the lens you’re using, you can get either barrel distortion or pincushion distortion.
Wide angle and fisheye lenses create barrel distortion, making the center of the image look like it’s bulging out. If there are lines in your photo, the lines can appear curved rather than perfectly straight. Pincushion distortion is associated with telephoto lenses and makes the image look pinched at the center.
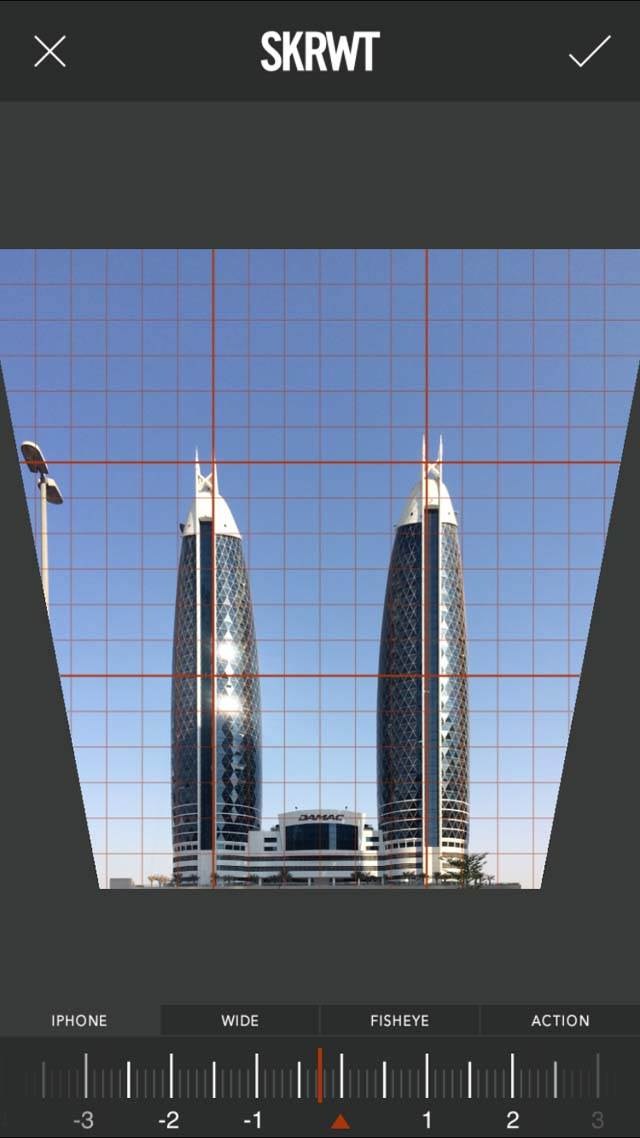
With the Lens Correction Tool, select the type of lens you used (in this case I selected iPhone as I used the built-in iPhone lens rather than any add-on lens to take the photo). Use the dial to correct any distortion remaining in the image.
SKRWT uses a non-destructive workflow, so you can go back to any tool and make changes without losing any pixels while editing your photo. If necessary, go back to the Vertical or Horizontal Correction Tool and readjust the dial so that the lines look straight.
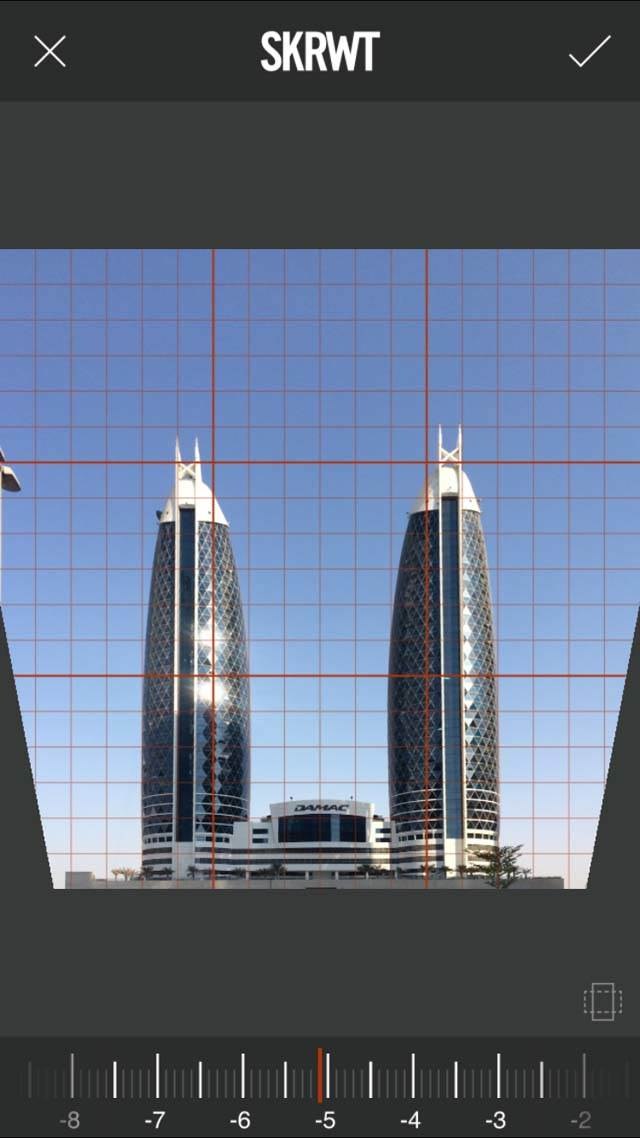
The Ratio Tool (to the right of the Lens Correction Tool) can be used to stretch the image horizontally or vertically if necessary.
Finally, you can crop your photo. Select the Crop Tool (to the left of the Grid Tool), then drag the crop handles to select the area you want to keep. You can double-tap on the image to zoom in and fine tune the crop edges.

In the example above, I chose the 1:1 ratio to crop it into a square. Notice that I set the crop area to be outside of the limits of the photo on the bottom left and right edges. This is going to leave blank edges in these areas, but I’ll show you how to easily fill them in using a different app shortly (this is only possible for images that have a plain area to fill, such as the sky in this image).
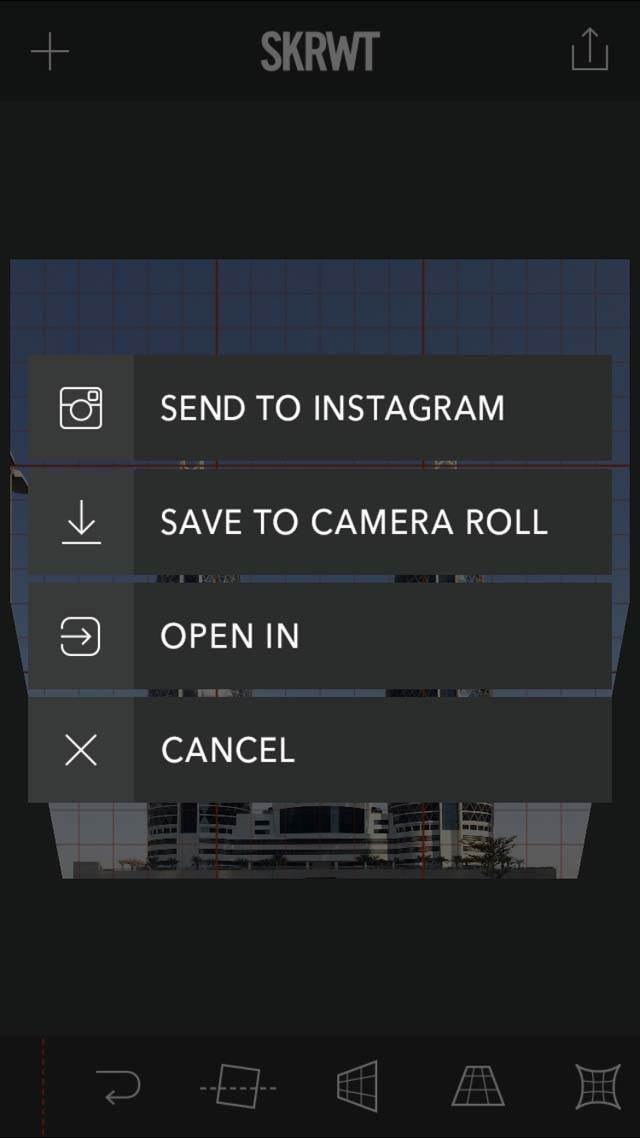
To save the edited photo, tap the Export/Save icon at the top right of the screen, then select Save To Camera Roll.
If you need to fill in the blank edges of the photo, like I do in my image, you can do this using the TouchRetouch app shown below.
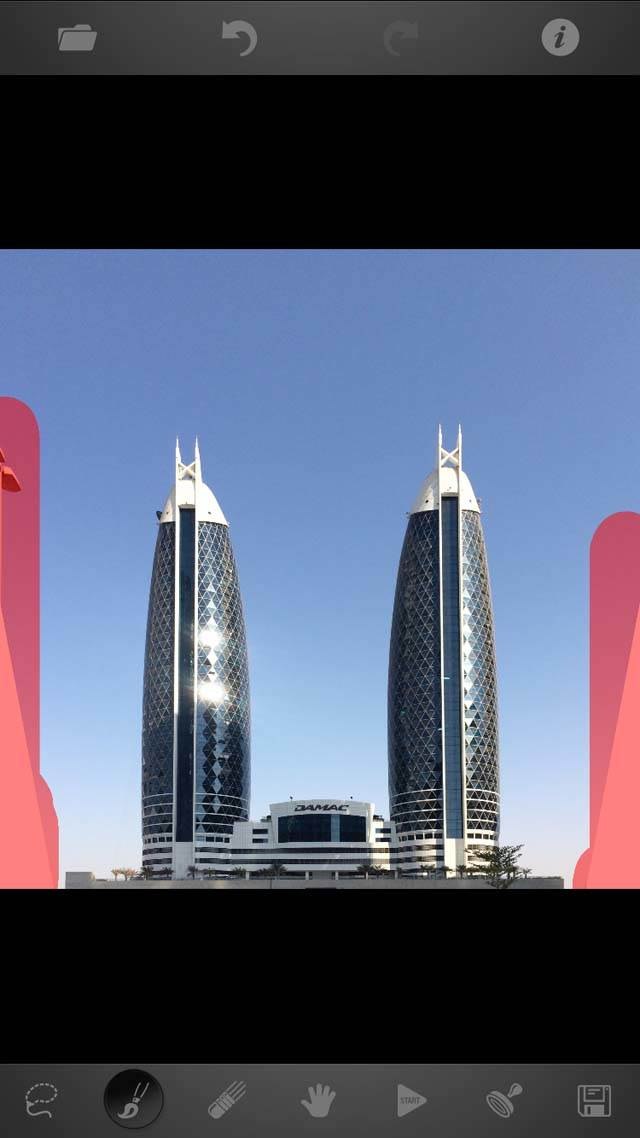
In TouchRetouch, select the white corners with the Brush Tool so that they appear painted red, then tap Start and watch how the blue sky fills in the selected area. Now you have a complete new photo! Check out our in-depth tutorial on how to use TouchRetouch to remove and replace objects in your photos.
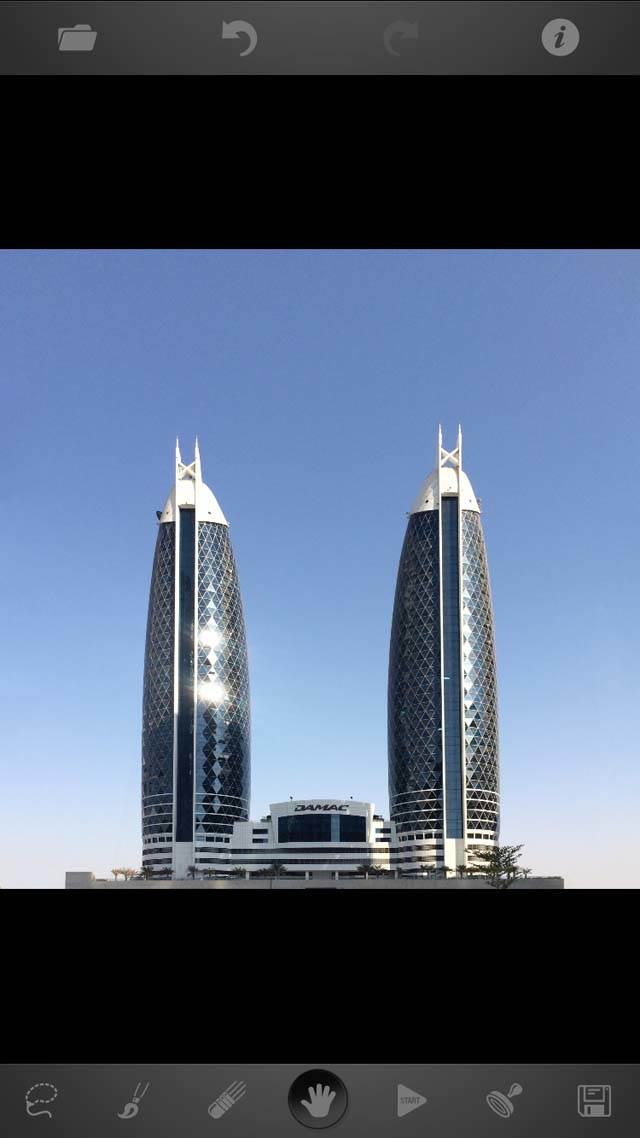
Save the finished result by tapping the Save button in the bottom right corner of the screen. And there you have it – a great photo of a tall building without any perspective distortion or converging lines!



Leave a Reply
You must be logged in to post a comment.