Have you ever looked at one of your iPhone photos and thought, “It’s good, but there’s something missing”? Luckily for us, there are hundreds of photography apps that can be used to edit and enhance our photos in whatever way we wish. The only limit is our imagination! In this tutorial you’ll discover how to create amazing fantasy images by adding a variety of special effects, such as planets, moons, spaceships, lightning bolts, birds and other elements.
In this article, I’ll be showing you some examples of how you can turn an ordinary photo into something truly spectacular using just a few editing apps. In all these cases the original photo was taken with the native iPhone camera and edited using apps on the iPhone.
Combine Multiple Images
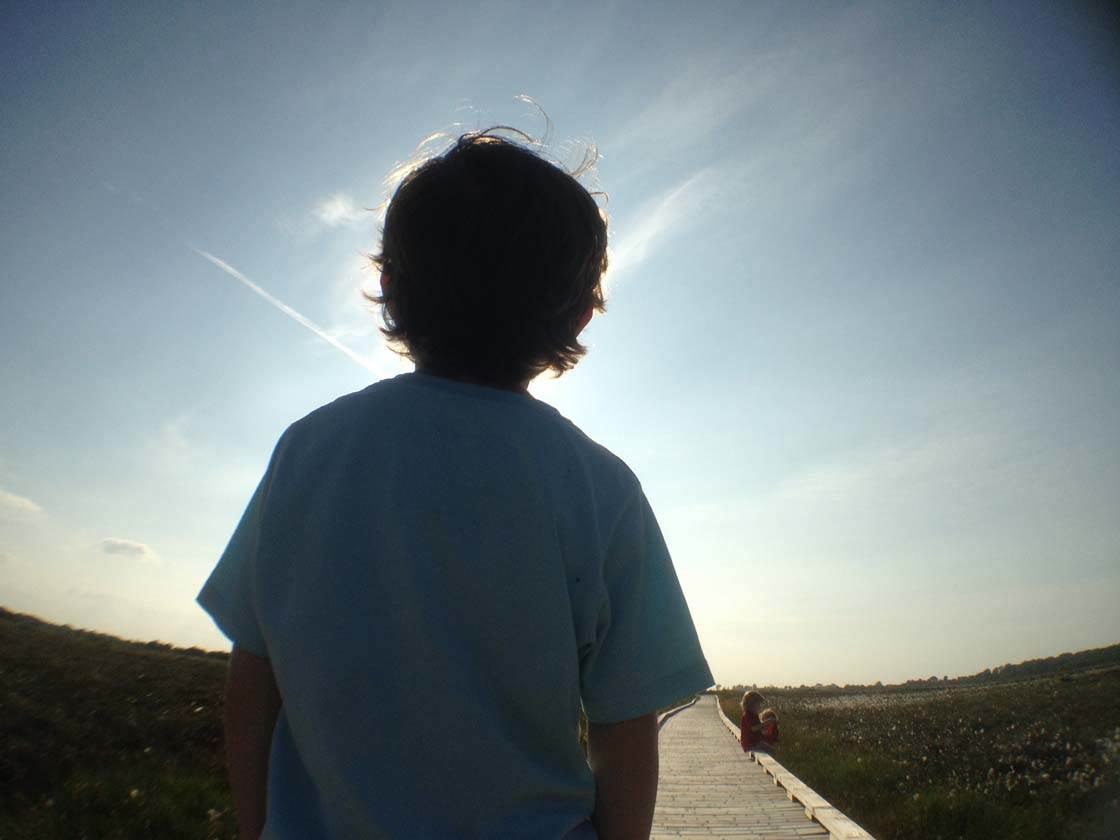
This original shot was taken at a local bog which has a boardwalk running through it. It was a beautiful summer’s evening. The sun was low in the sky and I was trying to capture that “magic hour” light.
The magic hour refers to the time around sunrise or sunset when the sun is low in the sky and not as harsh as it is at other times of the day. Most photographers prefer to take shots at these times of the day.
My usual work flow is that I will take as many photos as I can, from as many points of view as possible, when I’m on location. When I get home I’ll review all of the shots from the day and pick the ones that I’m happy with, or that at least have potential.
When I looked at this shot I couldn’t help but wonder what my son was looking at. The light was good, but the overall shot wasn’t very interesting. So I decided to add some hot air balloons into the shot using the Juxtaposer app. This app is great for combining multiple images.
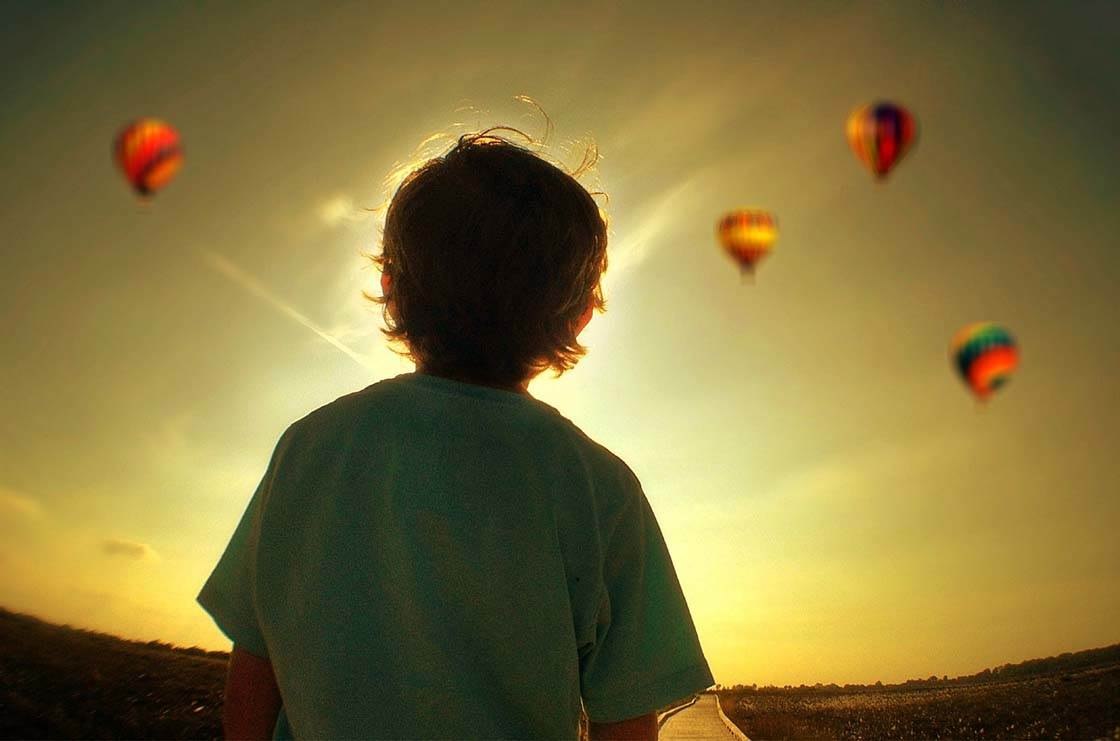
In Juxtaposer I opened the original photo as the base image. I then brought in the first photo I had of a hot air balloon as the top image. Using the eraser tool in the app, I was able to erase everything from the top photo apart from the balloon.
You can zoom right in on the image so that you’re working at pixel level. This gives a great level of control and a clean edge on the subject you’re trying to keep.
Once I’d isolated the balloon, I was able to position it where I wanted over the base image. I repeated this process three more times with different balloon photos until I had all the balloons I needed.
Whenever I use Juxtaposer to add something to a photo, I always do this as the first step in the editing process. The reason for this is that all subsequent filters and edits will be applied to the overall photo, including the added elements – this will help them blend into the image even more.
For the next step in the process I opened the photo in another app called PhotoToaster. This is one of the apps I use the most. The first thing I did was to use the lighting brushes to darken the sky and bright my son’s hair to emphasise the sunlight. I then used the Soft Focus brush from the FX Brushes to blur the sky, giving the photo a sense of depth of field.
All of the brushes in PhotoToaster can be found under the brush icon at the top right of the screen. You apply the effects for each brush by rubbing your finger over the area of the photo you wish to change.
The final step in PhotoToaster was to crop the photo to give it a more widescreen cinematic feel. I then applied the Warm filter to make it look more like a summer sunset. These simple changes make for a far more compelling image than the original photo.
Add A Moon To Your Sky
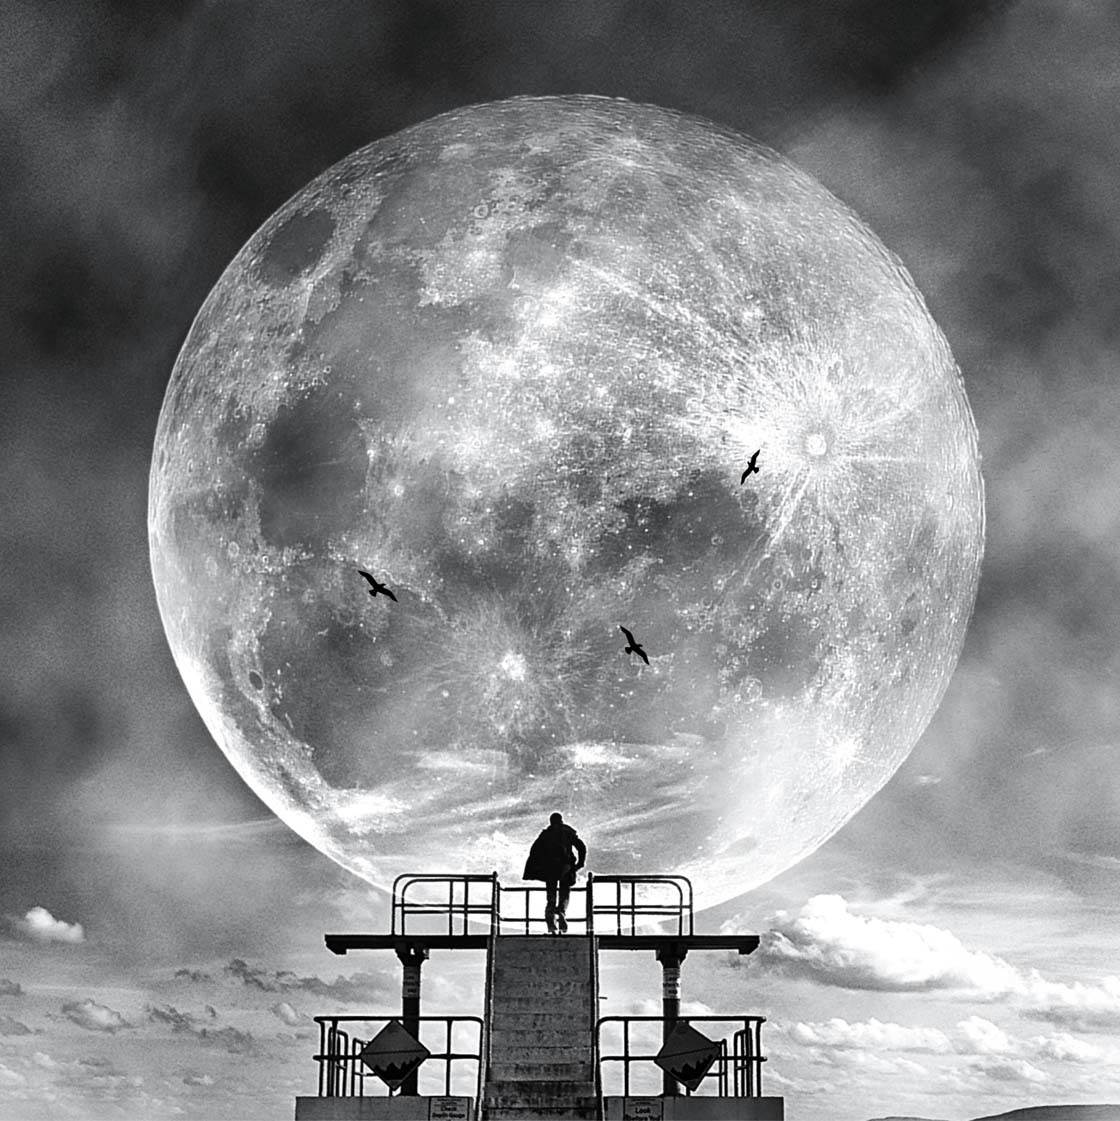
The original photo here is of a diving platform in the seaside town of Salthill, Galway on the west coast of Ireland. The diving platform is one of those iconic landmarks that has been photographed many times. But I wanted to do something a bit different.
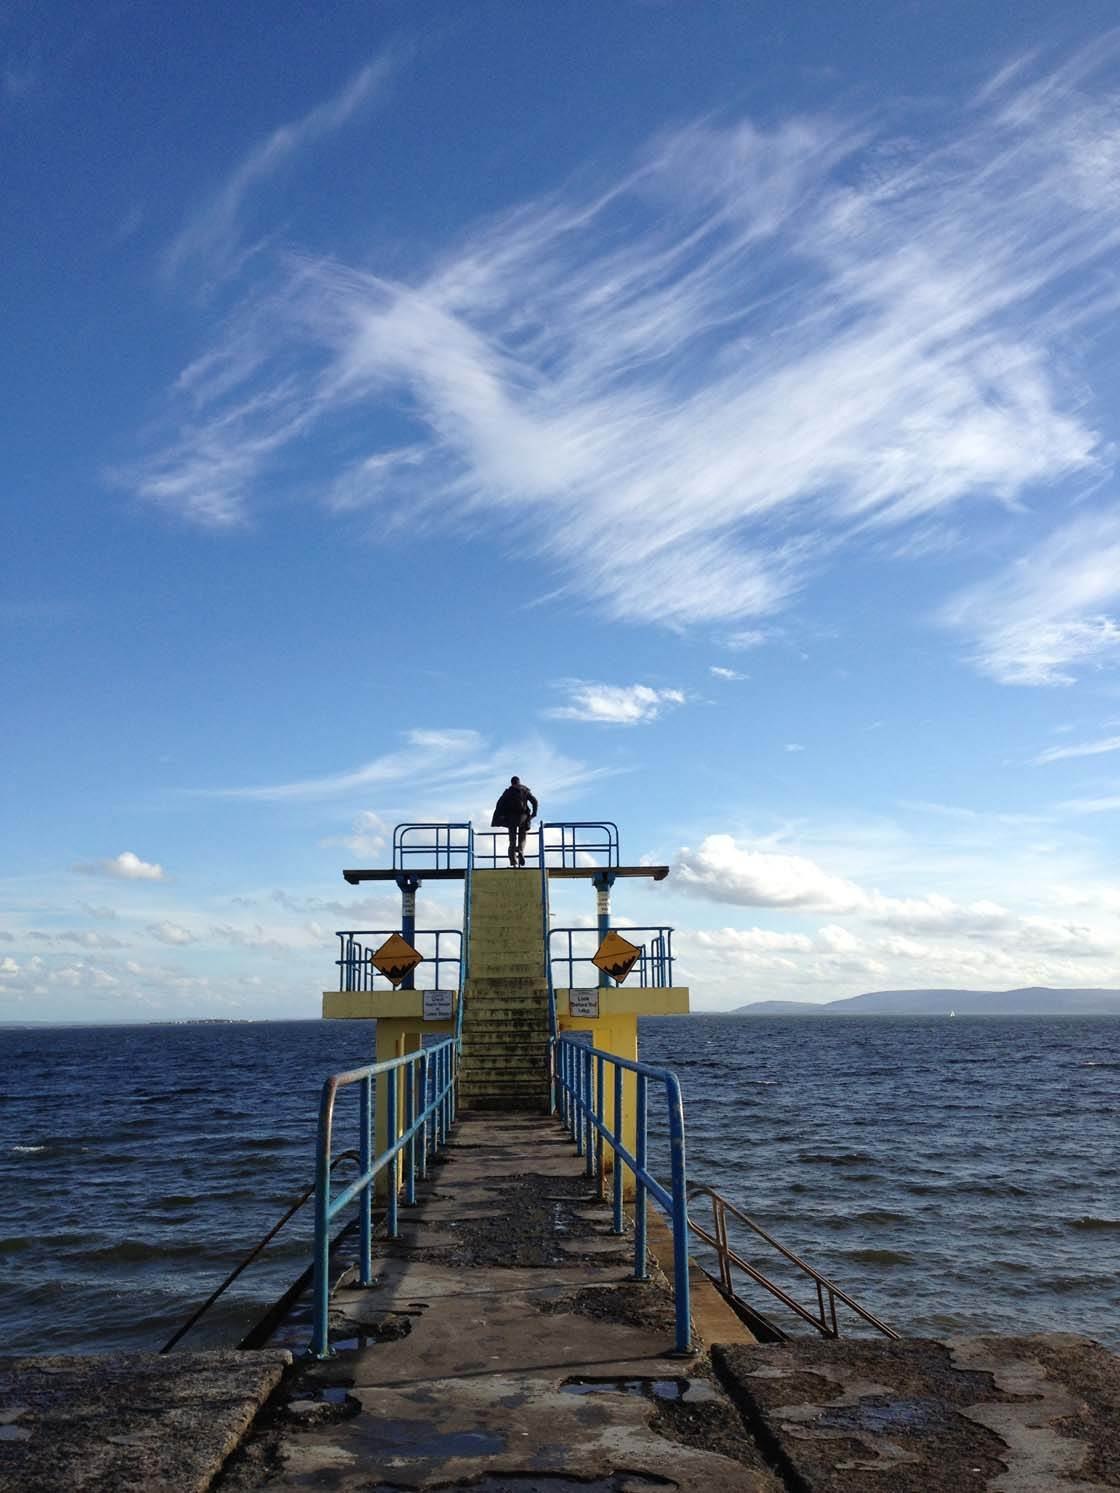
I liked the silhouette of the figure staring out to sea from the top of the platform, and I wondered what he might be looking at. In this case I decided to create something fantastical.
I used the Alien Sky app to bring the moon into the shot. With Alien Sky you can adjust the size of the effect that you’re adding to the image, so I made the moon as big as I could without losing the detail.

I then used Juxtaposer to add the three birds from another shot that I had with birds silhouetted against the sky. Finally I cropped it into a square shape and converted it to black and white.
This was a relatively simple edit, but it was more about the idea than the execution. The more you experiment with these photo editing apps the more ideas you’ll come up with.
Create Alien Worlds
This original shot was taken on Fanore Beach in the West of Ireland on a November day, hence the wonderful winter light. My two sons were playing on the beach as I wandered around taking photos. I managed to get a few shots where they were pretending to be cowboys having a gunfight.
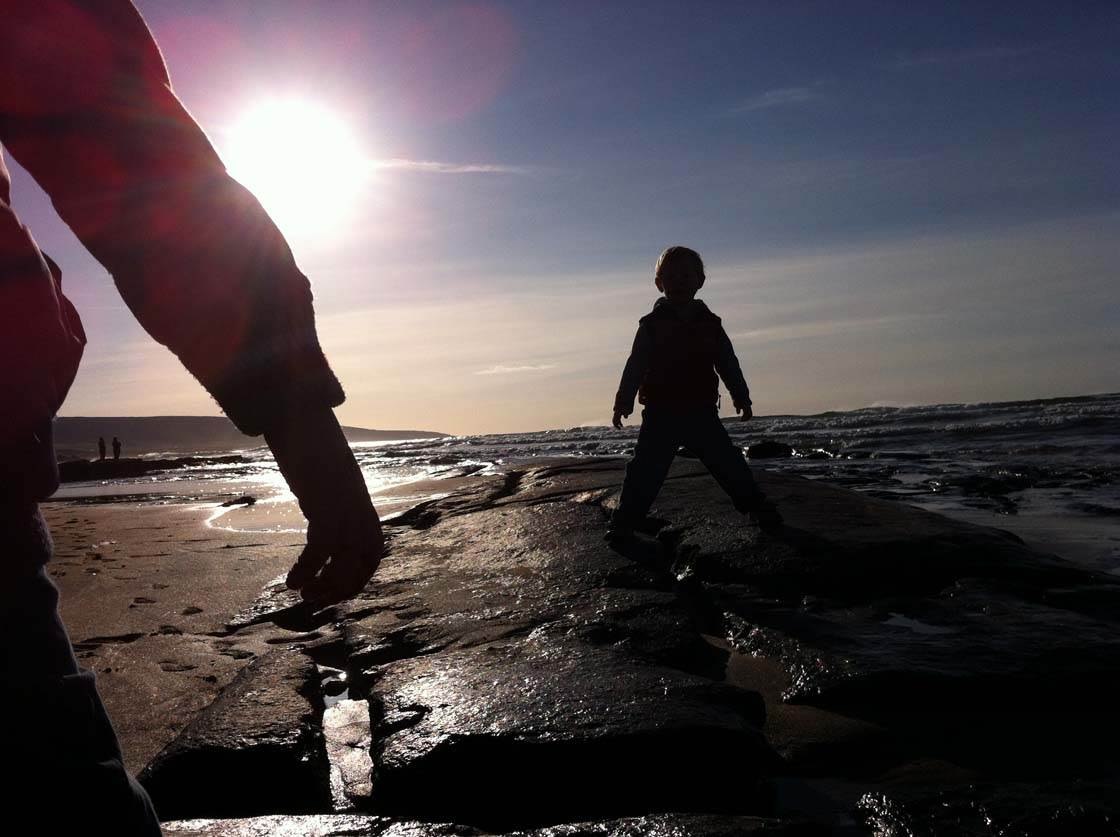
With the rocky beach and the low winter sun looking very large in the image I thought that it had an overall feeling of an alien world. So I decide to enhance this by using the Alien Sky app to add a large planet in the background.
AlienSky is a really fun app to use. It has a huge selection of planets, moons, stars, nebulas and other fantastic effects that can help turn your images into scenes from a science fiction movie.
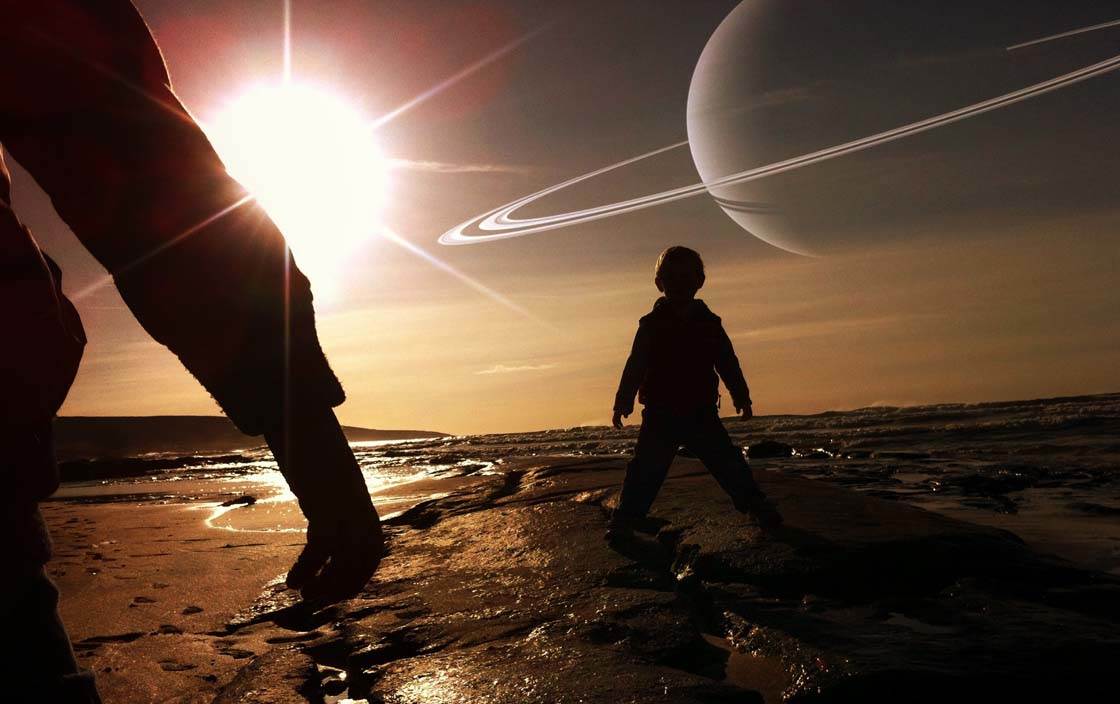
Another fun app, from the same developer as Alien Sky, is called LensLight. This app has a large selection of lighting and lens flare effects that can substantially enhance the existing light in any image.
I used the Sun Flare effect to add rays of light to the sun. I finished off the image by applying the Sunset Filter in PhotoToaster to warm up the colors.
I also also used the Retouch Tool in the Handy Photo app to remove the two people in the distance that I thought were a distraction. You can use this tool to remove most distractions from your photos.
The end result of this process is a fun image of a gunfight on a distant planet. It could be a still from a science fiction movie!
Below is another example of taking something familiar and creating a fun image that plays on that familiarity. In recent years in Ireland, whenever new roads are being built, the National Roads Authority and local councils commission works of art to be placed at the road side at various points along its route.
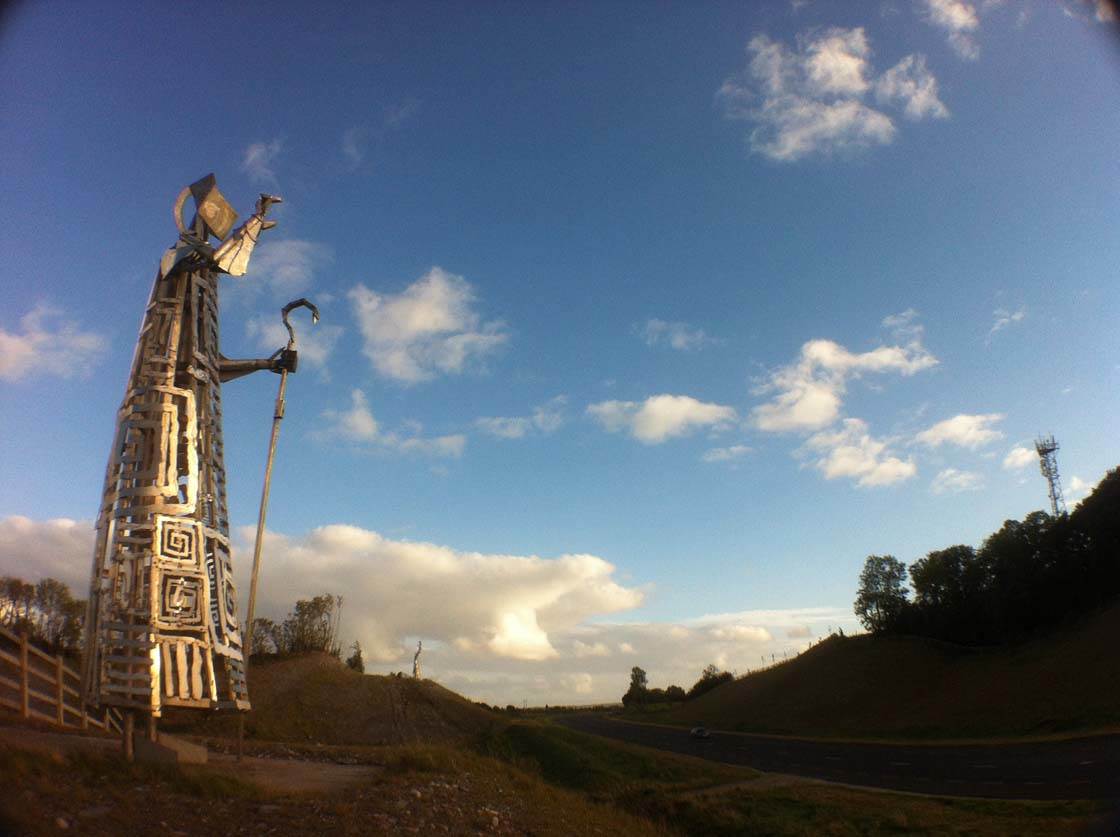
When a new bypass was built around my hometown a few years ago, four tall wrought iron statues commemorating the scholastic and monastic history of the local area were commissioned. These fantastic statues are great subjects for photographs.
After taking this photo, I decided to have a bit of fun by enhancing the futuristic look of the statues. As I said earlier, I always introduce the added elements to a shot at the beginning, so that any subsequent edits will help to blend in these new elements.
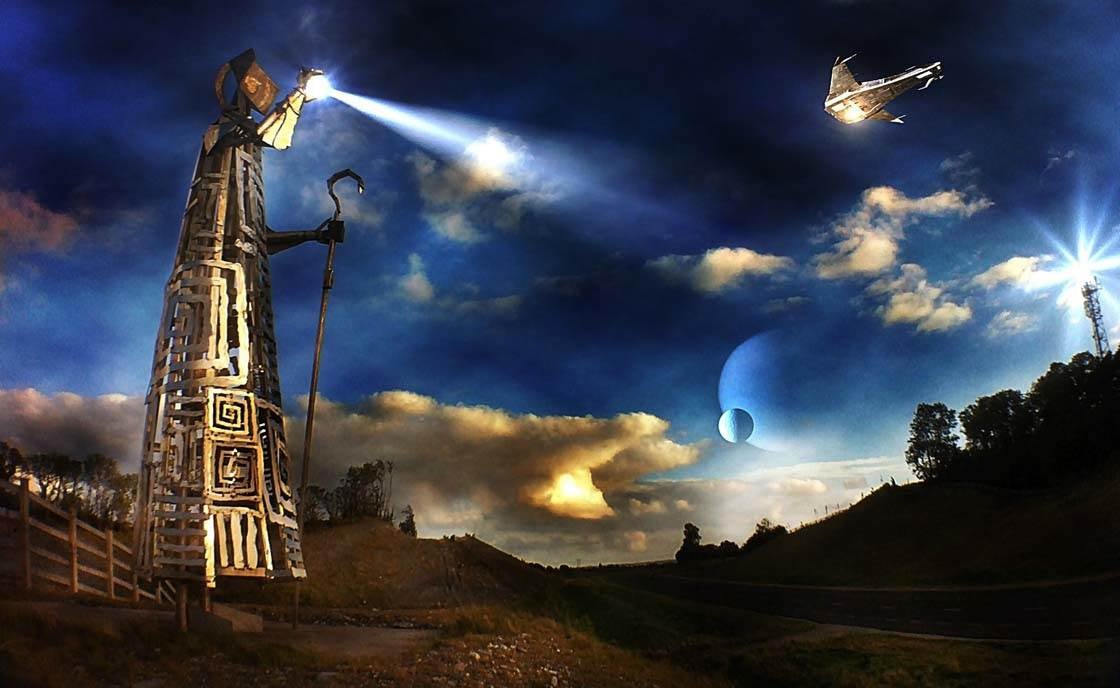
So the first step was to add the spaceship using Juxtaposer. I then added the planets using AlienSky. When creating these types of images it’s all about adding elements and layers to bring your idea alive, but also being careful about the order in which you add them.
After I’d brought in the planets and the spaceship, I used LensLight to add the beam of light emanating from the statue’s hand, the light flare at the top of the communications tower and the light at the bottom of the spaceship. The final step was to adjust the overall tone and color with PhotoToaster.
The Complete Editing Process Workflow
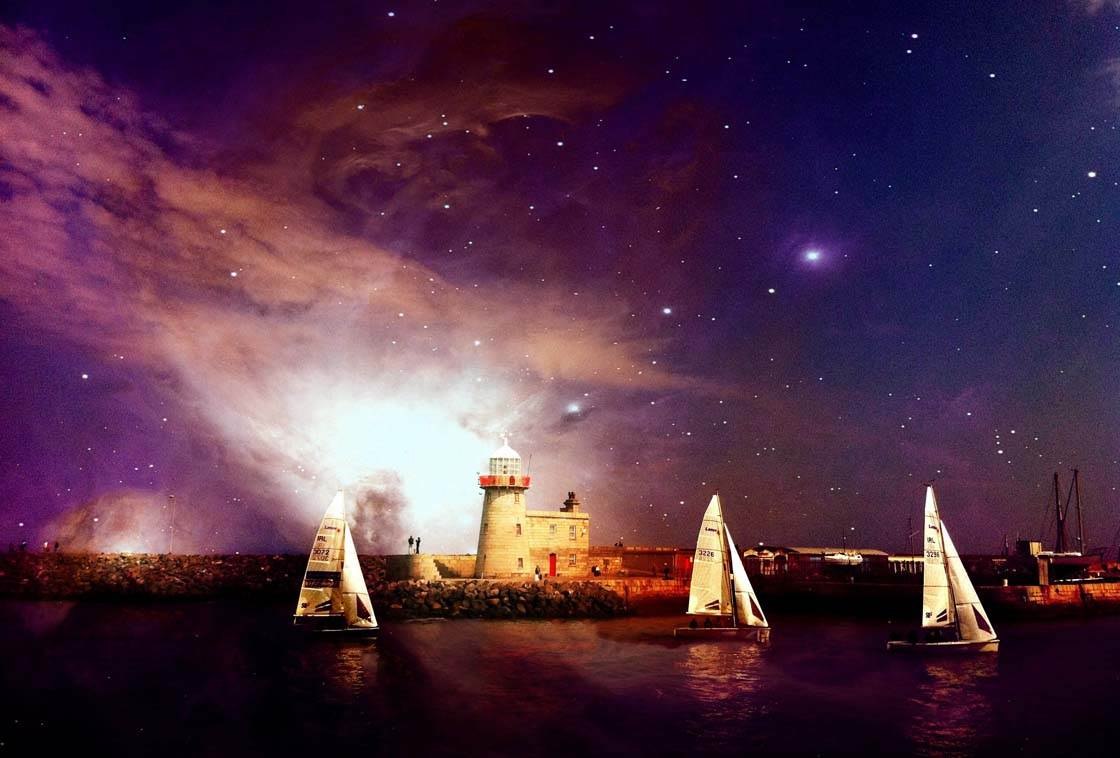
In this example you’ll see each step of the editing process, from the original photo through to the final fantasy world image. Below is the original photo of Sragh Castle – it was the first house built in my hometown in 1588.
Unfortunately it’s just a ruin now, but it’s still an impressive building. I like the look of the building and I thought it would make a great scene for a fantasy movie.
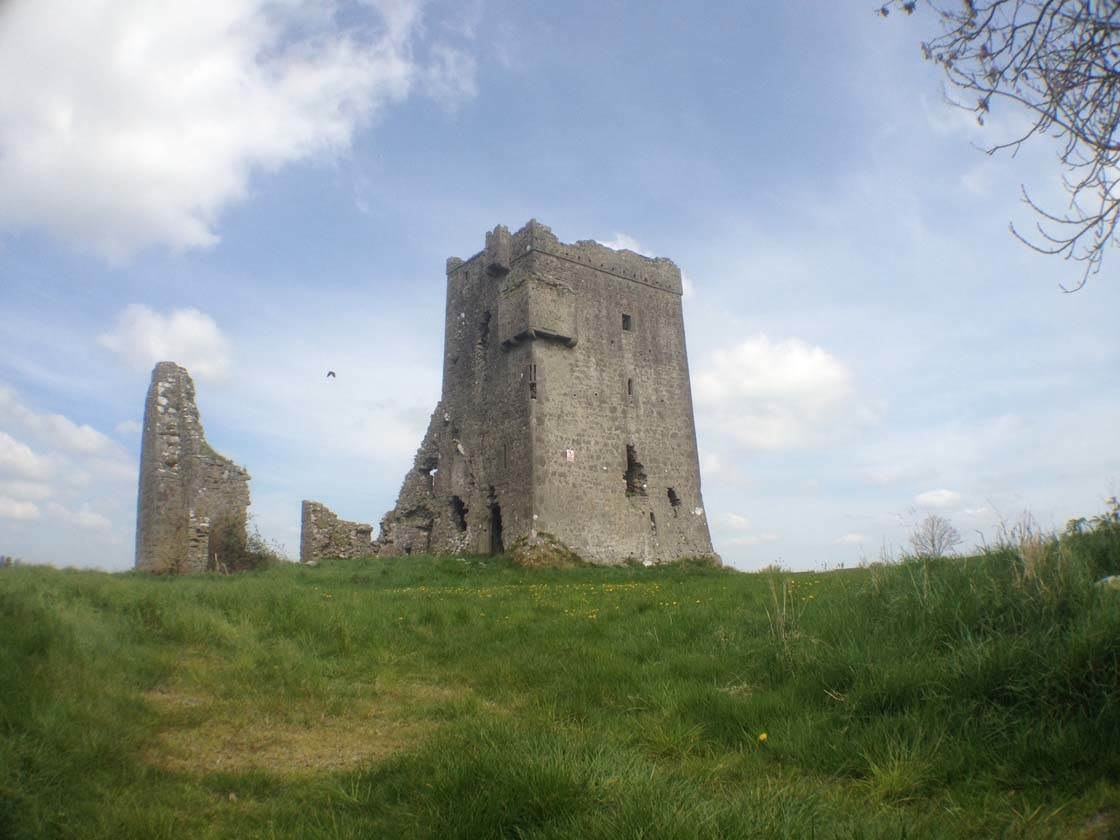
The first step in the process was to use the HDR feature in the Snapseed app to bring out some of the detail and to even out the lighting between the foreground and the sky. I then used the Retouch Tool in Handy Photo to remove the branches in the top right corner. I used Alien Sky to add a heavily cratered moon to help create the surreal mood I was after.
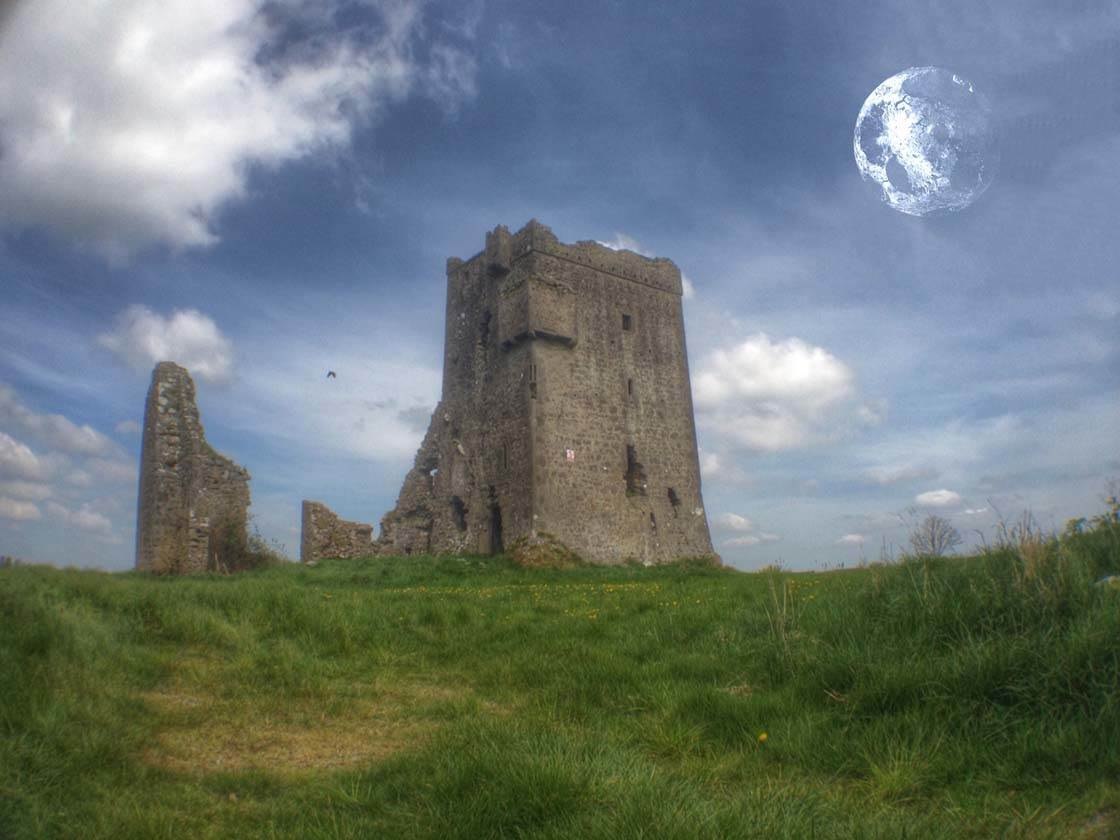
Next I opened the photo in the Tadaa app and used the Blue Steel filter. By adding a blue filter to an image it makes it look like it was shot at night. The filters in Tadaa are completely customizable and I reduced the filter strength to about 50% to keep some color in the image.
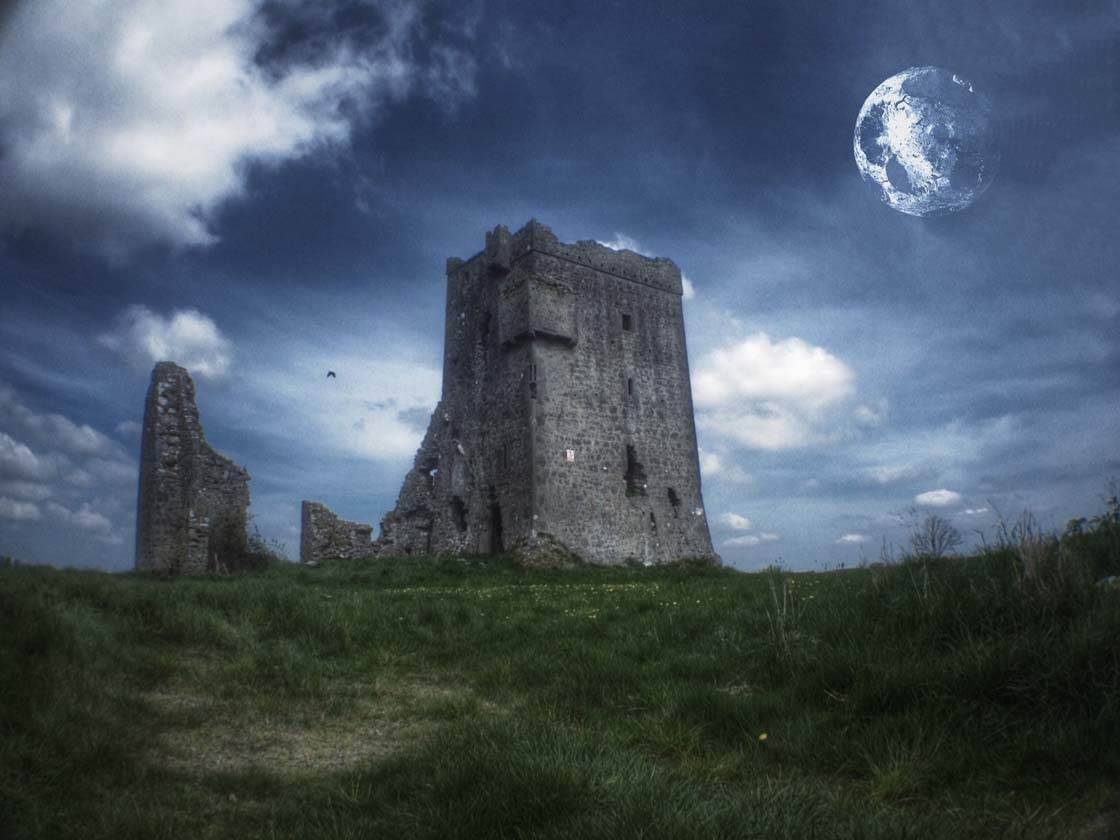
At this stage I wanted to add a figure to the photo. Bringing in a figure into the image can have a two-fold effect. Firstly it adds a sense of scale to a photo. And secondly it adds an element of storytelling. The viewer will become more engaged with the image as they try to relate to the person in it.
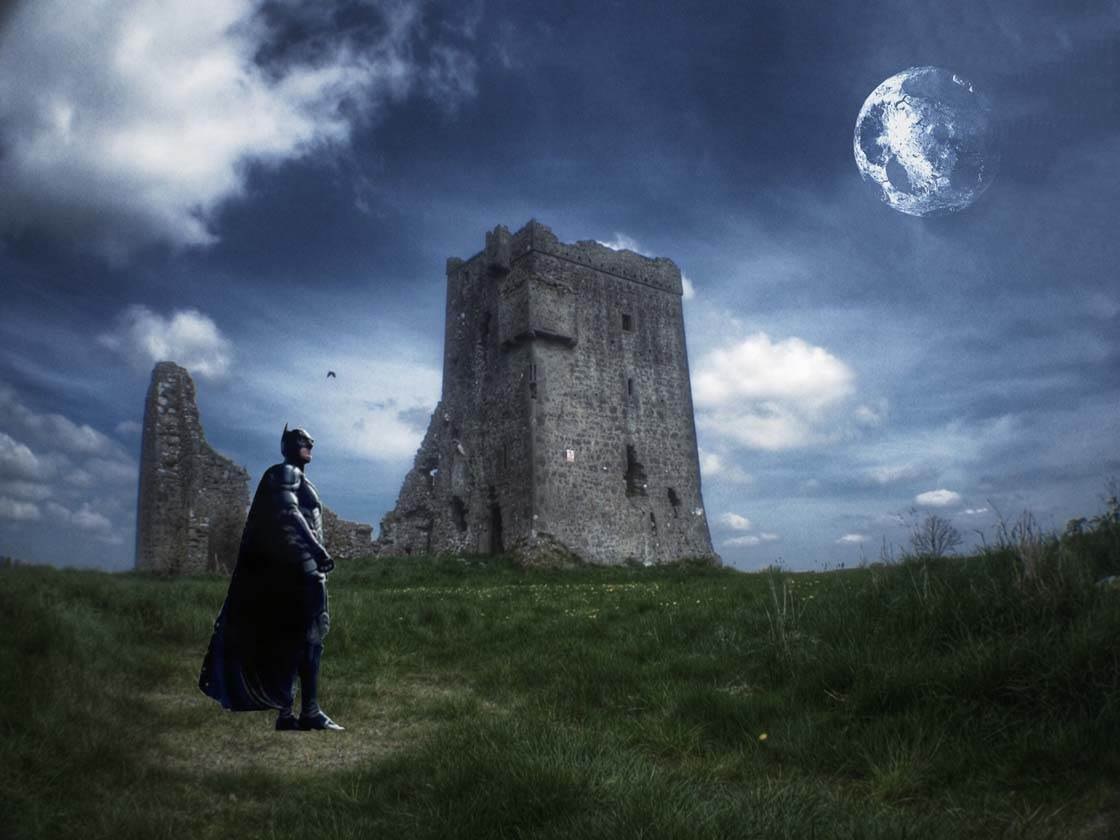
Initially I decided to go with Batman, using Juxtaposer to add him into the image. But even when I’m creating fantasy photos I try to keep a sense of reality, so this wasn’t going to work. Batman hasn’t been known to hang out in Tullamore!
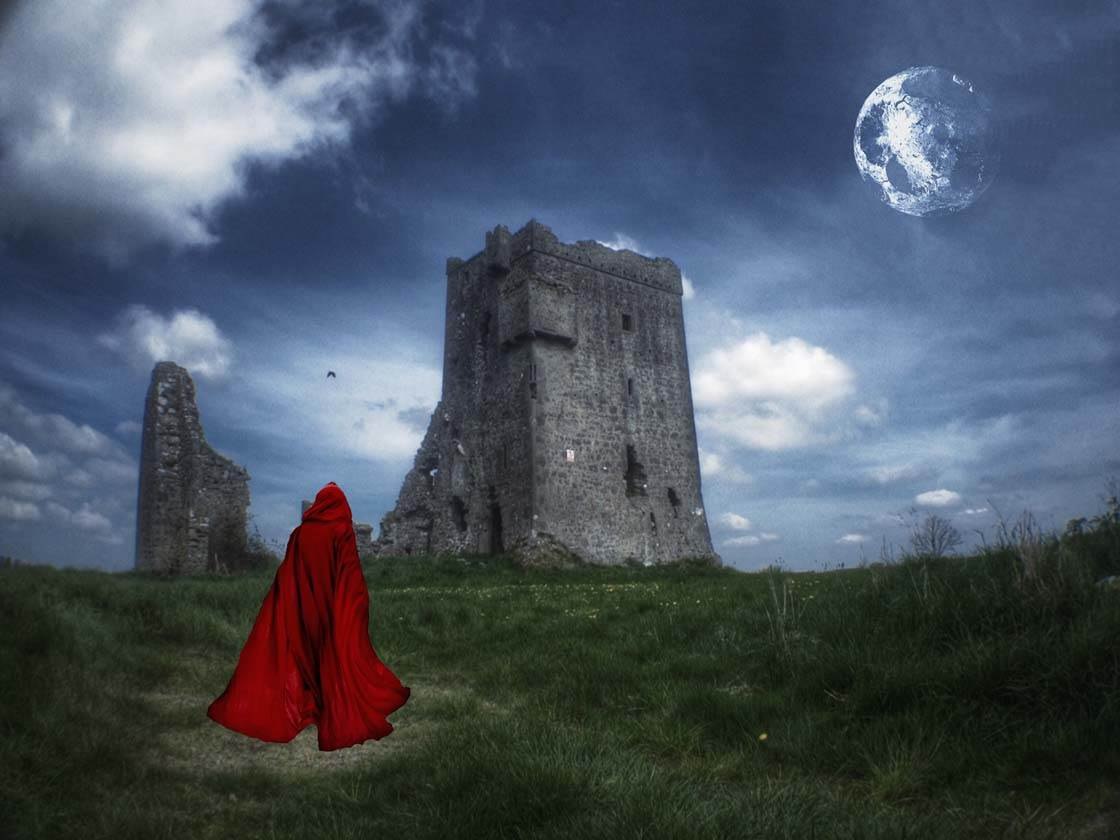
I then decided to go with this robed figure. The fact that the person is facing away from the viewer and you can’t see their face adds to the mystery.
As you can see in the image above, at this stage of the editing process the added element is really obvious and it doesn’t look natural. From here on the aim is to blend in this addition to the background image.
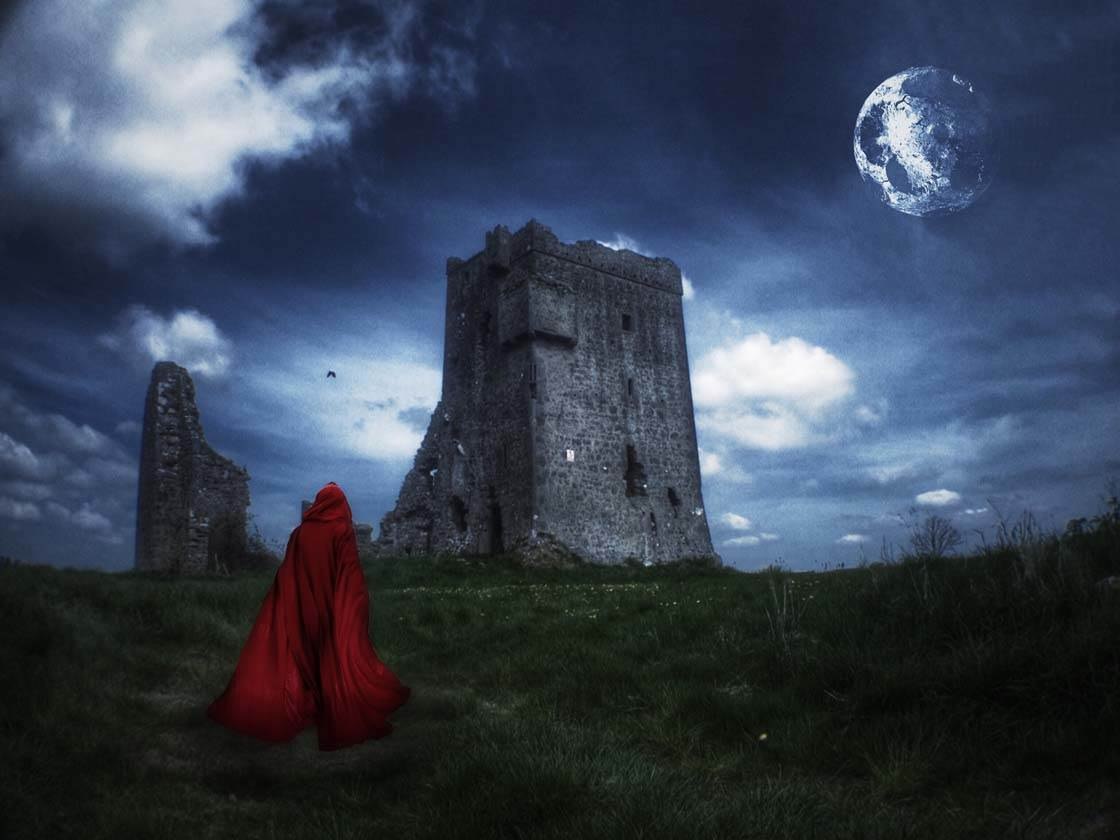
So I opened the image in PhotoToaster and used the lighting brushes to darken the area around the base of the person to make it look like it was casting a shadow. I also used the Tone Filter to darken the overall image to further enhance the feeling of a night time shot.
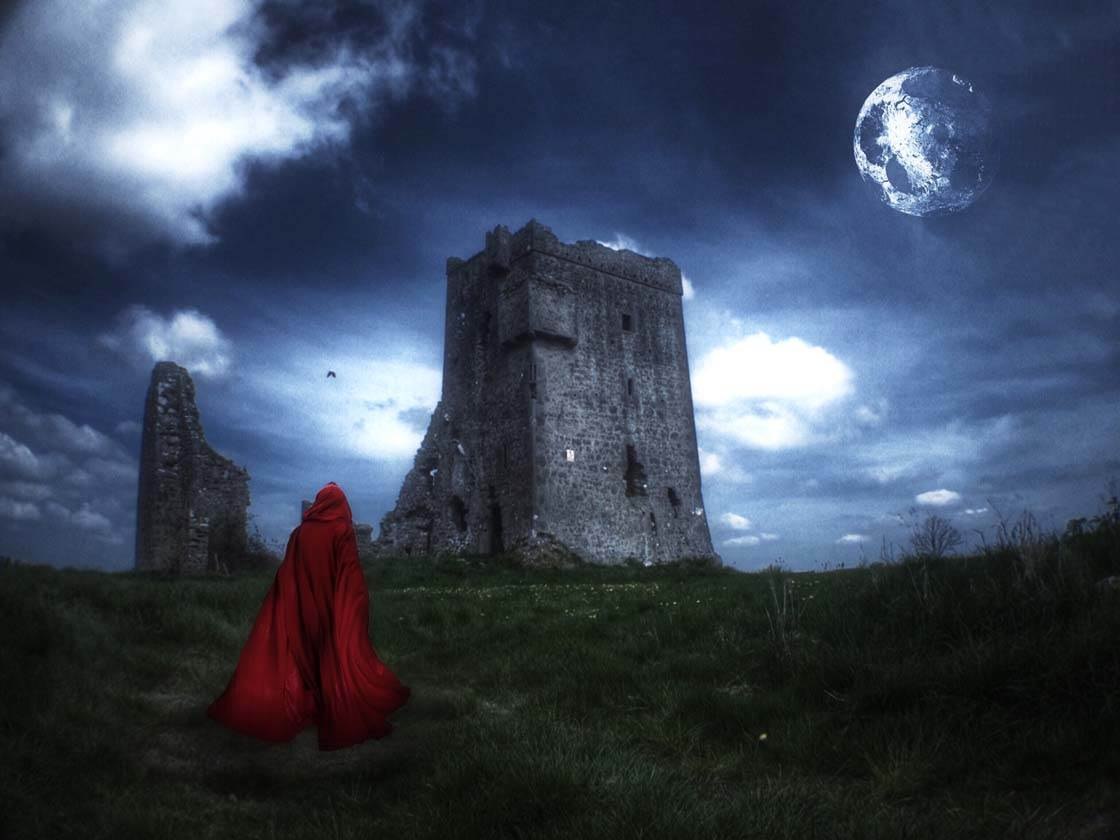
The next step was a quick edit with the glow filter in the PhotoFX app to brighten the clouds. At this stage I still thought that the person stood out a bit too much, so I went back to PhotoToaster to use the lighting brushes again to increase the shadow as shown below.
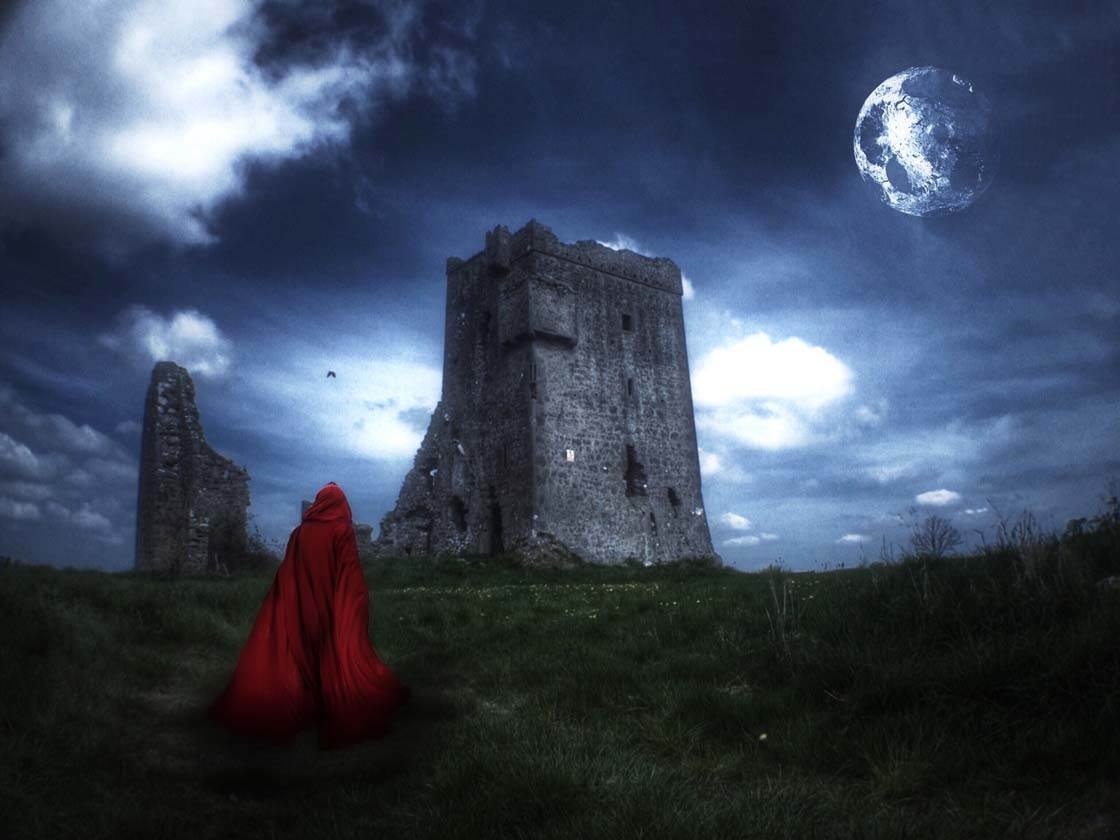
For the final step I opened the image in Handy Photo and used the Retouch Tool to remove a couple of small distractions – the small bird to the left of the tower and the “no trespassing” sign on the front of the tower. While in Handy Photo I used it’s Glow filter on a very low setting to decrease the grain in the image.
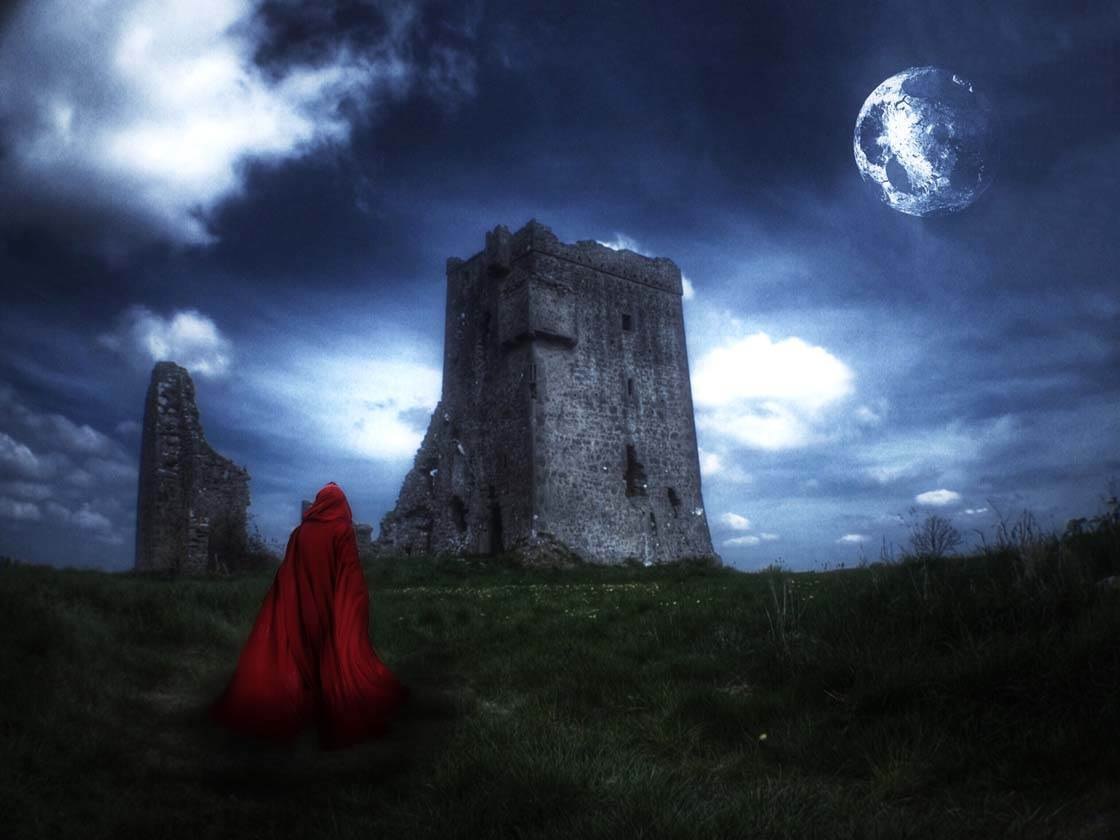
And there you have it! A quick ten minute edit using a few apps can dramatically alter the look and mood of a photo. Ideally, you need to have a good idea of the look you’re hoping to achieve and work out the apps you’ll need before you start.
But as with everything, don’t be afraid to experiment. If something doesn’t work, just delete that step and go back to the previous edit. And you never know, sometimes you’ll come across something that works by pure luck.
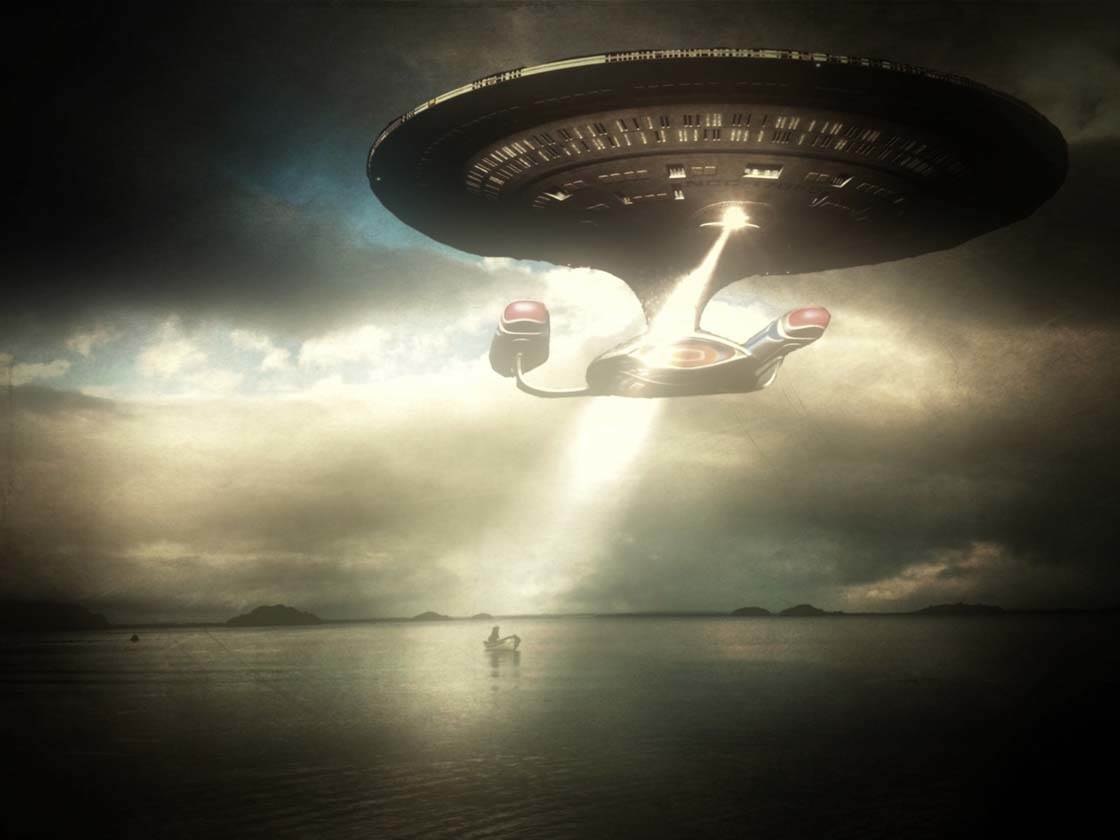
The majority of examples that I’ve used here are as a result of the science fiction and fantasy movies and books that I loved when I was growing up. You should use your interests as influences for your edits to make them more personal to yourself.
To recap, the apps that I used to create these images were Juxtaposer, Alien Sky, LensLight, PhotoToaster, Snapseed, Handy Photo, Tadaa and PhotoFX.
But you don’t have to limit yourself to these apps. There are a huge variety of apps available on the App Store so you should be able to find something to help you realize your vision.


Wow, amazing work! I need to look into some of these apps. Thanks for the tutorial!
You’re very welcome Chris. Delighted you liked it 🙂
Such amazing ,which is full of imagination,Big thanks for sharing.
Thanks for letting me know you enjoyed the article. If you have any queries do not hesitate to ask.
Amazing images Paul. Thanks for the great tips! 🙂
Thanks Kate. Glad you like it 🙂
Awesome blog. Thanks for the amazing tips. Question: all this work is done on your iMac or iPad?
I don’t want to speak for anybody but everthing is done on an iOS device. Basically everything you read on this site is done with iOS. The names of the apps that are being used are always named so you can check them out and experiment yourself.
Got it! Thanks
Hi Ernest. Delighted you like the tutorial. I can confirm that all photos in this article were taken and edited with an iPhone using the apps that were listed.
Thanks Paul Moore! It is good to know that with a lot of practice and patience, I can use my iPhone to create these amazing images.
Just a shout out…. you rock !!
Thanks for the post. I have a photo that was Google Awesomed by my old Android. I would love to recreate this effect. Do you know of an Iphone app that can do this?
Very useful post and very imaginative editing! You have motivated me to try some edits…..
Glad to hear you’re feeling motivated by these editing tips 🙂
I am living in a city… and i want to shoot pics of nature in the parks withput getting the city view in it… how could i could i do that?