White balance is one of the most important settings on a digital camera as it helps you achieve accurate colors in your photos. But a lot of people never use it as they don’t understand its purpose. With the release of iOS 8, many third-party camera apps now have manual white balance settings, giving you far more control over color than ever before. In this tutorial, you’ll discover how to use white balance to get perfect colors in your iPhone photos.
Understanding Color Temperature
Have you ever taken a photo with your iPhone where the color doesn’t look quite right? Maybe you’ve ended up with a photo that has an unsightly orange, yellow or blue tint?
When an entire photo is tinted with a certain color, we call this a “color cast.” Color casts are caused by the type of light that you’re shooting in. Different light sources emit different colored light, and this has an effect on how the colors appear in a photo.
The color of light is known as “color temperature.” When we talk about color temperature and color casts we’re referring to the relative “warmness” or “coolness” of a color. Orange is a warm color and blue is a cold color.
Candles emit a very warm orange colored light, and tungsten or incandescent bulbs (ordinary household light bulbs) emit a warm yellow colored light.
By contrast, the color of light in shaded areas or on an overcast day is a much cooler blue. The color temperature of bright midday sun is fairly neutral, whereas the color temperature of sunset is much warmer.
So how does color temperature manifest itself in your photos? Well, if you take a photo in candlelight, the resulting image might end up with an orange color cast. Or a scene lit by a household lamp might end up with a warm yellow color cast.
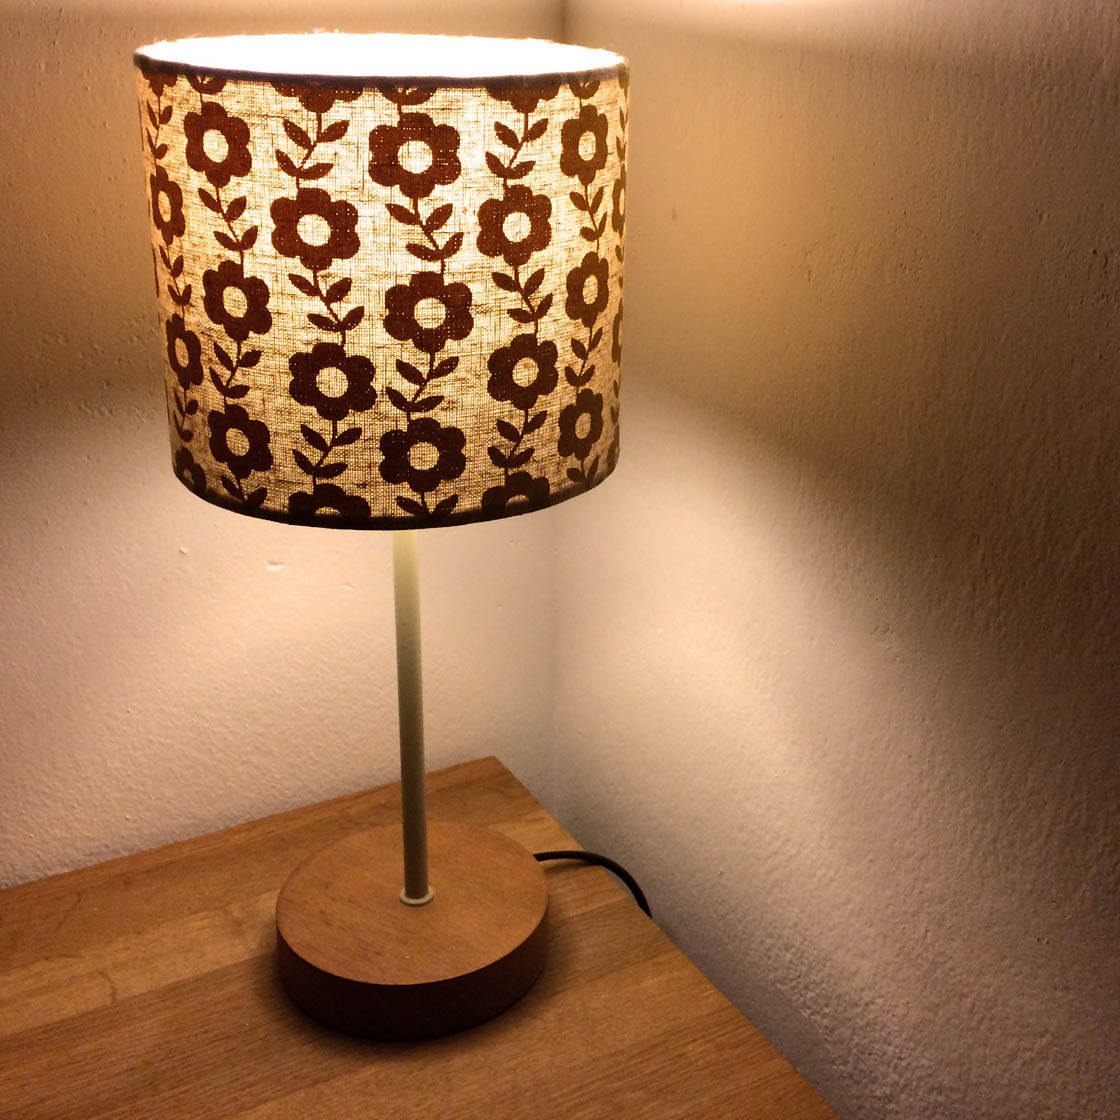
While a color cast affects the entire photo, it’s most noticeable in the white parts of the image. So in the photo above, the white walls appear a yellowy orange because of the color cast from the light bulb.
Taking a photo in outdoor shade or in cloudy conditions produces a cool blue color cast, so the colors in your photo will appear cooler (more blue) than normal.

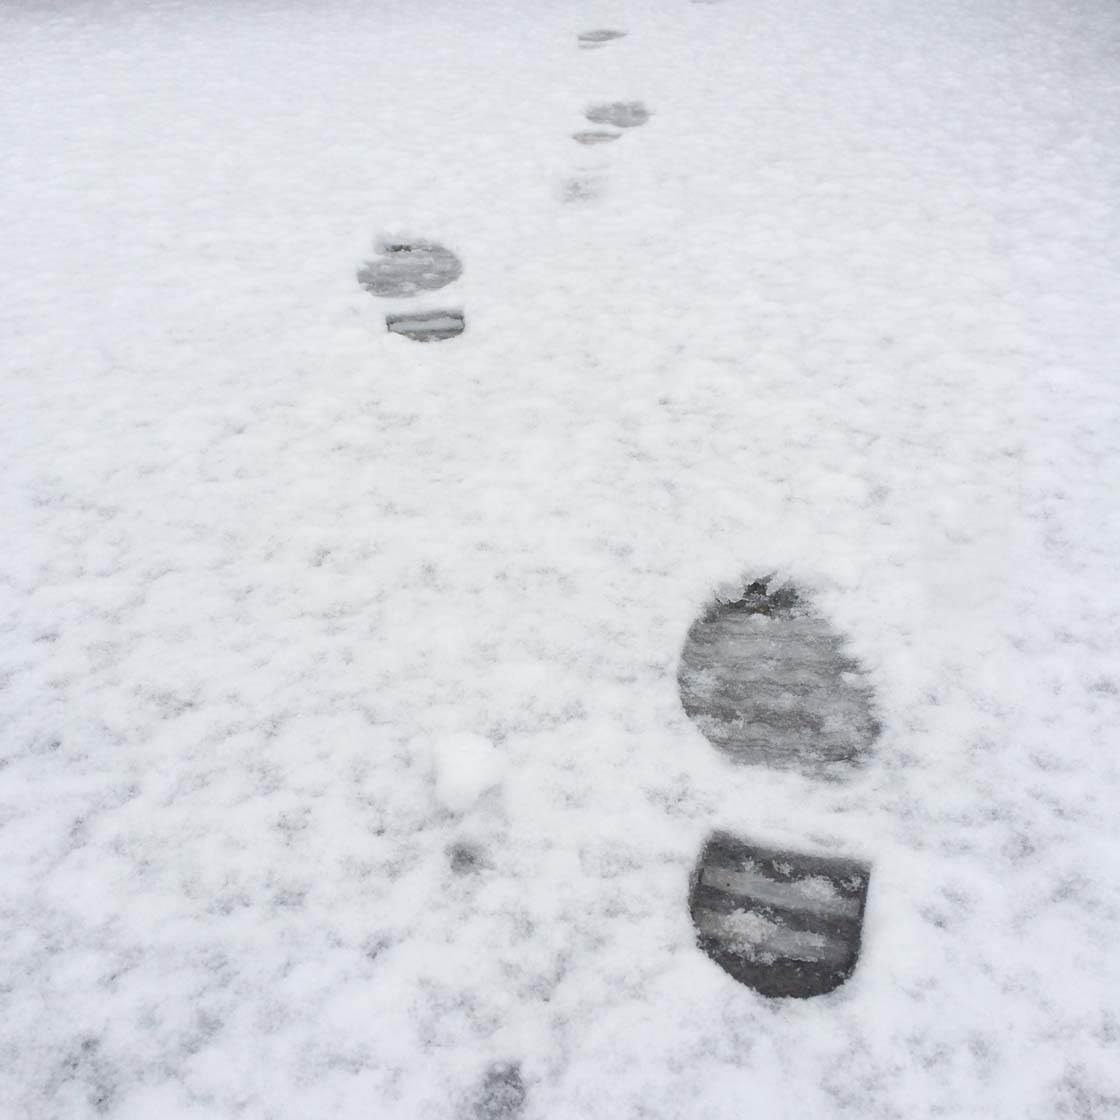
This is the reason that when you take a photo of a snowy scene on an overcast day or under the shade of trees, the snow often appears blue in your photo.
Color temperature is measured on the “Kelvin scale.” While you don’t need to know much (or anything) about the Kelvin scale in order to get the colors right in your photos, having a basic knowledge of it can help you understand the white balance settings on your iPhone.
Warm colored light has a low number on the Kelvin scale and cool colored light has a high number. As a rough guide, the warm color temperature of candlelight is approximately 2000 K (Kelvin).
Whereas the cool color temperature of shade or a heavily overcast sky is approximately 8000 K. As a general rule of thumb, the color temperature of common light sources goes from warm to cool in the following order:
candlelight > sunrise/sunset > tungsten/incandescent light bulbs > fluorescent light bulbs > clear sunny sky > camera flash > cloudy overcast sky > shade
So the warmest colored light is candlelight, and the coolest colored light is shade. Clear blue sunny skies and the light from your iPhone’s flash are fairly neutral so tend not to produce a warm or cool color cast.
How Does White Balance Work?
We don’t generally notice the different color temperatures of light because our eyes automatically adjust for it. So when we look at a white plate in candlelight, we see the plate as being white, not orange.
Or when we’re out in the snow on an overcast day, the snow doesn’t look blue to us – it looks white because our eyes adjust for the color temperature of that particular light.
While our eyes are very good at judging what’s white under different light sources, digital cameras (including our iPhones) often have difficulty in reproducing the colors accurately, resulting in orange, yellow, blue or even green color casts.
Understanding the white balance setting on your iPhone allows you to help your camera out in certain lighting situations.
Selecting the right white balance setting will eliminate unsightly color casts. This will result in photos with accurate colors, where your whites appear white as opposed to yellow, orange or blue.
So how does white balance work? It’s actually very simple. White balance neutralizes color casts by warming up or cooling down the colors in your photo.
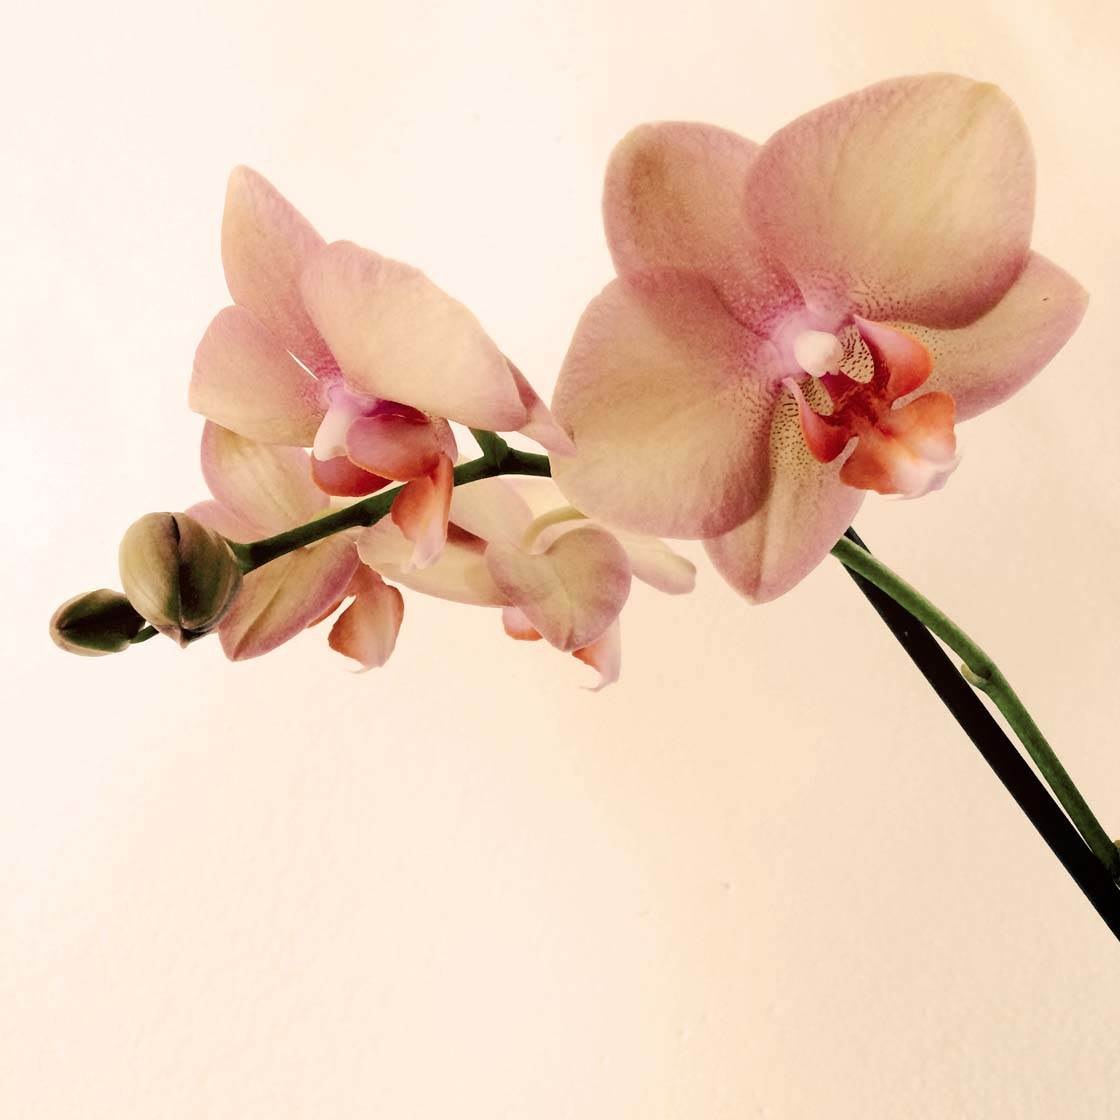
So if the colors are too warm and you’re getting an orange or yellow color cast, you can tell the camera to cool the colors down a bit.
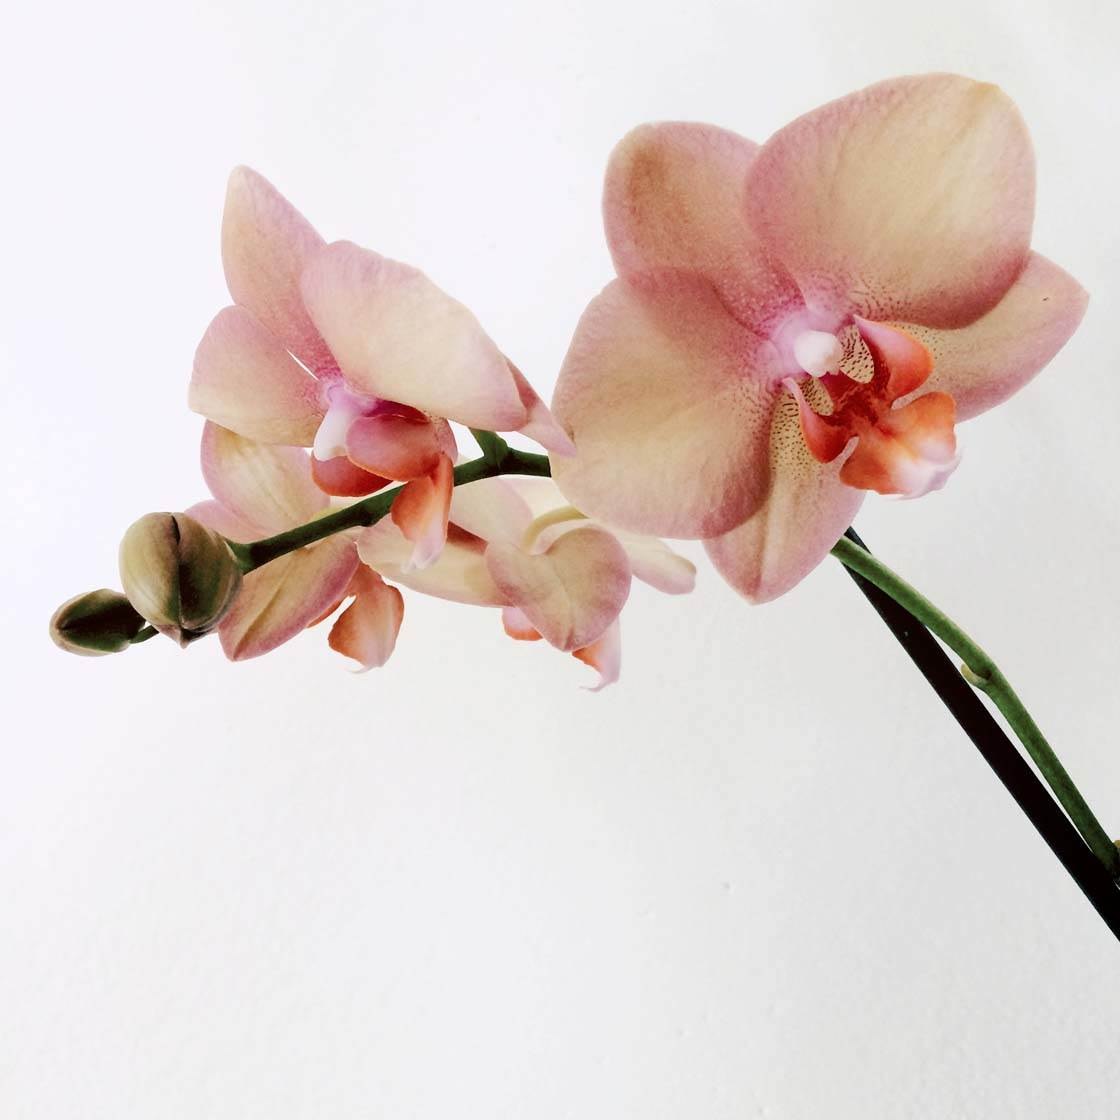
This neutralizes the overly warm colors, making sure that your whites appear white and all of the other colors are reproduced accurately.
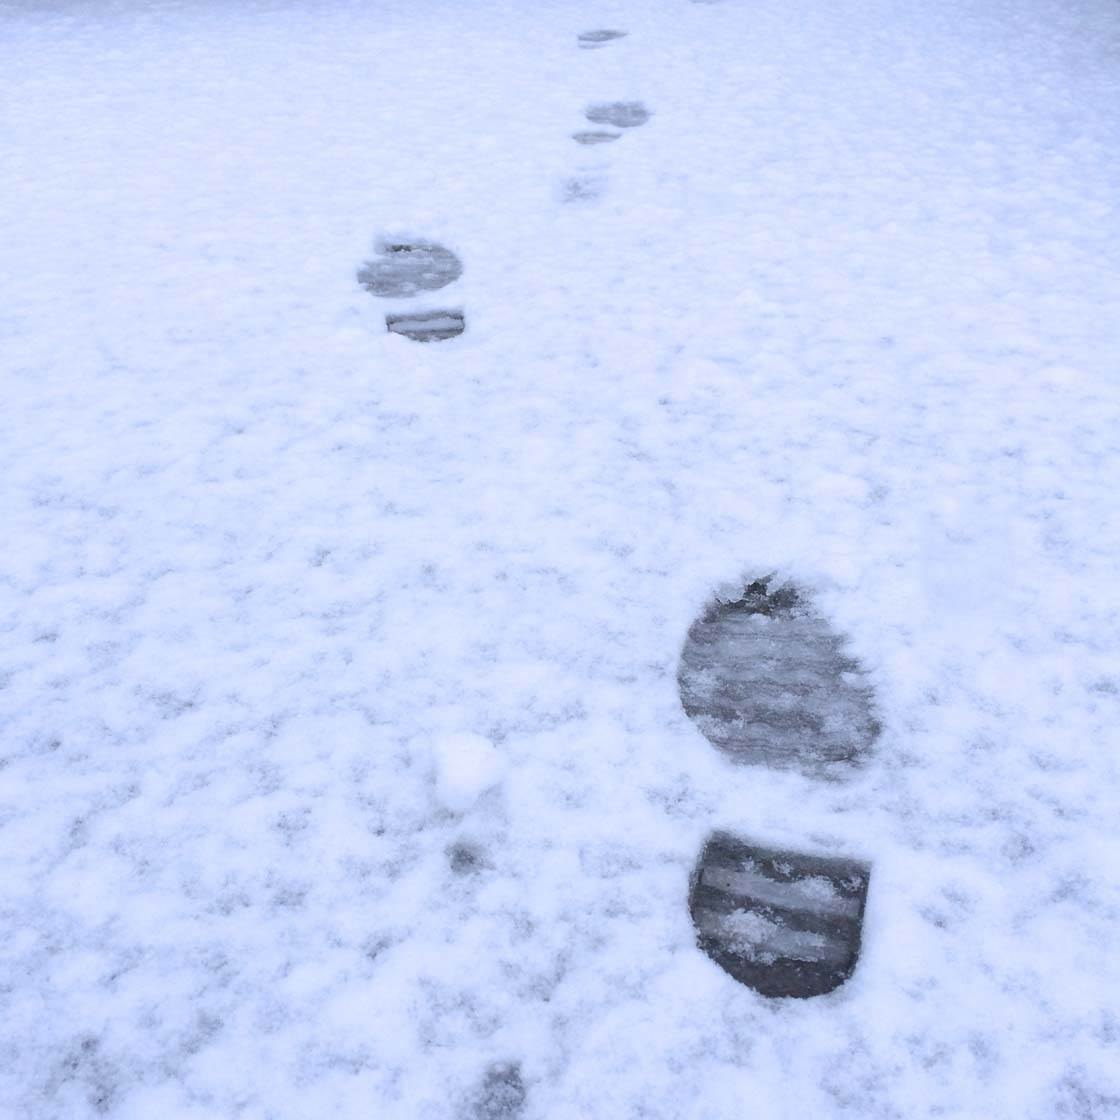
Alternatively, if the colors are too blue, you can tell the camera to warm the colors up. This will neutralize the overly cool colors, eliminating the color cast and ensuring that the colors in your photo appear accurate.
Using White Balance On Your iPhone
The white balance (WB) setting always has an Auto white balance (AWB) option which automatically senses the color temperature of the light and attempts to neutralize it.
So if the camera senses cool light, it compensates by making the colors slightly warmer. And in warm light, it makes the colors slightly cooler.
The iPhone’s camera actually does a very good job of automatically setting white balance for a scene, and in many situations the colors in your photos will appear accurate.
However, sometimes the Auto white balance setting struggles to deal with a particular type of light, and this will result in a photo with an ugly color cast.

In these situations you need to use the manual white balance settings on your iPhone. This will help to eliminate the warm or cool color cast, so that your whites appear white as opposed to yellow, orange or blue.

The most common lighting situations that the camera struggles to deal with are the two extremes of the Kelvin (color temperature) scale. So in very warm light such as candlelight or tungsten lighting, or in very cool light such as cloud or shade.
Unfortunately, the native Camera app on the iPhone doesn’t have a manual white balance setting, so you’ll need to use a third-party camera app that offers white balance.
With the release of iOS 8, many camera apps have been updated to include manual white balance settings, so it’s worth checking any camera apps that you currently use to see if they now have white balance.
In this tutorial I’ll be showing you how to use the white balance settings in the VSCO Cam app and Camera+ app.
Using The White Balance Slider In VSCO Cam
The white balance setting in the VSCO Cam app has two options: an Auto white balance setting and a manual white balance slider.
In the VSCO Cam app, ensure you’re in the camera mode. If you don’t have the VSCO Cam viewfinder on the screen, tap the Camera icon at the bottom of the app.
To access the manual camera settings, tap the Settings icon (show bottom left in the screenshot below), then tap the ADV (advanced) icon so that it appears black.
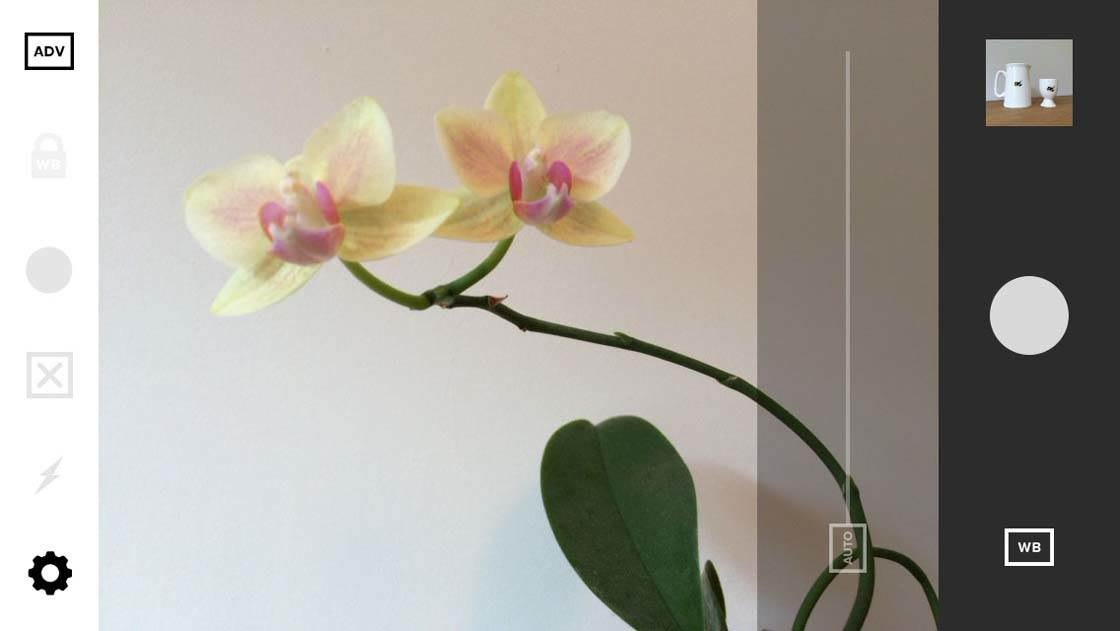
To access the white balance settings, keep tapping the icon next to the shutter button (shown bottom right in the screenshot above) until the WB (white balance) icon appears.
The white balance Auto button and slider will appear on the screen. The default setting is Auto white balance, so if you take a photo now it will be taken using the Auto setting.
The Auto white balance setting tells the iPhone to detect the color temperature of the light in a scene, and automatically compensate by making the image warmer or cooler to eliminate any color cast.
Generally the Auto setting does a good job, but if the image still has a color cast you’ll need to manually adjust the white balance to get the colors right in your photo.
To adjust the white balance manually, simply slide your finger along the white balance slider next to the Auto button. As you move the slider, you’ll notice the colors in the viewfinder becoming warmer or cooler.
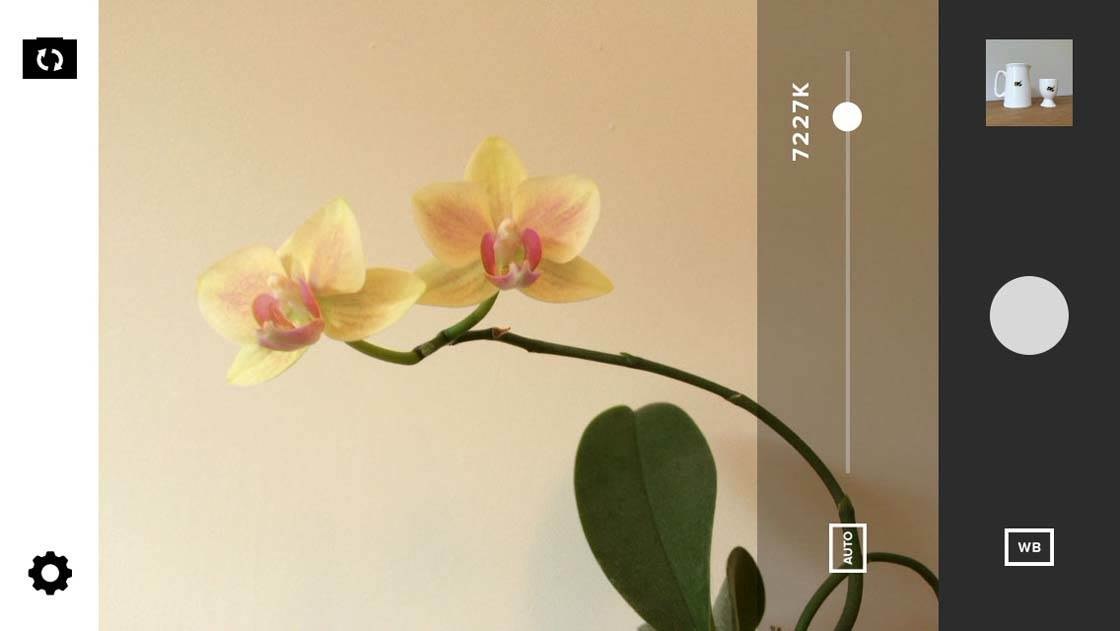
You’ll also see a Kelvin (K) number on the slider. A high Kelvin number will make the colors in the photo warmer, and a low number will make the colors cooler.
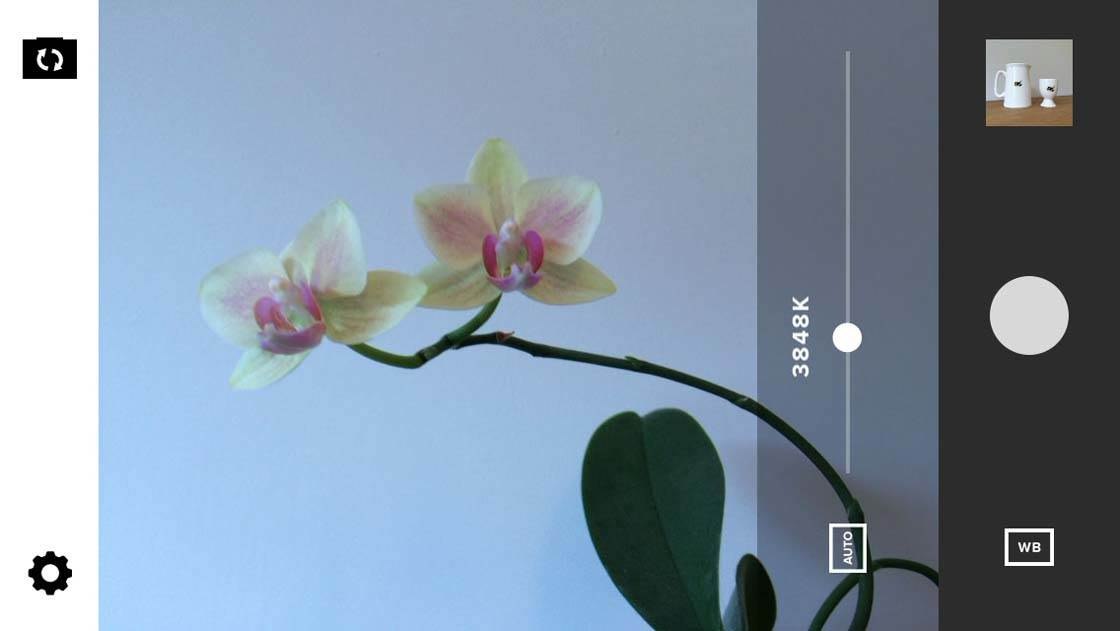
Use the slider to adjust the color temperature so that the colors in the scene are reproduced accurately in the photo. Pay particular attention to any white areas in the scene, as these are where you’ll notice color casts the most.
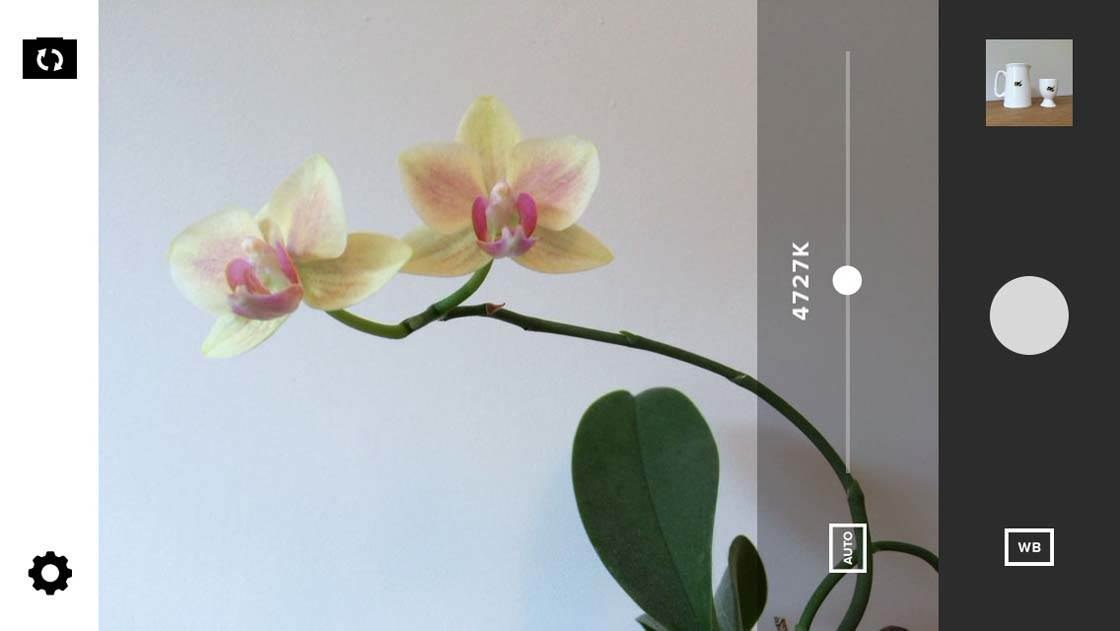
Once you’re happy with the colors, press the shutter button to take the photo. It’s now worth reviewing the photo that you just took. If the photo still has a color cast, try taking it again using a different color temperature on the white balance slider.
To revert back to using Auto white balance, just tap the Auto button next to the white balance slider. The camera will now attempt to neutralize color casts automatically.
Using The White Balance Presets In Camera+
The white balance setting in the Camera+ app works a bit differently to VSCO Cam. Like VSCO Cam it has an Auto white balance option, but it doesn’t have a color temperature slider.
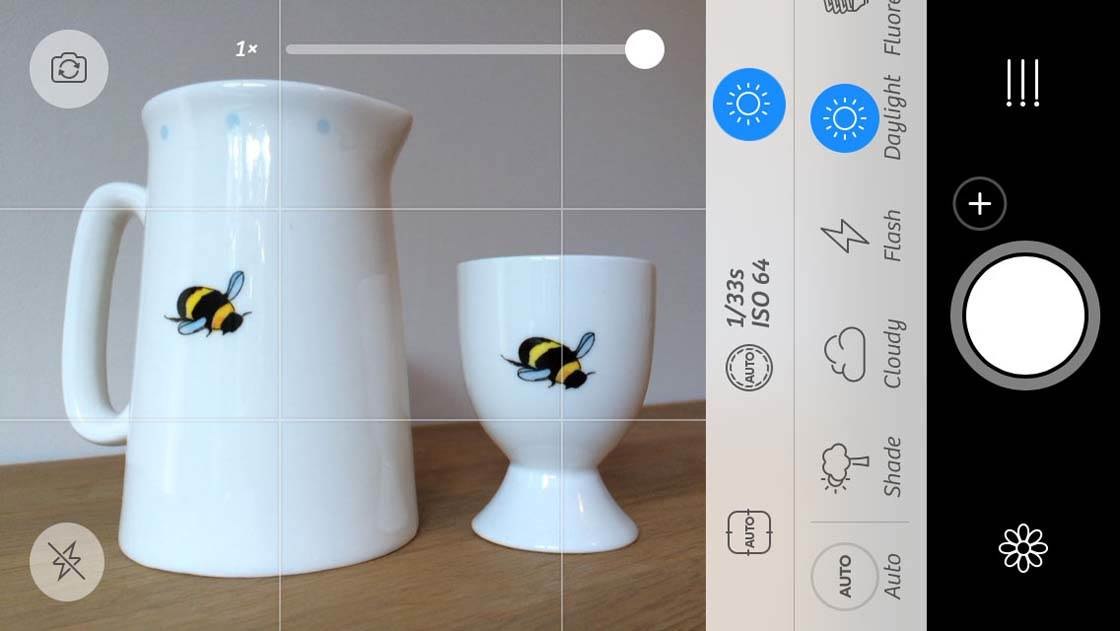
Instead, it has a selection of presets which can be used to quickly adjust the white balance for the relevant lighting conditions. The presets are called: Shade, Cloudy, Flash, Daylight, Fluorescent, Incandescent, Sunrise/Sunset and Candlelight.
The idea is that you simply select the relevant preset for the type of lighting you’re shooting in, and any color cast from that type of light should be eliminated.
In the Camera+ app, ensure you’re in camera mode – if you don’t have the Camera+ viewfinder on the screen, tap the Camera icon at the bottom of the app.
To access the white balance settings, tap the WB icon which is located in the settings between the viewfinder and the black bar containing the shutter button. The list of white balance presets will be displayed as shown below.
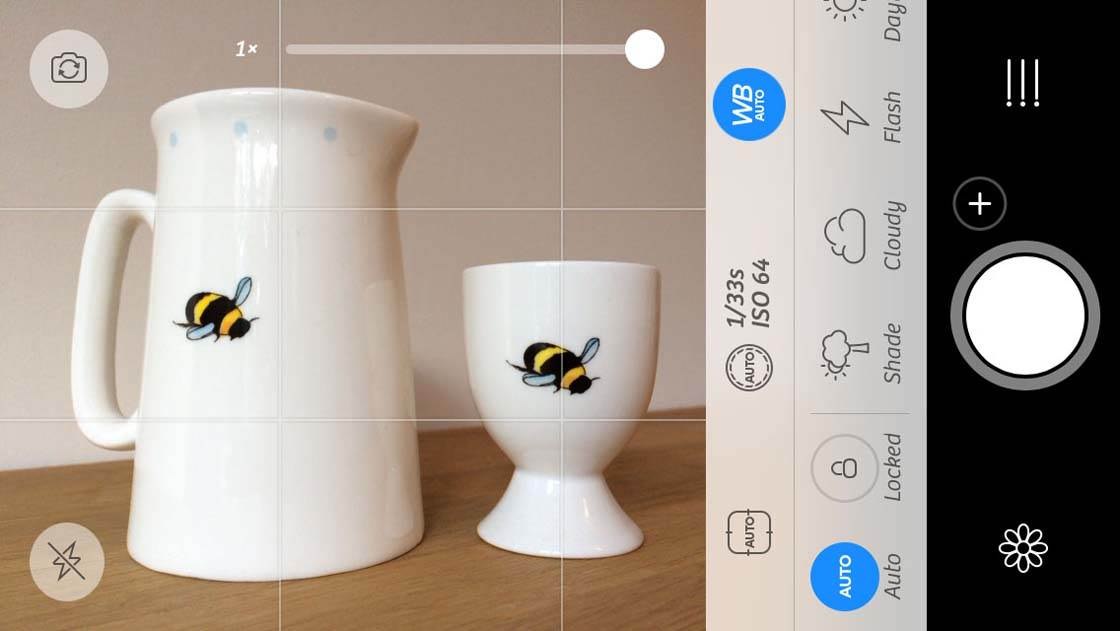
You can swipe across this list to view more presets. Try tapping on each preset to see how they warm up or cool down the colors in the viewfinder.
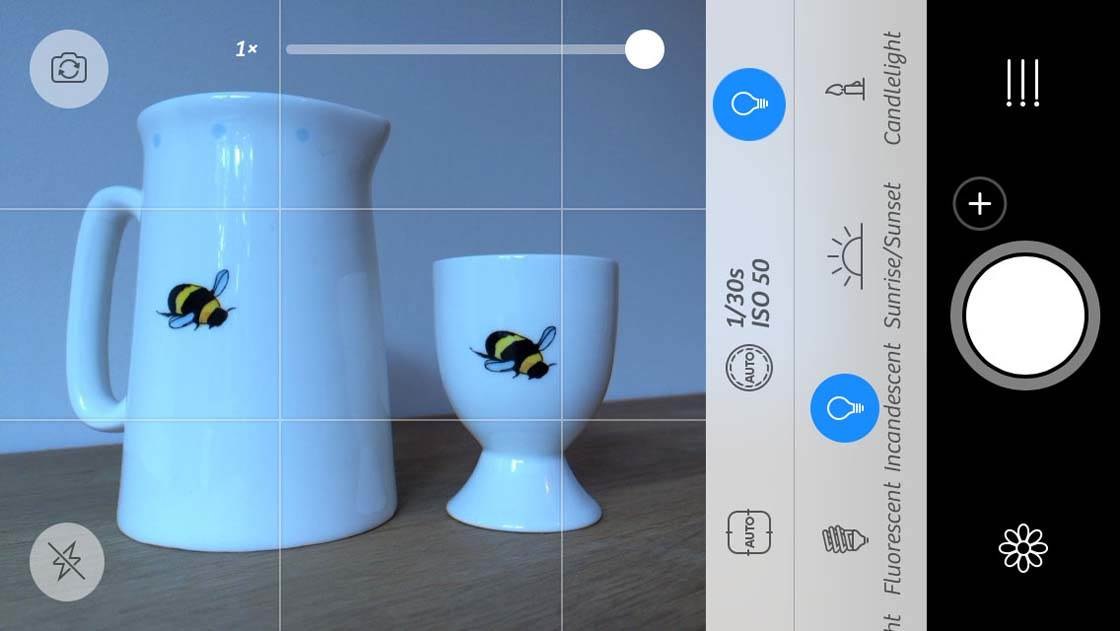
You’ll notice a huge difference in color temperature with some of these presets. Pay particular attention to any white areas of the image as this is where you’ll notice color changes the most.
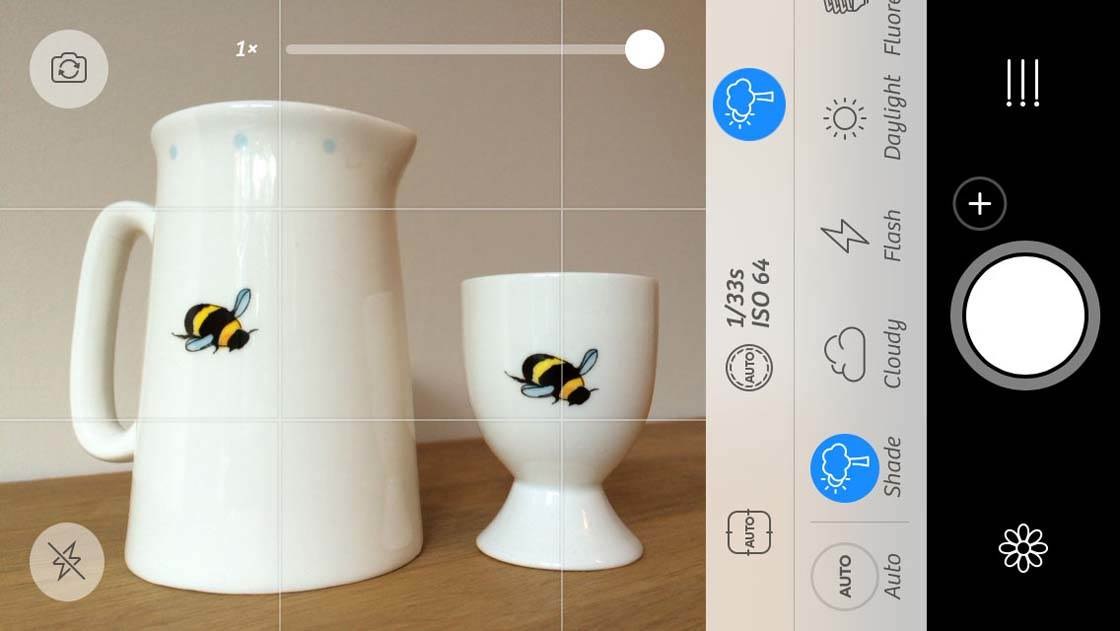
Normally you would select the white balance preset that matches the type of light you’re shooting in. So if you’re shooting on a cloudy day, select the Cloudy white balance setting.
This tells the iPhone that the color temperature is fairly cool, and so it will compensate by warming up the colors in the photo.
It’s definitely worth trying out these presets, especially when shooting at the extremes of the Kelvin scale, such as cool blue shade or warm orange candlelight. In certain situations the presets can do a better job of eliminating color casts than the Auto setting.
If you want to hide the list of white balance presets when you’re shooting, just tap the white balance icon above the list of presets (the icon will have the symbol for the preset that is currently selected).
If you want to switch back to Auto white balance at any time, tap the white balance icon that displays the icon for the current white balance preset, then tap Auto in the list of presets.

Once you’re happy with the white balance setting and the colors in the viewfinder, press the shutter button to take the photo.
Deliberately Using The “Wrong” White Balance
So far we’ve discussed white balance in terms of eliminating color casts. However, in certain situations you may want to use the “wrong” white balance setting to creatively enhance the colors or influence the mood of a photograph.
This involves thinking creatively and experimenting with the white balance settings.
Normally, you’d want to eliminate a color cast from a scene, so that your whites appear white and all other colors are reproduced accurately. However, sometimes a color cast adds atmosphere and helps to convey a certain mood in your photos.
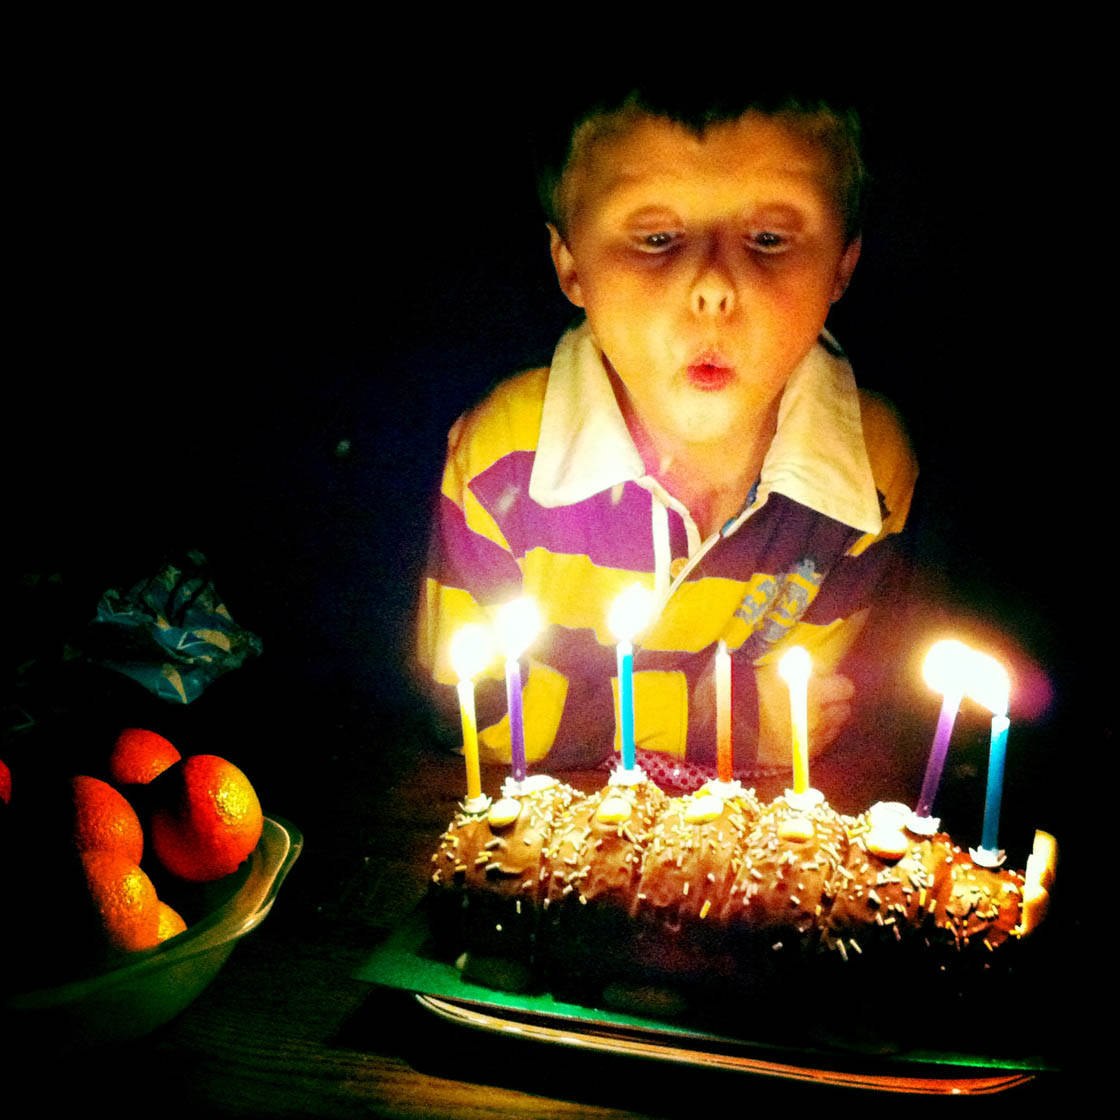
For example, if you take a photo in candlelight you might want to keep that warm orange glow in your photo, rather than cooling it down so that the colors appear neutral.
Another common scenario is taking photos at sunset. If you use the Auto white balance setting or the Sunrise/Sunset preset, the camera will think you want to eliminate the warm color cast from this type of light, and it will cool down the colors in the photo.
This will result in a sunset photo that doesn’t look anything like the colors that you saw with your own eyes. In cases like this you need to take control of the white balance in order to get the colors in your photo that you’d envisioned.
So how do you do this? Well, it depends which app you’re using. If you’re shooting with VSCO Cam, you’d simply move the white balance slider until you achieve the color temperature that you want.
In Camera+ you need to think a bit more carefully as you only have white balance presets to choose from. But it’s actually quite simple once you get the hang of it. Let’s take this sunset photo as an example.
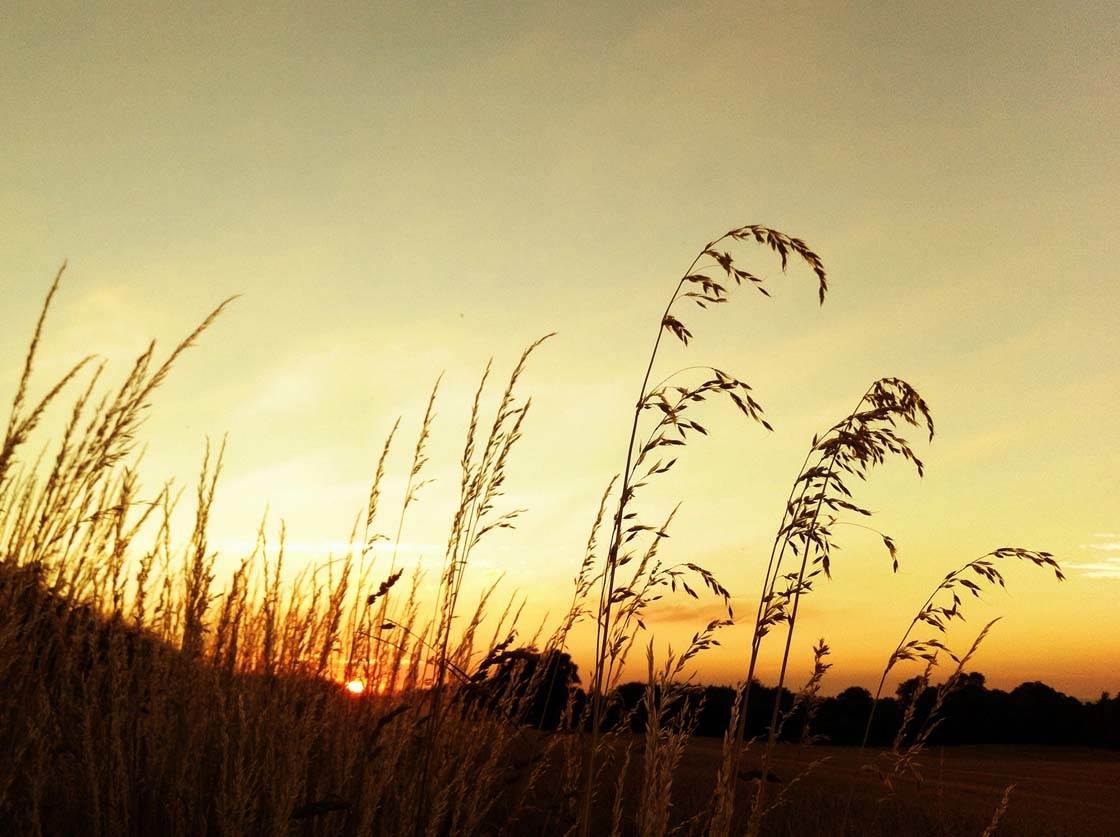
We know that the Shade and Cloudy white balance presets in Camera+ will warm up the colors in a photo. Remember, they’re designed to warm up the cool colors created by shade and cloud.
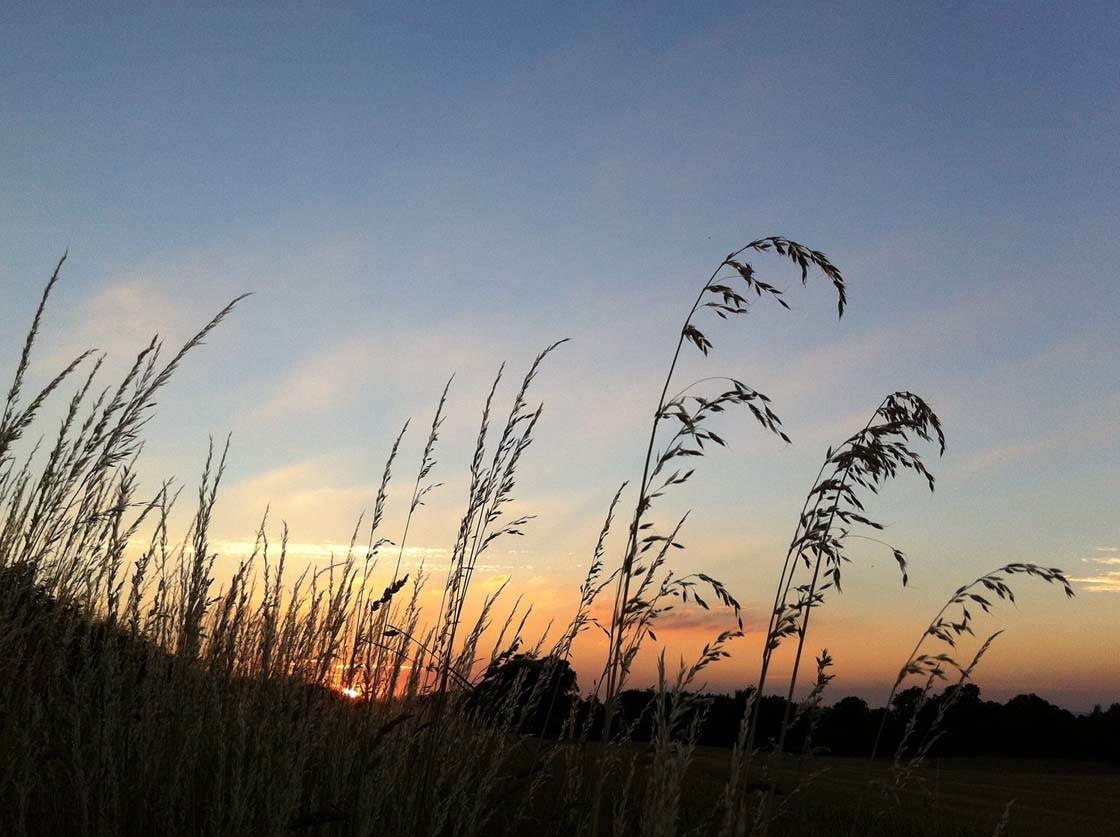
So if you want to warm up the colors in your sunset scene and really boost those reds and oranges, you’d simply use the Shade or Cloudy preset when taking your photo. Try it out next time you’re shooting a sunset. It can be very effective.
Sometimes you might want to cool down the colors in a photo to create an image with a cold feel to it. Maybe you’re taking a photo of someone skating across an icy lake and you want to emphasize how cold it was.
Or maybe you just want to cool down the colors for artistic effect. For example, the image below is a photo of the inside of a lampshade. The light from the bulb has created a strong orange color cast.
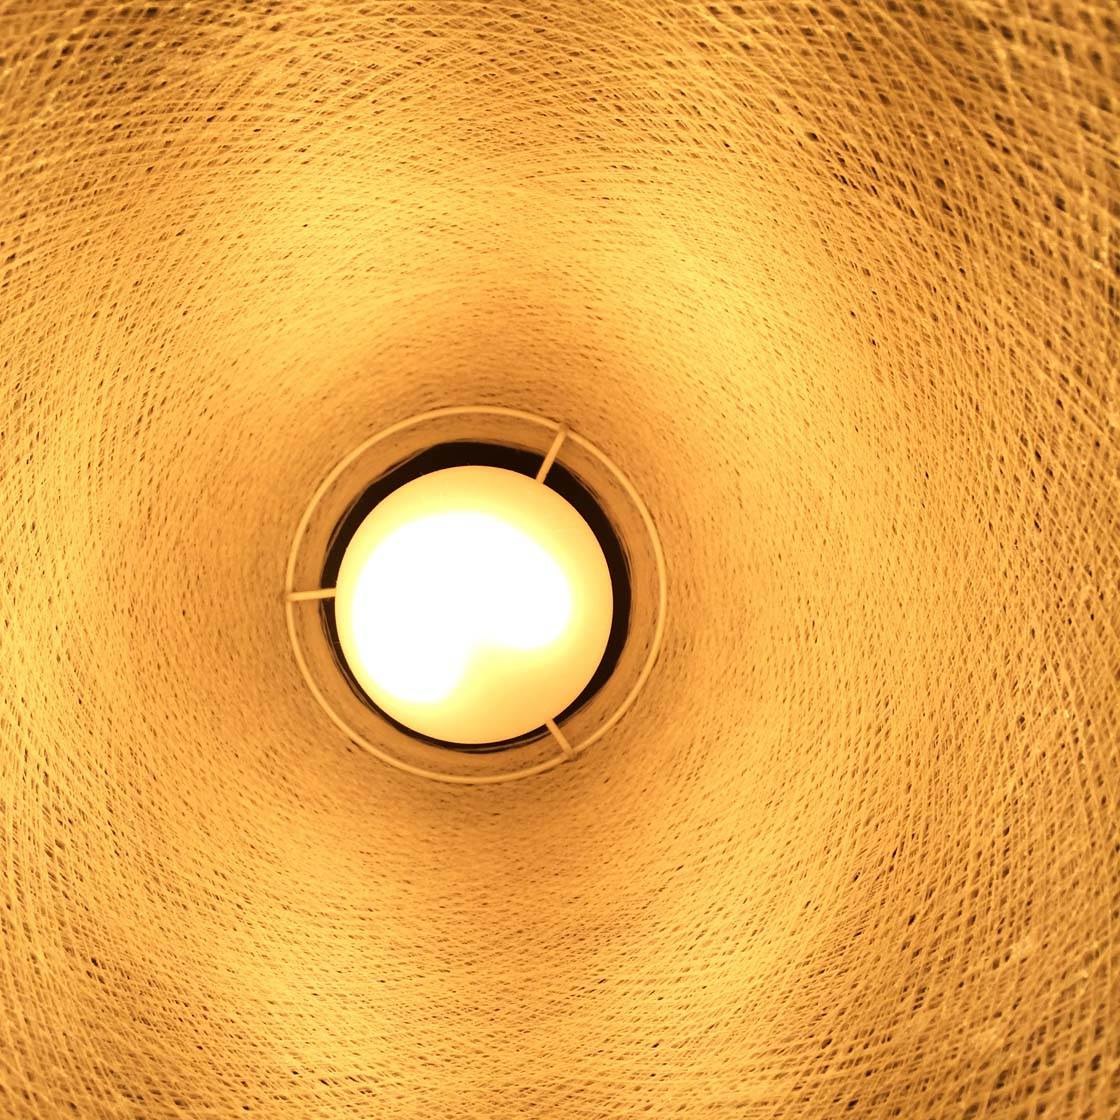
Adjusting the white balance enabled me to create a completely different image by cooling the colors right down to a cold blue. Because you don’t normally see a light in this color, it makes the image more unusual and unique.

To make the colors in an image more blue, you need to use the relevant white balance setting to cool down the color temperature. In VSCO Cam you would just move the white balance slider until you’re happy with the color.
In Camera+ you’d select a white balance setting that’s designed to cool down the colors to compensate for warm color temperatures. Try the Incandescent or Sunrise/Sunset presets.
You can have a lot of fun with deliberately changing the white balance to create a warm or cool feel in your photo. Just make sure you choose a color temperature that suits the scene and helps emphasize the message you want to convey in your photo.


Thanks – wondering if you’ve come across any apps which has white balance, and also hdr.
That’s a good question 🙂 Yes, ProCamera 8 (version 6.0) includes HDR, manual exposure and white balance controls: https://itunes.apple.com/us/app/procamera-8/id694647259?mt=8
Thanks Kate – downloading now. While the white balancing is useful, I spend a lot of time taking pics of the interiors of homes, and they many times are on the water, so I try as much as possible to get great photos of the rooms, with a water shot out in the background through the windows. HDR gives me great balance of interior/exterior exposures.
Hope this app does the trick for you! Let us know how it goes 🙂
Hi. According to your blog above, the white balance on camera + can be adjusted before taking a picture. But, according to the camera+ instructions, its only in the editing that the white balance can be adjusted. Please explain. I couldn’t do white balance with your instructions above….and I just bought the app based on your instructions!
Hi Mindy. Sorry you’re having problems. Make sure you’re in camera mode (not editing mode) in Camera+. With the phone held in portrait orientation you should see WB near the bottom right of the screen (above and to the right of the shutter button). Tap on WB then you’ll see a list of white balance presets such as Shade, Cloudy, Flash, etc. You can swipe across to see more options. Just tap the WB preset you want to use, then take your photo. I’ve just done this in Camera+ on my phone and it worked fine. Hope that helps. Let me know if you’re still having problems. Kate
There is no WB appearing on my screen at all. I’m pretty sure I’m in camera mode since I can take pictures. Like Mindy, I got the app for the white balance feature. There’s nothing on the viewfinder above the shutter button bar when I bring up the Camera+ app.
Hi Nancy, I wonder whether the advanced controls are switched on in the Camera+ settings. Can you tap the menu button (three horizontal lines with dots) to the right of the shutter button, then scroll down the list of settings and tap Advanced Controls. Make sure the Always Show option is set to on so that the switch appears blue), then tap Done. The WB and other advanced settings should now appear above the shutter button. Hope that works 🙂
I’m still in awe that Apple didn’t include the manual WB feature on the native camera, one would think they would like for us to stay and use the iPhone camera most of the time if not all, instead of using third parties apps for it.
And I tend to disagree when it comes to the knowing the Kelvin Scale. It is a good resource to know about the way color temperature works and it’s even more helpful when wanting to edit and print something with a more professional touch. A little bit of extra knowledge doesn’t hurt and we all should strive for it instead of discouraging…no offense 😉